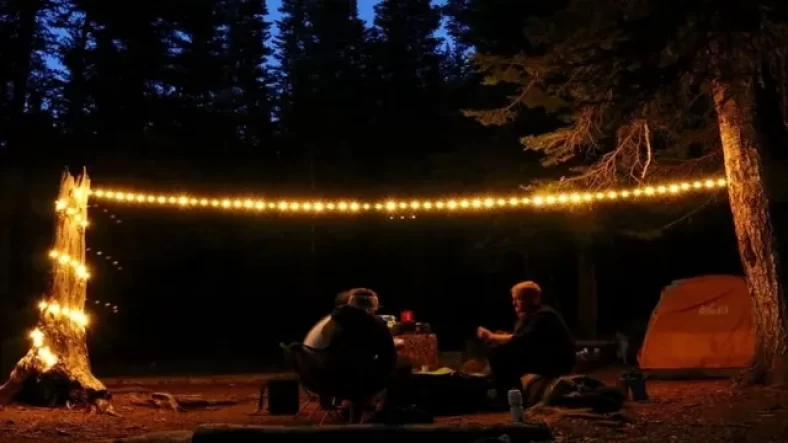
Are you planning a romantic escape or a weekend camping adventure but want to add a cozy touch to your camper? String lights are a great way to embellish your RV, and invitingly illuminate the atmosphere. Whether you want to create a romantic ambiance or add some light to your campsite. In this blog, we will guide you on how to hang string lights on a camper and make your outdoor retreat a charming paradise.
No matter your skill level, we got you covered. From the type of string lights to the essential materials and tools you need, we have all the steps and tips you need to make your camper the talk of the campsite. So, let’s get started!
Choose the Right String Lights
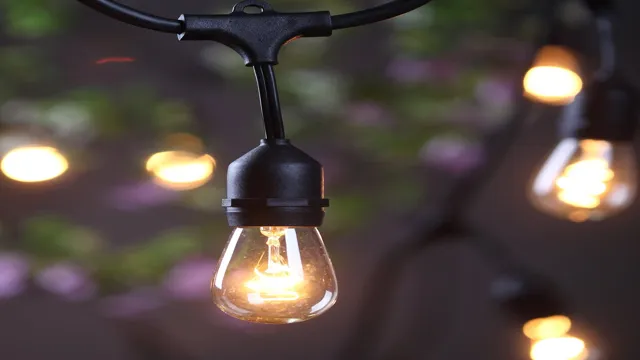
If you’re planning to hang string lights on your camper, then you need to choose the right string lights that are suitable for outdoor use. Opt for string lights that are designed to withstand harsh weather conditions, such as heavy rain, strong winds, and extreme temperatures. LED lights are an excellent option since they are more durable and energy-efficient than traditional bulbs.
You can also choose different colors to set the mood and create a stylish ambiance. Before hanging the lights, ensure that you have the right tools and materials, such as screw hooks, cable ties, and electrical tape. It’s also essential to follow the manufacturer’s instructions and safety guidelines when installing the lights.
A little extra effort spent in choosing the right string lights and installing them correctly can go a long way in creating a cozy and inviting atmosphere on your camper.
Consider Power Source
When it comes to choosing the right string lights, it’s important to consider the power source that best suits your needs. Whether you opt for battery-operated lights or plug-in lights, each has its own benefits. Battery-operated string lights offer flexibility and convenience, since they don’t require an electrical outlet, making them perfect for outdoor settings like gardens, patios, or balconies.
These lights are also easy to install and adjust as needed. On the other hand, plug-in string lights provide constant power and brightness, which is ideal for large indoor spaces or areas with limited natural light. They’re also more economical in the long term and come in a wider range of designs and styles.
Consider the intended use and location of your lights, and then choose the power source that best fits your needs.

Length and Color
When it comes to choosing the perfect string lights for your home or outdoor space, there are two important factors to consider: length and color. First, think about the length of your space and how much coverage you need. If you have a larger area, you may want to invest in longer string lights to ensure they reach all areas and provide ample lighting.
As for color, think about the overall aesthetic you want to achieve. White string lights provide a classic and timeless look, while colored lights can add a playful and festive touch. Don’t be afraid to mix and match different colored lights to create a unique and personalized look.
Ultimately, by choosing the right length and color of string lights, you can create a warm and inviting atmosphere that is perfect for any occasion, whether you’re hosting a party or simply enjoying a cozy night in.
Plan Your Setup
If you’re looking to add some ambiance to your camping experience, hanging string lights on your camper can be a great way to do so. Firstly, you need to plan your setup before hanging the lights. This means deciding where you want the lights, measuring the space to ensure you have enough string lights, and choosing the power source you’ll need.
If you plan on using an electrical outlet, ensure you have a long enough extension cord. If you choose battery-powered lights, ensure you have enough batteries. Once you’ve planned out your setup, you can hang the string lights using hooks or carabiners, and string them across your camper in the locations you’ve chosen.
With some careful planning, your camper can be transformed into a cozy retreat for you and your family and friends to enjoy.
Pick the Perfect Spot
When you’re planning your setup for an outdoor activity, it’s important to pick the perfect spot. You want to choose a location that’s both safe and enjoyable for you and your group. One factor to consider is the terrain of the area.
If you’re going hiking or camping, you’ll want to choose a spot that’s level and has some natural protection from wind and sun. Another factor to consider is the accessibility of the location. If you’re bringing a lot of gear or equipment, you’ll want to choose a spot that’s easy to get to and has enough space to set everything up comfortably.
Additionally, you’ll want to check for potential hazards in the area, such as poisonous plants or dangerous wildlife. By taking these factors into account, you can pick the perfect spot for your outdoor adventure.
Measure and Mark
When it comes to setting up a woodworking project, it’s crucial to plan your setup before diving in. This means taking the time to measure and mark your materials accurately. By doing this, you can rest assured that everything will fit together precisely as intended.
Keep in mind that precision is key in woodworking, and even a tiny miscalculation can throw off your entire project. Therefore, take your time and use reliable measuring tools such as a tape measure or a square. Once you have measured and marked your materials, you can move on to cutting, drilling, and assembling.
Remember, the success of your woodworking project depends on these initial steps, so don’t rush them. Take your time to plan your setup correctly, and the rest will fall into place.
Gather Materials
When it comes to setting up for a project, one of the first things you need to do is gather your materials. Whether it’s tools or supplies, you don’t want to find yourself mid-project without something you need. So, before you start, take a step back and plan out your setup.
Make a list of everything you’ll need and make sure you have it all on hand or know where to get it. This can be as simple as buying a few extra screws or as complex as renting specialized equipment. By taking the time to plan ahead, you’ll save yourself time and frustration in the long run.
And remember, if you’re missing something, it’s better to take a pause and gather what you need than to risk a shoddy end result.
Hang Your String Lights
If you’re looking to add some cozy ambiance to your camper, hanging string lights is the way to go! First, you want to choose your desired location for the lights and gather the appropriate tools such as hooks, clips, and string lights. Once you have the materials, decide on the spacing and pattern of the lights. It’s important to use hooks or clips specifically designed for outdoor use and ensure they are securely attached to the camper.
Begin stringing the lights, using clips or ties along the way to hold them in place and maintain the spacing. Once you reach the end, plug in the lights to ensure they’re working properly and adjust any areas as needed. Now sit back, relax and enjoy the cozy atmosphere your string lights add to your camper!
Attach Hooks or Clips
String lights can add the perfect touch of ambiance and charm to any outdoor living space. One essential tip for hanging your string lights is to attach hooks or clips to your desired location. Hooks and clips come in handy when it comes to securing your string lights without damaging your walls or trees.
They are also easier to install and remove when it’s time to pack up your outdoor lights. Simply attach the hooks or clips to your designated spots, and then connect and hang your string lights. Using hooks or clips allows you to create a unique lighting arrangement that fits your space.
Whether you’re stringing lights for a special event or for everyday use, attaching hooks or clips will make hanging your string lights a breeze. So, don’t hesitate to add some hooks or clips to your arsenal, and transform your outdoor living space with beautiful and warm lighting.
String the Lights
String lights can transform any outdoor space into a cozy, magical wonderland. Hanging your string lights can seem daunting at first, but it’s actually quite simple. First, determine where you want to hang your lights and measure the distance between the posts or walls.
Make sure to buy enough string lights to cover the entirety of the space. Next, attach some screw hooks to the posts or walls, making sure they’re level and sturdy. Then, drape the lights over the hooks, making sure they’re evenly spaced and taut.
Finally, plug in the lights and enjoy the cozy ambiance they create. With a little patience and attention to detail, you’ll have a stunning outdoor space that you’ll never want to leave. So, what are you waiting for? Go ahead and string those lights and experience the magic they bring!
Secure the Lights
If you’re planning to hang string lights in your backyard, it’s important to take steps to ensure they are safely secured. After all, the last thing you want is for your beautiful lights to come crashing down on your guests. To hang your string lights securely, start by using sturdy hardware.
Choose hooks or other hanging devices that are rated for the weight of your lights, and make sure they are properly anchored in place. Additionally, consider using guy wires or other supports to help distribute the weight of your lights and reduce stress on your hanging hardware. Finally, be sure to check your lights regularly and make any necessary adjustments or repairs to keep them safe and secure.
By taking these simple steps, you can enjoy the beauty and ambiance of your string lights without any worries or concerns.
Enjoy Your New Setup!
If you’re planning a camping trip and want to add a little ambiance to your outdoor space, a great way to do so is by hanging string lights on your camper. To start, you’ll need to pick the right type of lights and ensure that they are suitable for outdoor use. Once you’ve found the perfect set of lights, you’ll want to ensure that you have the right tools to secure them in place.
This might include hooks, clamps, or zip ties. Depending on the style of your camper, you may need to get creative with your installation process. Once you’ve secured your lights in place, plug them in and enjoy the warm glow that they provide.
With a few simple steps, you can turn your camper into a cozy retreat that’s perfect for a night under the stars. Happy camping!
Conclusion
In conclusion, hanging string lights on your camper is a great way to add some charm and personality to your camping experience. With a little creativity and ingenuity, you can create a glowing oasis that will make your campsite the envy of all your neighbors. So go ahead and get your DIY on, and let those lights shine bright all night long!”
FAQs
What type of string lights should I use for my camper?
When selecting string lights for your camper, it’s important to consider the type of bulbs and the power source. LED bulbs are a safe and energy-efficient option, and battery-powered string lights eliminate the need for an electrical hookup.
How do I attach string lights to my camper awning?
To attach string lights to your camper awning, you can use clips, hooks, or adhesive strips. Make sure the attachment method you choose is secure and can withstand wind and movement.
Can I leave my string lights up on my camper all year-round?
While leaving string lights up on your camper can add a cozy touch, it’s important to remove them during harsh weather or when not in use. This will help prolong the life of the lights and prevent damage to your camper’s exterior.
How do I troubleshoot string lights that won’t turn on in my camper?
First, check the power source and make sure it’s working properly. Then, inspect the bulbs and replace any that are burned out or broken. If the lights still won’t turn on, there may be an issue with the wiring or fuse and it’s best to consult a professional.


Leave a Reply