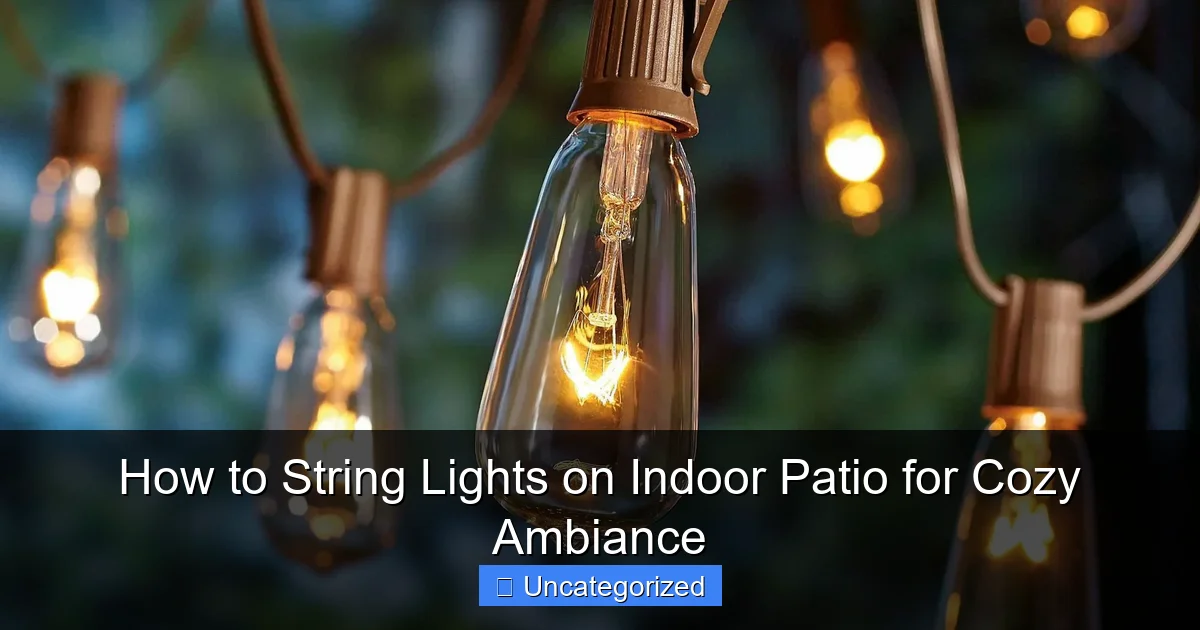
Featured image for how to string lights on indoor patio
Image source: i5.walmartimages.com
Transform your indoor patio into a cozy retreat by strategically stringing lights along railings, walls, or ceiling beams for maximum ambiance. Choose weather-resistant, battery-powered, or plug-in LED string lights and secure them with removable hooks, zip ties, or adhesive clips to avoid damage. For a polished look, weave lights through plants or drape them in gentle swags to enhance warmth and intimacy effortlessly.
Key Takeaways
- Plan your layout: Sketch light placement to balance coverage and avoid overhang.
- Use adhesive hooks: Secure lights without damaging walls or ceilings.
- Measure twice: Ensure lights fit your space before purchasing or installing.
- Layer lighting: Combine string lights with lamps for depth and warmth.
- Check voltage: Use low-voltage or LED lights for safety and efficiency.
- Anchor ends firmly: Prevent sagging by securing start and end points tightly.
📑 Table of Contents
- How to String Lights on Indoor Patio for Cozy Ambiance
- 1. Choosing the Right String Lights for Your Indoor Patio
- 2. Planning Your Layout: Designing the Perfect Ambiance
- 3. Installation Methods: Safe and Damage-Free Solutions
- 4. Hanging Techniques: Step-by-Step Instructions
- 5. Safety and Maintenance: Keeping Your Lights Sparkling
- 6. Creative Ideas to Elevate Your Ambiance
How to String Lights on Indoor Patio for Cozy Ambiance
Imagine stepping into your indoor patio after sunset, where the soft glow of string lights dances along the ceiling, casting warm, inviting shadows. The atmosphere transforms instantly—no longer just an extension of your home, but a sanctuary of relaxation and charm. String lights have become a cornerstone of modern interior design, and for good reason: they’re affordable, versatile, and capable of elevating any space from mundane to magical. Whether you’re hosting a dinner party, curling up with a book, or simply unwinding after a long day, the right lighting can make your indoor patio feel like a retreat.
But how do you achieve that perfect balance of ambiance and functionality? Stringing lights indoors requires careful planning to ensure safety, aesthetics, and longevity. Unlike outdoor installations, indoor patios present unique challenges—limited mounting points, delicate surfaces, and the need for a seamless integration with your existing decor. In this guide, we’ll walk you through everything from choosing the right lights to troubleshooting common pitfalls. By the end, you’ll have the tools and confidence to create a cozy, Instagram-worthy oasis that feels like home.
1. Choosing the Right String Lights for Your Indoor Patio
Before you start hammering nails or drilling holes, take time to select string lights that align with your patio’s style, size, and practical needs. The wrong choice can lead to dim lighting, frequent replacements, or even safety hazards.
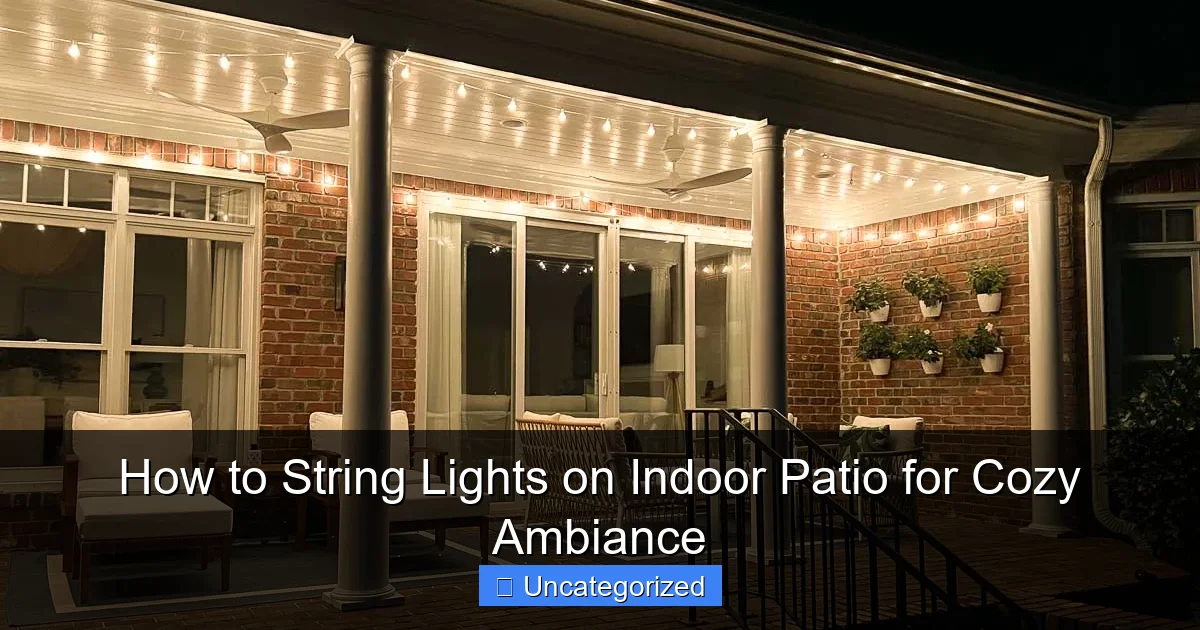
Visual guide about how to string lights on indoor patio
Image source: drivenbydecor.com
Types of String Lights: Pros and Cons
- LED String Lights: Energy-efficient, long-lasting (up to 50,000 hours), and cool to the touch. Ideal for year-round use. Look for warm white (2700K–3000K) for cozy ambiance or cool white (4000K+) for a modern look.
- Incandescent String Lights: Classic warm glow, but less efficient and hotter. Best for short-term or decorative use.
- Edison-Style Bulbs: Vintage charm with exposed filaments. Great for rustic or industrial themes but often dimmer than LEDs.
- Smart Lights: Wi-Fi or Bluetooth-enabled for color changes, dimming, and scheduling. Perfect for tech-savvy users.
Key Features to Consider
- Bulb Spacing: Closer spacing (6–12 inches) creates a denser glow; wider spacing (18–24 inches) works for subtle accent lighting.
- Length and Connectability: Measure your patio’s perimeter and ceiling height. Opt for sets with end-to-end connectors to cover large areas without overloading circuits.
- Dimmable Options: Adjust brightness to match the mood—brighter for gatherings, softer for relaxation.
- UL Certification: Ensures lights meet U.S. safety standards for indoor use. Avoid uncertified products.
Style Tips: Matching Lights to Your Decor
A minimalist patio with clean lines pairs well with sleek, white or black wire LED lights. For a bohemian space, try colorful lanterns or fairy lights in mason jars. Rustic or farmhouse styles shine with Edison bulbs on black rubber cords. Pro tip: Use warm white LEDs universally—they mimic candlelight and flatter skin tones.
2. Planning Your Layout: Designing the Perfect Ambiance
A well-planned layout ensures your lights enhance the patio’s architecture and function. Rushing this step often leads to uneven coverage, awkward shadows, or lights that clash with furniture.
Step 1: Sketch Your Patio’s Layout
Grab graph paper or use a digital tool to map:
- Furniture placement (e.g., seating areas, dining table, planters).
- Ceiling beams, windows, and doorways.
- Power outlets (critical for plug-in lights).
Example: A 10’ x 12’ patio with a central dining table might use a grid pattern: 4 horizontal strands across the ceiling (spaced 2.5’ apart) and 3 vertical strands from ceiling to wall (spaced 3’ apart).
Step 2: Choose a Hanging Pattern
- Grid or Crisscross: Ideal for open ceilings. Creates a “canopy” effect. Use 3–5 strands horizontally and 2–4 vertically.
- Perimeter (Cove Lighting): Hang lights along the walls or ceiling edges. Highlights architectural features and frees up floor space.
- Zigzag or Diagonal: Adds movement and visual interest. Best for long, narrow patios.
- Clusters or Drapes: Hang lights in cascading loops from a central beam. Works for vaulted ceilings or statement pieces.
Step 3: Calculate Light Coverage
Use this formula: Total patio area (sq. ft.) ÷ bulb spacing (ft) = number of bulbs needed. For a 120 sq. ft. patio with 1-ft spacing, you’ll need ~120 bulbs. Always buy 10–15% extra for overlaps and mistakes.
Pro Tip: Test with Tape
Before installing, use painter’s tape to outline your planned layout. Turn on lights (if possible) to check coverage and adjust spacing. This avoids costly rework!
3. Installation Methods: Safe and Damage-Free Solutions
Indoor patios often have delicate surfaces—plaster, wood, or textured ceilings. The wrong hardware can cause cracks, stains, or permanent damage. Here are the safest, most effective methods:
Adhesive Hooks and Strips
- Best for: Smooth, painted walls/ceilings (e.g., drywall, wood).
- Products: Command™ hooks, 3M™ Picture Hanging Strips, or adhesive LED light clips.
- How to: Clean the surface with alcohol, let dry, then press the adhesive for 30 seconds. Wait 1 hour before hanging lights. Holds up to 1 lb per hook.
- Tip: Use clear adhesive strips for a seamless look. Avoid on porous or textured surfaces.
Removable Hooks and Clips
- Best for: Wooden beams, crown molding, or ceiling edges.
- Products: Spring-tension clips, removable ceiling hooks, or magnetic clips (for metal beams).
- How to: Snap clips onto beams or press tension hooks into gaps. No drilling required.
- Tip: For heavy lights (e.g., Edison bulbs), use reinforced clips rated for 3+ lbs.
Screw Hooks and Eye Bolts
- Best for: Permanent installations on wood or concrete.
- Products: Cup hooks, eye bolts, or J-hooks.
- How to: Drill a pilot hole, then screw the hook into the beam. Use a stud finder to avoid drywall anchors.
- Tip: Paint hooks to match your ceiling or use decorative caps for a polished finish.
Ceiling Tracks and Rods
- Best for: Large patios or renters who want flexibility.
- Products: Tension rods (for between walls) or adhesive ceiling tracks.
- How to: Install the track/rod, then clip lights onto it. Tracks allow easy repositioning.
- Tip: Combine with curtain rods for a dual-purpose setup (lights + privacy curtains).
Data Table: Installation Method Comparison
| Method | Best Surface | Max Weight | Installation Time | Removability | Cost (10 ft) |
|---|---|---|---|---|---|
| Adhesive Hooks | Painted drywall | 1 lb | 5 mins | High | $5–$10 |
| Spring Clips | Wood beams | 3 lbs | 2 mins | High | $8–$15 |
| Screw Hooks | Concrete/wood | 10 lbs | 10 mins | Low | $3–$8 |
| Ceiling Tracks | Any surface | 5 lbs | 30 mins | Medium | $20–$50 |
4. Hanging Techniques: Step-by-Step Instructions
Now that you’ve chosen lights and hardware, it’s time to hang them. Follow these steps for a flawless finish.
Step 1: Gather Tools
- Measuring tape
- Level (for straight lines)
- Step ladder
- Scissors (for cutting wire ties)
- Extension cord (if outlets are far)
Step 2: Mark Hanging Points
Use a pencil to mark where each hook/clip will go. For a grid pattern:
- Measure and mark the first horizontal strand’s endpoints.
- Use a level to draw a faint line between them.
- Mark every 2–3 feet along the line for hooks.
- Repeat for vertical strands.
Step 3: Install Hardware
For adhesive hooks:
- Clean the surface with alcohol.
- Peel the backing and press firmly for 30 seconds.
- Wait 1 hour before hanging.
For screw hooks:
- Drill a pilot hole (¼” smaller than the hook’s screw).
- Twist the hook clockwise until snug.
Step 4: Hang the Lights
- Unroll lights carefully to avoid tangles.
- Start at one end, attaching the first bulb or clip to the hook.
- Work along the line, securing every 1–2 bulbs.
- For vertical strands, drape lights loosely to create a “swoop” effect.
- Use zip ties or twist ties to secure excess cord.
Step 5: Test and Adjust
Turn on the lights and check:
- Are bulbs evenly spaced?
- Do shadows or dark spots exist?
- Is the brightness comfortable?
Adjust hooks or add extra strands as needed. Pro tip: Use dimmer switches to fine-tune brightness.
5. Safety and Maintenance: Keeping Your Lights Sparkling
Indoor string lights are generally safe, but negligence can lead to fire hazards, short circuits, or damage. Follow these guidelines for long-term enjoyment.
Safety Checks
- Inspect Regularly: Check for frayed wires, cracked bulbs, or loose connections every 3–6 months.
- Avoid Overloading Circuits: Never connect more than 3–5 standard light strands. Use a circuit checker app to monitor load.
- Keep Away from Water: Even “waterproof” lights can malfunction if water enters plugs. Never hang near sinks or humidifiers.
- Unplug When Not in Use: Reduces fire risk and extends bulb life.
Maintenance Tips
- Clean Bulbs: Wipe with a dry microfiber cloth monthly. For stubborn grime, use a damp cloth (unplug first!).
- Replace Bulbs Promptly: A single dead bulb can dim the entire strand. Carry spare bulbs.
- Coil and Store Properly: After removal, wrap lights around a cardboard tube or reel to prevent tangles.
Seasonal Considerations
- Summer: Ensure lights don’t overheat in enclosed spaces. Use LED to reduce heat.
- Winter: Avoid condensation by letting the patio dry before turning on lights.
- All Seasons: Trim nearby plants to prevent friction damage.
6. Creative Ideas to Elevate Your Ambiance
Beyond basic stringing, these ideas will make your patio unforgettable.
Layer with Other Lights
- Combine string lights with floor lamps or wall sconces for depth.
- Add fairy lights in glass vases or lanterns for tabletop glow.
Use Light as Art
- Spell words (e.g., “LOVE”) with individual bulbs.
- Create a starry sky by hanging lights in random clusters.
- Frame a mirror or artwork with a halo of lights.
Incorporate Nature
- Weave lights through indoor plants or hanging vines.
- Suspend lights from a living wall for a jungle vibe.
Smart Lighting Hacks
- Program lights to fade on at sunset or change colors for holidays.
- Sync with music for a dance party ambiance.
Pro Tip: The 80/20 Rule
Hang 80% of lights in the main area and 20% in unexpected spots (e.g., under shelves, behind furniture). This adds surprise and intrigue.
Stringing lights on your indoor patio isn’t just about illumination—it’s about crafting a mood. From selecting warm, energy-efficient LEDs to choosing adhesive hooks that protect your walls, every decision shapes the space. Remember, the best designs feel intentional, not cluttered. Start small, test your layout, and refine as you go. Whether you’re aiming for a bistro vibe, a starlit retreat, or a cozy reading nook, the right lights will transform your patio into a haven. Now, grab your ladder, invite a friend, and let the glow begin. Your perfect ambiance awaits.
Frequently Asked Questions
How do I string lights on an indoor patio without drilling holes?
Use adhesive hooks, removable mounting strips, or tension rods to hang lights without damaging walls or ceilings. This method is ideal for renters or temporary setups while still creating a cozy ambiance.
What type of string lights work best for an indoor patio?
LED string lights with warm white or soft yellow tones are ideal for indoor patios—they’re energy-efficient and safe for enclosed spaces. Opt for battery-operated or plug-in styles depending on outlet accessibility.
How can I arrange string lights for even coverage on my indoor patio?
Create a grid pattern by crisscrossing lights between walls or ceiling anchors, or drape them in parallel lines for a uniform glow. Use clips or hooks every 12–18 inches to prevent sagging.
Can I use outdoor string lights on an indoor patio?
Yes, but ensure they’re rated for indoor use or kept away from moisture sources (like plants or humidifiers). Outdoor lights may be brighter, so dimmable options help maintain a cozy vibe.
How do I hide string light cords on an indoor patio?
Route cords along baseboards, behind furniture, or inside cord covers for a tidy look. For ceiling-hung lights, use clear zip ties or clips to blend wires into the background.
How to string lights on an indoor patio with high ceilings?
Use longer extension cords and anchor lights to tall furniture, wall-mounted hooks, or suspended ceiling wires. A zigzag or cascading design helps draw the eye upward while maximizing light spread.

