
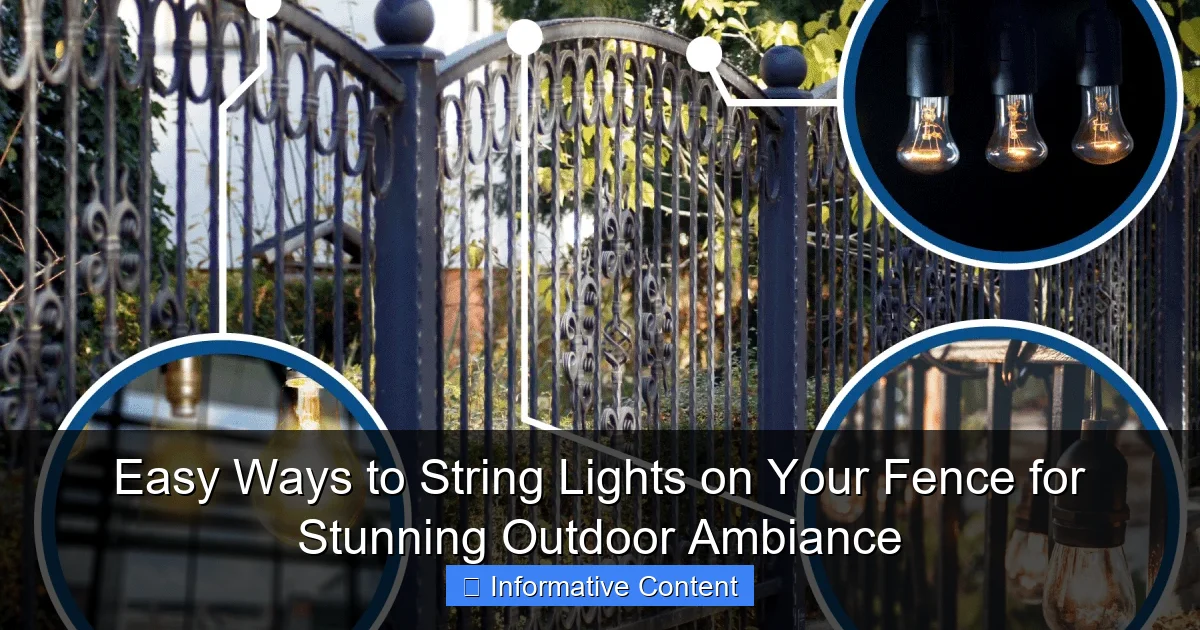
Featured image for attaching string lights to fence
Image source: i.ytimg.com
Transform your outdoor space instantly by securely attaching string lights to your fence using simple, damage-free methods like zip ties, adhesive clips, or hooks. Choose weather-resistant lights and space them evenly for a balanced, professional look that enhances ambiance without sagging or slipping. With minimal tools and a few minutes, you can create a stunning, inviting glow perfect for evenings and entertaining.
Key Takeaways
- Choose weather-resistant lights: Ensure durability and safety for outdoor use.
- Use removable hooks: Attach lights without damaging your fence.
- Plan your layout first: Measure spacing for even, balanced illumination.
- Secure with zip ties: Reinforce connections for windy conditions.
- Opt for solar-powered: Save energy and simplify installation with no cords.
- Test before finalizing: Check brightness and placement for desired ambiance.
📑 Table of Contents
- Easy Ways to String Lights on Your Fence for Stunning Outdoor Ambiance
- Choosing the Right String Lights for Your Fence
- Preparing Your Fence and Gathering Tools
- 5 Proven Methods to Attach String Lights to Your Fence
- Creative Layout Ideas to Elevate Your Outdoor Ambiance
- Maintenance, Safety, and Longevity Tips
Easy Ways to String Lights on Your Fence for Stunning Outdoor Ambiance
There’s something magical about a well-lit outdoor space. Whether you’re hosting a summer barbecue, enjoying a quiet evening with a book, or simply unwinding after a long day, string lights can instantly transform your backyard into a cozy, inviting retreat. One of the simplest—and most effective—ways to achieve this ambiance is by attaching string lights to your fence. It’s a project that sounds daunting at first, but with the right approach, it’s surprisingly easy, affordable, and highly rewarding.
I remember the first time I tried this. My backyard was dark, uninviting, and honestly a little sad. I wanted to make it feel like a personal sanctuary, and after some research (and a few trial-and-error attempts), I discovered that string lights on the fence were the perfect solution. Not only did they add warmth and charm, but they also made the space feel larger and more usable at night. Over the years, I’ve tried different methods, materials, and styles—some worked better than others. Now, I want to share what I’ve learned so you can skip the mistakes and get straight to the magic. Whether you’re a DIY newbie or a seasoned decorator, there’s a method here that will work for your fence and your lifestyle.
Choosing the Right String Lights for Your Fence
Before you start hammering or drilling, it’s crucial to pick the right type of string lights. Not all lights are created equal, and choosing the wrong kind can lead to frustration, poor performance, or even safety hazards. The good news? There are plenty of options, and once you know what to look for, the decision becomes much easier.
Visual guide about attaching string lights to fence
Image source: fencefixation.com
Types of String Lights
- Incandescent: These are the classic warm white bulbs that give off a soft, nostalgic glow. They’re affordable and widely available, but they use more energy and burn out faster than newer options. Great for occasional use, but not ideal for long-term outdoor lighting.
- LED: LED string lights are energy-efficient, last much longer (up to 25,000 hours), and come in a variety of colors and brightness levels. They’re perfect for permanent or semi-permanent installations. Many even have smart features like dimming, timers, or app control.
- Solar-Powered: If you’re looking to save on electricity or avoid running extension cords, solar string lights are a fantastic choice. They charge during the day and automatically turn on at dusk. Just make sure they get enough sunlight during the day—shaded areas may result in dimmer or shorter lighting times.
- Fairy Lights: Delicate and twinkling, fairy lights are ideal for creating a whimsical, romantic atmosphere. They’re often battery-powered and come in small, flexible strands—perfect for wrapping or draping along fence lines.
Key Features to Consider
- Length: Measure your fence line first. It’s better to have a little extra than to run short. Most string lights come in 10, 25, or 50-foot strands. You can connect multiple strands, but be mindful of wattage limits if using incandescent or plug-in LEDs.
- Weather Resistance: Look for lights rated IP44 or higher for outdoor use. This means they’re protected against splashing water and dust. Avoid indoor-only lights—they’ll fail quickly outside.
- Bulb Shape and Spacing: Globe, Edison, or mini bulbs? Closer spacing (4–6 inches) gives a fuller look, while wider spacing (12+ inches) is more minimalist and easier to install.
- Power Source: Plug-in lights offer consistent brightness and more features, but they require access to an outlet. Solar or battery-powered lights are more flexible but may be dimmer.
Pro tip: I once bought a 50-foot strand of cheap LED lights that looked great online but turned out to be too dim and poorly constructed. They started flickering after two weeks. Lesson learned: read reviews, check the wattage, and opt for reputable brands like GE, Philips, or Brightech.
Preparing Your Fence and Gathering Tools
Now that you’ve picked your lights, it’s time to prep your fence. A little prep work goes a long way in making the installation smooth, safe, and long-lasting. The type of fence you have (wood, vinyl, chain link, or metal) will influence your approach, but the general steps are similar.
Visual guide about attaching string lights to fence
Image source: storables.com
Inspect and Clean the Fence
Start by walking along your fence and checking for loose boards, rusted nails, or warped sections. If the fence is wobbly or damaged, fix those issues first—hanging lights on a weak fence can lead to sagging or even collapse over time. Clean the fence with a mild soap and water solution to remove dirt, mold, or mildew. This helps ensure that any adhesives or hardware stick properly and last longer.
Measure and Plan the Layout
Use a measuring tape to determine the total length of the fence where you want the lights. Sketch a rough layout on paper or use a garden hose to “test” the path. Think about:
- Where the power source will be (outlet, solar panel, or battery pack).
- Whether you want the lights at the top, middle, or bottom of the fence.
- If you’d like to create patterns (zigzags, waves, or even a canopy).
For example, I once installed lights in a zigzag pattern across my wooden fence. It looked amazing, but the extra length meant I needed two 25-foot strands instead of one. Planning saved me from running out of lights halfway through.
Gather the Right Tools and Materials
Here’s a list of what you’ll likely need:
- Measuring tape
- Drill (if using screws or anchors)
- Hammer (for nails or hooks)
- Outdoor-rated screws, hooks, or clips (more on these below)
- Extension cord (if using plug-in lights)
- Timer or smart plug (optional, but highly recommended)
- Gloves (to protect your hands)
- Ladder (if the fence is tall)
Pro tip: Buy a few extra hooks or clips. You’ll probably need more than you think, and having spares saves a trip to the store mid-project.
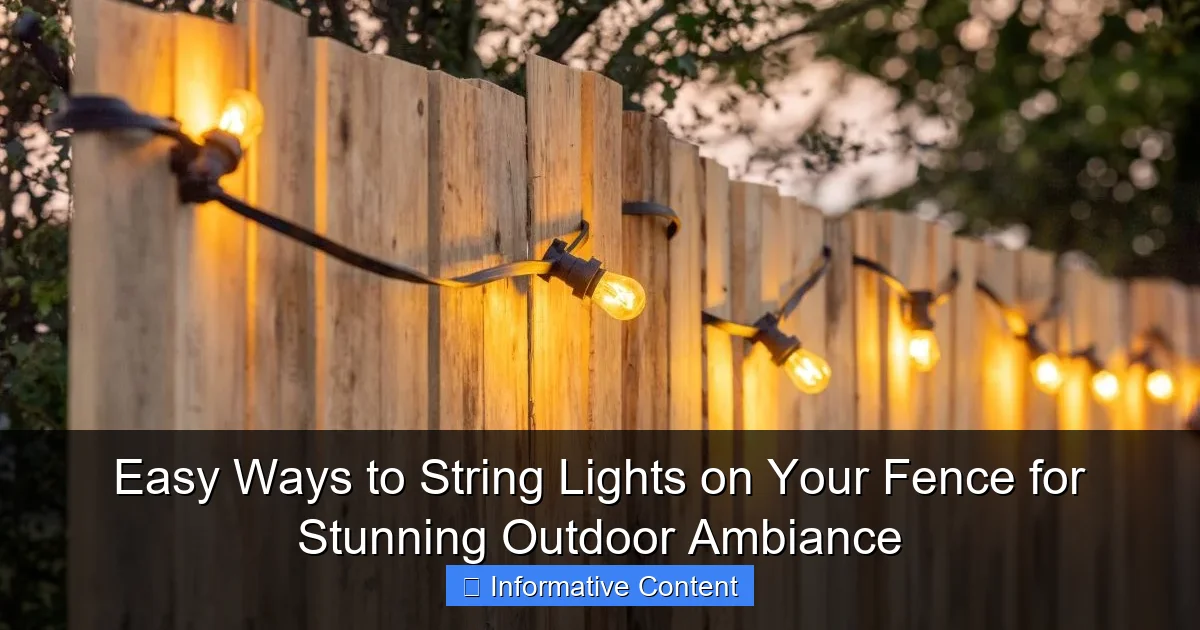
5 Proven Methods to Attach String Lights to Your Fence
Now for the fun part—installation! There’s no one-size-fits-all method. The best approach depends on your fence material, how permanent you want the setup, and your comfort level with tools. Here are five proven methods, each with pros, cons, and real-world examples.
1. Outdoor-Rated Adhesive Hooks (Best for Temporary or Lightweight Lights)
These are small plastic or metal hooks that stick to surfaces using strong adhesive backing. They’re ideal for renters or those who want a no-damage, temporary setup.
- Best for: Vinyl or smooth wood fences, fairy lights, or lightweight strands.
- How to install: Clean the fence, let it dry, then press each hook firmly for 30 seconds. Wait 24 hours before hanging lights.
- Pros: No drilling, easy to remove, minimal damage.
- Cons: May loosen in extreme heat or heavy rain; not ideal for heavy strands.
My experience: I used these on my vinyl fence for a summer party. They held up great for two weeks, then one corner started sagging. A quick re-press fixed it, but I wouldn’t rely on them year-round.
2. Screw-In Cup Hooks (Best for Permanent Installations)
These small metal hooks screw directly into wood or vinyl. They’re sturdy and can support heavier strands or multiple runs.
- Best for: Wooden or vinyl fences, permanent LED or incandescent strands.
- How to install: Drill a pilot hole slightly smaller than the hook’s threads. Screw in by hand or with a screwdriver. Space hooks 12–18 inches apart.
- Pros: Very secure, long-lasting, low profile.
- Cons: Leaves small holes; not suitable for metal or chain link.
Pro tip: I painted my hooks to match the fence color—now they’re barely noticeable during the day.
3. Zip Ties or Cable Clips (Best for Chain Link or Metal Fences)
For chain link or metal fences, zip ties or plastic cable clips are the go-to solution. They’re cheap, easy, and surprisingly strong.
- Best for: Chain link, metal, or mesh fences.
- How to install: Thread zip ties through the fence links and attach the lights’ sockets or cords. Trim excess with scissors.
- Pros: No tools needed, removable, weather-resistant.
- Cons: Can degrade over time in direct sun; not as elegant.
Real example: A friend used black zip ties on their chain link fence. The lights looked great, but after two years, the ties started cracking. She replaced them with UV-resistant ties—problem solved.
4. Fence Clips or S-Hooks (Best for Quick, Reusable Installations)
These are small clips or hooks designed specifically for fences. They grip the top rail or pickets without tools.
- Best for: All fence types, temporary or seasonal setups.
- How to install: Simply clip or hook them onto the fence. Hang lights from the hook end.
- Pros: No damage, easy to remove, reusable.
- Cons: May not hold heavy strands; can be knocked loose by pets or wind.
My favorite: I use S-hooks for my annual holiday lights. They’re easy to adjust and store.
5. Drill and Mount with Eye Screws (Best for Heavy or Long-Term Use)
For heavy-duty installations—like large globe lights or multiple strands—eye screws provide maximum strength.
- Best for: Wooden or vinyl fences, heavy strands, year-round use.
- How to install: Drill a hole, insert a wall anchor (if needed), then screw in the eye screw. Hang lights from the loop.
- Pros: Extremely durable, supports heavy loads.
- Cons: More work; leaves visible holes.
Tip: Use stainless steel eye screws to prevent rust, especially in humid climates.
Creative Layout Ideas to Elevate Your Outdoor Ambiance
Once the lights are up, it’s time to get creative. The layout you choose can completely change the mood of your space. Here are some inspiring ideas, from simple to show-stopping.
Straight Line Along the Top
The classic look. Hang lights along the top rail of your fence for a clean, elegant glow. It’s perfect for defining the boundary of your yard and works with any fence type.
Pro tip: Add a small overhang (let the lights drape 6–12 inches beyond the end) to create a soft, inviting edge.
Zigzag or Crisscross Pattern
For a dynamic, modern look, zigzag the lights across the fence. This works best with longer strands and adds visual interest, especially in larger yards.
- Use clips or hooks every 18 inches.
- Start at one corner and alternate direction with each run.
- Ideal for parties or festive occasions.
Canopy or Drape Effect
Attach lights to both the fence and nearby trees, posts, or pergolas to create a canopy. This mimics a starry sky and adds depth to your space.
- Use longer strands (50+ feet).
- Anchor one end to the fence, the other to a tree or post.
- Add extra strands for a fuller look.
Wave or S-Curve Pattern
Instead of straight lines, gently curve the lights in a wave or S-shape. It’s subtle but adds movement and softness.
- Use flexible fairy lights or LED tape.
- Secure with adhesive hooks or clips every 6–8 inches.
- Perfect for intimate seating areas.
Vertical or Diagonal Runs
For a unique twist, run lights vertically or diagonally across the fence pickets. This draws the eye upward and makes the space feel taller.
- Great for privacy fences or enclosed patios.
- Use clips or small nails to secure the cord at each picket.
- Pair with ground lighting for a layered effect.
Maintenance, Safety, and Longevity Tips
Great lighting isn’t just about installation—it’s about keeping it looking great year after year. A little maintenance goes a long way in preserving your investment and ensuring safety.
Seasonal Care
- Spring: Inspect lights for damage, replace burnt-out bulbs, and clean the fence.
- Summer: Check for loose hooks or sagging strands after storms.
- Fall: Trim overgrown plants that might block lights or cause moisture buildup.
- Winter: If using plug-in lights, unplug during snowstorms or extreme cold to prevent damage.
Safety First
- Always use outdoor-rated extension cords with built-in GFCI (Ground Fault Circuit Interrupter) protection.
- Never overload circuits—check the wattage limit of your lights and extension cords.
- Avoid running cords across walkways. Use cord covers or tuck them behind plants.
- For solar lights, clean the panels monthly to maintain charging efficiency.
Extending Lifespan
- Store lights in a cool, dry place during off-seasons. Wrap them around cardboard to prevent tangling.
- Use timers to limit usage to 6–8 hours per night. This reduces wear and saves energy.
- Replace bulbs or strands as needed. A single burnt-out bulb can affect the whole strand (especially in series-wired lights).
Data Table: Recommended Hook Spacing by Fence Type
| Fence Type | Recommended Hook Spacing | Best Attachment Method | Notes |
|---|---|---|---|
| Wooden Picket | 12–18 inches | Cup hooks or eye screws | Pre-drill holes to prevent splitting |
| Vinyl | 18–24 inches | Adhesive hooks or clips | Avoid high-temp adhesives in direct sun |
| Chain Link | 12–18 inches | Zip ties or S-hooks | |
| Metal | 18–24 inches | Cable clips or magnets (for steel) | Check for rust; use stainless steel |
| Composite | 18–24 inches | Adhesive hooks or clips | Clean surface thoroughly before applying |
Attaching string lights to your fence is more than just a DIY project—it’s an invitation to enjoy your outdoor space in a whole new way. From the soft glow of warm white LEDs to the playful twinkle of fairy lights, the right setup can turn a simple yard into a personal oasis. Whether you’re going for cozy, festive, or modern, the methods and tips above give you the tools to do it safely, beautifully, and affordably.
Remember, it’s not about perfection. It’s about creating a space that feels like you. Don’t be afraid to experiment, mix styles, or change things up seasonally. The best part? You don’t need to be a handyman or spend a fortune. With a little planning, the right tools, and a touch of creativity, you can achieve stunning outdoor ambiance that your family and friends will love.
So grab those lights, head outside, and let the magic begin. Your fence is waiting—and so is your next perfect evening under the stars.
Frequently Asked Questions
How do I attach string lights to a fence without damaging it?
Use non-invasive methods like zip ties, adhesive hooks, or S-hooks to secure string lights to your fence. These options hold lights firmly while protecting the fence material from nails or screws.
What’s the best way to string lights on a wooden fence?
For wooden fences, install small cup hooks or eye screws along the top edge, then loop the lights through them. This method evenly distributes weight and keeps the lights stable in windy conditions.
Can I use command hooks for attaching string lights to a fence?
Yes, outdoor-rated command hooks work well for attaching string lights to vinyl or metal fences. Ensure the hooks are designed for exterior use and clean the surface thoroughly for maximum adhesion.
How do I hide the cords when stringing lights on a fence?
Route cords behind fence posts or use cable clips to tuck them against the fence line. For a seamless look, choose lights with dark or neutral-colored wires that blend with the fence.
How far apart should I space hooks for string lights on a fence?
Space hooks or clips 12–18 inches apart, depending on the weight of the lights and fence stability. Heavier lights may need closer spacing to prevent sagging.
Are there weatherproof options for attaching string lights to a fence?
Absolutely—opt for stainless steel clips, UV-resistant zip ties, or waterproof adhesive strips rated for outdoor use. These ensure your string lights stay secure in rain, snow, or sun.

