

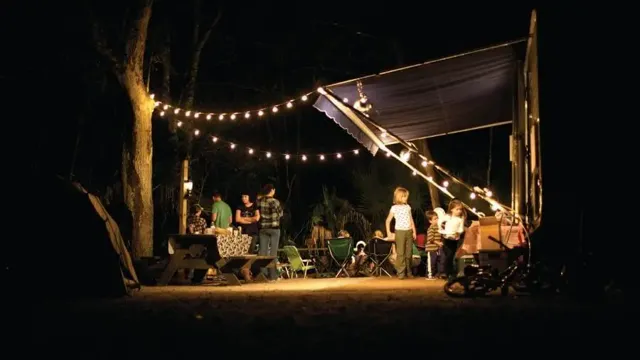
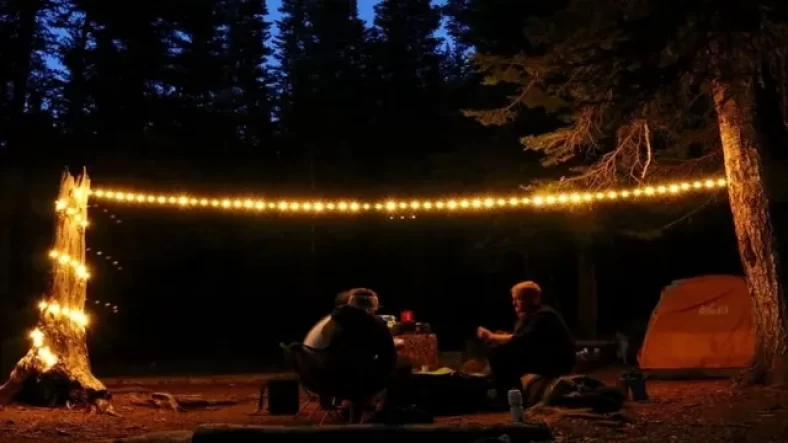
Looking for a way to add a touch of magic to your next camping trip? Look no further than a DIY camping string light holder! Whether you’re looking to light up your tent or create a cozy ambiance around the fire, these simple holders can be made with just a few basic materials and a bit of creativity. In this blog post, we’ll show you how to create your own string light holders in just a few easy steps. So grab your tools and let’s get started! With these holders, you’ll be sure to wow your camping buddies and create memories to last a lifetime.
Materials Needed
If you want to add some ambiance to your camping experience, creating your own DIY camping string light holder is an excellent option. To get started, you will need a few materials that can be easily found at your local hardware store or online. The first item on the list is a piece of PVC pipe that is at least half an inch in diameter.
You will also need an end cap and a T-joint that fits the pipe. Additionally, grab some rope or paracord to tie your light holder to a tree or other support structure. To give your holder some extra stability, you can also add some small weight or sandbags to the bottom of the PVC pipe.
With these materials in hand, you will be well on your way to creating a DIY camping string light holder that will enhance the atmosphere of your camping area.
PVC Pipe
PVC pipes are an excellent material for DIY projects and plumbing applications due to their affordability, durability, and versatility. To work with PVC pipes, you’ll need a few essential materials. Firstly, you’ll need PVC pipes and fittings of the correct size and shape for your specific project.
You’ll also need a hacksaw or PVC cutter to cut the pipes to the right length and a deburring tool to smooth out any rough edges. Additionally, you’ll need PVC primer and cement to connect the pipes and fittings securely. A measuring tape, pencil, and level will help ensure precise cuts and fittings.
Finally, gloves and safety glasses are essential protective equipment to prevent injuries. With these materials on hand, you’re well prepared to tackle any PVC pipe project with confidence, from simple household repairs to more complex DIY creations. Remember to follow proper safety procedures when working with PVC pipes, and have fun getting creative!
Zip Ties
Zip ties, also known as cable ties or wire ties, are versatile fastening devices that are perfect for bundling, securing, and organizing all sorts of items. To use zip ties, the first and only thing you’ll really need is a pack of them. Of course, the specialty tools that make it easier to trim any excess material from the tails can also be useful, but they are not absolutely necessary.
Other than that, the sky is the limit when it comes to the materials you can combine and secure with zip ties. From electrical cables to bike frames and even Christmas decorations, zip ties can be used for nearly anything. They are simple, relatively inexpensive, and highly effective, making them a go-to tool in many applications.
Remember to always choose the right size and strength for the job at hand to ensure the best results. Happy zip-tying!
Screws
When it comes to choosing the right screws for your project, it’s important to consider the materials needed. Different types of screws are designed to work best with different materials, so making sure you have the right combination is crucial for the longevity and stability of your construction. For example, if you’re working with softwoods like pine or cedar, you’ll want to use screws made from materials like carbon steel or zinc plated steel as they offer a good balance of strength and corrosion resistance.
On the other hand, if you’re working with hardwoods like oak or maple, you should consider using screws made from stainless steel or brass as they offer greater corrosion resistance and can withstand the density of the wood. It’s also important to consider the size and length of the screw, as well as the shape of the head and thread, to make sure they match your project’s needs. By taking the time to select the right screws and materials, you can ensure a job well done and a reliable final product for years to come.
Instructions
Are you looking for a fun and creative way to light up your camping site? Look no further than a DIY camping string light holder! Start by finding a sturdy and stable base for your holder, such as a tree branch or a metal post. Next, strategically wrap your string lights around the holder, making sure they are evenly spaced and secure. You can even add fun decorations like pinecones or small lanterns to make your camping area feel cozy and inviting.
Not only will this holder add ambiance to your campsite, but it will also provide practical lighting for nighttime activities. So, gather your supplies and let your creativity shine with a DIY camping string light holder!
Step 1: Cut PVC Pipe
Cutting PVC pipe is an essential step in any DIY project that requires the use of this versatile material. To ensure that you cut the pipe to the correct length, you’ll need a few basic tools. First, measure the length that you need the pipe to be using a measuring tape or ruler.
Once you have this measurement, mark it on the PVC pipe using a permanent marker. To cut the pipe, you’ll need a PVC pipe cutter or a hacksaw. If you’re using a pipe cutter, place the pipe inside the cutter and tighten the cutter’s grip.
Rotate the cutter around the pipe until the blade has cut through the entire circumference of the pipe. If you’re using a hacksaw, place the pipe in a vice or hold it securely with your non-dominant hand. Use the saw to make a straight cut along the marked line, being careful not to apply too much pressure and crack the pipe.
Once you’ve made your cut, use a deburring tool to smooth out any rough edges or burrs on the pipe. With these basic instructions, cutting PVC pipe is a straightforward task that you can complete in no time!
Step 2: Drill Holes
Drilling holes is an essential step in many DIY projects, whether you’re building a piece of furniture or hanging a shelf on the wall. First and foremost, it’s important to choose the right drill bit for the job. Consider the material you’ll be drilling into and the size of the hole you need.
It’s often a good idea to start with a smaller bit and gradually work your way up to the desired size. When drilling into walls, it’s important to make sure you’re not drilling into any electrical wires or pipes. Use a stud finder or a metal detector to locate any potential hazards before you drill.
Once you’ve chosen the right bit and located a safe drilling spot, gently press the drill into the surface and begin drilling in a slow, steady motion. Be sure to keep the drill perpendicular to the surface for a clean, straight hole. With careful preparation and precision, you can create the perfect hole to achieve your desired results.
Happy drilling!
Step 3: Attach Zip Ties
Now that you’ve drilled holes into your PVC pipe and threaded the fairy lights through, it’s time to secure everything in place with zip ties. Start at one end and wrap a zip tie around the pipe and wire, tightening it snugly. Trim off any excess.
Repeat this process at regular intervals along the length of the pipe until all the lights are securely fastened. Using zip ties not only keeps your lights from slipping out of place but also helps tidy up the appearance of your finished product. It’s important to make sure the zip ties are tight enough to securely hold the lights in place but not so tight that they damage the wires.
With careful attention to detail, your DIY fairy lights will look stunning and bring a magical touch to any room or outdoor space!
Step 4: Attach to Tent or Tree
To fully enjoy the outdoors, it’s essential to have reliable shelter, and attaching your hammock to a tent or tree is the next step in securing your campsite. Begin by finding a solid anchor point, at least 12-15 feet apart, and wrap the straps around the tree or secure to the tent poles with carabiners. Adjust the height to your preference and make sure the hammock is level for optimal comfort.
Take note of the weight capacity of your anchor point and ensure it can handle the weight of your hammock and body. It’s recommended to pack extra straps or ropes in case of unexpected damage to your original attachment. Enjoy the peace and serenity of nature from the comfort of your hammock, knowing it’s securely attached to your campsite.
Tips for Success
If you’re planning a DIY camping trip, string lights can make your campsite look cozy and inviting, but finding a way to hang them can be a challenge. One solution is to use a homemade string light holder. To make one, simply take a piece of PVC pipe and cut it into small sections.
Then drill holes through each section so that you can thread your string lights through them. Finally, attach a hook to one end of each section so that you can hang them from a tree or a tent pole. This simple DIY project will make your campsite look amazing and it’s a great way to add some extra light to your outdoor space.
Plus, you can customize the length and spacing of your string lights to suit your needs. So why not give it a try and see how beautiful your campsite can look with a little bit of DIY magic?
Choose the Right PVC Size
Choosing the right PVC size can make all the difference in the success of your project. Whether you’re creating a plumbing system or working on a DIY project, selecting the appropriate size is crucial. One tip is to measure the inner diameter of the pipe you plan to connect to, and choose a PVC size that matches.
It’s also important to take into account the pressure and flow rate required for your project. Different PVC sizes can handle different amounts of pressure, so be sure to choose a size that is compatible with your needs. Additionally, considering the temperature and chemical resistance of the material is important for selecting the right PVC pipe size.
By carefully considering these factors, you can ensure that your PVC piping system is both safe and effective.
Use Strong Screws
When it comes to DIY projects, using strong screws is a must for success. Choosing the right screw size and type for your project is important, but it’s equally vital to ensure that the screws are durable and can withstand the workload. Using weak screws can result in your project falling apart or not being secured properly.
You don’t want to run the risk of having to start your project all over again or, even worse, causing injury to yourself or others. Investing in high-quality and robust screws is a wise choice that will save you time, money, and stress in the long run. So, next time you embark on a DIY project, make sure to use strong screws and give yourself peace of mind knowing that your project is built to last.
Conclusion
In conclusion, our DIY camping string light holder is the perfect solution for illuminating your campsite without sacrificing on style and functionality. With its simple design and ease of assembly, you can bring a touch of charm to your outdoor space and enjoy the warm glow of string lights throughout your camping adventure. So next time you’re planning a trip into the wilderness, remember to pack this nifty little gadget and light up the night with your own personal touch of creativity! Happy camping, folks!”
FAQs
What materials do I need to make a DIY camping string light holder?
For a basic DIY camping string light holder, you can use items like a rope, carabiners, and a sturdy branch. However, you can also get creative and use materials like PVC pipe, wooden dowels, or metal rods.
How do I attach the string lights to the holder?
You can attach the string lights to the holder by wrapping them around the rope, tying them to the carabiners, or using clips to attach them to the holder.
Will my DIY camping string light holder be able to withstand different weather conditions?
It depends on the materials you use and how well you assemble the holder. If you use sturdy materials and secure everything tightly, your DIY camping string light holder should be able to withstand different weather conditions.
Can I customize my DIY camping string light holder with decorations?
Yes, you can customize your DIY camping string light holder with decorations like beads, feathers, or fabric. Just make sure that the decorations don’t compromise the stability or functionality of the holder.


Leave a Reply