Featured image for how to make cafe string lights
Image source: 11magnolialane.com
Transform your space with DIY cafe string lights by repurposing simple materials like LED bulbs, weatherproof cords, and vintage-style cages for a charming, custom glow. Follow easy steps to safely wire and hang them—perfect for patios, balconies, or cozy indoor nooks—and instantly elevate your ambiance with warm, inviting light.
Key Takeaways
- Choose LED bulbs: Opt for energy-efficient, durable LEDs to save power and last longer.
- Measure your space: Plan light placement first to determine string length and spacing needs.
- Use outdoor-rated materials: Ensure cords and bulbs are weatherproof for patio or balcony use.
- Space bulbs evenly: Maintain 6–8 inch gaps for balanced, professional-looking illumination.
- Secure with clips: Use adhesive or screw-in hooks to safely anchor lights without damage.
- Add dimmers: Install a dimmer switch to adjust ambiance for any mood or occasion.
📑 Table of Contents
- How to Make Cafe String Lights for Cozy Ambiance
- Understanding Cafe String Lights: What Makes Them Special?
- Materials and Tools You’ll Need
- Step-by-Step Guide to Building Your String Lights
- Creative Ways to Hang and Style Your Lights
- Maintenance, Safety, and Troubleshooting
- Bringing It All Together: Your Cozy Oasis Awaits
How to Make Cafe String Lights for Cozy Ambiance
There’s something magical about the soft glow of cafe string lights. You’ve probably seen them draped across patios, wrapped around trees, or hanging in cozy cafes. They instantly transform any space into a warm, inviting retreat. I remember the first time I sat under a canopy of these twinkling lights at a small bistro in Portland. The air was crisp, the coffee was strong, and the ambiance? Pure magic. That moment inspired me to recreate that feeling at home. And guess what? You can too—without spending a fortune.
Making your own cafe string lights is not only budget-friendly, but it also gives you full creative control. Whether you’re setting up a backyard oasis, sprucing up a balcony, or creating a dreamy indoor reading nook, DIY cafe string lights add charm and personality. The best part? You don’t need to be an electrician or a craft expert. With a few tools, some thoughtful planning, and a little patience, you can craft a lighting setup that feels like it was plucked straight from a Pinterest board. Let’s walk through the entire process—from choosing the right materials to hanging them with confidence.
Understanding Cafe String Lights: What Makes Them Special?
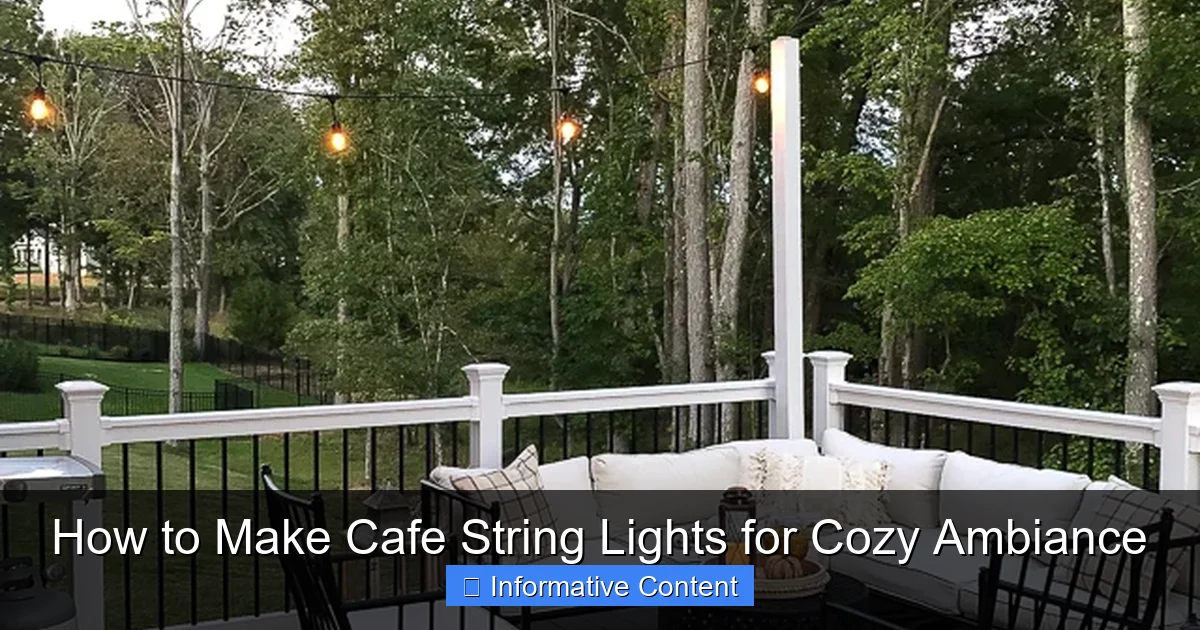
Before diving into the DIY process, it helps to understand what sets cafe string lights apart from regular holiday lights or basic string lights. These lights aren’t just about illumination—they’re about atmosphere. The goal is to create a soft, diffused glow that enhances the mood, not overpowers it. Think warm, golden light that casts gentle shadows and makes people want to linger.
Visual guide about how to make cafe string lights
Image source: 11magnolialane.com
The Aesthetic Appeal
Cafe string lights are typically designed with exposed bulbs (often Edison-style or vintage filament) spaced evenly along a cord. This gives them a rustic, industrial-chic look that’s popular in cafes, restaurants, and outdoor event spaces. The bulbs are usually spaced 8–12 inches apart, which allows for even coverage without creating dark spots. The spacing also prevents the “Christmas tree” effect—where lights look too clustered or overwhelming.
Light Quality Matters
Not all light is created equal. Cafe string lights use warm white LEDs (2700K–3000K color temperature) or incandescent bulbs to mimic the cozy glow of candlelight. Cool white or blue-tinted lights can feel harsh and clinical, which defeats the purpose of a relaxing ambiance. When choosing bulbs, look for “warm white” or “soft white” on the packaging. Pro tip: If you’re using incandescent bulbs, make sure they’re rated for outdoor use if you plan to hang them outside.
Durability and Safety
Since these lights are often used outdoors, durability is key. Look for weather-resistant cords, UV-protected bulbs, and waterproof connections. A good cafe string light setup should survive rain, wind, and temperature changes without flickering or failing. Safety is also important—always use UL-listed components and avoid overloading circuits. More on that later.
Real Talk: I once bought cheap string lights from a discount store. They looked great for two weeks, then one rainy evening, half the strand went out. Lesson learned: invest in quality. It’s worth the extra $10–$20 to avoid frustration later.
Materials and Tools You’ll Need
Now that you know what to look for, let’s gather the supplies. The beauty of DIY cafe string lights is that you can mix and match components to suit your space, budget, and style. Here’s a comprehensive list of what you’ll need.
Core Components
- String light cord: Choose a heavy-duty, outdoor-rated cord with a plug at one end. Look for 24–36 feet in length, depending on your space. Sockets should be E26 (standard base) and spaced 12 inches apart for even lighting.
- Bulbs: Edison-style LED or vintage filament bulbs (40–60 watts equivalent). LED bulbs last longer and use less energy. I recommend 15–25 bulbs per strand.
- Weatherproof connectors (if extending): Use inline waterproof connectors if you plan to link multiple strands. Avoid cheap plastic connectors—they degrade quickly in sun and rain.
- Mounting hardware: Screw hooks, eye bolts, zip ties, or adhesive hooks (for indoor use). For outdoor installations, stainless steel or galvanized hardware resists rust.
- Extension cord (optional): A heavy-duty outdoor extension cord with a built-in fuse for safety.
Tools
- Measuring tape
- Drill and drill bits (for permanent outdoor mounting)
- Screwdriver
- Wire cutters/strippers (if modifying cords)
- Level (to keep lines straight)
- Ladder (for high installations)
- Marker or chalk (for marking drill points)
Optional (But Helpful) Add-Ons
- Timer or smart plug: Automate your lights to turn on at sunset. I use a smart plug with Alexa—just say, “Turn on the patio lights,” and voilà.
- Dimmer switch: Some LED bulbs are dimmable. A dimmer lets you adjust brightness for different moods.
- Light diffusers: Paper lanterns, mason jars, or frosted glass covers can soften the glow and add visual interest.
Pro Tip: Buy a few extra bulbs and a spare socket. Bulbs can fail, and having backups saves you from a midnight repair mission. Also, keep all receipts—some brands offer 2–3 year warranties.
Step-by-Step Guide to Building Your String Lights
Now comes the fun part: building your lights. This section walks you through the entire process, whether you’re using a pre-assembled cord or building from scratch. I’ll cover both methods, so you can choose what works best for your skill level.
Option 1: Using a Pre-Assembled String Light Cord
This is the easiest and most reliable method—perfect for beginners. You’ll just need to add bulbs and mount the cord.
- Unpack and inspect the cord. Check for frayed wires, loose sockets, or damaged insulation. Plug it in briefly to test all sockets.
- Install bulbs. Screw in your chosen bulbs by hand. Don’t overtighten—this can crack the socket. For outdoor use, use silicone sealant around the base of each bulb to prevent moisture from seeping in.
- Plan your layout. Measure the area where you want to hang the lights. Mark anchor points with chalk or tape. For a straight line, use a string and level to keep it even.
- Mount hardware. Install screw hooks, eye bolts, or adhesive hooks at each anchor point. For wood, use 1.5-inch screws. For stucco or brick, use anchors. Spacing should match your socket spacing (e.g., 12 inches).
- Hang the lights. Gently hook the cord’s hanging loops (or use zip ties if no loops) to the hardware. Don’t stretch the cord—it should hang with a slight sag (about 6–8 inches) to allow for wind movement.
- Test and adjust. Plug in the lights. If any bulbs don’t light up, check the socket and connections. Adjust the sag if needed.
Option 2: Building from Scratch (Advanced)
If you want full customization (e.g., unique spacing, colored bulbs, or a vintage cord), you can build your own strand. This requires basic electrical knowledge.
- Cut the cord. Use 18-gauge outdoor extension cord. Cut to your desired length, leaving extra at both ends for connections.
- Strip and prepare sockets. Buy individual weatherproof sockets. Strip the cord’s insulation to expose the wires. Attach sockets using wire nuts or solder (solder is more durable).
- Space sockets evenly. Mark every 12 inches along the cord. Drill small holes and secure sockets with zip ties or clips. Use a template to ensure consistency.
- Seal connections. Apply silicone sealant to each socket base and wire connection to waterproof them.
- Add a plug. Attach a male plug to one end and a female connector to the other (if linking strands). Use crimp connectors or solder.
- Test thoroughly. Plug into a GFCI outlet (outdoor-safe) and check every bulb. Use a multimeter if any issues arise.
Real-World Example: I built a custom strand for my backyard deck using a vintage-style cloth-covered cord and amber LED bulbs. It took 4 hours (including drying time for sealant), but the result was worth it. The lights have survived three seasons—no failures.
Creative Ways to Hang and Style Your Lights
Hanging cafe string lights isn’t just about function—it’s about art. The way you drape, shape, and style them can dramatically change the feel of your space. Here are some creative (and practical) ideas to inspire you.
Classic Linear Layout
The most common setup: a straight line across a patio, pergola, or ceiling. Use this for a clean, modern look. Pro tip: Hang lights slightly above eye level (7–8 feet) to avoid glare. For long runs, use multiple strands connected with waterproof connectors.
Canopy or Web Design
Create a “starry sky” effect by crisscrossing lights in a grid or radial pattern. This works well under a pergola, between trees, or over a dining table. Use a central anchor point (like a tree branch or ceiling hook) and run strands outward. For extra magic, add paper lanterns or sheer fabric between the strands.
Curtain or Drape Style
Hang vertical strands from a horizontal support (like a beam or wire). This creates a soft, curtain-like glow—perfect for a bedroom, balcony, or wedding backdrop. Use clips or S-hooks to attach strands at varying lengths for a cascading effect.
Wrap Around Trees or Pillars
Wrap lights around tree trunks, columns, or railings for a whimsical touch. Start at the base and spiral upward, leaving 12–18 inches between wraps. Secure with zip ties or plant-safe clips. Avoid wrapping too tightly—trees grow!
Indoor Nook or Reading Corner
Bring the cafe vibe inside! Hang lights along a bookshelf, above a reading chair, or around a window. Use adhesive hooks for renter-friendly options. For a cozy corner, pair with a floor lamp and a plush rug.
Seasonal Themes
Swap bulbs or add decorations for holidays. Use colored bulbs for Christmas, paper hearts for Valentine’s Day, or tiny pumpkins for fall. I once hung mini jack-o’-lanterns on my string lights—my neighbors loved it!
Styling Tip: Less is more. Don’t overcrowd your space. A single well-placed strand can be more impactful than a tangled mess. And remember—the goal is ambiance, not a light show.
Maintenance, Safety, and Troubleshooting
Even the best cafe string lights need care. A little maintenance goes a long way in keeping your setup safe, functional, and beautiful for years.
Regular Cleaning
Bulbs and cords collect dust, pollen, and cobwebs. Clean them every 3–6 months:
- Unplug the lights.
- Wipe bulbs with a soft, dry cloth (or a damp cloth for stubborn grime).
- Use a brush to remove debris from sockets.
- Check cords for cracks, fraying, or rodent damage.
For outdoor lights, rinse with a hose (on low pressure) and let dry completely before plugging in.
Weatherproofing
Moisture is the enemy. To prevent shorts and corrosion:
- Use silicone sealant on bulb bases and connections.
- Store lights indoors during winter (if in a cold climate).
- Use GFCI outlets for outdoor power sources—they cut power if moisture is detected.
- Elevate plugs and connectors off the ground (use a waterproof box or hang them).
Safety First
Never ignore these red flags:
- Flickering or dimming lights (could mean a loose connection or overloaded circuit).
- Burning smell or hot sockets (unplug immediately).
- Exposed wires or melted insulation (replace the cord).
Pro Tip: Use a circuit checker to test outlets. Overloading a circuit is a fire hazard. As a rule, don’t connect more than 3–4 standard strands (144 watts max for a 15-amp circuit).
Common Issues & Fixes
| Issue | Likely Cause | Solution |
|---|---|---|
| Half the strand is out | Loose bulb or bad socket | Tighten bulbs; replace socket if needed |
| Flickering | Loose connection or faulty plug | Check all connections; use electrical tape |
| No power | Tripped breaker or GFCI | Reset breaker; check outlet |
| Bulbs burn out fast | Overvoltage or poor quality bulbs | Use surge protector; buy reputable brands |
Final Safety Note: If you’re not confident with electrical work, hire an electrician. It’s better to be safe than sorry.
Bringing It All Together: Your Cozy Oasis Awaits
Making cafe string lights isn’t just a DIY project—it’s an act of self-expression. It’s about creating a space where you want to be, where memories are made, and where the world slows down for a moment. Whether you’re sipping coffee on your balcony, hosting a dinner party, or just unwinding with a book, those soft golden lights make everything feel a little more special.
You now have everything you need to build a setup that’s safe, stylish, and uniquely yours. From choosing warm bulbs to mastering creative hanging techniques, you’re equipped to avoid common pitfalls and create something truly beautiful. Remember, the best projects are the ones that reflect your personality. Don’t be afraid to experiment—swap bulbs, try new layouts, or even add handmade lanterns. The only rule is: make it yours.
And here’s a final thought: these lights aren’t just for summer. Use them year-round to brighten dark winter evenings, celebrate holidays, or simply add a touch of magic to ordinary days. After all, a little glow goes a long way in making life feel cozier. So grab your tools, pick your favorite bulbs, and start stringing. Your perfect ambiance is just a few steps away.
Frequently Asked Questions
What materials do I need to make cafe string lights?
To make cafe string lights, you’ll need LED string lights, a power source (battery pack or plug-in), weatherproof bulbs (for outdoor use), and decorative elements like paper lanterns, Mason jars, or fabric covers. Ensure your materials match your desired aesthetic and location.
How do I safely install cafe string lights outdoors?
Use outdoor-rated LED string lights and waterproof connectors to prevent electrical hazards. Secure lights with clips or hooks designed for outdoor use, and avoid overloading circuits. Always follow local electrical codes for permanent installations.
Can I customize my DIY cafe string lights for a unique look?
Absolutely! Personalize your cafe string lights by adding colored bulbs, handmade shades, or themed ornaments. Wrap lights around branches, fences, or pergolas to create a custom ambiance that fits your space.
How do I hide the wires of my cafe string lights?
Conceal wires by running them along existing structures like gutters or railings, or use wire clips to keep them flush against walls. For a cleaner look, choose battery-powered lights or bury cords under mulch (if safe and allowed).
What’s the best way to power cafe string lights for long-term use?
For permanent setups, plug-in lights with timers are energy-efficient. For off-grid areas, solar-powered or rechargeable battery packs work well. Always calculate wattage to avoid overloading power sources.
How do I maintain my homemade cafe string lights?
Clean bulbs and covers regularly with a damp cloth, and check for loose connections or damaged wires. Store lights properly during off-seasons to extend their lifespan, especially if they’re not weatherproof.