
Featured image for hang string lights pergola
Image source: cdn.shopify.com
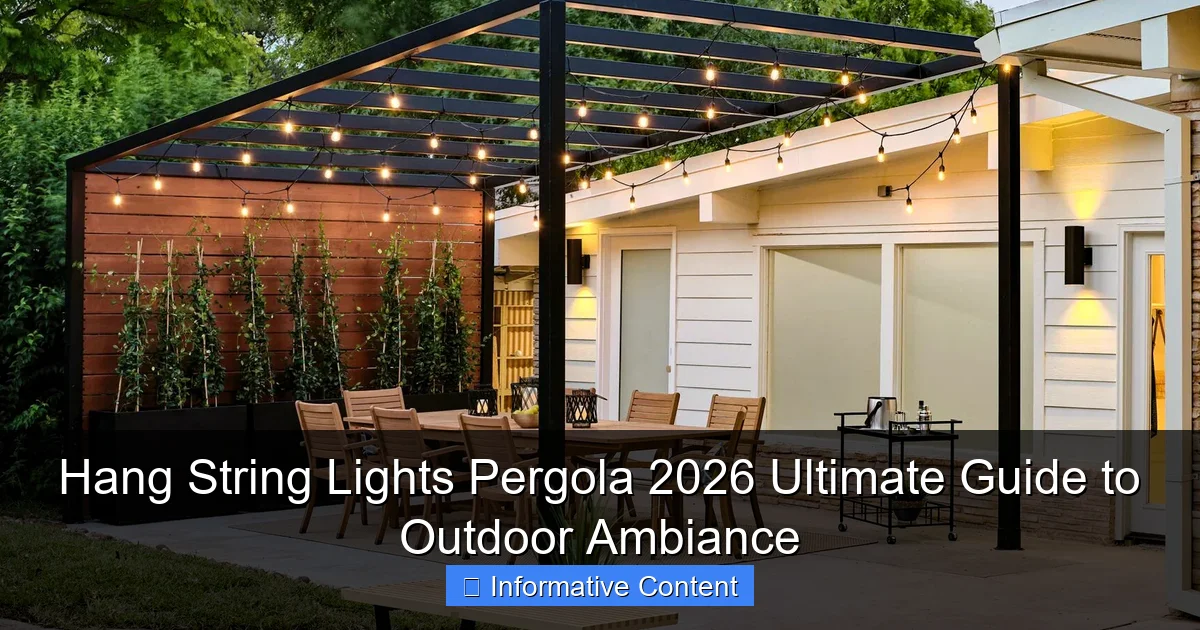
Transform your pergola into a magical nighttime retreat by mastering the art of hanging string lights—style, spacing, and secure installation are key for stunning results. Choose weather-resistant, dimmable LEDs and follow simple layout tips to create a warm, inviting ambiance perfect for entertaining or relaxing outdoors.
Key Takeaways
- Plan spacing first: Map light placement before installation for balanced, glare-free illumination.
- Use weatherproof lights: Choose UL-listed, outdoor-rated bulbs for year-round durability.
- Secure with hooks or clips: Avoid nails; use S-hooks or zip ties for damage-free mounting.
- Layer lighting: Combine string lights with lanterns or spotlights for dynamic ambiance.
- Measure twice: Calculate cord length and outlet proximity to prevent mid-installation shortages.
- Opt for dimmers: Adjust brightness to match moods and save energy long-term.
📑 Table of Contents
- The Magic of Hanging String Lights on Your Pergola
- Choosing the Right String Lights for Your Pergola
- Planning Your Layout: Designing the Perfect Ambiance
- Installation Tips: How to Hang String Lights Without the Headache
- Maintenance and Safety: Keeping Your Lights Shining Bright
- Creative Ideas to Take Your Pergola to the Next Level
- Comparison Table: Top String Light Options for Pergolas
- Final Thoughts: Creating Your Outdoor Oasis
The Magic of Hanging String Lights on Your Pergola
Imagine this: It’s a warm summer evening. The sun has just dipped below the horizon, painting the sky in soft hues of orange and pink. You’re sitting under your pergola with a glass of wine, the air gently rustling the leaves above. Then, with the flick of a switch, your pergola transforms into a glowing haven, wrapped in the warm, inviting glow of string lights. This isn’t just a dream—it’s a reality you can create. Hanging string lights on your pergola is one of the simplest, most effective ways to elevate your outdoor space. Whether you’re hosting a dinner party, enjoying a quiet night, or just want to make your backyard feel more magical, the right lighting can make all the difference.
But let’s be honest—hanging string lights isn’t as simple as just draping them around. There’s a balance between beauty and practicality. You want the lights to look stunning without being a hassle to install, maintain, or even remove if needed. That’s why this guide is here. We’ll walk you through everything you need to know to hang string lights on your pergola, from choosing the right lights to installation tips and maintenance. Whether you’re a DIY novice or a seasoned pro, this guide will help you create the outdoor ambiance you’ve always wanted. And don’t worry—we’ll keep it simple, fun, and full of real-life tips you can actually use.
Choosing the Right String Lights for Your Pergola
Types of String Lights: What’s Out There?
Before you start hanging anything, let’s talk about the types of string lights available. Not all lights are created equal, and the right choice depends on your style, budget, and how you plan to use your pergola.
Visual guide about hang string lights pergola
Image source: cdn.shopify.com
- Incandescent Bulbs: These are the classic, warm-white bulbs that give off that cozy, nostalgic glow. They’re affordable and easy to find, but they’re less energy-efficient and don’t last as long as newer options. Great for occasional use, but not ideal if you plan to leave them on for hours every night.
- LED Lights: LEDs are the gold standard for outdoor lighting. They’re energy-efficient, long-lasting (often 25,000+ hours), and come in a range of colors and styles. You can find warm white, cool white, color-changing, and even smart LEDs that you can control with an app or voice assistant.
- Edison-Style Bulbs: These vintage-style bulbs are a favorite for pergolas because of their rustic, industrial look. They’re often larger and more decorative, perfect for adding character to your space. Just keep in mind they can be more expensive and may require more power.
- Fairy Lights: If you want a delicate, whimsical look, fairy lights are your best friend. They’re usually smaller and more spaced out, creating a twinkling effect. Great for a romantic or boho vibe.
Pro tip: If you’re unsure which style you like, buy a small strand of each type and hang them temporarily. Live with them for a few nights to see which one feels right for your space.
Key Features to Look For
Now that you know the types, here are the features to consider when shopping:
- Weather Resistance: Since your lights will be outdoors, look for IP44 or IP65 ratings. These mean the lights are protected against rain and dust. If you live in a rainy or snowy area, this is non-negotiable.
- Length and Spacing: Measure your pergola carefully. Most string lights come in 25- or 50-foot strands, but you might need multiple strands or extension cords. Also, check the spacing between bulbs—closer spacing gives a denser, brighter look.
- Power Source: Decide whether you want plug-in lights or solar-powered. Plug-in lights are more reliable, but solar lights are easier to install and don’t require an outdoor outlet. If you go solar, make sure the battery is replaceable—some cheaper models have batteries that die after a year or two.
- Dimming and Timers: Want to adjust the brightness or set your lights to turn on automatically? Look for models with dimmers or built-in timers. This is especially useful if you’re using smart lights.
Example: If you have a 10×10 ft pergola and want a warm, cozy glow, a 50-foot strand of warm white LED Edison bulbs with IP44 rating would be perfect. Add a dimmer switch for flexibility.
Budget vs. Quality: Finding the Sweet Spot
String lights range from $10 for basic incandescent strands to $100+ for high-end smart LEDs. Here’s the truth: cheaper lights often fail within a year or two. They might not be weatherproof, the bulbs burn out quickly, or the wiring frays.
But that doesn’t mean you need to spend a fortune. Look for mid-range brands with good reviews (think 4+ stars on Amazon or Home Depot). A $30-$50 strand of LEDs with a 2-year warranty is often a better investment than a $15 strand that dies after one season.
And remember: you can mix and match. Use higher-quality lights for the main areas (like over your dining table) and save on cheaper strands for the perimeter.
Planning Your Layout: Designing the Perfect Ambiance
How to Map Out Your Pergola
Before you start hanging lights, plan your layout. This is where most people go wrong—they just drape the lights randomly and end up with a messy, uneven look. Here’s how to do it right:
- Measure Your Pergola: Use a tape measure to get the exact length and width. Note the height of the beams and any obstacles (like plants or furniture).
- Sketch a Layout: Draw a simple diagram of your pergola and mark where you want lights. Think about focal points—do you want lights over the dining area, around the edges, or in a crisscross pattern?
- Decide on the Pattern: Common patterns include:
- Straight Lines: Simple and elegant. Hang lights along the beams for a clean, modern look.
- Crisscross (X-Pattern): Creates a web-like effect. Great for larger pergolas.
- Hanging Curtains: Drape lights vertically from the beams to the ground. Adds drama and intimacy.
- Zigzag: A playful, dynamic look. Works well with fairy lights.
Pro tip: Use painter’s tape to mark where you’ll hang the lights before you commit. This lets you test different patterns without drilling holes.
Light Placement: Where to Hang for Maximum Impact
Where you place the lights matters as much as the pattern. Here are some tried-and-true tips:
- Along the Beams: This is the easiest and most common method. It highlights the structure of your pergola and creates a soft, even glow. Just make sure the lights are centered so they’re visible from all angles.
- From Beam to Beam: For a crisscross pattern, run lights from one beam to another. Use hooks or zip ties to secure them. Keep the tension tight so the lights don’t sag.
- From Top to Bottom: For hanging curtains, attach lights to the top beam and let them drape down to the ground. Use clips or hooks to keep them in place. This works best with longer strands (75+ feet).
- Under the Roof (If You Have One): If your pergola has a solid roof or shade sail, hang lights underneath for a cozy, enclosed feel.
Example: For a 12×12 ft pergola, you might run three horizontal strands along the beams (one at each end and one in the middle) and add a crisscross pattern in the center for extra depth.
Spacing and Density: Avoiding the “Too Much or Too Little” Trap
Too many lights can look overwhelming. Too few can look sparse. Here’s how to find the right balance:
- Spacing Between Strands: For horizontal lines, space strands 2-3 feet apart. For crisscross patterns, aim for 1-2 feet between each “X.”
- Bulb Density: For a bright, festive look, choose strands with bulbs 3-4 inches apart. For a softer, twinkling effect, go with 6-8 inches.
- Layering: Combine different types of lights. For example, use dense Edison bulbs along the beams and delicate fairy lights in the crisscross pattern.
Remember: You can always add more lights later. Start with a basic layout and see how it feels before going all out.
Installation Tips: How to Hang String Lights Without the Headache
Tools and Materials You’ll Need
Here’s what you’ll need for a smooth installation:
- String lights (obviously!)
- Measuring tape
- Drill and screws (or heavy-duty adhesive hooks)
- Zip ties or cable clips
- Extension cords (if needed)
- Ladder (for taller pergolas)
- Level (optional, but helpful for straight lines)
Pro tip: If you’re renting or don’t want to drill holes, use adhesive hooks rated for outdoor use. Just make sure they can support the weight of your lights.
Step-by-Step Installation Guide
Ready to hang your lights? Follow these steps:
- Mark the Spots: Use a pencil to mark where you’ll attach hooks or clips. For horizontal lines, mark the ends and every 3-4 feet along the beam.
- Install the Hooks: Drill pilot holes (if needed) and screw in the hooks. For adhesive hooks, clean the surface with rubbing alcohol first.
- Attach the Lights: Start at one end and work your way across. Loop the lights over the hooks or secure them with zip ties. For crisscross patterns, tie the lights to each hook with a knot or zip tie.
- Check the Tension: Make sure the lights are taut but not too tight. Sagging lights can look messy.
- Connect the Power: Plug in the lights and test them. If you’re using multiple strands, connect them with extension cords or splitters.
- Adjust as Needed: Turn the lights on and step back to see the effect. Make small adjustments to spacing or tension until it looks perfect.
Example: For a crisscross pattern, start by attaching lights from one corner to the opposite corner. Then, repeat for the other two corners. Secure the intersection points with zip ties to keep the pattern tight.
Common Mistakes to Avoid
- Overloading Outlets: Don’t plug too many strands into one outlet. Check the wattage rating of your lights and outlet to avoid tripping the breaker.
- Ignoring Weatherproofing: Make sure all connections are covered or elevated to avoid water damage. Use outdoor-rated extension cords and GFCI outlets.
- Forgetting the Ladder: If your pergola is tall, use a sturdy ladder and have someone spot you. Safety first!
- Rushing the Layout: Take your time planning. A well-thought-out layout will save you time and frustration later.
Maintenance and Safety: Keeping Your Lights Shining Bright
Regular Cleaning and Care
Your lights will last longer if you take care of them. Here’s how:
- Wipe Them Down: Every few weeks, use a damp cloth to wipe off dust and dirt. Avoid using harsh cleaners.
- Check for Damage: Inspect the wires and bulbs regularly. Replace any frayed wires or burned-out bulbs immediately.
- Store Properly: If you take your lights down in winter, coil them loosely and store them in a dry place. Avoid kinks in the wire.
Pro tip: Keep a spare strand of lights on hand for quick replacements. This way, you won’t have to wait for shipping if a bulb burns out.
Weatherproofing and Safety Tips
Safety is crucial when dealing with electricity and the outdoors:
- Use GFCI Outlets: These outlets shut off automatically if there’s a short circuit, preventing shocks.
- Elevate Connections: Keep plugs and connections off the ground. Use a covered outlet box or hang them on a hook.
- Check for Waterproofing: Make sure the lights are rated for outdoor use (IP44 or higher). If you’re unsure, cover connections with a waterproof bag or silicone sealant.
- Turn Off in Storms: If you’re not using the lights during heavy rain or wind, unplug them to avoid damage.
Troubleshooting Common Issues
Even the best lights can have issues. Here’s how to fix common problems:
- Flickering Lights: Usually a loose connection or bad bulb. Check the plugs and replace any faulty bulbs.
- Half the Strand Is Out: This often means a bulb is loose or burned out. Try tightening the bulbs or replacing the bad one.
- Lights Won’t Turn On: Check the outlet, breaker, and connections. Test the strand indoors to see if it’s a power issue or a problem with the lights.
Creative Ideas to Take Your Pergola to the Next Level
Mixing and Matching Light Types
Don’t be afraid to combine different styles! For example:
- Use warm white Edison bulbs along the beams and fairy lights in the crisscross pattern.
- Add color-changing LEDs to the edges for a fun, festive touch.
- Hang lanterns or mason jar lights from the beams for a rustic vibe.
Example: For a romantic dinner, use warm white lights for the main area and add red or pink fairy lights for a soft glow.
Incorporating Other Decor Elements
String lights work best when they’re part of a bigger design. Try:
- Greenery: Weave ivy, vines, or faux leaves through the lights for a natural look.
- Curtains: Hang sheer curtains from the beams and drape lights behind them. Creates a soft, diffused glow.
- Furniture: Add outdoor rugs, cushions, and lanterns to complete the ambiance.
Seasonal and Themed Lighting
Change up your lights for different seasons or events:
- Summer: Warm white or soft yellow lights for a cozy, inviting feel.
- Halloween: Orange or purple string lights for a spooky vibe.
- Christmas: Red and green lights, or add icicle lights for a festive touch.
- Weddings: Use white fairy lights and lanterns for a dreamy, romantic setting.
Pro tip: Use smart lights if you want to change colors or patterns without buying new strands.
Comparison Table: Top String Light Options for Pergolas
| Brand/Model | Type | Length | Weather Resistance | Special Features | Price Range |
|---|---|---|---|---|---|
| Brightech Ambience Pro | LED Edison | 48 ft | IP65 | Dimmable, 2-year warranty | $40-$50 |
| Twinkle Star Fairy Lights | LED Fairy | 66 ft | IP44 | 8 lighting modes, timer | $20-$30 |
| KooPower Solar String Lights | LED (Solar) | 72 ft | IP65 | Solar-powered, 8 modes | $25-$35 |
| GE Color Choice LED | LED (Smart) | 24 ft | IP44 | App-controlled, 16 colors | $50-$60 |
Note: Prices are approximate and may vary by retailer.
Final Thoughts: Creating Your Outdoor Oasis
Hanging string lights on your pergola is more than just a decor upgrade—it’s about creating a space where memories are made. Whether you’re sharing a meal with family, hosting a party, or just enjoying a quiet night under the stars, the right lighting can transform your backyard into a magical retreat.
The key is to take your time. Plan your layout, choose lights that match your style and needs, and install them with care. Don’t be afraid to experiment—mixing light types, adding greenery, or changing colors can make your space feel fresh and new.
And remember, this is your space. There’s no “right” way to hang string lights. If you love the way it looks and it brings you joy, you’ve succeeded. So go ahead—grab those lights, grab a ladder, and make your pergola the envy of the neighborhood. Your future self (and your guests) will thank you.
Now, go create that perfect outdoor ambiance. You’ve got this!
Frequently Asked Questions
How do I hang string lights on a pergola without drilling holes?
You can use adhesive hooks, zip ties, or tension rods to hang string lights pergola-style without damaging the structure. These methods work well for temporary setups and rental-friendly solutions.
What type of string lights work best for a pergola in 2026?
Solar-powered or LED string lights with weatherproof ratings (IP65+) are ideal for pergolas, offering energy efficiency and durability. Opt for warm white or smart color-changing options to enhance outdoor ambiance.
Can I leave pergola string lights up year-round?
Yes, if you use commercial-grade, weather-resistant string lights and secure them properly to withstand wind, rain, and snow. Always check manufacturer guidelines for long-term outdoor use when you hang string lights pergola installations.
How many string lights do I need for my pergola?
Measure the perimeter of your pergola and add 10-20% extra for draping or zigzag patterns. For a 12×12 ft pergola, 40-50 feet of lights typically creates balanced coverage.
Are there creative ways to hang string lights on a pergola?
Try crisscross patterns, zigzag lines, or hanging lights from pergola beams in parallel rows. For added flair, weave lights through climbing plants or combine with sheer fabric drapes.
How do I power string lights on a pergola without nearby outlets?
Use solar-powered lights, battery-operated strands, or run a heavy-duty outdoor extension cord discreetly along the pergola posts. For a permanent solution, consider hiring an electrician to install an outdoor outlet.

