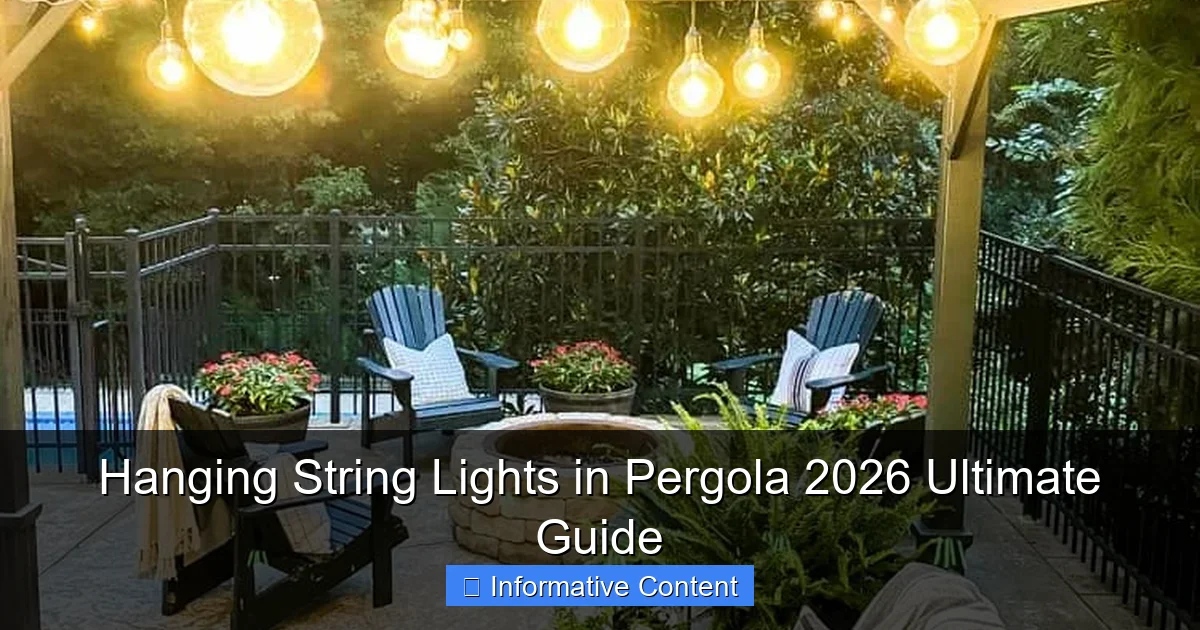
Featured image for hanging string lights in pergola
Image source: simply2moms.com
Transform your pergola into a magical outdoor retreat by mastering the art of hanging string lights with our 2026 Ultimate Guide. Discover expert tips on spacing, power sources, and weather-resistant setups to create a stunning, year-round ambiance that elevates any backyard or patio space.
Key Takeaways
- Plan layout first: Sketch light placement before installation to avoid mistakes.
- Use weatherproof lights: Choose IP65-rated LEDs for durability in all conditions.
- Secure with hooks: Install screw hooks into rafters for stable, safe hanging.
- Measure spacing carefully: Keep bulbs 6–8 inches apart for even illumination.
- Hide cords neatly: Run wires along beams and use clips for a clean look.
- Test before finalizing: Check brightness and connections prior to full installation.
📑 Table of Contents
- Why Hanging String Lights in Your Pergola Is a Game-Changer
- Planning Your Pergola String Light Setup
- Step-by-Step Installation Guide
- Creative Ideas and Design Tips
- Maintenance and Troubleshooting
- Data Table: Recommended String Lights for Pergolas
- Final Thoughts: Transform Your Pergola into a Nighttime Oasis
Why Hanging String Lights in Your Pergola Is a Game-Changer
Let’s be honest: a pergola is more than just a structure in your backyard. It’s a sanctuary—a place where you sip your morning coffee, host weekend barbecues, or unwind with a book under the open sky. But as the sun sets, that cozy vibe can quickly fade if you don’t have the right lighting. That’s where hanging string lights in pergola comes in.
Imagine this: you’re outside with friends, the air is warm, and the soft glow of string lights dances above you, casting a warm, inviting ambiance. It’s not just lighting—it’s a mood setter, a conversation starter, and a way to extend your outdoor enjoyment well into the night. Whether you’re aiming for a boho-chic vibe or a minimalist, modern look, string lights can transform your pergola into a magical retreat.
Planning Your Pergola String Light Setup
Before you start drilling holes or wrapping lights around beams, take a step back and plan. A little prep work now can save you time, money, and frustration later. Here’s how to approach it.
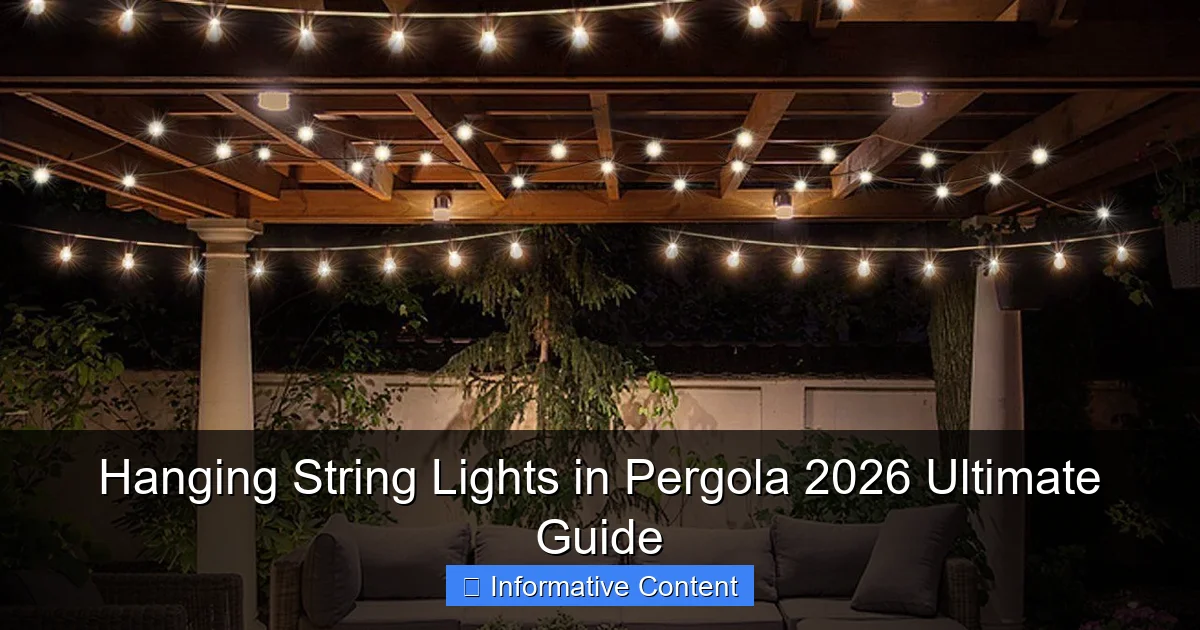
Visual guide about hanging string lights in pergola
Image source: i.pinimg.com
Assess Your Pergola Structure
Not all pergolas are built the same. Some have open rafters, others have solid roofs, and some even come with retractable canopies. The first thing to check is the material—wood, metal, or vinyl—since that affects how you’ll hang the lights.
- Wooden pergolas are the easiest. You can screw in hooks, use zip ties, or even staple the lights (though I’d only recommend staples for temporary setups).
- Metal pergolas require a bit more care. You’ll need magnetic hooks or non-marring clips to avoid scratching the finish.
- Vinyl or composite pergolas need special care. Avoid anything that could puncture or melt the material—use low-heat LED lights and adhesive hooks.
Also, measure the perimeter of your pergola. This helps you figure out how many feet of lights you’ll need. A good rule of thumb? Add 10% extra for draping or wrapping around beams.
Choose the Right String Lights
Not all string lights are created equal. Here’s what to look for:
- LED vs. Incandescent: LED lights are energy-efficient, last longer, and stay cooler. Incandescent lights give a warmer glow but use more power and burn out faster.
- Bulb Shape and Spacing: Globe bulbs give a soft, diffused light. Edison-style bulbs add a vintage touch. For pergolas, I recommend spacing bulbs 3-6 inches apart—close enough to look cohesive, but not so close they look like a Christmas tree.
- Weather Resistance: Look for lights with an IP44 rating or higher. This means they’re splash-proof and can handle rain, humidity, and temperature changes.
- Plug-In vs. Solar: Plug-in lights are more reliable for consistent brightness. Solar lights are eco-friendly but may dim on cloudy days. A hybrid option? Use solar for ambiance and plug-in for task lighting (like over a dining table).
Pro tip: Buy one extra strand than you think you need. It’s always better to have a backup than to run out mid-installation.
Decide on the Hanging Style
How you hang the lights sets the tone for your space. Here are a few popular styles:
- Straight Lines: Run lights parallel to the rafters. Simple, clean, and works with any pergola style.
- Criss-Cross (X-Pattern): Create an “X” pattern between beams for a more dynamic look. Great for larger pergolas.
- Draped or Swag Style: Let the lights hang in gentle curves between posts. Adds a romantic, boho vibe.
- Canopy Effect: Hang lights in a grid pattern to mimic a ceiling. Ideal for pergolas with open tops.
For example, I once helped a friend with a 12×12 ft pergola. We used the X-pattern with globe bulbs, and it instantly made the space feel like an outdoor lounge. The key? Keep the lines symmetrical so it doesn’t look messy.
Step-by-Step Installation Guide
Now that you’ve planned, it’s time to hang those lights! Here’s a detailed, no-fuss method.
Gather Your Tools
You’ll need:
- String lights (with extra extension cords if needed)
- Hooks, clips, or zip ties (choose based on your pergola material)
- Measuring tape
- Ladder (if your pergola is tall)
- Extension cord (rated for outdoor use)
- Timer or smart plug (optional but highly recommended)
Pro tip: Use a smart plug to control the lights with your phone. Set them to turn on at sunset and off at 11 PM—no more running outside to unplug!
Install Hooks or Clips
Start by marking where you’ll place the lights. For straight lines, measure and mark every 2-3 feet along the perimeter. For X-patterns, mark the beam intersections.
- Wooden pergolas: Screw in cup hooks or eye hooks. Drill a pilot hole first to prevent splitting.
- Metal pergolas: Use magnetic hooks or adhesive-backed clips. Avoid anything that could scratch the surface.
- Vinyl/composite: Stick with adhesive hooks rated for outdoor use. Test one hook first to make sure it holds.
For example, my neighbor has a metal pergola with a powder-coated finish. We used magnetic hooks, and they’ve held up for three years—even through heavy snowstorms.
Hang the Lights
Now for the fun part! Here’s how to do it right:
- Start at the power source: Plug the lights into an outdoor outlet. This ensures you don’t run out of reach halfway through.
- Work in sections: Hang one side at a time. For X-patterns, run the lights diagonally from one beam to the next.
- Secure the lights: Use clips or zip ties every 12-18 inches. For draped styles, leave 6-12 inches of slack between each attachment point.
- Test as you go: Plug in the lights periodically to check for dead bulbs or loose connections.
Common mistake: Don’t pull the lights too tight. They need a little slack to expand and contract with temperature changes.
Manage the Cords
Messy cords ruin the vibe. Here’s how to hide them:
- Use cord clips: Stick them to the pergola beams to keep cords tidy.
- Tuck under furniture: Route cords under benches or planters.
- Paint cords to match: If cords are visible, paint them with outdoor-safe spray paint to blend in.
I once saw a pergola where the owner used black zip ties to secure cords to a dark wooden beam—almost invisible at night!
Creative Ideas and Design Tips
Ready to take your pergola lighting to the next level? Here are some creative ideas and pro tips.
Layer Your Lighting
String lights alone can feel flat. Add depth by layering different types of lighting:
- Task lighting: Hang a pendant light or lantern over a dining table.
- Accent lighting: Use LED strips under benches or along the pergola floor.
- Fairy lights in jars: Place mason jars with fairy lights on tables or railings.
For example, a couple in Austin layered globe string lights with hanging Moroccan lanterns. The mix of warm and cool light created a stunning, eclectic look.
Play with Colors and Effects
Most string lights come in warm white, but don’t be afraid to experiment:
- Color-changing LEDs: Great for parties or holidays. Use a remote to switch from blue for a cool vibe to red for a cozy feel.
- Twinkle or flicker bulbs: Mimic fireflies or candlelight. Use sparingly—too much twinkle can look chaotic.
- Frosted or tinted bulbs: Add a soft, colored glow without being overwhelming.
One of my favorite tricks? Use amber-colored bulbs for a sunset-like glow. It’s perfect for evening relaxation.
Incorporate Nature
Blend the lights with your garden or landscape:
- Weave lights through vines: If your pergola has climbing plants, let the lights follow their natural path.
- Hang lights from trees: Extend the glow to nearby trees for a canopy effect.
- Use planters as light bases: Place heavy planters on either side of the pergola to anchor draped lights.
A client of mine has a pergola with a wisteria vine. We wrapped the lights around the vine, and now it looks like a glowing, flowering tree at night.
Seasonal Adjustments
Your lighting needs change with the seasons. Here’s how to adapt:
- Summer: Use brighter lights for evening gatherings. Add citronella candles for bug control.
- Fall: Switch to warmer, softer lights for cozy nights. Hang a few orange or yellow bulbs for a harvest vibe.
- Winter: Use lights to combat the darkness. Add a heated rug or outdoor heater to make the space usable.
- Spring: Go for pastel-colored bulbs or floral-shaped lights to celebrate the season.
Pro tip: Use a timer to automatically adjust the lights for daylight savings time.
Maintenance and Troubleshooting
Even the best setup needs occasional upkeep. Here’s how to keep your pergola lights shining bright.
Regular Cleaning
Dust, pollen, and bird droppings can dull the bulbs. Every 3-6 months:
- Turn off the power and unplug the lights.
- Wipe bulbs with a damp cloth. Avoid harsh chemicals—water and a mild soap work fine.
- Check for damage: Look for frayed wires, cracked bulbs, or loose connections.
I once had a strand of lights that kept flickering. Turns out, a squirrel chewed through the wire—now I keep a spare set just for repairs.
Winter Care
If you live in a snowy climate, take extra precautions:
- Remove lights before a heavy snowfall if possible. If not, use waterproof covers or plastic bags to protect the connections.
- Use cold-weather-rated lights. Some LEDs lose brightness in freezing temps.
- Inspect after storms: Check for ice damage or fallen branches.
One winter, my pergola lights survived a blizzard thanks to a simple trick: I wrapped the plugs in plastic wrap and secured them under the eaves.
Dealing with Common Issues
Here’s how to fix the most common problems:
- Flickering lights: Check connections, replace dead bulbs, or try a new extension cord.
- Dim lights: Clean the bulbs or replace old batteries (for solar lights).
- Lights not turning on: Test the outlet, check the fuse in the plug, or inspect the timer settings.
- Sagging lights: Add extra hooks or tighten the connections.
Pro tip: Keep a repair kit handy—extra bulbs, zip ties, and a multimeter can save the day.
Data Table: Recommended String Lights for Pergolas
Choosing the right lights can be overwhelming. Here’s a comparison of top-rated options:
| Brand & Model | Bulb Type | Length (ft) | Weather Rating | Power Source | Best For | Price Range |
|---|---|---|---|---|---|---|
| Brightech Ambience Pro | LED Edison | 48 | IP65 | Plug-in | Large pergolas, X-pattern | $35-$50 |
| Twinkle Star Globe | LED Globe | 25 | IP44 | Solar | Small pergolas, draping | $20-$30 |
| Lights4fun Color-Changing | LED RGB | 33 | IP44 | Plug-in | Parties, seasonal decor | $40-$60 |
| GE Energy Smart | LED Mini | 50 | IP65 | Plug-in | Long straight lines | $25-$40 |
| Moonrays Solar String | LED Fairy | 20 | IP44 | Solar | Low-light ambiance | $15-$25 |
Note: Prices are approximate and may vary by retailer.
Final Thoughts: Transform Your Pergola into a Nighttime Oasis
Hanging string lights in your pergola isn’t just about adding light—it’s about creating a space where memories are made. Whether you’re roasting marshmallows with the kids, hosting a dinner party, or simply enjoying a quiet night under the stars, the right lighting can make all the difference.
Remember, it’s not about perfection. A few loose bulbs or slightly uneven lines won’t ruin the vibe. What matters is the feeling—the warmth, the comfort, the joy of being outside when the rest of the world has gone dark. So grab those lights, follow this guide, and start hanging. Your perfect pergola awaits.
And if you ever need a little extra help? Don’t hesitate to experiment. Try a new pattern, swap out bulb colors, or even add a chandelier. The best part about hanging string lights in pergola is that it’s your space—make it yours.
Frequently Asked Questions
How do I hang string lights on a pergola without drilling holes?
You can use adhesive hooks, zip ties, or wrap lights around the pergola beams for a damage-free setup. This method works best with lightweight LED string lights and ensures easy removal or adjustments.
What’s the best way to hang string lights in pergola for a cozy ambiance?
For a warm glow, drape the lights in a zigzag pattern across the pergola rafters or weave them through lattice panels. Use dimmable bulbs or smart lights to customize brightness for different moods.
How do I power outdoor string lights on a pergola safely?
Use a weatherproof extension cord and GFCI outlet, or install a nearby outdoor-rated electrical box. For solar options, ensure panels get direct sunlight during the day.
Can I hang string lights in pergola during winter or rain?
Yes, as long as the lights are rated for wet or damp conditions (look for IP65+ ratings). Avoid leaving them on during storms to prolong bulb life and prevent damage.
What type of string lights work best for pergolas in 2026?
Opt for energy-efficient, shatterproof LED lights with smart features like app control or color-changing modes. Solar-powered options are also trending for eco-friendly installations.
How do I hide the wires when hanging string lights in pergola?
Run cords through cable clips, conduit, or match them to the pergola color for a discreet look. For a polished finish, bundle excess wires with ties and tuck them behind beams.

