Featured image for how to attach outdoor string lights to pergola
Image source: loveourreallife.com
Secure outdoor string lights to your pergola in 2026 with heavy-duty, weather-resistant mounting clips or stainless steel cable ties for a safe, long-lasting setup. Plan your layout to ensure even spacing and connect lights to a GFCI outlet to prevent electrical hazards. For a clean, professional look, run lights parallel to beams or in zigzag patterns using adjustable hooks designed for outdoor use.
Key Takeaways
- Plan layout first: Sketch light placement to ensure even coverage and avoid overloading circuits.
- Use weatherproof lights: Choose IP65-rated or higher for durability in all conditions.
- Secure with hooks or clips: Install stainless steel hooks or adhesive clips for damage-free mounting.
- Hide cords creatively: Use conduit or zip ties to run wires neatly along pergola beams.
- Test before finalizing: Check light function and spacing before permanent installation.
- Anchor end points: Reinforce connections to withstand wind and weather over time.
📑 Table of Contents
- How to Attach Outdoor String Lights to Pergola in 2026
- 1. Planning Your Pergola String Light Layout
- 2. Choosing the Right String Lights for Your Pergola
- 3. Tools and Hardware: What You’ll Need
- 4. Step-by-Step Installation Guide
- 5. Maintenance and Safety Tips for Long-Term Use
- 6. Creative Ideas and Pro Tips for 2026
How to Attach Outdoor String Lights to Pergola in 2026
There’s something magical about a warm summer evening under a pergola, the soft glow of string lights casting a golden hue over laughter and conversation. Whether you’re hosting a backyard barbecue, enjoying a quiet dinner al fresco, or simply unwinding with a book, outdoor string lights can transform your pergola into a cozy, inviting retreat. In 2026, with advancements in lighting technology and mounting solutions, installing these lights has never been easier—or more customizable.
But let’s be honest: the idea of hanging lights on a pergola can feel a little daunting. Are you drilling into wood? Will the lights sag? What if it rains? I’ve been there. A few summers ago, I tried (and failed) to string lights across my pergola using zip ties and sheer willpower. The result? A lopsided, droopy mess that looked more like a haunted house than a dreamy oasis. Since then, I’ve learned a lot—through trial, error, and a few YouTube deep dives—and I’m here to share the real, practical steps to help you avoid the same fate. Whether you’re a DIY newbie or a seasoned home improver, this guide will walk you through how to attach outdoor string lights to pergola safely, securely, and stylishly in 2026.
1. Planning Your Pergola String Light Layout
Before you grab your drill or ladder, take a step back and plan. A little forethought saves time, money, and frustration. The layout you choose will depend on your pergola’s shape, size, and purpose—and your personal style.
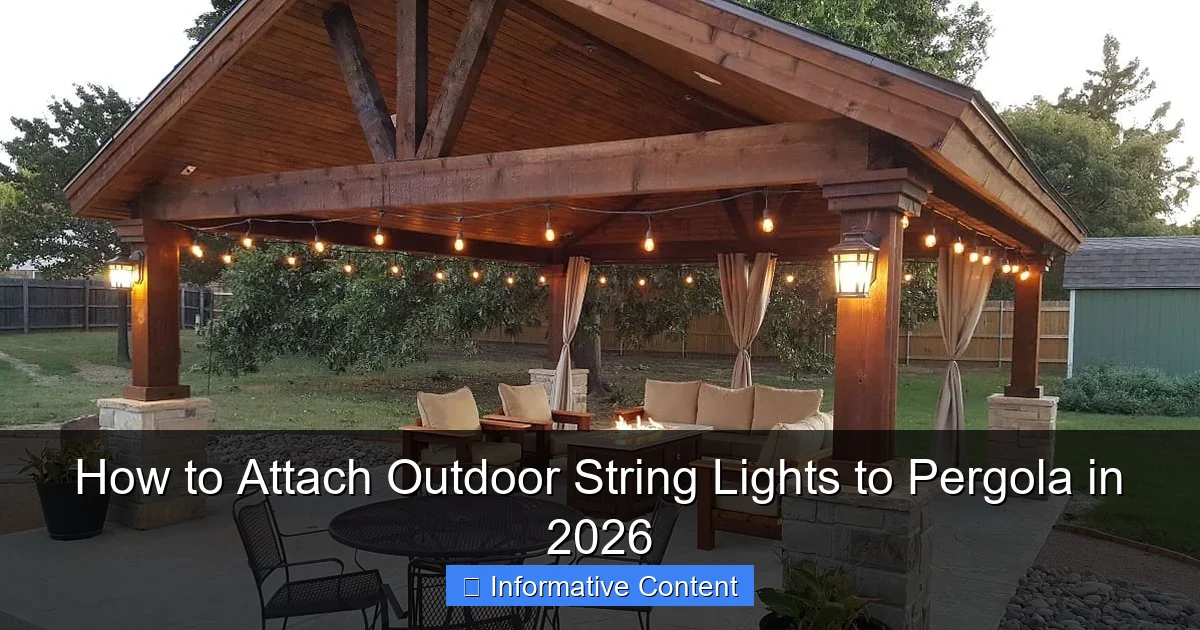
Visual guide about how to attach outdoor string lights to pergola
Image source: storables.com
Measure Your Pergola and Estimate Light Length
Start by measuring the perimeter and diagonal spans of your pergola. Most pergolas are rectangular or square, but some have unique angles or open sides. Use a measuring tape to note:
- The total length of all four sides
- The diagonal distances (corner to corner)
- The height from the ground to the pergola beams
For example, a standard 10-foot by 12-foot pergola has a perimeter of 44 feet. But if you’re draping lights diagonally, you’ll need more. A good rule of thumb: add 20–30% extra length to your measurement to account for draping, curves, or slight sagging. So for 44 feet, buy lights that total 53–57 feet. This gives you flexibility and prevents a too-tight, stretched look.
Choose a Hanging Pattern That Matches Your Style
Your layout sets the mood. Here are the most popular patterns in 2026:
- Perimeter Wrap: Lights run along the outer edges. Simple, classic, and great for outlining the space. Works well with Edison-style bulbs.
- Criss-Cross (X-Pattern): Strings cross diagonally from corner to corner, creating a web-like canopy. Best for larger pergolas—adds depth and drama.
- Parallel Lines: Multiple straight strings run parallel across the top, like a grid. Ideal for a clean, modern look. Use 2–4 lines depending on width.
- Zigzag (V-Pattern): Lights form a series of Vs across the pergola. Fun and dynamic, especially with color-changing LEDs.
Pro tip: Sketch your pergola on paper and draw your chosen pattern. This helps visualize spacing and prevents over- or under-lighting.
Consider Power Source and Weatherproofing
Not all string lights are created equal. In 2026, most outdoor lights are LED and rated for wet or damp conditions (look for IP65 or higher). But placement matters. If your pergola is fully covered, you have more flexibility. If it’s open-sided and exposed to rain, choose lights with sealed bulbs and waterproof connectors.
Also, think about power. Do you have an outdoor outlet nearby? If not, consider battery-operated or solar-powered string lights. Solar lights have improved dramatically—many now offer 8–12 hours of light after a full charge, even on cloudy days.
2. Choosing the Right String Lights for Your Pergola
With so many options on the market in 2026, picking the right lights can feel overwhelming. But it doesn’t have to be. Focus on three key factors: bulb type, durability, and power source.
LED vs. Incandescent: Why LED Wins in 2026
LEDs are the clear winner. They use up to 80% less energy, last 25,000–50,000 hours (that’s over 5 years of nightly use), and run cooler—important for wooden pergolas. Modern LEDs also come in warm white (2700K–3000K), which mimics the cozy glow of incandescent bulbs without the heat or energy drain.
Incandescent lights, while nostalgic, are inefficient, fragile, and often not rated for outdoor use. Save them for indoor decor.
Bulb Shape and Spacing: Match Your Vibe
- Edison bulbs: Vintage, exposed filaments. Perfect for a rustic or industrial look. Spacing: 6–12 inches apart.
- Globe bulbs: Round, soft glow. Great for a modern or minimalist aesthetic. Spacing: 8–10 inches.
- Mini lights: Tiny, dense clusters. Ideal for a twinkly, fairy-light effect. Spacing: 2–4 inches.
- Color-changing RGB: For parties or mood lighting. Look for app-controlled models with timers and presets.
Spacing affects coverage. Wider spacing (12+ inches) creates a more subtle glow. Closer spacing (under 6 inches) is better for bright, even illumination.
Durability: Look for Weather-Resistant Features
Outdoor lights must withstand sun, rain, wind, and temperature swings. In 2026, top-rated lights include:
- IP65 or IP67 rating: Dust-tight and protected against water jets or immersion.
- UV-resistant cords: Prevents yellowing and cracking in sunlight.
- Reinforced connectors: Sealed to prevent water ingress.
- Stainless steel or aluminum sockets: Resists rust and corrosion.
Check product descriptions carefully. A “weatherproof” label isn’t always enough—IP ratings are more reliable.
3. Tools and Hardware: What You’ll Need
You don’t need a full toolbox, but having the right gear makes installation faster and safer. Here’s what I use every time:
Essential Tools
- Measuring tape: For precise layout planning.
- Ladder (6–8 feet): A stable, extendable ladder with a tool tray is ideal.
- Drill and drill bits: For wood or metal beams. Use a countersink bit to avoid splitting.
- Screwdriver (manual or electric): For attaching hardware.
- Level: Ensures even lines, especially for parallel layouts.
- Work gloves: Protect your hands from splinters and sharp edges.
Mounting Hardware: Choose Based on Your Pergola
Your pergola’s material determines the best attachment method:
- Wooden pergolas: Use wood screws (stainless steel or galvanized) or eye hooks. For beams, 1.5–2 inch screws work well. For posts, use 2.5 inch screws.
- Metal pergolas: Use self-tapping metal screws or magnetic clips (for steel frames). Avoid drilling into thin aluminum unless using a pilot hole.
- No-drill options: Heavy-duty zip ties, bungee cords, or adjustable pergola clips (plastic or rubber-coated). Best for temporary setups or rental properties.
For a permanent, professional look, I recommend eye hooks or screw-in hooks. They’re secure, adjustable, and easy to remove later. For a softer look, try fabric clips with adhesive backing—they work on wood and metal and leave no marks.
Optional but Helpful Extras
- Extension cords (outdoor-rated): 16-gauge or thicker, with GFCI protection.
- Timer or smart plug: Automate lights to turn on at sunset.
- String light hooks (plastic or metal): Pre-made for easy hanging.
- Zip tie mounts: Adhesive-backed for no-drill installation.
4. Step-by-Step Installation Guide
Now for the fun part—hanging the lights! Follow these steps for a secure, professional-looking setup.
Step 1: Mark Your Mounting Points
Using your layout plan, mark where each hook or clip will go. For perimeter wraps, space hooks every 2–3 feet. For diagonal or parallel lines, measure and mark both ends. Use a pencil or masking tape. Double-check spacing with a level to avoid crooked lines.
Step 2: Install Hooks or Clips
- For wood: Drill a pilot hole (slightly smaller than the screw) to prevent splitting. Screw in eye hooks or hooks by hand, then tighten with pliers.
- For metal: Use a center punch to mark spots, then drill a pilot hole. Attach self-tapping screws or use magnetic clips.
- For no-drill: Clean the surface, then apply adhesive clips or zip tie mounts. Let adhesive cure for 1–2 hours.
Tip: For diagonal layouts, install hooks at all four corners first. Then add intermediate hooks along the beams if needed to prevent sagging.
Step 3: Hang the Lights
Start at the power source (usually an outlet or transformer). Unroll the lights and attach one end to the first hook. Work your way around the pergola, clipping each bulb socket or loop onto the hooks. For long runs, use zip ties or clips to secure the cord to the beam every 3–4 feet.
For parallel lines, hang one string at a time, using a level to keep them even. For criss-cross patterns, start at one corner, cross to the opposite, then return diagonally.
Step 4: Adjust for Tension and Drape
Don’t pull the lights too tight—this can strain the cord and sockets. Instead, allow a slight drape (about 1–2 inches between bulbs). For longer spans, add a center support hook to prevent sagging.
Pro tip: Test the lights as you go. Plug them in to check for burnt-out bulbs or connection issues. It’s easier to fix problems now than after full installation.
Step 5: Connect to Power and Test
Use an outdoor-rated extension cord if needed. Plug into a GFCI outlet for safety. Turn on the lights and check for even glow. Adjust any sagging lines or misaligned bulbs.
5. Maintenance and Safety Tips for Long-Term Use
Great lighting isn’t just about installation—it’s about upkeep. A few simple habits keep your pergola lights shining year after year.
Regular Inspections
Check your lights every season. Look for:
- Frayed cords or damaged insulation
- Corroded sockets or connectors
- Loose hooks or clips
- Burnt-out bulbs (replace promptly to avoid overloading)
Twist ties or clips can degrade in UV light. Replace them every 1–2 years.
Cleaning and Storage
Wipe bulbs with a dry microfiber cloth. For stubborn dirt, use a damp cloth—never submerge the lights. If you remove them for winter, store in a cool, dry place in a sealed bag to prevent dust and moisture buildup.
Safety First
- Never overload circuits. Most outdoor outlets handle 15–20 amps. A string of 100 LED bulbs uses about 1 amp—check your product specs.
- Use GFCI outlets to prevent shocks in wet conditions.
- Keep cords away from foot traffic to avoid tripping. Tuck them along beams or use cord covers.
- Turn off lights during storms to reduce lightning risk.
6. Creative Ideas and Pro Tips for 2026
Ready to take your pergola lighting to the next level? Here are fresh ideas and insider tips for 2026.
Smart Lighting Integration
Pair your string lights with a smart plug or hub (like Alexa, Google Home, or Apple HomeKit). Set schedules, dim brightness, or change colors with your phone. Some models even sync with music or motion sensors.
Layer Your Lighting
String lights are great, but don’t stop there. Add:
- Under-beam LED strips for a floating effect
- Hanging lanterns from pergola posts
- Fairy lights in mason jars on nearby tables
Layering creates depth and ambiance.
Seasonal Swaps
Change your lights with the seasons. Use warm white in summer, cool white or blue in winter, and multicolor for holidays. Some brands offer interchangeable bulb covers—swap colors without replacing the whole string.
Data Table: Recommended String Light Options (2026)
| Brand | Bulb Type | Length | Weather Rating | Power Source | Best For |
|---|---|---|---|---|---|
| Lumify Pro | Edison LED | 50 ft | IP67 | Plug-in | Rustic, permanent setups |
| SunBeam Solar | Mini LED | 30 ft | IP65 | Solar | No outlet, eco-friendly |
| SmartGlow RGB | Color-changing | 40 ft | IP66 | Plug-in + app | Parties, smart homes |
| EcoTwinkle | Globe LED | 60 ft | IP65 | Battery | Large pergolas, rentals |
Remember: the best lights are the ones that fit your space, style, and needs. Don’t overcomplicate it. Start simple, test your layout, and refine as you go.
Attaching outdoor string lights to your pergola isn’t just about function—it’s about creating a space that feels like home. Whether you’re chasing the golden hour glow or lighting up a late-night gathering, the right lights can make all the difference. With the tools, techniques, and tips in this guide, you’re ready to transform your pergola into a 2026-worthy retreat. So grab your ladder, pick your pattern, and let the light in. Your perfect evening awaits.
Frequently Asked Questions
How do I attach outdoor string lights to a pergola without drilling holes?
Use adhesive hooks, zip ties, or magnetic clips designed for outdoor use. These options secure lights firmly while preserving your pergola’s structure and finish.
What’s the best way to hang string lights on a pergola for a professional look in 2026?
Plan a zigzag or crisscross pattern between pergola beams, using screw-in hooks or eye bolts for even spacing. Ensure lights are taut and avoid sagging for a polished finish.
Can I attach outdoor string lights to a wooden pergola safely?
Yes—use corrosion-resistant hooks or nails rated for outdoor use to prevent wood damage. Avoid over-tightening fasteners to maintain the integrity of the pergola.
How far apart should I space hooks when attaching string lights to a pergola?
Space hooks or anchors 2–3 feet apart for standard string lights, adjusting based on bulb spacing. This prevents drooping and ensures even light distribution.
Do I need a guide for how to attach outdoor string lights to pergola with a sloped roof?
For sloped pergolas, anchor lights to the highest and lowest beam points, then adjust tension with turnbuckles or clips. This maintains a level, secure installation.
How do I hide the cords when installing pergola string lights?
Use cable raceways, paint cords to match the pergola, or route them along beams with clips. Concealing wires improves aesthetics and reduces tripping hazards.

