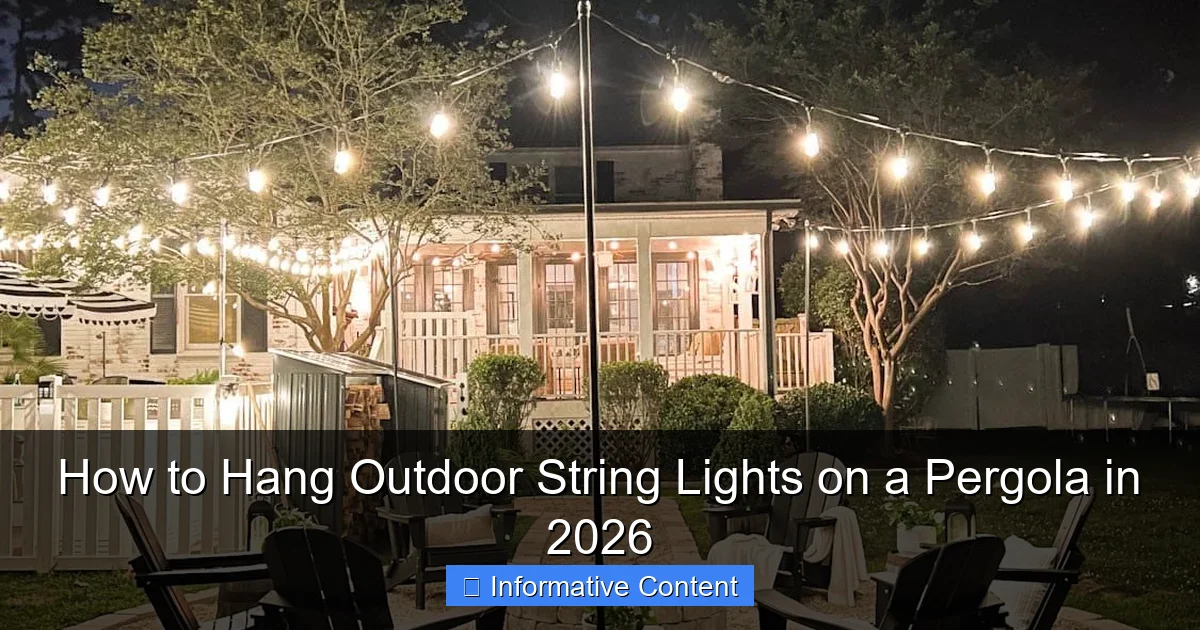
Featured image for how to hang outdoor string lights on a pergola
Image source: blesserhouse.com
Transform your pergola into a stunning nighttime oasis by securely mounting outdoor string lights using weather-resistant hardware and a strategic layout. For a clean, professional look in 2026, anchor lights to pergola beams with zip ties or hooks, ensuring even spacing and a safe, sagging-free design that enhances ambiance without overloading circuits.
Key Takeaways
- Plan spacing first: Map light placement before installation for balanced, even illumination.
- Use weatherproof hardware: Choose stainless steel or UV-resistant clips for long-lasting hold.
- Secure anchor points: Attach lights to pergola beams, not flimsy decorative elements.
- Opt for tension cables: Prevent sagging with a guide wire for heavier string lights.
- Test before finalizing: Power on lights during setup to spot gaps or malfunctions early.
- Follow a zigzag pattern: Weave lights across beams for fuller, professional-looking coverage.
📑 Table of Contents
How to Hang Outdoor String Lights on a Pergola in 2026
There’s something magical about stepping into your backyard at dusk and seeing your pergola glowing with warm, twinkling string lights. It feels like you’ve stepped into a cozy retreat—a personal oasis perfect for late-night chats, summer dinners, or just unwinding after a long day. I still remember the first time I strung lights across my own pergola. I was so excited, I didn’t even plan it properly. I ended up with tangled cords, uneven spacing, and a few dangling bulbs that looked more like a hazard than a highlight. But after a few tries, some trial and error, and a lot of coffee-fueled evenings, I cracked the code.
Hanging outdoor string lights on a pergola isn’t just about aesthetics—it’s about creating an atmosphere. Whether you’re hosting a birthday party, enjoying a quiet night with your partner, or just trying to brighten up a dark corner of your yard, the right lighting can transform your space. And in 2026, with smarter tools, better materials, and more creative options than ever, it’s easier (and safer) than you might think. This guide is packed with real-life tips, practical advice, and a few lessons learned the hard way—so you can skip the mistakes and go straight to that perfect glow.
Planning Your Pergola Lighting Layout
Before you grab a ladder and start hammering nails, take a breath. Planning your layout is the most important step—and honestly, the one most people skip. A well-planned design ensures your lights look balanced, function safely, and last for years.
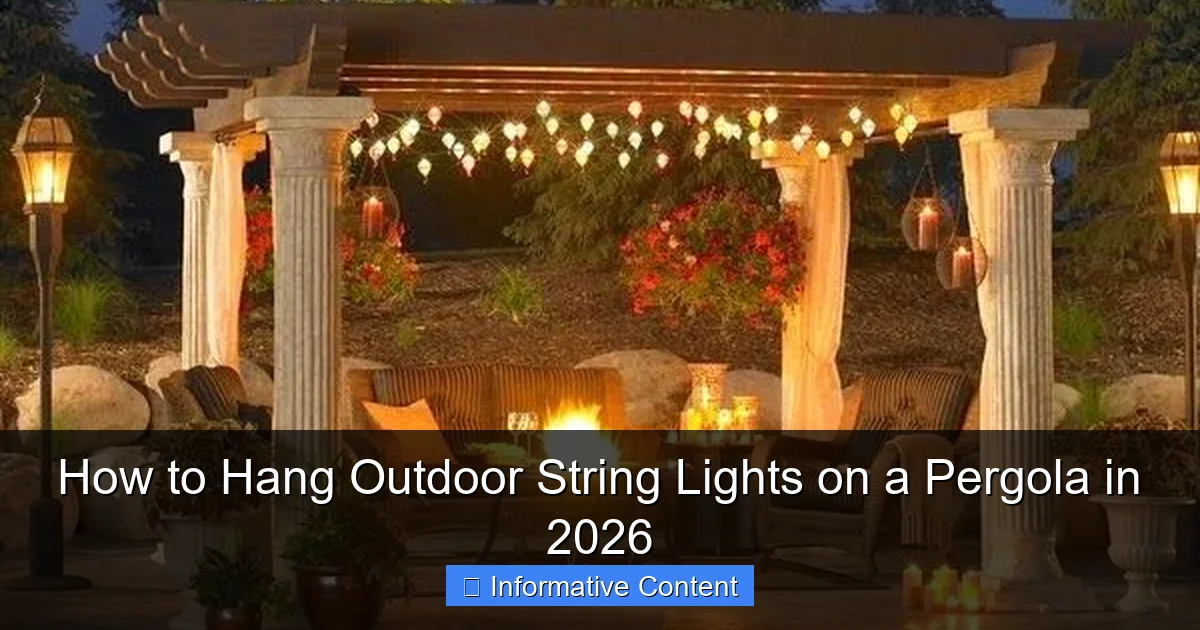
Visual guide about how to hang outdoor string lights on a pergola
Image source: i.pinimg.com
Measure Your Pergola Dimensions
Grab a tape measure and note the length, width, and height of your pergola. Measure the distance between the support beams (the horizontal rafters) and the posts. This tells you how many strings you’ll need and where to place them. For example, if your pergola is 12 feet long with rafters every 2 feet, you’ll likely want to run lights along each beam, spaced evenly.
Pro tip: Sketch a simple top-down diagram of your pergola. Mark where the beams, posts, and any electrical outlets are. This visual helps you avoid “light gaps” or overcrowding. I once tried to wing it without a sketch—ended up with three strings clustered in one corner and nothing on the other side. Not a good look.
Choose Your Lighting Pattern
There are a few popular ways to hang string lights, and the pattern you choose depends on your pergola’s style and your desired vibe:
- Parallel Lines: Run strings straight across the beams, like a grid. Great for even, consistent light. Ideal for modern or minimalist pergolas.
- X-Shape (Crisscross): String lights diagonally across the beams to form an X pattern. Creates a dramatic, cozy feel—perfect for entertaining.
- Zigzag: Alternating diagonal lines across the rafters. Gives a playful, dynamic look. Works well in larger spaces.
- Hanging Pendants: Suspend individual lights (like Edison bulbs) from the rafters using hooks or cables. Best for a vintage or bistro-style ambiance.
For most pergolas, I recommend starting with parallel lines. They’re simple, elegant, and easy to maintain. Once you’ve mastered that, you can experiment with more complex designs.
Calculate How Many String Lights You Need
Most outdoor string lights come in 24- to 48-foot strands. To avoid overbuying or coming up short, calculate the total linear footage you need. For example:
- If you’re running lights across 6 rafters, each 10 feet long, you’ll need 60 feet of light.
- Buy two 30-foot strings or one 48-foot string with a 12-foot gap (which you can fill with a second shorter strand or leave as a design choice).
Always add 10% extra for overlaps, connections, or mistakes. And remember: you can always cut a string to length, but you can’t add more without an extension cord (which we’ll talk about later).
Choosing the Right String Lights for Your Pergola
Not all string lights are created equal. The market is flooded with options, and picking the right ones can feel overwhelming. But here’s the truth: the best lights for your pergola depend on your climate, style, and how often you plan to use them.
LED vs. Incandescent: Which Is Better?
LED lights are the clear winner for most people in 2026. They’re energy-efficient, last up to 25,000 hours (that’s over 20 years with 3 hours of use per night!), and generate almost no heat. They’re also shatterproof and come in a range of colors and brightness levels. I switched to LED five years ago, and I’ve never looked back.
Incandescent bulbs have that classic warm glow, but they burn out faster, use more electricity, and can get hot. They’re great for occasional use, but for year-round outdoor lighting, LED is the smarter, safer choice.
Weather Resistance and Durability
Your pergola is exposed to rain, wind, UV rays, and temperature swings. So your lights need to be rated for outdoor use. Look for:
- IP65 or higher rating: This means the lights are dust-tight and protected against water jets. IP44 is okay for covered pergolas, but IP65 is better for full exposure.
- UV-resistant cords: Cheap plastic cords degrade in sunlight. Opt for rubber or silicone-coated cords that won’t crack or yellow.
- Commercial-grade construction: These are thicker, sturdier, and designed for permanent installation. They cost more upfront but save money in the long run.
I once bought “outdoor-rated” lights from a discount store. After one summer, the plastic was brittle and the sockets were corroded. Lesson learned: invest in quality.
Smart Features and Controls
In 2026, smart lighting is more accessible than ever. Consider:
- Wi-Fi or Bluetooth control: Use an app to turn lights on/off, dim, or change colors from your phone.
- Voice control: Works with Alexa, Google Assistant, or Siri. “Hey Google, turn on pergola lights” is a game-changer.
- Timers and schedules: Set lights to turn on at sunset and off at 11 PM. Saves energy and adds convenience.
Smart lights cost more, but if you love tech or want hands-free control, they’re worth it. I use a smart hub with motion sensors—my lights turn on automatically when I walk outside at night. Feels like magic.
Tools and Materials You’ll Need
You don’t need a full workshop, but having the right tools makes the job faster, safer, and more professional-looking. Here’s what I keep in my “pergola lighting kit”:
Essential Tools
- Drill with screwdriver bits: For driving screws into wood or masonry.
- Ladder or step stool: Choose one that’s stable and tall enough to reach the rafters safely. I use a 6-foot fiberglass ladder—lightweight but sturdy.
- Measuring tape and pencil: For marking drill points and spacing.
- Wire cutters: To trim zip ties or excess cord.
- Stud finder (optional): Helps locate beams if your pergola has a ceiling or trim.
Installation Hardware
- Outdoor-rated screws or lag bolts: Use 1.5-inch stainless steel screws for wood pergolas. For concrete or metal, use masonry anchors or toggle bolts.
- Cup hooks or eye screws: These are perfect for hanging lights. I prefer cup hooks—they hold the light cord securely and are easy to remove.
- Zip ties (heavy-duty, UV-resistant): For securing loose cords or bundling multiple strings. Avoid regular plastic ties—they break in the sun.
- Extension cords (if needed): Use outdoor-rated, grounded cords. Keep them off the ground and away from foot traffic.
- Weatherproof outlet cover: Protects outdoor sockets from rain and debris.
Optional Upgrades
- Light clips or adhesive mounts: Great for renters or if you don’t want to drill. Look for outdoor-rated, removable adhesive strips.
- Dimmer switch: Lets you adjust brightness. Works with compatible LED strings.
- Timer outlet: Automatically turns lights on/off without a smart hub.
Pro tip: Buy everything in one trip. Nothing’s worse than halfway through the job and realizing you’re out of screws. I keep a spare box of cup hooks and zip ties in my garage—saved me twice during last-minute parties.
Step-by-Step Installation Guide
Now for the fun part: hanging the lights. Follow these steps for a clean, professional installation.
Step 1: Install Hooks or Mounts
Start by marking where you want the hooks. For parallel lines, place a hook at each end of every rafter. Use a tape measure to ensure even spacing—I recommend 12 to 18 inches between hooks for a balanced look.
Drill pilot holes (especially in hardwood) to prevent splitting, then screw in the cup hooks. Tighten them firmly, but don’t over-torque—you want them secure, not stripped.
For crisscross or zigzag patterns, plan the diagonal path and mark hook positions accordingly. Use a chalk line or laser level to keep lines straight.
Step 2: Hang the First String
Start at the power source (usually an outlet near the pergola). Plug in the first string and drape it over the hooks. Don’t stretch it tight—leave a slight sag (about 2–3 inches) between hooks. This gives the lights a gentle curve and prevents tension on the cord.
Secure the cord to each hook by looping it through the cup. For extra security, use a zip tie to fasten the cord to the hook’s shank (not the cup itself).
Test the lights as you go. If a bulb is out, check the connection or replace the string. Better to fix it now than after the whole pergola is lit.
Step 3: Connect Multiple Strings (If Needed)
Most string lights have male/female plugs. Connect them end-to-end, but never exceed the manufacturer’s maximum wattage or string count (usually 3–5 strings). Overloading can trip breakers or damage the lights.
Use outdoor-rated extension cords if the outlet is far away. Coil excess cord neatly and secure it with zip ties. Never leave cords dangling or running across walkways—trip hazard!
Step 4: Secure Loose Cords
After all strings are hung, check for loose cords. Use zip ties to bundle and fasten them to beams or posts. Keep cords close to the structure to avoid wind damage.
For smart lights, hide the Wi-Fi hub or transformer in a weatherproof box near the outlet. Label all cords with colored tape so you know which string is which.
Step 5: Test and Adjust
Plug everything in and turn on the lights. Walk around the pergola and check for:
- Uneven spacing or sagging
- Flickering bulbs
- Exposed cords or tripping hazards
Make adjustments as needed. It’s okay to tweak the look—perfection comes with patience.
Maintenance and Long-Term Care
Your pergola lights will last longer if you treat them right. Here’s how to keep them shining for years.
Seasonal Cleaning
Dust, pollen, and bird droppings can dull your lights. Every 3–4 months, turn them off and wipe bulbs and cords with a soft, damp cloth. For stubborn grime, use a mild soap solution. Never use abrasive cleaners—they can scratch plastic or metal.
Check for loose hooks, frayed cords, or corroded sockets. Tighten screws and replace damaged parts immediately.
Winter Storage (If Needed)
If you live in a cold climate, consider removing lights in winter. Snow and ice can weigh down cords and damage bulbs. Store them in a dry, temperature-controlled space (like a garage or closet).
Before storing, coil each string neatly and place it in a breathable bag or box. Label the box with the length and style so setup is easier next year.
For year-round installation, choose commercial-grade lights rated for sub-zero temperatures. I leave mine up all year, and after five winters, they’re still going strong.
Troubleshooting Common Issues
- Flickering lights: Check connections. Loose plugs or damaged sockets are often the culprit.
- Half the string is out: One bulb is likely burned out or loose. Replace it or tighten the socket.
- Cord is frayed: Cut the cord and use a waterproof splice connector. If damage is extensive, replace the string.
- Smart lights not connecting: Reset the hub and ensure it’s within Wi-Fi range. Move it closer to the router if needed.
Data Table: Recommended String Lights for Pergolas (2026)
| Brand & Model | Length | Bulb Type | Weather Rating | Smart Features | Best For |
|---|---|---|---|---|---|
| Philips Hue Outdoor String | 25 ft | LED, color-changing | IP65 | Wi-Fi, app, voice control | Tech lovers, color customization |
| Brightech Ambience Pro | 48 ft | LED, warm white | IP65 | Timer, dimmer switch | Large pergolas, year-round use |
| Twinkle Star Solar String | 33 ft | LED, warm white | IP65 | Solar-powered, auto on/off | Eco-conscious, no outlet needed |
| GE Energy Smart | 24 ft | LED, clear | IP44 | None | Budget-friendly, basic lighting |
Final Thoughts: Creating Your Perfect Outdoor Ambiance
Hanging outdoor string lights on a pergola isn’t just a DIY project—it’s an investment in your home’s atmosphere. When done right, those twinkling lights become the backdrop for memories: laughter around a fire pit, quiet mornings with coffee, or stargazing with a loved one. And in 2026, with so many durable, smart, and stylish options, there’s no reason to settle for a half-finished look.
Remember, it’s okay to start small. You don’t need to light up the entire pergola on day one. Try one string, see how it feels, and build from there. Use the tips in this guide to plan carefully, choose quality materials, and install with care. And don’t forget to enjoy the process—there’s pride in creating something beautiful with your own hands.
When you finally step back and see your pergola glowing just right, you’ll know it was worth it. So grab your tools, pick your lights, and let your backyard shine. After all, the best moments happen under the lights.
Frequently Asked Questions
How do I hang outdoor string lights on a pergola without drilling holes?
Use removable hooks, adhesive clips, or zip ties to secure lights to the pergola beams. These methods work well for renters or those who want to avoid permanent damage while still achieving a secure hold.
What’s the best way to hang string lights on a pergola for a professional look in 2026?
Plan a symmetrical layout using guide wires or ceiling clips to keep strands straight and evenly spaced. For a polished finish, hide cords behind beams or use raceways, especially with LED string lights for energy efficiency.
Can I hang outdoor string lights on a pergola in a zigzag pattern?
Yes! Attach lights diagonally between pergola posts using hooks or eye screws, spacing them 12–18 inches apart. This pattern adds visual interest and works well for large or rectangular pergolas.
How do I hang string lights on a pergola with a slatted roof?
Weave lights horizontally through the slats or secure them with S-hooks or zip ties for stability. Ensure bulbs face downward for optimal illumination and avoid overloading the slats’ weight capacity.
What type of hardware is needed to hang outdoor string lights on a pergola?
Use weather-resistant materials like stainless steel hooks, eye screws, or plastic clips designed for outdoor use. For heavy-duty installations, consider turnbuckles or guide wires to reduce sagging over time.
How do I power outdoor string lights on a pergola if outlets are far away?
Use an outdoor-rated extension cord or a solar-powered string light set to avoid long cable runs. For permanent setups, consult an electrician to install a weatherproof outlet nearby.

