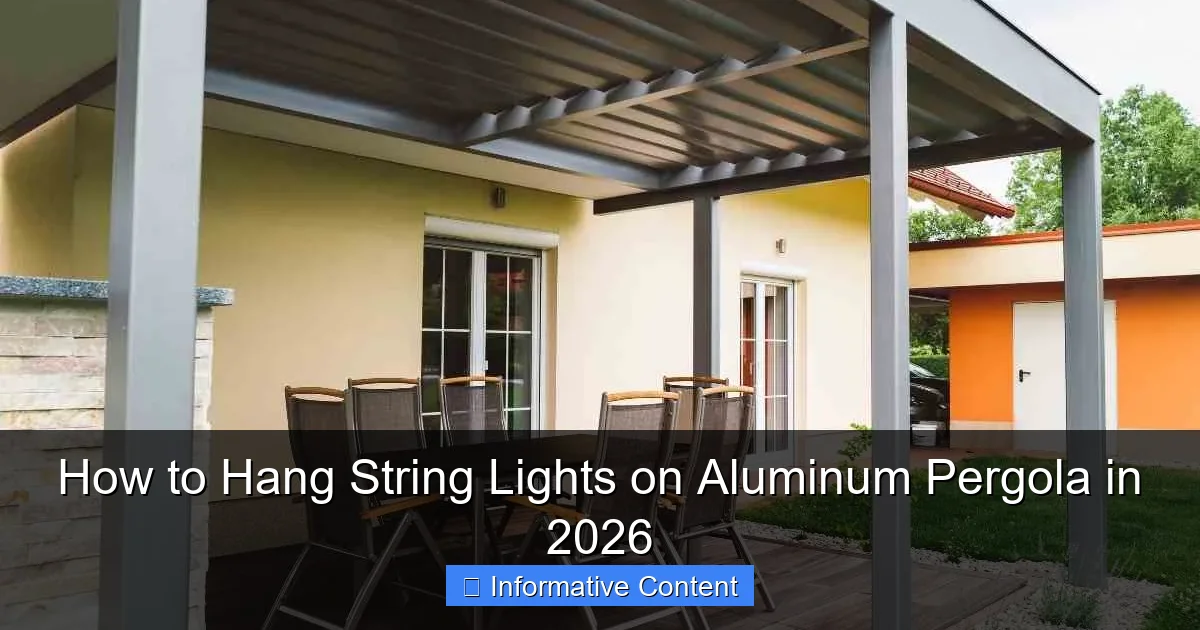
Featured image for how to hang string lights on aluminum pergola
Image source: gardeniaorganic.com
Transform your aluminum pergola into a stunning nighttime oasis in 2026 with weather-resistant LED string lights and non-invasive mounting clips designed for metal frames. Use adjustable, snap-on cable clips or magnetic hooks to securely attach lights without drilling, preserving your pergola’s sleek finish while ensuring a professional, droop-free display. For a modern touch, integrate smart lighting with app-controlled brightness and scheduling for effortless ambiance all year.
Key Takeaways
- Plan spacing first: Map light placement before installation for even coverage.
- Use removable clips: Choose no-damage clips designed for aluminum pergolas.
- Check weight limits: Ensure pergola can support lights and accessories safely.
- Weatherproof connections: Use outdoor-rated lights and seal electrical connections.
- Anchor securely: Fasten end strings tightly to prevent sagging or wind damage.
- Test before finalizing: Power lights during installation to spot gaps or issues.
📑 Table of Contents
- Why Hanging String Lights on Your Aluminum Pergola Is Worth the Effort
- Planning Your String Light Layout for Maximum Impact
- Choosing the Right String Lights and Hardware
- Step-by-Step Installation: How to Hang String Lights on Aluminum Pergola
- Creative Ideas and Pro Tips for a Stunning Display
- Maintenance, Troubleshooting, and Long-Term Care
- Final Thoughts: Enjoy the Glow
Why Hanging String Lights on Your Aluminum Pergola Is Worth the Effort
There’s something magical about stepping outside on a warm summer evening, only to be greeted by a warm, twinkling glow from string lights draped across your aluminum pergola. It’s not just about the light—it’s about the mood, the ambiance, the feeling of stepping into your own private oasis. I remember the first time I hung string lights on my aluminum pergola. I stood back, hands on hips, and thought, “This is it. This is the backyard I’ve always dreamed of.” But getting there? That took some trial, error, and a few too many trips to the hardware store.
Whether you’re hosting a dinner party, enjoying a quiet night with a book, or just want to add some sparkle to your outdoor space, string lights can transform your pergola from functional to unforgettable. The good news? Hanging them on an aluminum pergola isn’t as tricky as it seems. In fact, with the right tools, techniques, and a little patience, you can create a stunning display that lasts for years. In this guide, I’ll walk you through how to hang string lights on aluminum pergola in 2026—covering everything from planning and tools to installation and maintenance. No fluff, no gimmicks—just real advice from someone who’s been there, done that, and learned from their mistakes.
Planning Your String Light Layout for Maximum Impact
Assess Your Pergola Structure and Dimensions
Before you even buy a single light, take a good look at your aluminum pergola. Measure the length and width of the top beams, the spacing between the rafters, and the height from the ground. This will help you determine how many strands you’ll need and where to place them. I once made the mistake of eyeballing it—ended up short by two strands and had to make an emergency run to the store. Not fun.
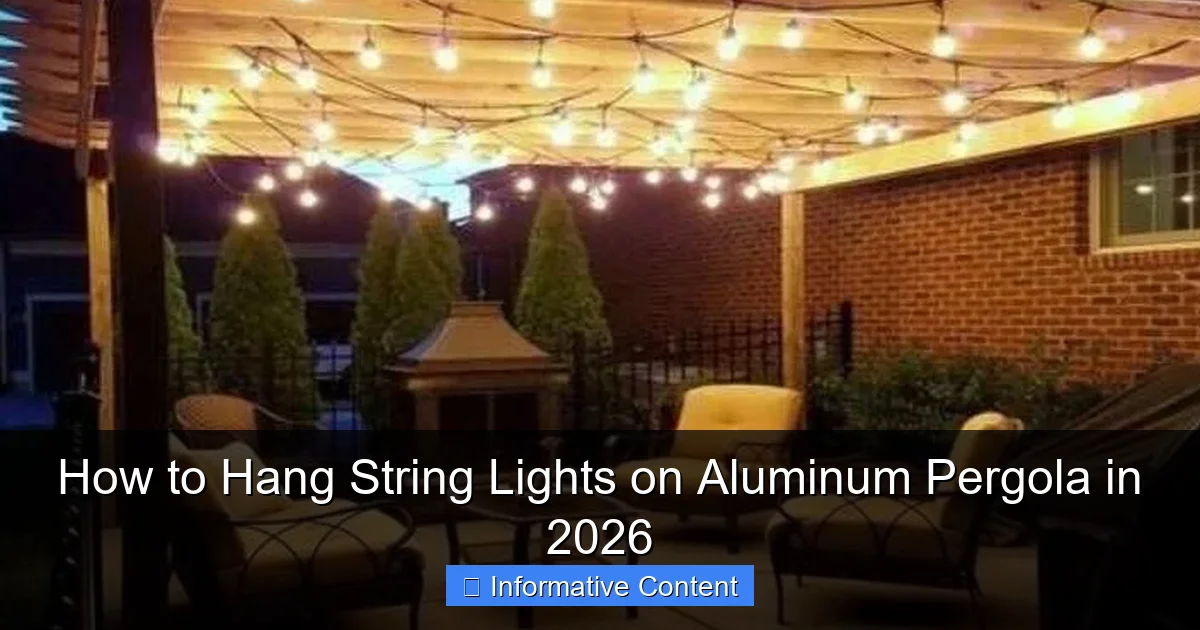
Visual guide about how to hang string lights on aluminum pergola
Image source: oillampman.com
Aluminum pergolas are typically lightweight and sleek, which means they’re not designed to hold heavy loads. But string lights are generally lightweight, so you’re in the clear—just make sure your plan doesn’t involve 200 feet of industrial-grade Edison bulbs (unless you’re reinforcing the structure, which we’ll cover later).
Decide on the Lighting Pattern
There are a few classic ways to hang string lights, and your choice will depend on the look you’re going for:
- Parallel Lines: Run lights straight across the rafters, evenly spaced. This is clean, modern, and perfect for a minimalist aesthetic.
- X-Pattern or Crisscross: Weave lights diagonally between rafters for a more dynamic, festive look. Great for parties or a bohemian vibe.
- Canopy or Ceiling Effect: Hang lights in a grid or net pattern across the top, creating a “roof” of light. This works best with shorter pergolas or if you’re using multiple strands.
- Hanging Pendants: Use hooks or loops to let strands drape down slightly, creating a soft, romantic glow.
I went with a hybrid approach: parallel lines along the outer beams with a single crisscross in the center. It gives structure but still feels playful. Pro tip: sketch your layout on paper or use a free design app like SketchUp Free to visualize the result before buying anything.
Consider Power Source and Accessibility
Most string lights need a power source, so think about where your outlet is. If it’s far from the pergola, you’ll need an outdoor-rated extension cord or a weatherproof outdoor outlet. I use a 25-foot GFCI-protected cord with a built-in timer—game changer. No more running outside to turn the lights on and off.
Also, consider if you want the lights to be permanent or seasonal. If you’re installing them for year-round use, make sure your setup can handle rain, wind, and temperature swings. If it’s just for summer, a simpler, removable system might work better.
Choosing the Right String Lights and Hardware
Types of String Lights: What Works Best for Aluminum Pergolas
Not all string lights are created equal. For aluminum pergolas, you want something durable, weather-resistant, and lightweight. Here’s a quick breakdown:
- LED String Lights: Energy-efficient, long-lasting, and cooler to the touch. Look for IP65 or higher waterproof ratings for outdoor use. I use LED Edison bulbs with a warm white glow—they’re bright enough to see, but not harsh.
- Solar-Powered Lights: Great if you don’t have easy access to an outlet. Just make sure the solar panel gets direct sunlight during the day. I tried these once—ended up with dim lights by 8 PM because the panel was shaded.
- Plug-In Lights with Timer or Remote: My personal favorite. I use a smart plug that connects to my phone. I can turn the lights on from inside, set schedules, or even sync them with music. Total luxury.
- Net Lights: These are pre-connected grids of lights, perfect for covering large areas quickly. Ideal for canopy-style layouts.
For aluminum pergolas, avoid heavy incandescent bulbs or glass-heavy designs—they add unnecessary weight and are more fragile. Stick with shatterproof or plastic-coated LEDs.
Essential Hardware: What You’ll Need to Hang Them Safely
Aluminum pergolas don’t have the same grip or surface texture as wood, so standard nails or screws won’t work. You need hardware that’s secure, non-damaging, and weatherproof. Here’s my go-to list:
- Stainless Steel Cable Clamps: These wrap around the pergola beams and hold the light strands with a secure, adjustable grip. I use 1/8-inch clamps—they’re strong and won’t scratch the aluminum.
- Aluminum-Friendly Hooks or Brackets: Look for hooks made of plastic, rubber-coated metal, or aluminum. Avoid steel—it can corrode or scratch the pergola finish. I love rubber-coated S-hooks—they grip without slipping.
- Zip Ties (UV-Resistant): Great for temporary setups or securing loose cords. Use black, UV-stabilized ties so they don’t degrade in the sun.
- Adhesive Outdoor Hooks: If you don’t want to clamp or drill, heavy-duty adhesive hooks (like Command Outdoor Hooks) can work. Just make sure they’re rated for outdoor use and can hold at least 5 lbs.
- Turnbuckles and Aircraft Cable (for long spans): If you’re running lights over a wide area, use thin aircraft cable (1/16 inch) strung between beams. Attach the lights to the cable with S-hooks or zip ties. This prevents sagging and keeps the lights taut.
One thing I learned the hard way: don’t use regular duct tape or flimsy plastic clips. They melt in the sun, fall off in wind, or leave residue. Invest in quality hardware—it’s worth it.
Weatherproofing and Longevity Tips
Aluminum pergolas are great, but they’re exposed to the elements. To keep your lights looking good and functioning well:
- Seal plug connections with electrical tape or waterproof caps.
- Elevate cords off the ground to avoid puddles and tripping hazards.
- Use a surge protector to guard against power spikes.
- Inspect connections monthly for corrosion or wear.
I once left a cheap plastic connector outside all winter. By spring, it was brittle and cracked. Lesson learned: spend a little more on weatherproof gear.
Step-by-Step Installation: How to Hang String Lights on Aluminum Pergola
Step 1: Prepare the Area and Gather Tools
Clear the pergola area of furniture and debris. Make sure the beams are clean and dry. You’ll need:
- Measuring tape
- Ladder (sturdy, non-conductive)
- Drill (if using screws)
- String lights
- Hardware (clamps, hooks, zip ties)
- Outdoor extension cord (if needed)
- Timer or smart plug (optional but recommended)
Pro tip: Do this on a calm, dry day. Wind and rain make installation frustrating and unsafe.
Step 2: Install the Support System
Start by attaching your clamps or hooks to the pergola beams. For parallel lines, space clamps every 2 to 3 feet along the top rails. Use a level to keep them aligned—crooked lights look sloppy.
If you’re using a crisscross pattern, attach hooks to opposite corners of the pergola. Use a chalk line or laser level to mark diagonal paths. I use a simple trick: tie a piece of string from corner to corner to guide my eye.
For aircraft cable systems, loop the cable around the beams and secure with turnbuckles. Tighten gradually until the cable is taut but not straining the pergola. Test it by gently tugging—no movement means it’s secure.
Step 3: Hang the Lights
Now the fun part: hanging the lights. Start at the power source and work outward. This way, you don’t have to drape cords over installed lights.
- For parallel lines: Clip each light socket into a clamp or hook. If the sockets are too big, use zip ties to secure them to the clamp.
- For crisscross: Weave the strand through the hooks, following your chalk line. Keep tension even to avoid sagging.
- For canopy: Drape net lights over the top and secure the edges with clamps or hooks. Make sure the center is supported to prevent pooling water.
I like to leave a little slack between sockets—about 2 inches. This gives the lights room to move in the wind without stressing the connections.
Step 4: Connect and Test
Once all strands are up, connect them to the power source. Use outdoor-rated connectors and seal the joints with electrical tape. Plug in the timer or smart plug and test each strand.
If a section isn’t lighting up, don’t panic. Check the connections first. Sometimes a socket just needs to be wiggled into place. I’ve spent 20 minutes troubleshooting only to find a loose plug.
Step 5: Final Adjustments and Safety Check
Step back and look at your work. Are the lights even? Is the pattern balanced? Adjust as needed. Trim excess zip ties and tuck cords neatly along the beams using more clamps or hooks.
Do a safety check: Are cords off the ground? Are plugs protected? Is the ladder safely stored? I always do a “wind test” by gently shaking the lights to see if anything wiggles loose.
Creative Ideas and Pro Tips for a Stunning Display
Mix Light Types for Depth and Interest
Don’t be afraid to mix different styles. I combine warm white LEDs with a few strands of colored fairy lights for a festive touch. Or use larger Edison bulbs along the edges and smaller micro LEDs in the center for a layered look.
Another trick: hang lanterns or glass globes from the pergola beams and place small LED candles inside. It adds texture and a soft, flickering glow.
Use Dimmers and Smart Controls
If your lights support it, add a dimmer switch. This lets you adjust the brightness for different moods—bright for cooking, soft for stargazing. I use a Lutron Caseta outdoor dimmer—works like a charm.
Smart plugs are also great. I set mine to turn on at sunset and off at 11 PM. No more forgetting to switch them off.
Incorporate Greenery or Curtains
Pair your lights with climbing vines, sheer curtains, or hanging plants. The lights will peek through the foliage, creating a dreamy, ethereal effect. I grow jasmine along one side—smells amazing and looks magical at night.
Light the Ground Too
Don’t forget the floor. Use solar path lights or ground stakes to light walkways. It makes the space feel cohesive and safe. I place a few lanterns near the steps—perfect for evening strolls.
Maintenance, Troubleshooting, and Long-Term Care
Regular Cleaning and Inspection
Every few months, give your lights a quick check. Wipe down bulbs with a damp cloth to remove dust and pollen. Inspect clamps and hooks for rust or loosening. Tighten turnbuckles if needed.
I do a full inspection every spring and fall. It takes 30 minutes and saves me from bigger issues down the line.
Winter Storage Tips
If you’re not using the lights year-round, take them down before winter. Store them in a cool, dry place—preferably in a sealed plastic bin. Coil them loosely to avoid tangles.
For permanent setups, make sure all connections are sealed and elevated. Use a waterproof cover over the power source.
Common Problems and How to Fix Them
Here’s a quick reference table for troubleshooting:
| Problem | Likely Cause | Solution |
|---|---|---|
| Lights won’t turn on | Blown fuse, loose plug, or dead bulb | Check plug, replace fuse, test bulbs |
| Sagging strands | Too much weight or loose support | Add more clamps or use aircraft cable |
| Flickering lights | Loose connection or damaged wire | Tighten connections, inspect for cuts |
| Water in sockets | Unsealed connections | Seal with electrical tape or silicone |
| Clamps slipping | Incorrect size or worn rubber | Replace with proper-sized clamps |
When to Replace vs. Repair
If a strand has multiple burned-out bulbs or frayed wires, it’s usually better to replace it. Repairing old lights can be more trouble than it’s worth. But if it’s just one bad bulb, go ahead and swap it out.
Final Thoughts: Enjoy the Glow
Hanging string lights on an aluminum pergola isn’t just a DIY project—it’s an investment in joy. Every time I walk outside and see those lights twinkling, I feel a little spark of happiness. It’s not about perfection. It’s about creating a space that feels like home.
Remember, how to hang string lights on aluminum pergola isn’t a one-size-fits-all process. Your pergola, your style, your needs—they’re all unique. Use this guide as a starting point, but don’t be afraid to experiment. Try a new pattern. Swap out bulbs. Add a timer. Make it yours.
And if you make a mistake? That’s okay. I’ve hung lights too low, tangled cords, and even shorted a circuit once (don’t worry, the GFCI saved me). The important thing is to keep going. The result—your own little slice of magic—is worth every step.
So grab your clamps, plug in your lights, and get ready to enjoy your pergola like never before. The stars are out, and your backyard is waiting.
Frequently Asked Questions
How do I hang string lights on an aluminum pergola without drilling holes?
Use removable adhesive hooks or magnetic clips designed for metal surfaces to avoid damaging your pergola. These solutions provide a secure hold while allowing easy removal or adjustments.
What’s the best way to hang string lights on an aluminum pergola in 2026?
In 2026, opt for smart LED string lights with built-in magnets or solar-powered options paired with no-damage clips. These modern solutions blend aesthetics with functionality for effortless installation.
Can I use zip ties to secure string lights to an aluminum pergola?
Yes, zip ties are a quick and sturdy option, but use UV-resistant ones to prevent degradation from sun exposure. For a polished look, trim excess ties and space them evenly.
How do I hide the wires when hanging string lights on an aluminum pergola?
Route wires along the pergola’s beams using wire clips or adhesive cable channels for a clean finish. Choose lights with colored or braided cords that blend with your pergola’s design.
Do I need special hardware to hang string lights on an aluminum pergola?
Not necessarily—many lights work with standard hooks, clips, or adhesive mounts. For heavier fixtures, use stainless steel hooks or tension rods designed for metal frames.
How do I hang string lights on an aluminum pergola with a slatted roof?
Weave lights through the slats using S-hooks or twist ties, ensuring they don’t sag. For even distribution, plan a zigzag or grid pattern to cover the space effectively.

