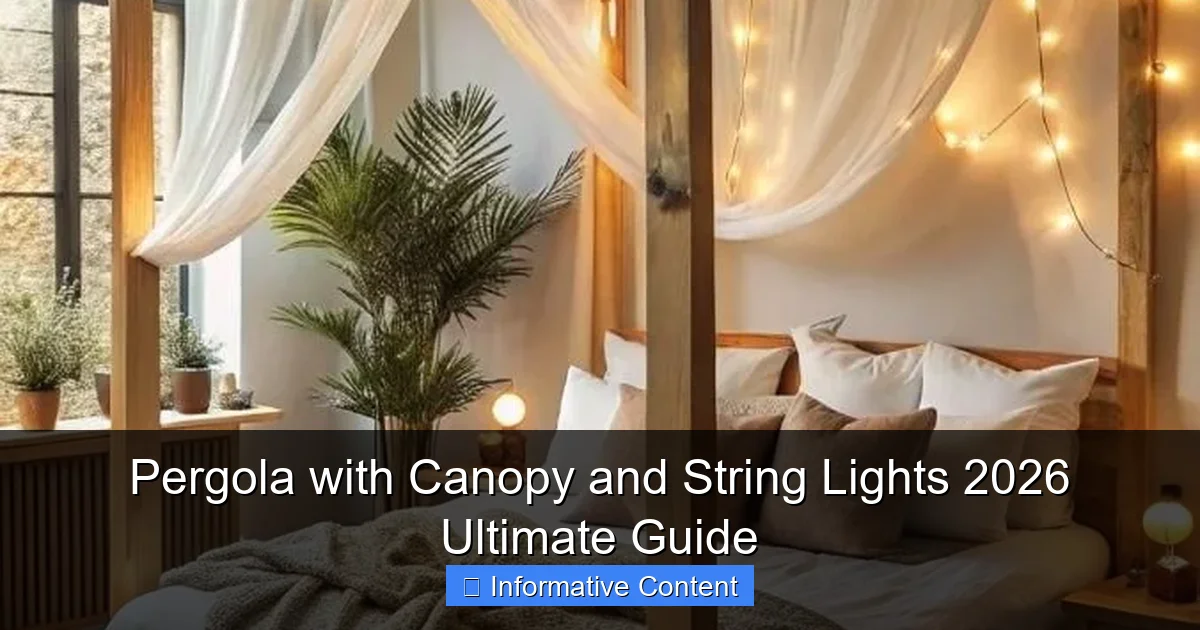
Featured image for pergola with canopy and string lights
Image source: i.pinimg.com
Transform your outdoor space with a pergola with canopy and string lights—the ultimate 2026 upgrade for style, shade, and ambiance. Combining weather-resistant canopies with energy-efficient LED string lights, these modern pergolas offer year-round comfort and effortless elegance. Perfect for entertaining or relaxing, this guide reveals top designs, installation tips, and smart features to maximize your backyard oasis.
Key Takeaways
- Choose weather-resistant materials: Ensure longevity by selecting rust-proof frames and UV-protected canopy fabrics.
- Layer lighting effectively: Combine string lights with task lighting for ambiance and functionality.
- Install a retractable canopy: Adapt to weather by adding a manual or motorized retractable roof system.
- Prioritize proper spacing: Hang string lights 8–12 inches apart for even, glare-free illumination.
- Anchor securely: Use ground stakes or concrete footings to stabilize freestanding pergolas in windy areas.
- Blend with outdoor decor: Match canopy colors and light tones to your existing outdoor aesthetic.
📑 Table of Contents
- Why a Pergola with Canopy and String Lights Is the Ultimate Outdoor Upgrade
- What Is a Pergola with Canopy and String Lights?
- Types of Pergolas with Canopies and String Lights (2026 Edition)
- Choosing the Right Canopy and String Lights
- Installation: DIY vs. Professional Help
- Styling Your Pergola with Canopy and String Lights
- Maintaining Your Pergola for Years of Use
Why a Pergola with Canopy and String Lights Is the Ultimate Outdoor Upgrade
Picture this: It’s a warm summer evening. The sun has dipped below the horizon, painting the sky in soft hues of orange and pink. You’re outside, barefoot on the patio, a cold drink in hand, surrounded by the gentle glow of string lights strung overhead. The air is still, the bugs are kept at bay, and your pergola’s canopy provides just enough shade and shelter. This isn’t a scene from a lifestyle magazine—it’s your backyard, transformed. A pergola with canopy and string lights isn’t just a structure; it’s an invitation to live more intentionally outdoors.
Whether you’re hosting a dinner party, enjoying a quiet night with a book, or stargazing with your kids, this setup creates a space that feels both luxurious and lived-in. Over the years, I’ve tested various outdoor setups—pop-up gazebos, retractable awnings, even DIY shade sails—but nothing beats the charm and functionality of a well-designed pergola with a canopy and ambient lighting. It’s not just about aesthetics (though, let’s be honest, they’re stunning). It’s about creating a year-round retreat that blends comfort, style, and practicality. In this guide, we’ll explore how to choose, install, and style the perfect pergola with canopy and string lights for your space in 2026 and beyond.
What Is a Pergola with Canopy and String Lights?
Breaking Down the Components
A pergola with canopy and string lights combines three essential elements into one cohesive outdoor feature: the pergola itself, a functional canopy, and decorative string lights. Let’s unpack each part.
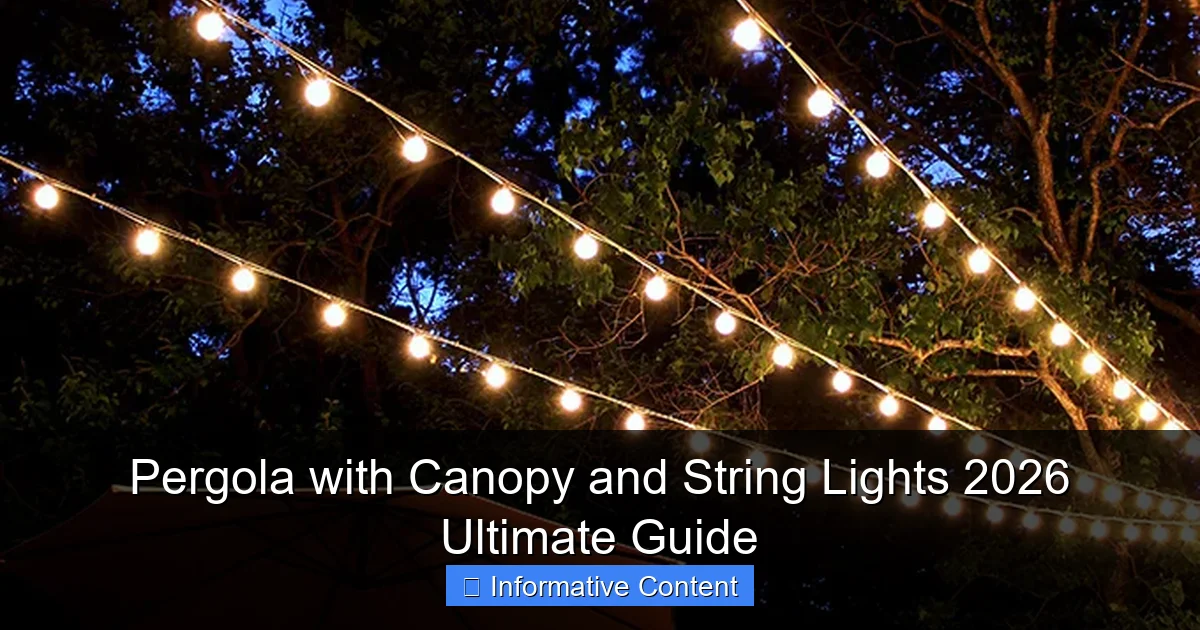
Visual guide about pergola with canopy and string lights
Image source: grayhousestudio.com
- The Pergola: Traditionally an open-roof structure with vertical posts supporting cross-beams, pergolas are architectural anchors for patios, decks, or gardens. Unlike solid-roof gazebos, pergolas allow dappled sunlight and airflow, making them ideal for transitional weather.
- The Canopy: This is the game-changer. Modern pergolas often come with retractable, fixed, or motorized canopies made from weather-resistant fabric (like polyester with PVC coating or Sunbrella). These canopies provide shade, light rain protection, and UV defense—without blocking the view or feeling claustrophobic.
- The String Lights: These aren’t your average Christmas lights. We’re talking about commercial-grade, weatherproof LED string lights (often Edison-style bulbs) that create a warm, inviting glow. They’re strung across the pergola’s beams, adding ambiance and extending usable hours into the night.
Why This Combo Works
Think of it as a “smart outdoor room.” The pergola gives structure, the canopy adds utility, and the lights bring soul. Together, they create a space that’s:
- Weather-Adaptive: A retractable canopy lets you open it for sunbathing or close it during a light drizzle. No more canceling plans because of a passing cloud.
- Energy-Efficient: LED string lights use minimal electricity and last years. Many are solar-powered or dimmable, so you control the mood.
- Year-Round Use: In winter, add outdoor heaters or close the canopy for wind protection. In summer, open it up for airflow. String lights provide warmth (literally and figuratively) in colder months.
- Low Maintenance: Quality materials resist fading, mold, and rust. A quick wipe-down every few weeks is all most setups need.
I learned this the hard way. A few summers ago, I hosted a backyard BBQ under a basic pergola—no canopy, no lights. By 7 PM, the sun was in everyone’s eyes, and the mosquitoes were feasting. Half the guests left early. The next year, I added a retractable canopy and string lights. The same event? People stayed until 11 PM, sipping wine under the glow. That’s the power of this combo.
Types of Pergolas with Canopies and String Lights (2026 Edition)
1. Retractable Canopy Pergolas
These are the most popular for a reason: flexibility. A motorized or manual canopy rolls back and forth along tracks. Open it for sun, close it for shade. Some models even have sensors that auto-close in rain.
- Best for: Backyards with changing weather, families who want sun control.
- Pros: Adaptable, high-end look, often integrates with smart home systems.
- Cons: Higher cost ($2,000–$8,000), requires professional installation.
- Pro Tip: Look for models with UV-resistant canopies (UPF 50+). I once bought a cheaper one—faded to gray in 18 months. Lesson learned.
2. Fixed Canopy Pergolas
Think of this as a semi-permanent roof. The canopy is permanently attached, often made from heavy-duty fabric or polycarbonate panels. Great for areas with consistent sun or light rain.
- Best for: Sunny climates, low-maintenance setups.
- Pros: Affordable ($800–$3,000), durable, quick install.
- Cons: Less flexible (no opening/closing), may need seasonal removal in heavy snow.
- Pro Tip: Use polycarbonate panels if you want filtered light without glare. They’re like sunglasses for your patio.
3. Louvered Roof Pergolas
The 2026 “smart” upgrade. These have rotating slats (like blinds) that you can adjust via app or remote. Open for sun, close for shade, tilt to block wind. Some even have built-in rain sensors.
- Best for: Tech lovers, all-season use.
- Pros: Ultimate control, sleek design, integrates with Alexa/Google Home.
- Cons: Expensive ($5,000–$15,000+), complex installation.
- Pro Tip: Pair with outdoor-rated string lights (IP65 or higher) for seamless integration.
4. DIY Pergola Kits with Canopy & Lights
Want to build it yourself? Kits from brands like Sunjoy or Outsunny include pre-cut wood/metal beams, canopy, and even string lights. Perfect for weekend warriors.
- Best for: Budget-conscious homeowners, DIYers.
- Pros: Affordable ($300–$1,500), customizable, instant gratification.
- Cons: Less durable than custom builds, may need upgrades (e.g., better fasteners).
- Pro Tip: Reinforce joints with galvanized brackets. My first DIY kit wobbled in wind—until I added corner braces.
5. Freestanding vs. Attached Pergolas
- Freestanding: Independent structure. Great for open yards or poolside. Needs stronger footings.
- Attached: Connects to your house (e.g., deck or wall). Saves space, easier to wire for lights.
My neighbor has an attached pergola with a canopy that doubles as a rain shelter for her grill. Genius.
Choosing the Right Canopy and String Lights
Canopy Materials: What to Look For
Not all canopies are created equal. Here’s how to pick one that lasts:
- Fabric:
- Polyester with PVC: Waterproof, affordable, but can stretch over time.
- Sunbrella: Premium, fade-resistant, breathable. Costs more but worth it for coastal areas.
- Polycarbonate Panels:
- UV-blocking, hail-resistant. Choose 6mm+ thickness for durability.
- Look for honeycomb structure—it insulates better.
- Metal Roofs (Aluminum/Copper):
- Longest lifespan (20+ years), but can be noisy in rain.
- Ideal for snowy climates.
String Lights: Ambiance Meets Function
String lights aren’t just decorative—they’re practical. Here’s what to consider:
- Bulb Type:
- Edison bulbs: Warm, vintage glow. Use LED versions (80% less energy).
- Globe lights: Modern, uniform. Great for clean lines.
- Fairy lights: Delicate, magical. Best for small pergolas.
- Weather Resistance:
- Look for IP65 or IP67 rating (dust/waterproof).
- Solar-powered options save on electricity but need sun exposure.
- Smart Features:
- App-controlled dimming, color change (RGB), or timer settings.
- I use a smart hub to turn on lights at sunset—no more fumbling with switches.
Pro Tips for Integration
- Spacing: Hang lights 6–8 inches apart for even glow. Too close = glare; too far = dark spots.
- Power Source: Use outdoor-rated extension cords. Bury cords in conduit for safety.
- Canopy & Light Synergy: If your canopy is opaque, place lights above it. If translucent (e.g., polycarbonate), lights below create a lantern effect.
- Maintenance: Clean canopy with mild soap; wipe lights with a dry cloth. Check connections annually.
Installation: DIY vs. Professional Help
DIY Installation (When It’s Worth It)
DIY is doable for kits and simple setups. Here’s how to do it right:
- Step 1: Plan
- Measure your space. Leave 2+ feet clearance on all sides.
- Check local codes. Some areas require permits for permanent structures.
- Step 2: Prepare the Site
- Level the ground. Use concrete footings (4×4 posts) or ground anchors.
- For decks, use deck-mounted brackets (no drilling into wood).
- Step 3: Assemble
- Follow kit instructions. Use a level—crooked beams = sagging canopy.
- Attach canopy before lights (easier access).
- Step 4: Lights
- Use light clips (not nails) to avoid damage.
- Test connections before finalizing.
I built my first pergola in a weekend. Total cost: $1,200. The key? A helper and a laser level. One mistake: I didn’t slope the canopy enough—it collected water. Fixed it by adding a slight tilt.
When to Hire a Pro
Call in experts for:
- Motorized/louvered systems: Complex wiring and alignment.
- Attached pergolas: Structural integrity matters. Pros ensure it won’t pull on your house.
- Large structures (20+ ft): Heavy materials need heavy tools.
- Permit requirements: Pros handle paperwork and inspections.
My friend tried to install a louvered pergola himself. The motor failed, the slats jammed, and he spent $1,500 on repairs. Lesson: Some things are worth paying for.
Cost Breakdown (2026 Estimates)
| Type | DIY Cost | Professional Installation | Total (DIY + Pro) |
|---|---|---|---|
| Retractable Canopy (12×12 ft) | $2,000 | $1,500–$3,000 | $3,500–$5,000 |
| Fixed Canopy Kit | $800 | $500–$1,000 | $1,300–$1,800 |
| Louvered Roof | $6,000 | $3,000–$5,000 | $9,000–$11,000 |
| String Lights (30 ft) | $100–$200 | $200–$400 (wiring) | $300–$600 |
Styling Your Pergola with Canopy and String Lights
Design Themes for Every Taste
Your pergola with canopy and string lights should reflect your lifestyle. Here are ideas:
- Boho Retreat:
- Macrame hangings, rattan furniture, fairy lights.
- Use a neutral canopy to avoid clashing colors.
- Modern Minimalist:
- Clean lines, monochrome palette, globe lights.
- Pair with a louvered roof for a tech-forward look.
- Coastal Escape:
- White canopy, blue cushions, Edison bulbs.
- Add a retractable canopy to protect from sea spray.
- Farmhouse Charm:
- Reclaimed wood beams, mason jar lights, gingham cushions.
- Use a fixed canopy for a “covered porch” feel.
Practical Styling Tips
- Furniture: Choose weather-resistant materials (teak, aluminum, wicker). Add outdoor rugs for warmth.
- Plants: Hang planters from beams or place potted trees nearby. Ivy or jasmine adds fragrance.
- Lighting Layers:
- String lights (ambient), lanterns (task), and spotlights (accent).
- I use dimmer switches to adjust brightness for dinner vs. stargazing.
- Seasonal Updates:
- Summer: Lightweight cushions, citronella candles.
- Winter: Faux fur throws, outdoor heaters, warm-toned lights.
Real-Life Example: The “Movie Night” Setup
My cousin transformed her pergola into a backyard cinema:
- Retractable canopy (closed for privacy).
- Edison string lights (dimmed to 30%).
- Outdoor projector screen hung between beams.
- Bean bags and popcorn station.
Result? Her kids’ friends beg to come over. Total cost: ~$2,500 (pergola + lights + projector).
Maintaining Your Pergola for Years of Use
Seasonal Care Checklist
- Spring:
- Inspect for winter damage (cracked beams, loose fasteners).
- Wash canopy with mild soap. Check for mold.
- Test lights and motors.
- Summer:
- Trim nearby branches to prevent debris.
- Reapply UV protectant to fabric canopy (if needed).
- Fall:
- Remove leaves and debris from tracks (for retractable/louvered).
- Store cushions and rugs.
- Winter:
- Remove canopy in heavy snow (unless rated for it).
- Cover beams with a tarp if not weatherproof.
Troubleshooting Common Issues
- Sagging Canopy: Tighten fasteners or add support beams.
- Flickering Lights: Check connections, replace bulbs, or upgrade transformer.
- Sticking Retractable Mechanism: Clean tracks with a dry cloth. Lubricate with silicone spray.
- Fading Fabric: Apply a fabric protectant (e.g., 303 Aerospace Protectant).
I once ignored a small tear in my canopy. A year later, it was a gaping hole. Now, I inspect monthly. Prevention is cheaper than replacement.
Longevity Tips
- Use stainless steel or galvanized hardware to prevent rust.
- Store string lights in a dry place if not year-round.
- For louvered roofs, service motors every 2 years.
A well-maintained pergola with canopy and string lights can last 15–20 years. Mine is 8 years old and still looks new—thanks to TLC.
Your backyard isn’t just grass and fences. It’s potential. A pergola with canopy and string lights turns that potential into a sanctuary. Whether you want a quiet reading nook, a lively party hub, or a cozy winter hideout, this setup adapts to your needs. It’s not about perfection—it’s about creating a space that feels like you.
So, take the leap. Start small (a DIY kit) or go big (a smart louvered roof). Add lights that make you smile. Style it with things you love. And remember: The best pergolas aren’t the fanciest—they’re the ones where memories are made. Here’s to many sunsets, laughter, and starlit nights under your own little slice of paradise.
Frequently Asked Questions
What is the best material for a pergola with canopy and string lights?
The best materials are aluminum or cedar—aluminum is durable and rust-resistant, while cedar offers a natural aesthetic and weather resistance. Both pair well with a retractable canopy and string lights for year-round use.
How do I install string lights on my pergola with canopy?
Use hooks, zip ties, or built-in channels (if included) to secure string lights along the pergola beams. Ensure lights are rated for outdoor use and connect them to a weatherproof power source.
Can a pergola with canopy provide shade during all seasons?
Yes, especially with a retractable or waterproof canopy that blocks UV rays and rain. Pair it with insulated string lights for warmth and ambiance in cooler months.
What size pergola with canopy and string lights do I need for my backyard?
Measure your space and choose a size that accommodates seating (e.g., 10×12 ft for 4-6 people). Leave room for light spacing—10-12 ft between bulbs is ideal for even illumination.
Are pergolas with canopy and string lights easy to maintain?
Low-maintenance options include powder-coated aluminum frames and fade-resistant canopies. Wipe down surfaces seasonally and check light connections for wear.
Can I use solar-powered string lights with a pergola with canopy?
Absolutely! Solar string lights are energy-efficient and work well under a canopy with a clear panel or partial coverage. Ensure the solar panel gets direct sunlight daily.

