Featured image for use cup hooks on pergola string lights
Image source: lightenify.com
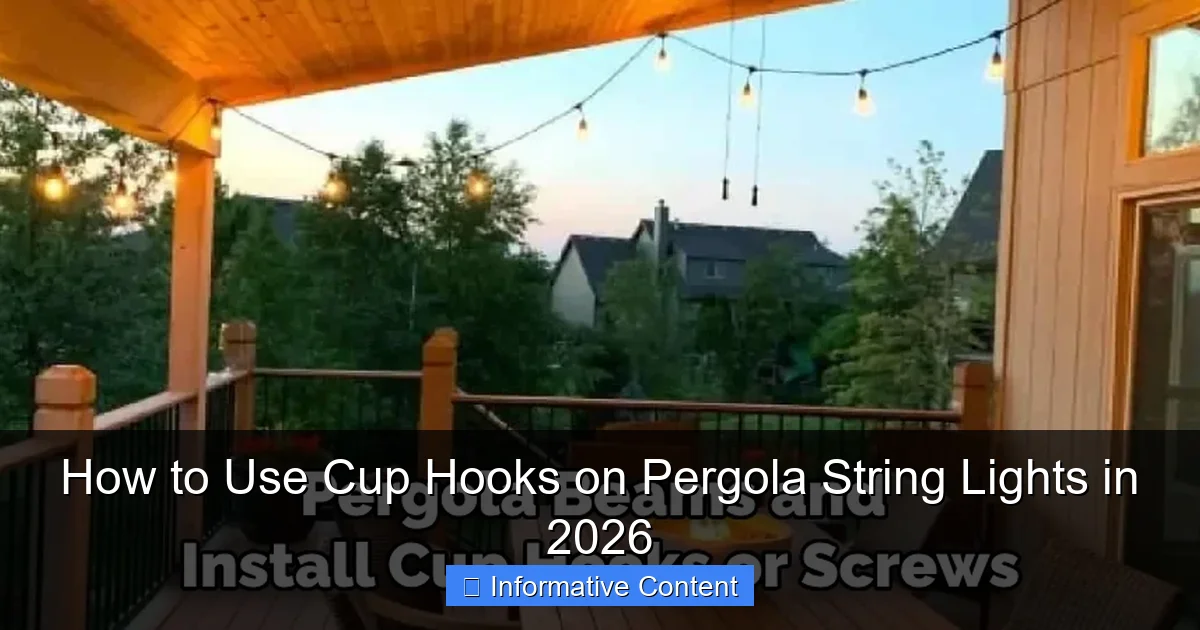
Secure your pergola string lights effortlessly in 2026 by using cup hooks—ideal for creating a stable, adjustable, and weather-resistant lighting setup. These small but mighty hooks screw easily into wood or metal, allowing you to space lights evenly and maintain a clean, professional look without sagging. Perfect for DIYers, cup hooks offer a low-cost, high-impact solution that blends seamlessly into any outdoor aesthetic.
Key Takeaways
- Plan spacing first: Measure and mark hook placement for even light distribution.
- Use stainless steel: Choose rust-resistant cup hooks for long-term outdoor durability.
- Pre-drill holes: Prevent wood splitting by drilling pilot holes before installation.
- Secure tightly: Twist hooks fully into place to avoid sagging or dislodging.
- Test tension: Hang lights temporarily before finalizing to adjust spacing if needed.
- Add extra hooks: Install backup hooks for future string light expansions or repairs.
📑 Table of Contents
- Why Cup Hooks Are a Game-Changer for Pergola String Lights
- Choosing the Right Cup Hooks for Your Pergola
- Step-by-Step Installation Guide (With Real-World Tips)
- Creative Ways to Use Cup Hooks Beyond Basic String Lights
- Maintenance and Troubleshooting Common Issues
- Cost, Tools, and Time Comparison: Cup Hooks vs. Alternatives
- Final Thoughts: Why Cup Hooks Are Worth the Effort
Why Cup Hooks Are a Game-Changer for Pergola String Lights
There’s something magical about stepping into a backyard at night, where twinkling string lights drape gracefully above, casting a warm, inviting glow over everything. If you’ve ever tried to hang string lights on a pergola, you know it’s not always as simple as it sounds. Tying knots, wrestling with zip ties, or drilling holes into wood can feel like more trouble than it’s worth. But what if there was a smarter, cleaner, and more durable way? Enter: cup hooks. These small, unassuming screws have become my secret weapon for creating stunning outdoor lighting setups—especially on pergolas.
After years of experimenting with different hanging methods (and yes, a few failed attempts involving duct tape and sheer stubbornness), I discovered that cup hooks offer the perfect balance of strength, simplicity, and flexibility. Whether you’re lighting up a cozy nook for evening chats or transforming your space for a summer party, cup hooks can make the process smoother and the results more professional. In this guide, I’ll walk you through exactly how to use cup hooks on pergola string lights in 2026, from choosing the right hooks to troubleshooting common hiccups. Think of this as the ultimate cheat sheet for anyone who wants their outdoor space to shine—literally.
Choosing the Right Cup Hooks for Your Pergola
Material Matters: Steel, Stainless Steel, or Brass?
Not all cup hooks are created equal. The material you pick will determine how well your lights hold up over time, especially since pergolas are exposed to sun, rain, and wind. Here’s a quick breakdown:
- Stainless steel: My top pick. It’s rust-resistant, strong, and ideal for outdoor use. Even after a rainy season, mine have stayed shiny and functional.
- Galvanized steel: A budget-friendly option with decent corrosion resistance. Just check the coating—cheap versions can chip over time.
- Brass: Great for a vintage or decorative look, but not as strong. Best for light-duty lighting or covered pergolas.
- Plastic-coated: Avoid these outdoors. The coating can crack, exposing the metal underneath to rust.
For example, I once used brass hooks on a covered pergola in my friend’s garden. They looked elegant and held up fine for a few years. But when I tried them on my own exposed pergola, one rusted through in less than a year. Lesson learned: match the material to your climate.
Size and Weight Capacity: Don’t Underestimate the Load
Cup hooks come in different lengths and thread sizes (measured in #4, #6, #8, etc.). The longer the hook, the more weight it can hold—but also the more wood you need to screw into. Here’s what to consider:
- #6 or #8 hooks (2–3 inches long): Ideal for most string lights. A single strand of LED lights typically weighs under 5 lbs, so these provide a safety margin.
- #4 hooks (1–1.5 inches): Use only for ultra-light fairy lights or temporary setups. They’re great for rental spaces but risk pulling out in wind.
- Heavy-duty hooks (4+ inches): Needed if you’re layering multiple strands or using heavier Edison bulbs.
Pro tip: Test a few hooks first. Screw one into your pergola beam and hang your lights from it. Give it a gentle tug—if it wiggles or feels loose, go a size up.
Cup vs. Loop Hooks: What’s the Difference?
You’ll see two common designs:
- Cup hooks: Have a small cup-shaped end that cradles the wire or clip. They’re great for keeping lights from sliding off.
- Loop hooks: Have a closed loop instead of a cup. These are better if you’re using S-hooks or carabiners to attach lights.
I prefer cup hooks for pergolas because they’re self-contained. No extra hardware needed—just screw in the hook and drape the lights. But if you plan to swap out lights seasonally, loop hooks with carabiners make it easier to remove the strands.
Step-by-Step Installation Guide (With Real-World Tips)
Step 1: Plan Your Layout
Before you start drilling, map out where you want the lights. A few things to consider:
- Light spacing: For a soft, even glow, place hooks every 12–18 inches. Closer spacing (8–10 inches) works better for bright, festive lighting.
- Beam thickness: Thicker beams (4×4 or larger) can handle more hooks. For 2×4 beams, space hooks at least 6 inches apart to avoid splitting the wood.
- Power source: Plan your layout so the plug end reaches an outlet. Use an outdoor-rated extension cord if needed.
I once skipped this step and ended up with a zig-zag pattern that looked chaotic. Now, I sketch it out on graph paper first. For a rectangular pergola, I usually do a grid: one row along each long side, plus a center line for extra brightness.
Step 2: Mark and Pre-Drill Holes
Use a pencil to mark where each hook will go. For accuracy, I like to use a laser level or a long straightedge. This ensures your lines are perfectly parallel—no wobbly “drunken” lights!
Next, pre-drill holes with a drill bit slightly smaller than the hook’s thread. Why? It prevents the wood from splitting, especially in dry or aged pergolas. I learned this the hard way when I cracked a beam by forcing a hook in without drilling first. Now, I use a 3/32″ bit for #6 hooks and a 1/8″ bit for #8 hooks.
Step 3: Screw in the Hooks
Here’s the fun part! Use a screwdriver or drill with a screwdriver bit to turn the hooks clockwise. Go slow—rushing can strip the wood or bend the hook.
- Hand-tighten first, then use a tool for the last few turns. This gives you better control.
- Angle matters: Screw hooks straight in (90° to the beam) for maximum strength. If you angle them, they’re more likely to pull out.
- Check alignment: As you go, step back and make sure the hooks are level. A crooked hook can throw off your entire design.
For a 10-foot beam, I can install about 10 hooks in 20 minutes. If you’re doing a large pergola, break it into sections to avoid arm fatigue.
Step 4: Hang the Lights
Now for the payoff! Most string lights have clips or loops on the ends. Simply:
- Clip the first end onto the first hook.
- Stretch the strand to the next hook and clip it in.
- Repeat until the strand is taut and even.
For a “draped” look, leave a little slack between hooks. For a “tightrope” look, pull the strand snug. I like to use a helper for long runs—it’s easier to adjust the tension.
Step 5: Test and Adjust
Turn on the lights and inspect your work. Look for:
- Sagging strands: Tighten them or add an extra hook in the middle.
- Twisted bulbs: Rotate them so the sockets face up (to prevent water pooling).
- Uneven glow: Adjust spacing or add a second strand for brightness.
One time, I installed lights on a windy day and came back to find a strand dangling. Now, I always test after a windy night—just in case a hook worked loose.
Creative Ways to Use Cup Hooks Beyond Basic String Lights
Layering Lights for Depth and Drama
Why stop at one strand? Cup hooks make it easy to layer lights for a professional, high-end look. Try:
- Double rows: Install hooks at two heights (e.g., top edge and 6 inches below). Hang one strand of warm white LEDs and another with colored bulbs.
- Grid patterns: Create a crisscross design by installing hooks on both the top and sides of the pergola. Use clear clips to attach strands at intersections.
- Starburst effect: Screw hooks in a circular pattern around a central point, then hang radial strands outward.
I used this trick at a wedding reception. We installed a grid of hooks on a pergola, then wove fairy lights through them like a glowing net. The effect was magical—and guests kept asking how we did it!
Hanging Decor, Plants, or Curtains
Cup hooks aren’t just for lights! Use them to:
- Hang sheer curtains: Screw hooks along the top edge of the pergola, then clip curtains with S-hooks. Great for privacy and blocking wind.
- Suspend plants: Use hooks to hang macrame plant holders or mason jar planters. Just ensure the beam can support the weight.
- Display decor: Hang wind chimes, lanterns, or seasonal ornaments. I use mine for holiday wreaths in winter and paper lanterns in summer.
One summer, I hung a row of hanging herb planters from my pergola hooks. The herbs grew beautifully in the sunlight, and I could snip fresh basil for dinner without going to the garden!
Seasonal Swaps: Quick Changes Made Easy
Want to switch from twinkling lights to paper lanterns for a party? No problem. Since cup hooks are permanent, you can:
- Unclip the lights and store them.
- Attach new decor using S-hooks or carabiners.
- Re-hang the lights when the season changes.
This saved me during a last-minute backyard BBQ. I swapped my everyday lights for festive string lanterns in 15 minutes—no tools needed.
Maintenance and Troubleshooting Common Issues
Preventing Rust and Corrosion
Even stainless steel can corrode over time, especially in salty or humid climates. To keep your hooks looking new:
- Wipe them down with a dry cloth after rain or snow.
- Apply a thin coat of silicone spray annually (avoid oil-based sprays—they attract dirt).
- Check for green or white residue (signs of corrosion). If you see it, replace the hook.
I live near the coast, so I inspect my hooks every spring. I’ve had the same stainless steel hooks for 5 years, and they still look like new.
Fixing Wobbly or Loose Hooks
If a hook feels loose, don’t panic. Here’s how to fix it:
- Add wood glue: Remove the hook, squirt wood glue into the hole, then reinsert the hook. Let it dry overnight.
- Use a larger hook: If the hole is too big, fill it with a wooden toothpick or matchstick, then screw in a bigger hook.
- Relocate the hook: Sometimes, the wood is too dry or soft. Move the hook 2–3 inches over.
One of my hooks started wobbling after a storm. I used wood glue and it’s held strong for two seasons now.
Dealing with Wind Damage
Wind is the enemy of outdoor lighting. To prevent strands from flapping or hooks from pulling out:
- Use shorter spans: The longer the distance between hooks, the more strain on each one. For windy areas, place hooks every 8–10 inches.
- Add anchor points: Screw extra hooks at the ends and tie the light strand to them with zip ties.
- Choose flexible wires: Look for lights with rubber-coated wires—they bend without breaking.
After a storm knocked down a strand last year, I added anchor points at each corner. Now, even 30 mph winds don’t budge the lights.
Cost, Tools, and Time Comparison: Cup Hooks vs. Alternatives
Data Table: Cost and Effort Comparison
| Method | Cost (per 10 ft) | Installation Time | Durability | Best For |
|---|---|---|---|---|
| Cup hooks | $10–$15 | 30–60 mins | 5+ years | Permanent, professional setups |
| Zip ties | $5–$10 | 20–30 mins | 1–2 seasons | Temporary or rental spaces |
| Command hooks | $15–$20 | 15–25 mins | 6–12 months | No-damage, light-duty use |
| Drill + eye screws | $20–$30 | 60–90 mins | 10+ years | Heavy-duty or commercial use |
As you can see, cup hooks strike a great balance. They’re cheaper than eye screws, more durable than zip ties, and easier to install than most alternatives. I’ve used all four methods, and cup hooks win for most homeowners.
Tools You’ll Need (and What to Skip)
Keep it simple. Here’s what you need:
- Drill or screwdriver: A cordless drill speeds things up, but a manual screwdriver works fine for small jobs.
- Drill bits: Use one slightly smaller than your hook’s thread.
- Measuring tape and pencil: For accurate spacing.
- Level: Optional, but helpful for straight lines.
Skip the fancy tools. I once bought a “light hanging kit” with special clips—it cost $40 and didn’t work as well as $5 cup hooks. Stick to the basics.
Final Thoughts: Why Cup Hooks Are Worth the Effort
Hanging pergola string lights with cup hooks might seem like a small detail, but it makes a huge difference in how your outdoor space looks and feels. No more sagging strands, no more zip ties breaking after one season, and no more drilling holes every time you want to change your decor. With cup hooks, your lights stay put, look polished, and last for years.
I’ll never forget the first time I turned on my pergola lights after installing cup hooks. The glow was even, the strands were taut, and I felt a real sense of pride—like I’d finally cracked the code to outdoor lighting. Since then, I’ve used this method for everything from romantic dinners to neighborhood block parties. It’s not just about the lights; it’s about creating a space where memories happen.
So, if you’re ready to upgrade your pergola in 2026, grab a pack of stainless steel cup hooks and give it a try. Start small—maybe just one strand to test the waters. Once you see how easy and effective it is, you’ll wonder why you ever did it any other way. And remember: the best outdoor spaces aren’t about perfection. They’re about warmth, creativity, and the joy of sharing a well-lit moment with the people you love. Happy hanging!
Frequently Asked Questions
How do I install cup hooks on a pergola for string lights?
To install cup hooks, screw them into the wooden beams of your pergola at equal intervals, ensuring they’re secure. Then, hang your string lights by looping the light strands or hooks onto the cup hooks for a clean, professional look.
Can I use cup hooks for heavy-duty pergola string lights?
Yes, but choose cup hooks rated for the weight of your lights, and ensure they’re screwed into solid wood beams. For extra support, use longer screws or add additional hooks to distribute the weight evenly.
What spacing should I use between cup hooks for pergola string lights?
Space cup hooks 12–24 inches apart, depending on the weight of your string lights and the desired droop. Heavier lights or a tighter look may require closer spacing to prevent sagging.
Are cup hooks better than nails or staples for pergola string lights?
Cup hooks are more durable and adjustable than nails or staples, offering a reusable solution that won’t damage your lights. They also allow you to tweak the height or tension of the lights easily.
How do I hide cup hooks on my pergola string lights setup?
Paint cup hooks to match your pergola’s color or use decorative hooks that complement your outdoor decor. For a seamless look, weave greenery or garlands around the hooks to camouflage them.
What type of cup hooks work best for outdoor pergola string lights?
Opt for rust-resistant cup hooks made of stainless steel, brass, or zinc-plated metal to withstand weather. These materials ensure longevity and prevent corrosion, keeping your pergola lights secure year-round.

