Featured image for how to hang light strings indoors
Image source: c8.alamy.com
Transform any indoor space into a warm, inviting retreat by strategically hanging light strings along walls, ceilings, or furniture using damage-free adhesive hooks or tension rods. Layer lights at varying heights and angles to enhance depth and create a soft, ambient glow perfect for cozy nights or entertaining guests.
Key Takeaways
- Plan your layout first: Sketch light placement to avoid over- or under-lighting.
- Use removable hooks: Protect walls and adjust spacing effortlessly.
- Layer lights strategically: Combine string lights with lamps for depth.
- Hide cords neatly: Tuck wires behind furniture or use cord covers.
- Choose warm white bulbs: Enhance coziness with soft, inviting tones.
- Test before finalizing: Ensure lights work and look balanced when lit.
📑 Table of Contents
- Creating a Magical Atmosphere with Indoor String Lights
- Planning Your String Light Layout and Design
- Selecting the Proper Hardware and Installation Tools
- Step-by-Step Installation Techniques for Different Surfaces
- Creative Design Ideas and Layout Patterns
- Safety, Maintenance, and Troubleshooting
- Bringing Your Indoor Light Display to Life
Creating a Magical Atmosphere with Indoor String Lights
There’s something inherently magical about the soft, warm glow of string lights. Whether it’s the gentle flicker of fairy lights in a bedroom corner or the cheerful twinkle of holiday lights draped across a living room wall, these delicate strands have the power to transform any indoor space into a cozy sanctuary. In recent years, indoor string lights have evolved from seasonal decorations to year-round design elements, becoming a staple in modern interior decor. From minimalist Scandinavian spaces to bohemian-inspired rooms, these luminous accents add depth, warmth, and personality to our homes.
The appeal of string lights goes beyond mere aesthetics. According to interior design experts, lighting accounts for nearly 30% of a room’s perceived ambiance, with warm-toned lighting (2700-3000K) being particularly effective at creating inviting spaces. Unlike harsh overhead fixtures, string lights provide soft, diffused illumination that reduces eye strain and promotes relaxation. Whether you’re creating a reading nook, enhancing your bedroom atmosphere, or adding sparkle to your dining area, knowing how to hang light strings indoors properly can make the difference between a professional-looking installation and a frustrating, drooping mess. This guide will walk you through every step of the process, from planning your layout to choosing the right hardware for a safe, beautiful, and long-lasting display.
Planning Your String Light Layout and Design
Assessing Your Space and Purpose
Before purchasing any string lights, take time to analyze your space and determine your goals. Are you aiming to create a romantic bedroom atmosphere, highlight architectural features, or add festive cheer to a living room? Different purposes call for different approaches. For example, a bedroom might benefit from soft, warm-white fairy lights arranged in a canopy above the bed, while a kitchen might look stunning with vintage-style Edison bulbs hung along the backsplash.
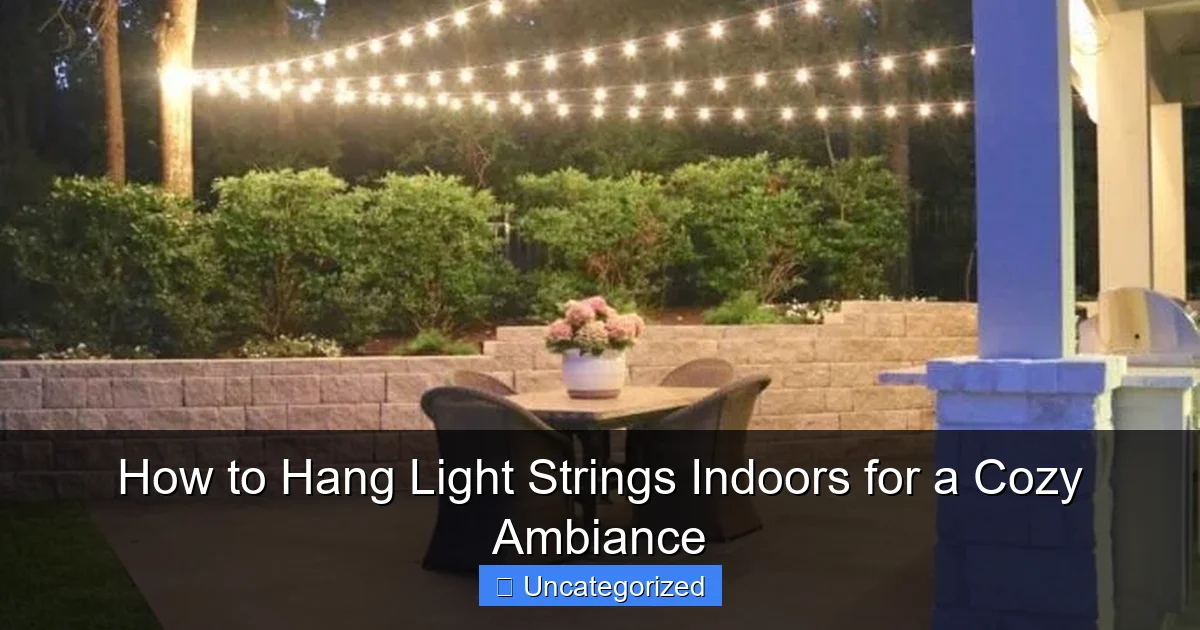
Visual guide about how to hang light strings indoors
Image source: jessicawellinginteriors.com
Measure the area you want to cover, accounting for any curves, corners, or obstacles. Use painter’s tape to mark potential light paths on your walls and ceiling. This “dry run” helps visualize the final look and identify any structural challenges. Consider the natural flow of your space—string lights should enhance, not hinder, movement through the room.
Choosing the Right Style and Color Temperature
String lights come in various styles, each with distinct visual effects:
- Fairy lights: Delicate, tiny bulbs on thin wire—perfect for subtle ambiance
- Edison bulbs: Vintage-style with visible filaments—ideal for industrial or rustic decor
- LED rope lights: Continuous tube of light—great for outlining shapes or edges
- Net lights: Grid-like arrangement—excellent for covering large, flat surfaces
- Curtain lights: Vertical strands hanging from a horizontal wire—dramatic for windows or walls
Color temperature significantly impacts mood. Warm white (2700-3000K) creates cozy, intimate spaces perfect for bedrooms and living rooms. Cool white (4000-5000K) feels more energizing and works well in kitchens and workspaces. For holiday displays, consider multicolor strings, but remember that too many colors can create visual clutter in everyday decor.
Power Source and Extension Considerations
Most indoor string lights operate on standard 120V household current, but always check the specifications. Calculate the total wattage of your planned installation to avoid overloading circuits. As a rule of thumb, don’t exceed 80% of a circuit’s capacity (about 1,440 watts on a 15-amp circuit).
For large installations, you may need multiple power sources. Plan your layout so extension cords are hidden behind furniture or along baseboards. Battery-operated lights offer flexibility but require regular battery changes or recharging. Solar-powered options work indoors near sunny windows but may not provide consistent brightness.
Selecting the Proper Hardware and Installation Tools
Understanding Wall and Surface Types
The right hanging hardware depends on your wall composition:
- Drywall: Use plastic wall anchors or toggle bolts for heavier installations
- Plaster: Requires special anchors designed for brittle surfaces
- Wood: Small finishing nails or cup hooks work well; avoid large screws
- Masonry: Use masonry screws with plastic anchors
- Tile: Adhesive hooks or suction cups (for smooth surfaces)
Always locate wall studs when possible for maximum support. Use a stud finder to mark positions before drilling. For delicate surfaces like painted walls, consider damage-free options like adhesive hooks or tension rods that don’t require permanent installation.
Essential Tools and Materials Checklist
Prepare these tools before starting your project:
- Measuring tape and laser measure
- Pencil and painter’s tape for marking
- Level for straight installations
- Drill with appropriate bits (if using screws)
- Hammer (for nails or anchors)
- Needle-nose pliers for bending wire
- Extension cords and power strips
- Voltage tester (for safety)
- Step ladder or sturdy stool
- Microfiber cloth (to clean surfaces before adhesive application)
For hardware, consider these options based on weight and permanence:
- Adhesive hooks: 1-5 lb capacity, removable
- Cup hooks: 5-15 lb capacity, semi-permanent
- Command strips: 5-16 lb capacity, damage-free removal
- Eye screws: 10-30 lb capacity, permanent
- Tension rods: 20-50 lb capacity, no installation needed
Special Considerations for Different Light Types
Different string lights require specific hardware:
- Fairy lights: Lightweight; adhesive hooks or tape often sufficient
- Bulb strings: Heavier; use cup hooks or eye screws every 12-18 inches
- Rope lights: Rigid; use mounting clips designed for the specific diameter
- Curtain lights: Require strong support at the top; use a tension rod or ceiling-mounted rail
For lights with visible wires, consider using wire clips or raceways to keep cables tidy and prevent tripping hazards. If your lights have built-in clips or loops, use these rather than adding extra hardware.
Step-by-Step Installation Techniques for Different Surfaces
Hanging on Drywall and Plaster Walls
Drywall requires careful hardware selection to avoid damage. For lightweight fairy lights (under 5 lbs total):
- Clean the surface with rubbing alcohol and let dry
- Apply adhesive hooks or Command strips according to package directions
- Allow adhesive to cure for the recommended time (usually 1-2 hours)
- Attach lights, distributing weight evenly across multiple hooks
For heavier installations (5+ lbs), use toggle bolts:
- Mark hole locations with a pencil
- Drill pilot holes slightly smaller than the toggle bolt diameter
- Insert toggle bolts and tighten until flush with the wall
- Attach lights using S-hooks or zip ties
Always test the strength of your installation by gently tugging on the lights before fully committing to the layout. For plaster walls, use anchors specifically designed for brittle surfaces and avoid over-tightening hardware.
Ceiling Installations: Canopies and Draping
Ceiling installations create dramatic effects but require careful planning. For a bedroom canopy:
- Locate ceiling joists using a stud finder
- Install eye screws into joists at your planned canopy points
- Use a ladder to string lights between eye screws, creating a draped effect
- Secure middle points with additional eye screws if lights sag
For a living room “sky” effect:
- Install a grid of cup hooks across the ceiling
- Use fishing line to connect hooks in your desired pattern
- Attach lights to the fishing line with small zip ties
- Ensure lights hang at varying heights for visual interest
Always leave a service loop near the power source so you can reach the plug without straining the connections. For vaulted ceilings, use extension poles to reach high points, and consider hiring a professional for installations above 10 feet.
Window and Door Frame Installations
Windows and doors offer natural frames for string light displays. For a curtain light effect:
- Measure the width of your window or door frame
- Install a tension rod just above the frame
- Attach curtain lights to the rod using built-in hooks or zip ties
- Adjust tension so lights hang straight without sagging
For fairy lights along the trim:
- Use small nails or adhesive hooks every 12 inches
- String lights along the top edge of the frame
- Create a “floating” effect by running lights slightly away from the wall
- Conceal power cords behind curtains or blinds
For bay windows, consider wrapping lights around each section, using corner hooks to maintain direction changes. Avoid placing lights where they might interfere with window operation or door swing.
Alternative Surfaces: Furniture, Mirrors, and Shelves
String lights can enhance furniture pieces without permanent installation:
- Headboards: Use adhesive hooks on the back or attach lights to a separate frame behind the bed
- Shelves: Drape lights along the back edge or weave through bookends
- Mirrors: Use adhesive hooks to create a frame of lights around the mirror
- Bookcases: String lights horizontally along the top or vertically between shelves
For a floating shelf installation:
- Measure the shelf depth and width
- Use small nails or adhesive hooks along the back edge
- String lights in a zigzag pattern from front to back
- Secure the end point with a hook or zip tie
Creative Design Ideas and Layout Patterns
Geometric Patterns and Shapes
Transform plain walls with structured light displays. Popular geometric designs include:
- Triangles: Create a mountain range effect by hanging lights in ascending triangles along a wall
- Hexagons: Use a template to create honeycomb patterns for modern spaces
- Circles: Frame artwork or mirrors with circular light arrangements
- Grids: Install a square grid for a contemporary, minimalist look
- Chevron: Create dynamic zigzag patterns that draw the eye across the room
For a geometric installation:
- Create a paper template of your desired shape
- Use painter’s tape to transfer the pattern to the wall
- Install hooks at each vertex and intersection
- String lights along the taped lines, securing at each hook
- Remove tape once lights are in place
Organic and Free-Form Arrangements
For a more natural look, try these free-flowing designs:
- Swags and drapes: Create gentle curves between anchor points for a romantic feel
- Branching patterns: Mimic tree branches radiating from a central point
- Waterfall effect: Hang lights in vertical strands from a horizontal support
- Floating clouds: Create irregular clusters that appear to hover on the wall
- Galaxy swirls: Use curved wire to create spiral patterns
For a “floating cloud” installation:
- Install multiple anchor points in an irregular cluster
- Use varying lengths of fishing line to create depth
- Attach lights to the lines at different heights
- Adjust until the lights appear to float in a natural, organic cluster
Functional Lighting Applications
Beyond decoration, string lights can serve practical purposes:
- Task lighting: Hang under kitchen cabinets or over workspaces
- Path lighting: Line hallways or stairs for nighttime safety
- Closet lighting: Install on closet rods for better visibility
- Vanity lighting: Frame bathroom mirrors for even illumination
- Reading nooks: Create a focused light source above seating areas
For under-cabinet kitchen lighting:
- Choose LED rope lights with adhesive backing
- Measure the length needed for each cabinet run
- Clean cabinet undersides thoroughly
- Apply lights along the front edge, ensuring the light shines forward
- Use a timer or smart plug for automatic operation
Seasonal and Themed Displays
Adapt your string lights for different occasions:
- Holiday displays: Combine with greenery for Christmas, or use pastel colors for Easter
- Party lighting: Create photo backdrops with curtain lights and fabric
- Themed rooms: Use colored lights for kids’ spaces or themed bedrooms
- Special events: Install temporary lights for weddings, baby showers, or birthdays
For a temporary photo backdrop:
- Hang a curtain light panel on a tension rod between two walls
- Attach fabric or paper decorations between the light strands
- Use a backdrop stand for freestanding installations
- Remove and store carefully after the event
Safety, Maintenance, and Troubleshooting
Electrical Safety Best Practices
Proper electrical safety prevents fire hazards and equipment damage:
- Always check for UL or ETL safety certification on light strings
- Inspect cords for damage before installation—never use frayed or cracked wires
- Don’t overload circuits; use a circuit calculator to determine safe loads
- Use GFCI outlets in bathrooms, kitchens, and other damp locations
- Never staple or nail through light cords
- Keep lights away from flammable materials like curtains or paper
- Unplug lights when not in use, especially overnight or when away from home
For large installations, consider using a smart plug or timer to automatically turn lights on and off. This reduces fire risk and saves energy. Never connect more than three standard light strings in series unless the manufacturer specifically allows it.
Preventing Common Installation Problems
Address these frequent issues before they occur:
- Sagging lights: Add more support points every 12-18 inches for heavy strings
- Uneven tension: Adjust hook positions until lights hang smoothly
- Visible cords: Use raceways, cord covers, or paint cords to match the wall
- Overheating: Ensure lights have proper ventilation; never cover with insulation
- Glare issues: Angle lights away from seating areas or use diffusers
- Color fading: Avoid direct sunlight exposure to prevent bulb discoloration
If lights sag after installation, don’t try to tighten them—this can damage the wires. Instead, add additional support hooks or redistribute the weight across more anchor points.
Maintenance and Long-Term Care
Proper maintenance extends the life of your string lights:
- Clean bulbs gently with a microfiber cloth when cool
- Check connections annually for corrosion or loose wires
- Store lights properly in labeled containers to prevent tangles
- Replace burned-out bulbs promptly to maintain even illumination
- Inspect for insect nests in outdoor-to-indoor transition areas
- Update older light strings that no longer meet safety standards
For seasonal storage:
- Remove lights carefully, following the original installation path
- Coil lights around a piece of cardboard or use a storage reel
- Store in a cool, dry place away from direct sunlight
- Label containers with contents and installation location
Troubleshooting Common Issues
| Problem | Likely Cause | Solution |
|---|---|---|
| Partial string not working | Loose bulb or connection | Check and reseat all bulbs; inspect for damaged wires |
| Flickering lights | Voltage drop or loose connection | Move power source closer; check all connections |
| Lights too dim | Too many strings in series | Reduce number of connected strings; use shorter runs |
| Adhesive hooks failing | Surface not properly cleaned | Remove and reapply to clean, dry surface; consider more permanent hardware |
| Overheating | Enclosed space or covered lights | Ensure proper ventilation; don’t cover with insulation or fabric |
| Uneven illumination | Damaged bulbs or poor layout | Replace all bulbs; adjust light spacing |
Always unplug lights before troubleshooting. For complex electrical issues, consult a licensed electrician rather than attempting repairs yourself.
Bringing Your Indoor Light Display to Life
Mastering how to hang light strings indoors transforms ordinary spaces into extraordinary environments. From the careful planning of your layout to the final adjustment of a single bulb, each step contributes to the magic of your illuminated space. The beauty of string lights lies not just in their glow, but in their ability to reflect your personality and enhance your home’s unique character. Whether you prefer the subtle shimmer of fairy lights above your bed or the bold statement of Edison bulbs across your living room wall, proper installation ensures your vision shines brightly.
Remember that lighting is a dynamic element of interior design. Don’t be afraid to experiment with different arrangements, colors, and patterns as your tastes and needs evolve. The most successful installations often combine practicality with creativity—lights that serve a functional purpose while creating emotional impact. With the techniques and knowledge from this guide, you’re equipped to create indoor light displays that are not only beautiful but safe, durable, and perfectly suited to your space. As you step back to admire your glowing handiwork, take a moment to appreciate how something as simple as a string of lights can fundamentally change the way you experience your home. Let the soft, warm light guide you to more peaceful evenings, memorable gatherings, and a space that truly feels like your own.
Frequently Asked Questions
How do I hang light strings indoors without damaging walls?
Use removable adhesive hooks, tension rods, or command strips designed for lightweight decor to avoid nail holes or paint damage. These options provide secure hold while allowing easy removal after use.
Where should I place indoor string lights for the best cozy ambiance?
Drape them along headboards, mantels, or window frames, or weave them through shelves and stair railings to create warm, inviting focal points. Layering lights near seating areas enhances the cozy atmosphere.
Can I hang light strings indoors with a ceiling that’s not flat?
Yes! Use adhesive clips, twist ties, or small nails along beams, molding, or textured ceilings to secure the lights. For vaulted ceilings, consider a fishing line or clear wire to suspend them.
What’s the safest way to hang light strings indoors near curtains or fabrics?
Choose LED string lights (which stay cool) and maintain at least 12 inches of distance from fabrics to prevent overheating. Use non-slip clips or hooks to keep them taut and away from flammable materials.
How do I hide the wires when hanging light strings indoors?
Route cords behind furniture, along baseboards, or tuck them into cord covers for a clean look. For a seamless effect, match the wire color to your wall or trim.
Do I need special hooks for hanging light strings indoors on different surfaces?
For smooth surfaces like glass or tile, use suction cup hooks; for drywall or wood, adhesive hooks or small nails work well. Always check weight limits to ensure the lights stay securely in place.

