Featured image for how to hang led starry string lights
Image source: i.pinimg.com
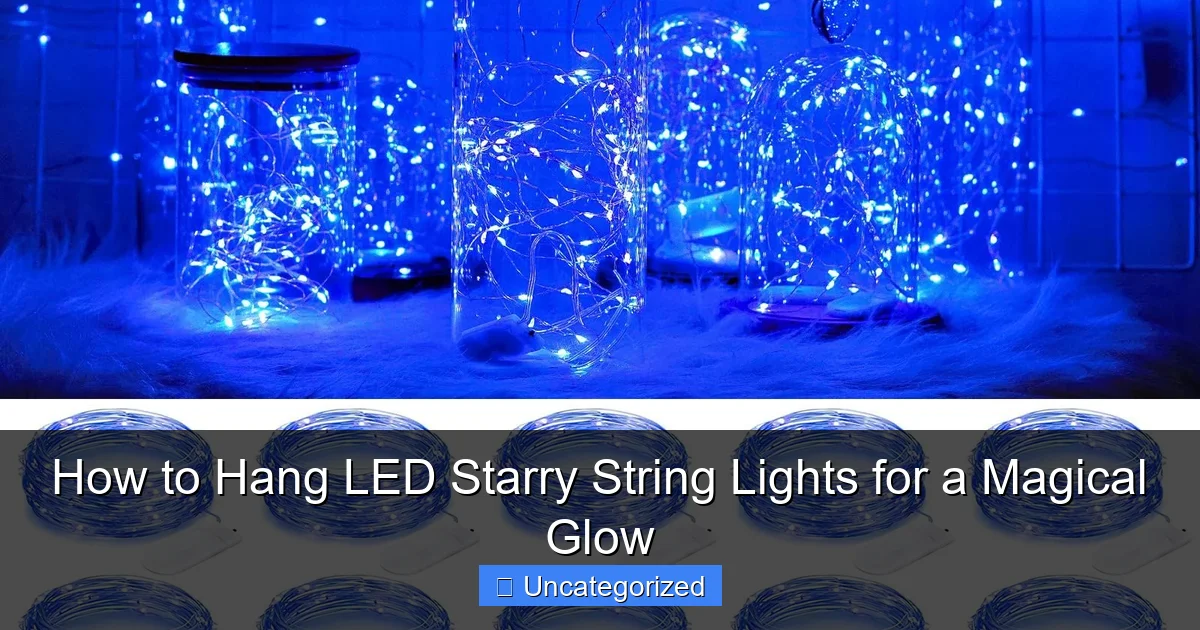
Transform any space into a dreamy oasis by hanging LED starry string lights with simple tools like adhesive hooks, nails, or command strips—no electrical expertise needed. For a seamless glow, drape them along walls, ceilings, or furniture, ensuring even spacing and secure placement to highlight their magical shimmer. Perfect for bedrooms, patios, or parties, these lights add instant ambiance with minimal effort.
How to Hang LED Starry String Lights for a Magical Glow
Key Takeaways
- Plan your layout: Sketch the area first for balanced light distribution.
- Use adhesive hooks: Secure lights without damaging walls or ceilings.
- Measure carefully: Account for extra wire to avoid mid-installation shortages.
- Layer for depth: Combine strings to create a fuller, magical glow.
- Weatherproof outdoors: Use waterproof lights and seal connections for safety.
- Anchor at corners: Fix lights at edges first for a taut, neat finish.
Why This Matters / Understanding the Problem
Ever walked into a room and felt like you stepped into a fairy tale? Chances are, LED starry string lights were behind that enchanting vibe. Whether you’re dressing up a bedroom, patio, wedding arch, or holiday tree, these tiny twinkling lights instantly transform any space into a cozy, dreamy retreat.
But here’s the catch: how to hang LED starry string lights for a magical glow isn’t as simple as tossing them up and hoping for the best. Poor placement, tangled cords, or weak fixtures can turn your dreamy setup into a frustrating mess. Lights droop, fall, or look uneven — and that “magical” glow? It fizzles fast.
The good news? With the right approach, anyone can create a stunning, long-lasting display. This guide walks you through every step, from planning to plugging in, so your lights shine bright and stay put. Whether you’re decorating indoors or outdoors, this method works for bedrooms, porches, dorm rooms, and even event spaces.
By the end, you’ll know exactly how to hang LED starry string lights for a magical glow — safely, beautifully, and without a single headache. Let’s turn your space into a twinkling wonderland.
What You Need
Before you start, gather your tools and materials. Having everything ready saves time and prevents mid-project trips to the store. Here’s your checklist for a smooth setup.

Visual guide about how to hang led starry string lights
Image source: i5.walmartimages.com
- LED starry string lights (battery-powered or plug-in, depending on location)
- Measuring tape (to plan spacing and avoid overbuying)
- Command hooks, adhesive clips, or outdoor-rated clips (no nails, no damage!)
- Zip ties or twist ties (for bundling cords and securing ends)
- Scissors or wire cutters (for trimming zip ties)
- Extension cord (if using plug-in lights) — choose a weatherproof one for outdoors
- Timer or smart plug (optional) — for automatic on/off
- Ladder or step stool (for high areas like ceilings or eaves)
- Masking tape or painter’s tape (for temporary placement testing)
- Weatherproof sealant (for outdoor use) — to protect connections
Pro tip: If you’re hanging lights outdoors, make sure they’re labeled “outdoor-rated” or “weather-resistant.” Indoor-only lights can short out or degrade when exposed to moisture.
Also, check your light strand length. Measure the area you want to cover (e.g., a 10-foot wall or a 16-foot ceiling perimeter). Buy a strand that’s slightly longer — you can always hide extra with clips or folds. But if it’s too short, you’ll need a connector (if compatible) or a second strand.
Now that you’re prepped, let’s dive into the how to hang LED starry string lights for a magical glow process — step by step.
Step-by-Step Guide to How to Hang LED Starry String Lights for a Magical Glow
Step 1: Plan Your Layout (Before You Hang a Single Light)
Don’t just start hanging — plan first. A little sketching saves hours of redoing.
Grab a piece of paper and draw a rough sketch of the space: a bedroom wall, a patio ceiling, or a headboard. Mark where you want the lights to go — along the top of the wall, in a zigzag pattern, or in a canopy over a bed.
Decide on the pattern:
- Straight line — along the ceiling, baseboard, or window frame
- Zigzag or crisscross — great for walls or ceilings to create depth
- Canopy style — draped over a bed or dining table for a dreamy effect
- Tree or branch wrap — for outdoor trees or indoor faux trees
Use your measuring tape to estimate how much light you’ll need. For example, if your wall is 12 feet wide and you want a zigzag pattern with 1-foot horizontal spacing, you’ll need about 25–30 feet of lights.
Pro tip: Use painter’s tape to mark anchor points on the wall or ceiling. This lets you “try before you install” and tweak spacing without committing.
Also, locate your power source. If using plug-in lights, make sure the outlet is nearby or use a safe extension cord. For battery-powered, plan where you’ll place or hide the battery pack.
Step 2: Choose the Right Hanging Method (Match to Your Surface)
Different surfaces need different hanging tools. Using the wrong method can damage walls, ceilings, or leave lights sagging.
Here’s how to choose:
- Drywall or painted walls: Use Command hooks or adhesive clips. They’re removable, leave no marks, and hold up to 1–3 lbs each — perfect for light strands.
- Ceiling (drywall, plaster, or wood): Use ceiling-mounted adhesive clips or mini Command hooks. For heavier setups, consider removable ceiling hooks with stronger adhesive.
- Wooden beams, fences, or trees: Use zip ties or outdoor-rated clips. Zip ties are cheap, strong, and invisible once tightened.
- Metal surfaces (like gutters or railings): Use magnetic clips or magnetic hooks — especially handy for metal fences or sheds.
- Glass (windows or mirrors): Use suction cup clips designed for holiday lights. They’re easy to reposition.
Example: For a bedroom wall, Command hooks every 2 feet along the top edge work perfectly. For a backyard fence, zip ties every 18 inches keep lights tight and secure.
Never use nails, screws, or permanent adhesives unless you’re okay with damage. The goal is a magical glow — not holes in your wall.
Warning: Avoid using tape (like duct tape or packing tape) — it can leave sticky residue or damage paint. Stick with purpose-made clips.
Step 3: Install the Hangers (Even Spacing Is Key)
Now, install your clips, hooks, or ties — but don’t hang the lights yet. First, place the hangers.
Measure and mark your anchor points. For a straight line, place hangers every 18–24 inches. For a zigzag, space them 12–18 inches apart horizontally, with vertical drops every 1–2 feet.
Press each adhesive hook firmly for 30 seconds. Let them sit for 1–2 hours (or as directed) to fully bond. This prevents early failures.
For zip ties on wood or fences, loop the tie around the surface and thread the end through the buckle. Tighten snugly — but don’t over-tighten, or you might damage the light wire.
If using suction cups on glass, clean the surface first with rubbing alcohol. Then press and lock the suction cup. Test each one by tugging gently.
Pro tip: For outdoor use, install hangers before rain or wind hits. Wet surfaces reduce adhesive strength.
Once all hangers are up, double-check spacing. Step back and look at your layout. Adjust if needed — better now than after lights are hung.
Step 4: Hang the Lights (Start at the Power Source)
Now the fun part: hanging the lights. Always start at the power source — the plug or battery pack end.
Why? This keeps excess cord from getting tangled and lets you run the cord neatly to the outlet or battery location.
Unroll the light strand completely to avoid kinks. Then, gently hook or tie the first section of lights to the first anchor point.
Work your way outward, attaching the lights to each hanger as you go. Don’t pull too tight — leave a slight curve or “sag” between points. This prevents stress on the wires and looks more natural.
For zigzag or canopy patterns, use the clips to guide the lights up and down. For example, on a wall:
- Clip at the top → run lights down 1 foot → clip at bottom → run up 2 feet → repeat.
This creates a flowing, starry effect — perfect for a magical glow.
Pro tip: Use twist ties to secure loose ends or bundle extra cord near the plug. Hide the battery pack in a small basket, under a pillow, or inside a decorative box.
If your lights have multiple strands, connect them first (if compatible), then hang as one unit. Test connections before hanging to avoid mid-installation surprises.
Step 5: Secure Cords and Hide Wires (No Ugly Tangles!)
Even the prettiest lights look messy with dangling cords. Tame the wires for a clean, polished look.
Use zip ties, twist ties, or adhesive cord clips to bundle and secure the cord from the plug to the first light. Run the cord along baseboards, behind furniture, or under rugs (indoor only).
For outdoor setups, run the extension cord along the ground and use cord covers or bury it slightly in mulch (not soil, to avoid water damage).
Hide the battery pack:
- Under a bed skirt
- Inside a nightstand drawer (with a small hole for wires)
- Behind a curtain or plant
If the battery pack is visible, wrap it in decorative paper or place it in a small fabric pouch.
Use painter’s tape to temporarily hold cords in place while testing. Once you’re happy, secure with clips or ties.
Warning: Never run cords under carpets or through doorways where they can be crushed. This creates fire hazards.
Step 6: Test and Adjust (Make It Shine Just Right)
Before you celebrate, plug in or turn on your lights. Watch the whole display.
Look for:
- Dark spots — add more clips or reposition lights
- Sagging sections — tighten slightly or add extra support
- Glaring bulbs — angle lights away or cover with sheer fabric
- Overlapping patterns — adjust spacing for balance
For a softer glow, drape a sheer curtain, tulle, or voile over the lights (especially on a canopy). This diffuses the light and adds romance.
Use a timer or smart plug to automate on/off. Set lights to turn on at dusk and off at 10 PM — saves energy and adds convenience.
Pro tip: If using colored lights, test in daylight and at night. Some colors look different under natural vs. artificial light.
Step 7: Weatherproof (For Outdoor Installations)
Outdoor lights need extra protection. Rain, wind, and UV rays can damage connections and shorten lifespan.
Here’s how to weatherproof:
- Seal connections: Use electrical tape or silicone sealant around plug-to-plug or plug-to-extension-cord joints.
- Elevate plugs: Place outdoor outlets and connections off the ground — use a small plastic box or hang them on a hook.
- Use weather-resistant clips: Avoid cheap plastic that cracks in cold. Choose UV-stable materials.
- Check monthly: Inspect for frayed wires, loose clips, or water damage.
If your lights are battery-powered, use a waterproof battery pack case. Or, store the pack in a sealed plastic bag with a small hole for the wire.
For trees, wrap lights around branches, not trunks — trunks expand and contract, which can break wires.
Warning: Never use indoor lights outside. Moisture can cause short circuits or electrical shock.
Pro Tips & Common Mistakes to Avoid
Even pros make mistakes. Here’s how to avoid the biggest pitfalls when learning how to hang LED starry string lights for a magical glow.
Pro Tip 1: Use a mix of light styles. Combine starry lights with fairy lights or net lights for layered depth. A starry strand on the ceiling + fairy lights on the wall = instant magic.
Pro Tip 2: For a “floating” effect, hang lights 6–12 inches below the ceiling. Use clear fishing line or nearly invisible wire to suspend them — looks like stars in the sky.
Pro Tip 3: Add movement. Use battery-powered flickering lights (like candle-style) for a firefly effect. Great for weddings or cozy corners.
Pro Tip 4: Label your lights. If you have multiple strands, use colored tape on plugs to identify which is which. Saves time when storing or troubleshooting.
Common Mistake 1: Overloading outlets. Don’t daisy-chain more than 3–4 light strands. Check the manufacturer’s “max connect” rating. Overloading can cause fires.
Common Mistake 2: Ignoring battery life. LED lights last 50,000+ hours, but batteries drain fast. Use high-quality batteries or rechargeable packs. For long events, plug-in is better.
Common Mistake 3: Poor spacing. Lights too far apart look sparse. Too close look cluttered. Aim for 4–6 inches between bulbs for best visibility.
Common Mistake 4: Forgetting to test before hanging. Always test lights on the floor first. A dead strand halfway up a ladder is frustrating.
Common Mistake 5: Using damaged clips. Old or brittle clips break easily. Inspect before installing. Replace any that are cracked or loose.
Bonus: Store lights properly. After taking them down, wrap them around a cardboard rectangle or use a light reel. Avoid tangling — it ruins the magic before next year.
FAQs About How to Hang LED Starry String Lights for a Magical Glow
Q: Can I hang LED starry string lights on a ceiling without nails?
A: Absolutely! Use ceiling adhesive clips or Command hooks designed for ceilings. They hold well and remove cleanly. Just make sure the surface is clean and dry before applying.
Q: How do I hide the battery pack in a bedroom?
A: Tuck it under a pillow, inside a nightstand drawer, or behind a decorative box on a shelf. For a cleaner look, use a fabric pouch or small basket. Just ensure the switch is accessible.
Q: Can I leave my outdoor LED string lights up all year?
A: Only if they’re rated for year-round outdoor use. Check the label. Even then, inspect monthly for damage. Most people take them down after the season to extend lifespan.
Q: What’s the best way to hang lights on a sloped roof or eave?
A: Use outdoor-rated gutter clips or magnetic hooks if the surface is metal. For wood, use zip ties or adhesive hooks rated for outdoor use. Always secure the cord so it doesn’t dangle.
Q: How do I make the lights look more “magical” and less like Christmas lights?
A: Use warm white or soft amber lights. Drape a sheer fabric over them. Hang in a canopy or zigzag pattern. Add a timer to turn on at dusk. Less is more — avoid over-lighting.
Q: Can I connect multiple strands of LED starry lights?
A: Only if the manufacturer allows it. Most LED strands have a “max connect” rating (e.g., “connect up to 3 strands”). Never exceed this — it can overload the circuit.
Q: What’s the safest way to hang lights on a rental wall?
A: Stick with Command hooks and adhesive clips. Avoid nails, screws, or tape. Test adhesive strength on a small spot first. Always remove slowly and clean the area after.
Final Thoughts
Creating a magical glow with LED starry string lights is easier than you think — and the results are worth every minute. Whether you’re setting a romantic mood, celebrating a holiday, or just adding cozy vibes to your space, the right setup makes all the difference.
Remember: plan your layout, choose the right hangers, start at the power source, and test before you finish. A little attention to detail turns a simple string of lights into a showstopper.
Don’t forget to protect outdoor lights from the elements and store them properly for next time. And if you’re feeling creative, mix patterns, add layers, or automate with timers for effortless ambiance.
Now go ahead — grab your lights, follow this guide, and master how to hang LED starry string lights for a magical glow. Your space is about to shine brighter than ever. Turn off the main lights, step back, and enjoy your very own twinkling wonderland.
Pro action step: Take a photo of your finished setup and share it with friends. You’ve earned the bragging rights!

