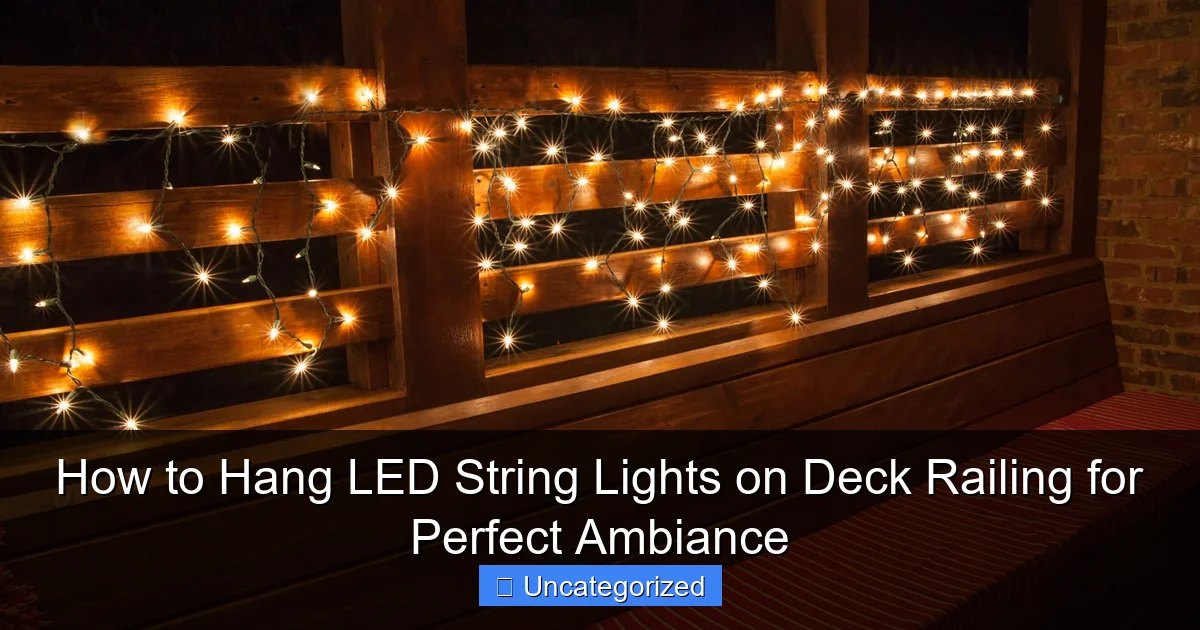
Featured image for how to hang led string lights on deck railing
Image source: bioinnovationethics.com
Transform your deck into a captivating nighttime retreat by securely attaching LED string lights directly to your railing using durable, non-invasive clips or zip ties that preserve both safety and style. Ensure a seamless glow by measuring spacing evenly, connecting waterproof-rated lights end-to-end, and hiding cords for a clean, professional look.
How to Hang LED String Lights on Deck Railing for Perfect Ambiance
Key Takeaways
- Measure your railing first to buy the right length of lights.
- Use weatherproof lights to ensure durability in outdoor conditions.
- Secure with zip ties or clips for a clean, stable installation.
- Plan spacing evenly to avoid gaps and maintain balanced brightness.
- Hide cords discreetly along railings for a polished, clutter-free look.
- Test lights before final installation to troubleshoot any issues early.
Why This Matters / Understanding the Problem
Imagine stepping onto your deck at dusk. The sun has just dipped below the horizon, and instead of flipping on a harsh overhead light, you’re greeted with a soft, golden glow wrapping around your railing like fireflies in the breeze. That’s the magic of how to hang LED string lights on deck railing for perfect ambiance—a simple upgrade that transforms your outdoor space into a cozy, inviting retreat.
But here’s the catch: if done wrong, those same lights can sag, flicker, or fall after the first gust of wind. Many homeowners buy beautiful string lights only to end up with tangled wires, loose clips, or uneven spacing that ruins the effect. The goal isn’t just to hang lights—it’s to create a seamless, long-lasting ambiance that feels intentional and elegant.
Whether you’re hosting summer BBQs, enjoying quiet evenings with a book, or setting the mood for a romantic dinner under the stars, the right lighting makes all the difference. And with LED string lights, you get energy efficiency, durability, and a wide range of styles (warm white, color-changing, Edison-style bulbs) that suit any vibe.
This guide walks you through how to hang LED string lights on deck railing for perfect ambiance—from choosing the right tools to avoiding common pitfalls. No guesswork. No frustration. Just a beautifully lit deck you’ll love using every night.
What You Need
Before you start, gather everything you’ll need. Having the right tools and materials saves time and prevents mistakes. Here’s your checklist:
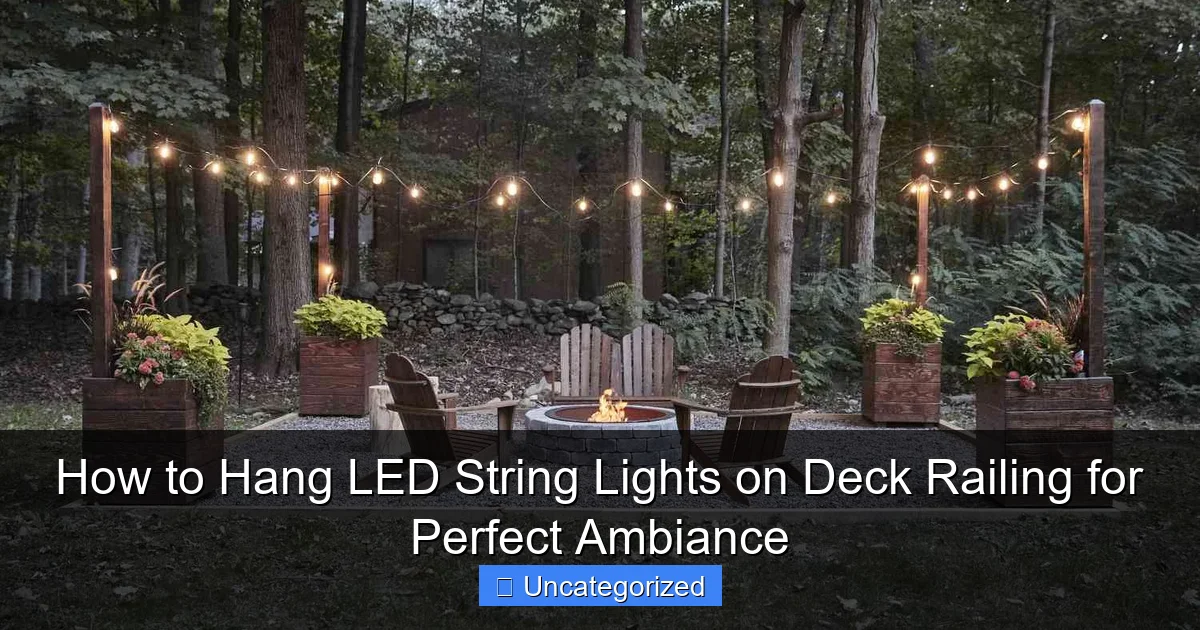
Visual guide about how to hang led string lights on deck railing
Image source: thespruce.com
- LED string lights (outdoor-rated, weatherproof, 25–50 feet depending on railing length)
- Weatherproof adhesive clips or cable clips (rated for outdoor use)
- Zip ties (UV-resistant, for extra security)
- Measuring tape (to plan spacing and length)
- Pencil or masking tape (for marking placement)
- Ladder (if your railing is high or you’re working on a second-floor deck)
- Gloves (to protect your hands from splinters or rough edges)
- Extension cord (outdoor-rated) with a GFCI outlet (safety first!)
- Timer or smart plug (optional)—for automatic on/off control
- Light tester (optional)—to check bulbs before hanging
Pro tip: Buy lights with replaceable bulbs or plug-and-play segments. If one bulb goes out, you won’t lose the whole strand. Also, choose LED lights with a warm white color temperature (2700K–3000K)—it feels cozy and natural, not clinical.
When shopping, look for keywords like “weatherproof,” “IP65 rating,” and “outdoor use.” These ensure your lights can handle rain, humidity, and temperature swings without failing.
Step-by-Step Guide to How to Hang LED String Lights on Deck Railing for Perfect Ambiance
Step 1: Measure and Plan Your Layout
Start by measuring the total length of your deck railing. Use a measuring tape to get an accurate count—include corners, posts, and any straight sections. This helps you buy the right length of lights and avoid running short.
Next, sketch a quick layout. Decide if you want the lights to run:
- Horizontally along the top rail (most common)
- Vertically down the posts (great for height and drama)
- In a zigzag or wave pattern (adds visual interest)
For horizontal runs, plan where each bulb will sit. A good rule: space bulbs 6–8 inches apart for even light distribution. Use a pencil or masking tape to mark every 6 inches along the railing. This keeps your spacing consistent and prevents clusters of light.
Pro Tip: If your railing is curved or has posts every 4 feet, adjust spacing slightly at corners. Don’t force symmetry—let the natural shape guide the flow.
Step 2: Test the Lights Before Hanging
Never hang lights before testing them. Plug in the string and check that every bulb lights up. If any are dim or flickering, replace them now—it’s much easier than doing it mid-install.
Also, test the plug and end caps. Make sure they’re sealed and not cracked. Water getting into the connections is a common cause of LED string light failure.
If you’re using multiple strands, connect them on the ground and test the full circuit. Some lights have a “daisy chain” limit (usually 3–5 strands). Check the packaging to avoid overloading the system.
This step saves major headaches later. A few minutes now can prevent a half-hung, non-working strand.
Warning: Don’t test lights near water or wet surfaces. Always use a GFCI outlet for outdoor electrical safety.
Step 3: Choose the Right Hanging Method
How you attach the lights depends on your railing material and your desired look. Here are the best options for how to hang LED string lights on deck railing for perfect ambiance:
Option A: Adhesive Cable Clips (Best for Smooth Wood or Composite)
- Use outdoor-rated adhesive clips (3M VHB or similar).
- Clean the railing with rubbing alcohol to remove dust and oils.
- Press clips firmly into place, waiting 24 hours for full bond (if possible).
Option B: Zip Ties (Great for Metal or Wrought Iron Railings)
- Use UV-resistant zip ties (they won’t crack in sunlight).
- Thread ties around the railing and through the light’s built-in loops.
- Trim excess with scissors—leave a small tail to prevent sharp edges.
Option C: S-Hooks or Carabiners (Flexible for Wood or Metal)
- Attach S-hooks to the railing and loop the light strand through them.
- Ideal if you want to remove lights seasonally.
- Ensure hooks are coated to prevent rust.
Choose based on your railing type. For example, zip ties work great on metal balusters, while adhesive clips are nearly invisible on smooth wood. Avoid nails or screws—they can damage the railing and create water entry points.
Step 4: Start Hanging from the Power Source
Always begin at the end closest to your power outlet. This ensures the plug doesn’t dangle in the middle of the railing, which looks messy and creates tripping hazards.
Attach the first clip or zip tie near the outlet. Then, unroll the string slowly, following your pre-marked spacing. Don’t pull too tight—leave a slight drape or “catenary curve” between clips. This prevents tension that can loosen connections or break bulbs.
As you go, secure each bulb or socket to a clip or tie. For adhesive clips, press firmly for 10 seconds to ensure a strong bond. For zip ties, pull snug but not so tight that it distorts the socket.
If you hit a corner, bend the lights gently around the post. Use an extra clip or tie at the turn to keep the shape smooth. Avoid sharp angles—they stress the wire and can cause shorts.
Pro Tip: Use a helper to hold the light strand while you attach it. It keeps the tension even and prevents kinks.
Step 5: Handle Corners and Posts Smoothly
Corners are where most installations go wrong. Don’t just yank the lights around the post—this creates tight spots and uneven spacing.
Instead, use one of these tricks:
- Wrap the post: Loop the lights once around the corner post, then continue along the next rail. Use a zip tie or clip to hold the loop in place.
- Offset the path: Hang the lights slightly off-center at the corner, creating a gentle curve instead of a 90-degree turn.
- Use a decorative post cap: Some caps have built-in hooks or grooves for lights. They add style and function.
For vertical runs on posts, space bulbs every 8–12 inches. This creates a “column of light” effect that draws the eye upward.
Remember: the goal is flow, not rigidity. Let the lights follow the natural lines of your deck.
Step 6: Secure the End and Hide Wires
Once you reach the end, secure the last bulb or socket. Don’t leave the tail flapping—it looks unprofessional and can snag.
Use a final clip or zip tie to anchor the end. If there’s excess cord, wrap it neatly around the railing post and secure with a zip tie. Or, tuck it behind a planter or furniture.
For extension cords, run them along the railing or deck edge, using clips or ties every 12–18 inches. Avoid running cords across walkways—use a cord cover or route them under a bench.
If you have a timer or smart plug, place it near the outlet but out of direct rain. A small waterproof box or zip-top bag works in a pinch.
Step 7: Adjust for Even Spacing and Drape
Step back and look at your work. Are the bulbs evenly spaced? Is the drape consistent? Now’s the time to fix any issues.
Use your measuring tape to check spacing. If a section is too tight, loosen the clip or tie and reposition. If it’s too loose, add an extra support.
For horizontal runs, aim for a slight “smile” curve—higher at the ends, lower in the middle. This prevents water pooling on the bulbs and looks more natural.
For vertical runs, ensure the lights hang straight down without twisting. Rotate the socket if needed.
Pro Tip: Take a photo from a distance. It’s easier to spot spacing issues on camera than with your eyes up close.
Step 8: Test Again and Add Automation (Optional)
Plug in the lights and turn them on. Walk around the deck and check for:
- Flickering bulbs
- Uneven brightness
- Loose clips or sagging sections
Make final adjustments. Then, consider adding automation:
- Timer: Set it to turn on at dusk and off at 10 PM.
- Smart plug: Control lights with your phone or voice (“Hey Google, turn on deck lights”).
- Dimmer: Adjust brightness for different moods (bright for parties, soft for reading).
Automation is the final touch for how to hang LED string lights on deck railing for perfect ambiance. It makes your setup feel intentional, not just decorative.
Pro Tips & Common Mistakes to Avoid
Even the best plans can go sideways. Here’s how to avoid the top pitfalls and get pro-level results.
Pro Tips
- Use a “ghost line” first: Hang a piece of string or fishing line along your planned path. This lets you visualize spacing and flow before committing to clips.
- Buy a few extra clips: They’re cheap, and you’ll likely need spares for corners or repairs.
- Choose lights with built-in hooks or loops: They’re much easier to attach than flat-wire strands.
- Install in dry weather: Adhesive clips bond best when the surface is dry and above 50°F (10°C).
- Label your strands: Use masking tape to mark “Front,” “Back,” or “Left” if you have multiple runs. It saves time when storing or rehanging.
Common Mistakes to Avoid
Warning: Never use regular household tape (like duct tape or masking tape) to hang lights. It dries out, loses stickiness, and leaves a sticky residue that’s hard to remove.
- Overloading the circuit: Don’t plug too many strands into one outlet. Check the wattage and stay under 80% of the outlet’s capacity.
- Ignoring the plug placement: A dangling plug looks messy. Always start at the outlet and plan the route so the plug is hidden.
- Skipping the drape: Pulling lights too tight stresses the wire and can cause bulbs to pop out. A little sag is good.
- Forgetting about maintenance: Clean lights yearly with a dry cloth. Remove leaves or cobwebs that block light.
- Using indoor-rated lights outdoors: They’ll fail in rain or humidity. Always check the packaging for “outdoor use.”
One last tip: if you’re renting or don’t want to commit, try removable hooks or magnetic clips (for metal railings). They’re easy to take down and leave no marks.
FAQs About How to Hang LED String Lights on Deck Railing for Perfect Ambiance
Q1: Can I leave LED string lights on my deck year-round?
Yes, if they’re outdoor-rated and weatherproof. Look for an IP65 or higher rating, which means they can handle rain, snow, and temperature swings. Just clean them yearly and check for damage. For extra protection, take them down during extreme weather (like hurricanes or heavy ice).
Q2: What’s the best way to hide the extension cord?
Run the cord along the railing or deck edge, using clips to keep it flush. Or, route it under a bench, planter, or along a wall. For walkways, use a cord cover (available at hardware stores) to protect it and prevent tripping.
Q3: How do I fix a flickering bulb without removing the whole strand?
If your lights have replaceable bulbs, turn off the power and gently unscrew the flickering bulb. Replace it with a new one from the spare pack. If bulbs are sealed, the whole strand may need replacing—but check for loose connections first.
Q4: Can I use solar-powered string lights on my deck railing?
Yes! Solar lights are great for decks with good sun exposure. Just ensure the solar panel is placed where it gets at least 6 hours of direct sunlight. They’re easier to install (no cords), but may not be as bright as plug-in models.
Q5: How do I hang lights on a metal railing without drilling?
Use magnetic clips (if the railing is steel) or UV-resistant zip ties. Both attach without tools and leave no holes. For wrought iron, zip ties work especially well—thread them through the decorative scrollwork.
Q6: What if my railing is curved or uneven?
No problem! Use flexible clips or zip ties and adjust spacing as needed. Let the lights follow the curve naturally. For tight turns, use a shorter strand or add an extra support clip to prevent sagging.
Q7: How can I make the lights look more professional?
Focus on consistency. Even spacing, smooth curves, and hidden cords make a huge difference. Use a timer so lights turn on at the same time every evening. And choose a warm, soft light—not harsh or blue-white.
Final Thoughts
Hanging LED string lights on your deck railing isn’t just about adding light—it’s about creating a mood. With the right tools, a clear plan, and attention to detail, you can master how to hang LED string lights on deck railing for perfect ambiance in just a few hours.
Remember: start at the outlet, test first, space evenly, and let the lights flow with your deck’s shape. Avoid shortcuts that compromise safety or appearance. And don’t forget the small touches—like a timer or dimmer—that make the experience magical.
Your deck isn’t just a structure. It’s a place for memories: laughter with friends, quiet moments with a book, or stargazing with someone special. With the right lighting, those moments feel even better.
So grab your lights, follow this guide, and light up your deck tonight. The perfect ambiance is closer than you think.

