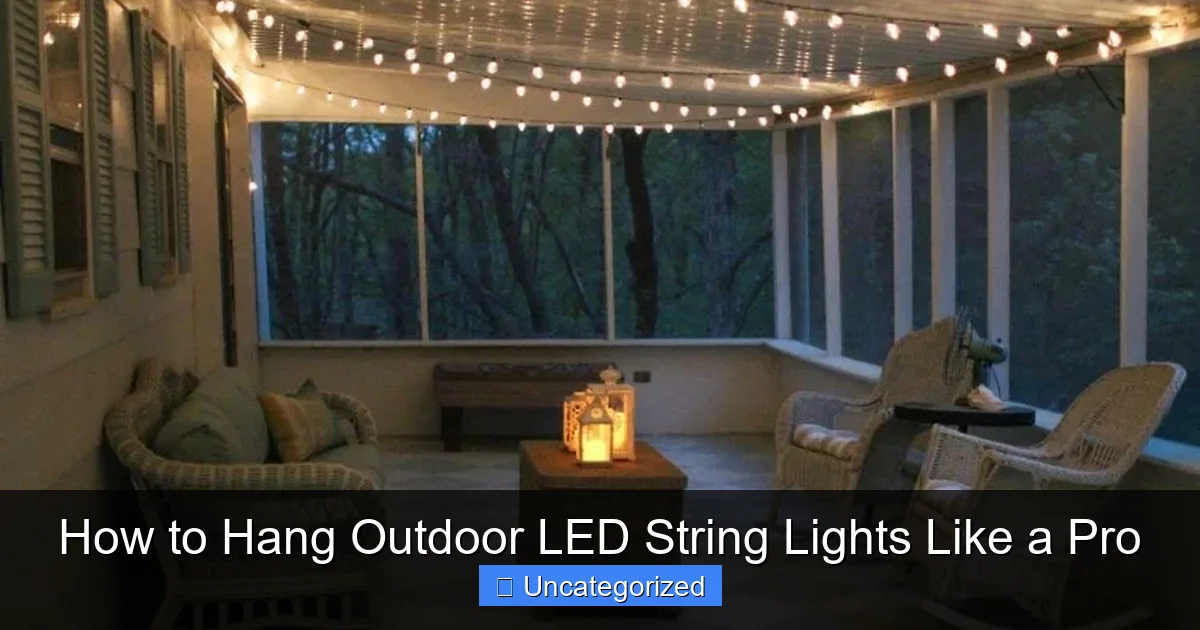
Featured image for how to hang outdoor led string lights
Image source: lovelyetc.com
Plan your layout and measure the space before hanging outdoor LED string lights to ensure even spacing and avoid sagging or overstretching. Use durable mounting hardware like hooks, zip ties, or guide wires to securely attach lights to eaves, fences, or trees while maintaining a clean, professional look. Always prioritize safety and weatherproofing for long-lasting, stunning results.
How to Hang Outdoor LED String Lights Like a Pro
Key Takeaways
- Plan your layout: Sketch the area to ensure even spacing and avoid overloading circuits.
- Use proper hardware: Install hooks, clips, or cables rated for outdoor weight and weather.
- Check light spacing: Match bulb spacing to your design for consistent illumination.
- Secure connections: Protect all connections with waterproof covers to prevent damage.
- Test before hanging: Verify lights work fully before installation to avoid rework.
- Anchor tightly: Tighten wires to prevent sagging and tripping hazards.
Why This Matters / Understanding the Problem
Outdoor spaces are where memories are made—whether it’s a backyard BBQ, a quiet evening on the porch, or a holiday gathering under the stars. But without the right lighting, even the coziest patio can feel dull and uninviting.
That’s where how to hang outdoor LED string lights like a pro comes in. These energy-efficient, long-lasting lights transform patios, pergolas, decks, and gardens into warm, inviting retreats. Yet, many people struggle with tangled wires, sagging strands, or lights that don’t last through the season.
Done wrong, your lights can look messy, fall down, or even become a safety hazard. But with the right approach, you can create a professional, magazine-worthy ambiance—no electrician needed. This guide walks you through the entire process, from planning to plug-in, so you can hang your lights like a pro the first time.
What You Need
Before you start, gather your supplies. Having the right tools saves time and prevents frustration. Here’s a quick checklist of everything you’ll need for how to hang outdoor LED string lights like a pro:
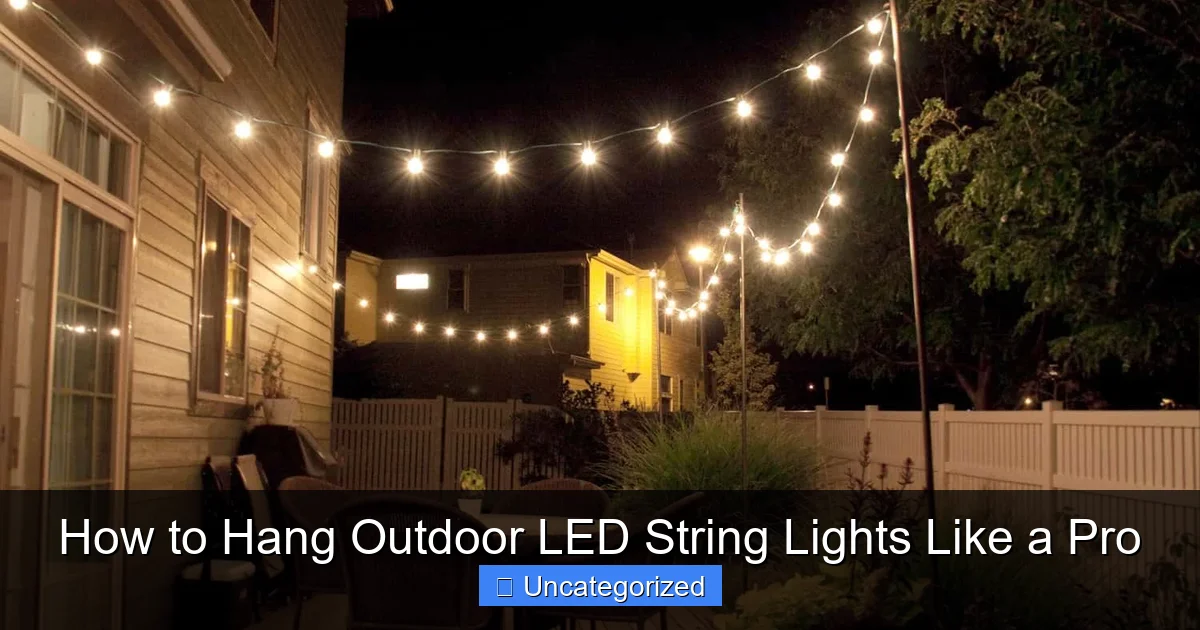
Visual guide about how to hang outdoor led string lights
Image source: wehangchristmaslights.com
- Outdoor LED string lights (rated for wet or damp locations)
- Measuring tape (to plan spacing and coverage)
- Stakes, hooks, or mounting hardware (screw-in hooks, zip ties, gutter clips, or adhesive clips)
- Drill with appropriate drill bits (for wood, brick, or concrete)
- Extension cords (outdoor-rated, with GFCI protection)
- Ladder (stable and tall enough for your space)
- Zip ties or cable clips (for securing wires and reducing sag)
- Timer or smart plug (optional, but great for automation)
- Marker or chalk (for marking drill points)
- Level (optional, but helpful for straight lines)
Pro tip: Choose LED string lights with replaceable bulbs and weatherproof sockets. This way, if one bulb goes out, you can fix it instead of replacing the whole strand. Also, look for lights with a plug-and-play design that allows end-to-end connections—great for long runs.
Step-by-Step Guide to How to Hang Outdoor LED String Lights Like a Pro
Step 1: Plan Your Layout and Measure the Space
Start by visualizing how you want your lights to look. Do you want a canopy over the patio? A border around the deck? Or a crisscross pattern above the seating area?
Grab your measuring tape and map out the total length of the area where you’ll hang the lights. For example, if your patio is 15 feet long and 10 feet wide, and you plan to run lights along all four sides, you’ll need about 50 feet of lighting.
Use a piece of string or rope to mock up the path your lights will follow. This helps you see how the layout looks in real life before you start drilling or stapling.
Pro Tip: Always add 10–15% extra to your total length. You’ll need slack for curves, connections, and reaching the outlet. For how to hang outdoor LED string lights like a pro, planning is half the battle.
Step 2: Choose the Right Mounting Method for Your Surface
Not all walls, roofs, or railings are the same. The way you hang your lights depends on your surface type:
- Wooden pergola or deck railing: Use screw-in cup hooks or eye hooks. These are sturdy and easy to install.
- Brick, stone, or stucco: Use masonry anchors and stainless steel hooks. A hammer drill may be needed.
- Metal gutters or eaves: Use gutter clips or magnetic hooks (for steel surfaces).
- Fences or trees: Use zip ties or bungee cords with plastic hooks to avoid damaging bark.
- No permanent fixtures: Use adhesive-backed clips (rated for outdoor use) or lightweight tension rods for temporary setups.
Always check the weight rating of your hardware. Most outdoor LED strings are lightweight, but if you’re connecting multiple strands, use stronger anchors.
Warning: Avoid using nails or staples directly on the light cord. This can damage insulation and create fire hazards. Always use proper clips or hooks designed for string lights.
Step 3: Install Mounting Points at Even Intervals
Once you’ve chosen your hardware, it’s time to install the mounting points. Use your measuring tape and a marker to mark where each hook or clip will go.
For a straight line (like along a deck rail), space hooks every 12–18 inches. For a canopy or crisscross pattern, space them 2–3 feet apart, depending on how much sag you want.
Drill pilot holes if needed, then screw in hooks or install clips. For masonry, use a hammer drill and masonry bit, then insert anchors before attaching hooks.
Use a level to keep lines straight—especially important for a polished, professional look. A crooked line can make your whole setup look sloppy.
Pro Tip: For long runs, install a hook at the start, middle, and end to reduce sagging. If your lights are over 30 feet, consider a center support (like a pole or tree) to prevent drooping.
Step 4: Test Your Lights Before Hanging
Before you hang anything, plug in your lights and test them. Turn them on to make sure every bulb works and there are no flickers or dead sections.
This step is crucial. Once the lights are up, fixing a broken bulb or faulty strand is a pain. Testing now saves time and frustration later.
If you’re using multiple strands, connect them end-to-end and test the full run. Check for overheating (rare with LEDs, but still good to verify) and ensure the plug is dry and away from water sources.
Warning: Never leave lights plugged in during installation. Unplug the cord before hanging to avoid shock or short circuits.
Step 5: Hang the Lights Using the Right Technique
Now for the fun part—hanging the lights! Start at the end closest to your power source. This reduces the risk of tangling and makes it easier to reach the outlet.
Attach the first bulb or socket to the starting hook. Then, gently drape the strand along the path, securing it to each hook or clip as you go. Don’t pull too tight—LED strings should have a slight sag for a natural, elegant look.
For canopies or crisscross designs, use a ladder and a helper to guide the lights across open space. Secure the middle points first, then work outward to maintain tension.
If you’re using zip ties on trees or fences, loop them through the socket or bulb base (not the wire) to avoid pressure on the cord.
Pro Tip: For a “floating” effect, use clear fishing line between hooks to support long spans without visible wires. This is a favorite trick among pros for how to hang outdoor LED string lights like a pro.
Step 6: Secure the Cord and Manage the Plug
The power cord is often overlooked, but it’s a key part of a clean installation. Use zip ties, cable clips, or conduit to secure the cord along the wall, railing, or eave.
Keep the cord away from high-traffic areas to avoid tripping. If it runs across the ground, use a cord cover or bury it slightly (if safe and allowed by local codes).
Plug the cord into a GFCI outlet (Ground Fault Circuit Interrupter), which shuts off power if it detects a leak. This is essential for safety in wet environments.
For longer runs, use an outdoor-rated extension cord. Make sure it’s the same gauge or thicker than your light strand to prevent overheating.
Warning: Never daisy-chain more than three extension cords. This can overload the circuit and create fire risks.
Step 7: Add a Timer or Smart Plug (Optional but Recommended)
Want your lights to turn on automatically at sunset and off at bedtime? Install a timer or smart plug.
A simple mechanical timer plugs into the outlet and lets you set on/off times. For more control, use a Wi-Fi smart plug (like TP-Link Kasa or Amazon Smart Plug) that connects to your phone.
With a smart plug, you can control your lights remotely, set schedules, or even sync them with your voice assistant (Alexa, Google Home, Siri).
This not only saves energy but also gives your outdoor space a “lived-in” look when you’re away—great for security.
Pro Tip: Set your timer to turn on 30 minutes before sunset and off at midnight. This maximizes ambiance while conserving power.
Step 8: Inspect and Adjust for a Polished Finish
Step back and admire your work—then take a closer look. Walk around the space and check for:
- Sagging strands (tighten or add support)
- Misaligned bulbs (rotate or reposition)
- Loose cords (secure with extra clips)
- Visible wires (hide with conduit or paint)
Make small adjustments until everything looks balanced and professional. A little tweaking goes a long way in achieving that pro look.
If you used temporary clips, now’s the time to reinforce them for long-term use. Replace adhesive clips with screws if the lights will stay up all year.
Pro Tips & Common Mistakes to Avoid
Even with the best plan, small mistakes can ruin your setup. Here are expert tips and pitfalls to avoid when mastering how to hang outdoor LED string lights like a pro:
Use the Right Bulb Type for Your Space
Not all LED string lights are the same. Choose based on your needs:
- Warm white (2700K–3000K): Cozy, inviting—perfect for patios and dining areas.
- Cool white (4000K–5000K): Bright and crisp—great for pathways or workspaces.
- Color-changing or RGB: Fun for parties, but harder to control. Use sparingly.
- Globe vs. Edison bulbs: Globe lights give a modern look; Edison bulbs have vintage charm.
Don’t Overload the Circuit
Most outdoor LED strands draw very little power (around 5–10 watts per 25 feet). But if you’re connecting 10+ strands, check the total wattage.
Most household circuits can handle 1,800 watts. If you’re close to the limit, use a separate outlet or a dedicated outdoor circuit.
Warning: Overloading can trip breakers or cause overheating. Always read the wattage on your light packaging.
Avoid Direct Exposure to Rain
While LED lights are weather-resistant, the plug and socket connections are not always waterproof. Keep plugs and connectors under eaves, in covered outlets, or inside a weatherproof box.
If you must run a cord across a roof or gutter, use a drip loop—a small U-shape in the cord that lets water drip off before reaching the outlet.
Use Cable Management Tools
Messy cords ruin a clean look. Use:
- Zip ties for bundling
- Conduit or raceway for hiding cords along walls
- Paintable cord covers to blend with your trim
Don’t Hang Lights Too Low
For safety and style, keep lights at least 7 feet above the ground. This prevents people from walking into them and keeps the glow at eye level.
If you’re lighting a walkway, use lower strands (4–5 feet) with clear bulbs to avoid glare.
Think About Maintenance
Even the best setup needs care. Clean bulbs with a dry cloth every few months. Check connections before each season. Replace broken bulbs promptly.
If you’re using adhesive clips, inspect them after storms—heat and UV can weaken adhesive over time.
FAQs About How to Hang Outdoor LED String Lights Like a Pro
Q1: Can I leave LED string lights outside all year?
Yes, as long as they’re labeled for outdoor use and weatherproof. Most outdoor LED strings can handle rain, snow, and UV exposure. Just store them in a dry place during extreme weather or if you’re not using them for months.
Pro tip: Unplug and cover the outlet during heavy storms to prevent moisture buildup.
Q2: How do I prevent my string lights from sagging?
Sagging is common with long runs. To fix it:
- Use support hooks every 12–18 inches
- Add a center pole or tree for long spans
- Use tension wire (like aircraft cable) with clips
- Choose heavier-duty “heavy-duty” or “commercial-grade” strands
Never pull the cord too tight—this can damage the wiring.
Q3: Can I connect multiple strands together?
Yes, but only if the manufacturer says so. Most outdoor LED strings allow end-to-end connection—usually up to 3–5 strands (check the packaging).
Never connect more than the recommended number. Overloading can burn out bulbs or damage the cord.
Q4: What’s the best way to hang lights on a tree?
Use zip ties or bungee cords with plastic hooks. Wrap them around the trunk or branches, securing the light socket (not the wire). For a spiral effect, start at the base and work upward.
Never use nails or screws—they can damage the tree and create entry points for pests.
Q5: Do I need a permit to hang outdoor lights?
Usually not for temporary or decorative lighting. But if you’re running wires through walls, installing permanent fixtures, or using high-voltage lights, check local codes.
Always use outdoor-rated extension cords and GFCI outlets to meet safety standards.
Q6: How do I hide the power cord?
Use cord covers, conduit, or paintable raceways along walls. For ground-level cords, use a cord protector (like a rubber mat) or bury it slightly (only if allowed and safe).
You can also run the cord through a downspout or along a gutter with clips.
Q7: Can I use smart lights for outdoor string lighting?
Absolutely! Many brands (like Philips Hue, Nanoleaf, and Govee) make outdoor-rated smart string lights. They connect to Wi-Fi or Bluetooth and let you control color, brightness, and schedules from your phone.
Just make sure the hub and plug are protected from moisture.
Final Thoughts
Hanging outdoor LED string lights doesn’t have to be a chore. With the right tools, a solid plan, and a few pro tricks, you can transform your backyard, porch, or garden into a glowing oasis—no electrician needed.
Remember, how to hang outdoor LED string lights like a pro is all about preparation, precision, and patience. Plan your layout, test your lights, use the right hardware, and manage your cords. The result? A space that’s not just lit, but truly alive.
Start with a small area—like a deck railing or pergola—and build confidence. Before you know it, you’ll be the go-to person for backyard ambiance at every gathering.
So grab your lights, pick a clear evening, and get to work. Your perfect outdoor glow is just a few hooks away. And when your friends ask, “Who did your lighting?”—you can smile and say, “I did. Like a pro.”

