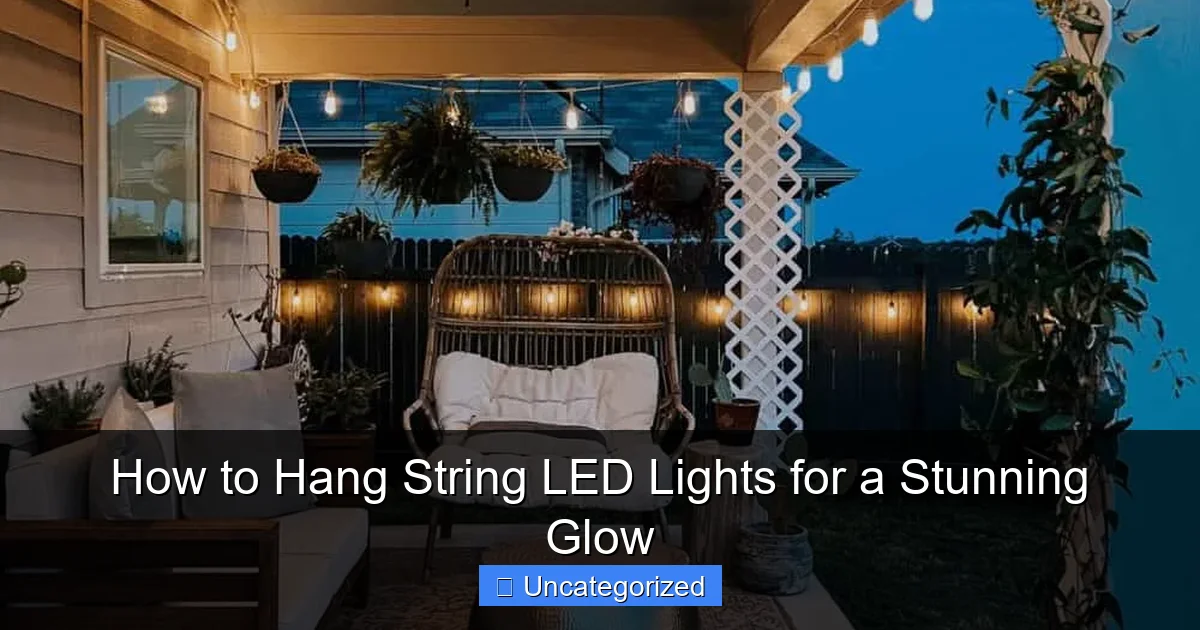
Featured image for how to hang string led lights
Image source: loveandrenovations.com
Hang string LED lights securely and creatively by planning your layout, choosing the right mounting hardware—like hooks, adhesive clips, or tension wires—and spacing bulbs evenly for a professional glow. Prioritize safety and symmetry by testing connections, avoiding overloaded circuits, and securing cords to prevent sagging or tripping hazards.
“`html
How to Hang String LED Lights for a Stunning Glow
Key Takeaways
- Plan your layout: Sketch light placement before installation for balanced coverage.
- Use proper hardware: Choose hooks or clips designed for outdoor/indoor string lights.
- Check spacing: Keep bulbs evenly spaced to avoid dark spots or glare.
- Test lights first: Ensure functionality before hanging to avoid rework.
- Secure connections: Protect plugs and joints from weather with waterproof covers.
- Angle for effect: Hang lights diagonally or in layers for dynamic ambiance.
Why This Matters / Understanding the Problem
Imagine this: you’re hosting a backyard BBQ, and as the sun sets, the space feels dull and lifeless. But when you flip a switch and warm string LED lights gently illuminate the patio, the whole mood shifts. That’s the magic of how to hang string LED lights for a stunning glow—they transform ordinary spaces into cozy, inviting retreats.
Whether you’re decorating a bedroom, balcony, wedding venue, or backyard, string LED lights add ambiance, style, and a touch of whimsy. But here’s the catch: poor placement, tangled wires, or sagging strands can ruin the effect. That’s why knowing how to hang them right is key. Done correctly, these lights create a professional-looking glow that feels intentional and beautiful.
From choosing the right lights to avoiding common pitfalls, this guide walks you through every step. You’ll learn how to hang string LED lights for a stunning glow—safely, stylishly, and without the frustration of trial and error.
What You Need
Before you start, gather the right tools and materials. Having everything on hand saves time and prevents mid-project trips to the hardware store. Here’s what you’ll need for a successful installation:
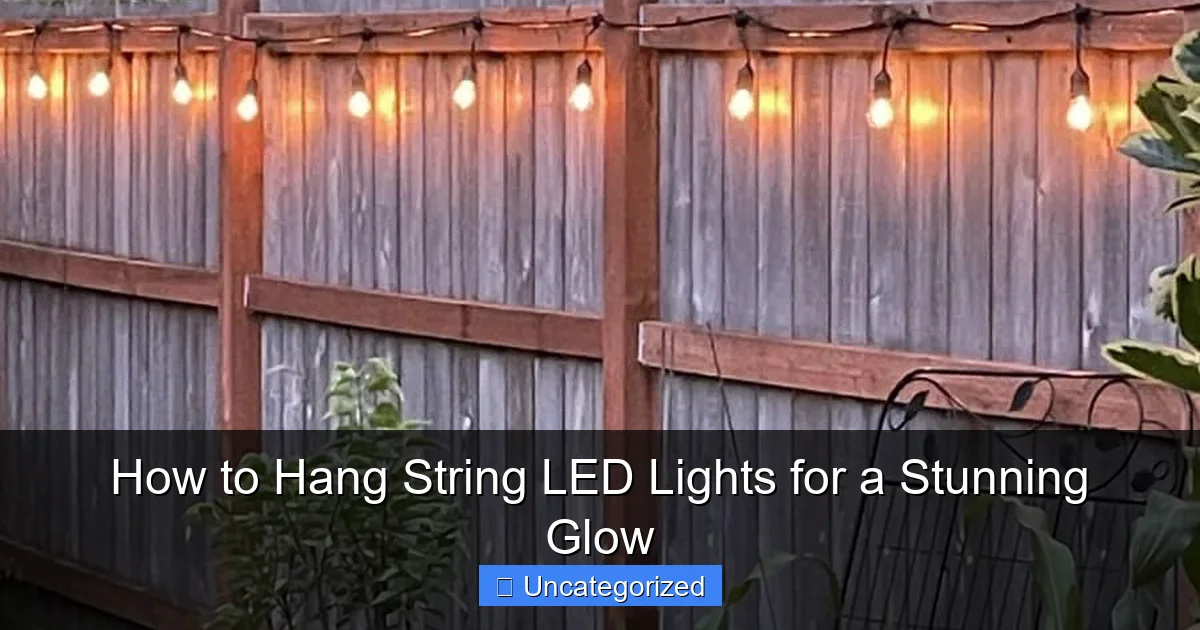
Visual guide about how to hang string led lights
Image source: jessicawellinginteriors.com
- String LED lights (choose warm white, RGB, or color-tunable based on your vibe)
- Measuring tape (to plan spacing and length)
- Pencil or marker (for marking drill points)
- Drill and drill bits (for wood, concrete, or masonry—use the right one for your surface)
- Eye hooks, cup hooks, or adhesive hooks (depending on surface type)
- Zip ties or twist ties (for securing wires and managing slack)
- Extension cords (if needed) (outdoor-rated for exterior use)
- Timer or smart plug (optional, but great for automatic on/off control)
- Level (to keep lines straight and even)
- Scissors or wire cutters (for trimming zip ties)
- Weatherproof sealant or caulk (for outdoor installations to protect screw holes)
Pro tip: Always check the wattage and power requirements of your lights. If you’re connecting multiple strands, make sure the total doesn’t exceed the circuit limit—especially important for outdoor setups.
For indoor use, adhesive hooks or tension rods work great for renters or non-permanent setups. For outdoor spaces, durability and weather resistance matter. Knowing how to hang string LED lights for a stunning glow starts with choosing the right gear for your environment.
Step-by-Step Guide to How to Hang String LED Lights for a Stunning Glow
Step 1: Choose the Right Location and Layout
Start by deciding where you want the lights. Common spots include:
- Patio or deck railings
- Ceiling or wall in a bedroom or living room
- Backyard pergola, fence, or trees
- Along a staircase or balcony
Once you’ve picked the area, sketch a rough layout. Ask yourself: Do you want a straight line, zigzag, crisscross pattern, or a canopy effect? For a dramatic glow, consider layering lights—like hanging them in parallel rows or creating a “starry sky” with clusters.
Measure the total length of your space. Then, check how long your string lights are. Most strands are 24–50 feet. If you need more, plan to connect multiple strands—but never exceed the manufacturer’s recommended number of connected sets (usually 3–5).
For example, if your patio is 30 feet wide and your lights are 25 feet long, you’ll need at least two strands with a connection point in the middle. This step ensures you don’t end up short or with too much slack.
Warning: Avoid hanging lights over water (like pools) unless they’re specifically rated for such use. Water and electricity don’t mix—even with LED.
Step 2: Pick the Right Hanging Method for Your Surface
The surface you’re hanging on determines what hardware you’ll use. Here’s a quick breakdown:
- Wood (deck, pergola, wall): Use cup hooks or eye screws. They’re sturdy and easy to install with a drill.
- Concrete or brick: Use masonry anchors with screws. A hammer drill makes this faster.
- Metal (fences, railings): Use magnetic hooks or zip ties. No drilling needed!
- Indoor drywall: Use adhesive hooks (3M Command strips) or small picture hooks. Great for renters.
- Ceiling (indoor): Use ceiling hooks or tension rods for a no-drill option.
For outdoor use, always choose weather-resistant hooks and seal screw holes with silicone caulk. This prevents water from seeping in and damaging your structure or creating rust.
Pro tip: If you’re hanging lights on trees, use zip ties or plant-safe clips. Avoid nails or screws—they can damage the bark and invite pests.
This step is crucial in mastering how to hang string LED lights for a stunning glow—because the wrong method leads to sagging, slipping, or damage.
Step 3: Install the Hooks or Mounting Points
Now it’s time to install your hardware. Here’s how to do it right:
- Use your measuring tape to mark where each hook will go. For straight lines, space hooks every 2–3 feet. For crisscross patterns, place them at the corners of your design.
- Use a level to ensure your marks are even. Nothing kills the vibe like crooked lights!
- Drill pilot holes slightly smaller than your hooks. This prevents wood from splitting.
- Screw in the hooks by hand first, then tighten gently with pliers or a screwdriver.
For adhesive hooks, clean the surface with rubbing alcohol, let it dry, then press the hook firmly for 30 seconds. Wait 1 hour before hanging lights—this ensures a strong bond.
On concrete, use a masonry bit to drill holes, insert anchors, then screw in the hooks. This takes a little more effort, but it’s worth it for a secure hold.
Example: On a 20-foot pergola, you might install 7 hooks—one at each end and five evenly spaced in between. This gives enough support to prevent sagging.
Pro tip: If you’re using multiple strands, install hooks on both sides of the space (e.g., front and back of a pergola) to create a “tent” or canopy effect.
Step 4: Hang the String LED Lights
Now for the fun part—hanging the lights! Follow these steps:
- Start at the power source. Plug in the first strand and test it. Make sure all bulbs are working.
- Attach the first end to the hook closest to the outlet. Use the built-in loop (if available) or a zip tie.
- Unroll the strand along your planned path, gently draping it over each hook. Don’t pull too tight—leave a slight sag for a natural, flowing look.
- For straight lines, keep the strand parallel to the ground. For canopies, create gentle curves between hooks.
- If using multiple strands, connect them at the end of the first set. Secure the connection with a zip tie to prevent strain.
- Work your way to the last hook, then secure the end.
For zigzag or crisscross patterns, use a second row of hooks on the opposite side. Weave the lights back and forth, like a web. This creates depth and dimension.
Example: In a bedroom, hang lights in a zigzag across the ceiling from one wall to another. It draws the eye upward and adds a dreamy feel.
Warning: Never stretch string lights beyond their natural length. Over-tightening can damage the wiring and cause bulbs to fail.
Step 5: Manage the Wires and Power Source
Messy wires ruin the clean look of your setup. Here’s how to keep things tidy:
- Use zip ties to bundle excess wire and secure it to hooks or railings.
- Route the power cord along a wall or railing, hiding it behind furniture or plants.
- Use cord clips or adhesive wire organizers (like raceways) to guide cords neatly.
- If the outlet is far away, use an outdoor-rated extension cord. Choose one with a built-in surge protector.
For outdoor setups, elevate cords off the ground with hooks or clips. This prevents tripping and keeps water from pooling near connections.
Example: On a deck, run the cord along the railing and down a support beam. Cover it with a plant or outdoor curtain for camouflage.
Smart tip: Plug your lights into a timer or smart plug. Set it to turn on at sunset and off at 10 PM. This saves energy and ensures your glow appears like magic every night.
Step 6: Test, Adjust, and Perfect the Glow
Turn on the lights and step back. Look for:
- Uneven sagging (add more hooks or adjust tension)
- Glaring hotspots (angle lights slightly or use frosted bulbs)
- Dark spots (add a second layer or shorter strands in gaps)
- Wires that stand out (re-route or cover them)
Adjust the sag: a little droop is good (about 6–12 inches between hooks), but too much looks sloppy. If needed, add a middle hook or use a zip tie to lift the strand slightly.
For a “starry” effect, hang shorter strands in clusters or use net lights. This adds texture and prevents a flat, uniform look.
This final step is where how to hang string LED lights for a stunning glow truly comes to life—because the perfect ambiance is in the details.
Step 7: Secure for Long-Term Use (Especially Outdoors)
If your lights are staying up for weeks or months, take extra precautions:
- Seal all screw holes with clear silicone caulk to prevent water damage.
- Use UV-resistant zip ties (black or gray) to avoid brittleness from sun exposure.
- Check connections monthly for wear, especially after storms.
- Remove or cover lights during extreme weather (hurricanes, heavy snow).
For indoor lights, dust them gently with a microfiber cloth every few weeks. Avoid spraying water near the bulbs or sockets.
Example: On a pergola, use clear caulk around each hook after installation. It blends in and protects the wood.
Pro tip: Label your strands or take photos during setup. This makes removal and rehanging next year much easier.
Pro Tips & Common Mistakes to Avoid
Even small mistakes can ruin your glow. Here’s what the pros know—and what you should avoid:
- Use warm white (2700K–3000K) for cozy ambiance. Cool white feels clinical. RGB is fun, but stick to warm tones for everyday use.
- Don’t daisy-chain too many strands. Exceeding the limit causes overheating and fire risk. Always check the label.
- Plan for power access before installing. Running cords across walkways is a trip hazard. Use outdoor outlets or GFCI-protected extensions.
- Test lights before hanging. It’s way easier to fix a broken strand on the ground than 8 feet in the air.
- Avoid direct sunlight on plastic bulbs. UV rays can make them yellow or crack over time. Use LED with UV-resistant coatings for outdoor use.
- Don’t staple or nail lights. This damages wiring and creates short circuits. Use hooks or zip ties instead.
- Layer lights for depth. Combine string lights with fairy lights, lanterns, or candles for a richer glow.
Common mistake: Hanging lights too tightly. This causes tension on the sockets and can pull bulbs out. Always allow a gentle sag—it looks better and lasts longer.
Another pro secret: Use a dimmer or smart bulb controller. You can adjust brightness for different moods—dim for romance, brighter for parties. This flexibility is key to mastering how to hang string LED lights for a stunning glow.
FAQs About How to Hang String LED Lights for a Stunning Glow
Can I hang string lights without drilling?
Yes! For renters or delicate surfaces, use adhesive hooks (like 3M Command), tension rods, magnetic hooks, or zip ties on railings. These are removable and leave no marks. Just make sure the adhesive is rated for the weight and environment (indoor/outdoor).
How many string lights can I connect together?
Most manufacturers recommend connecting 3 to 5 strands max. Check the packaging or manual. Exceeding this limit can overload the circuit, cause overheating, or trip a breaker. For long runs, use a power strip with multiple outlets instead of daisy-chaining.
Are string LED lights safe for outdoor use?
Only if they’re rated for outdoor use. Look for “IP44” or “weatherproof” on the label. These lights have sealed sockets and UV-resistant cords. Never use indoor-only lights outside—moisture can cause shorts or fire.
How do I keep lights from sagging in the middle?
Add extra support. Install a hook in the center of long spans or use zip ties to gently lift the strand. A 6–12 inch sag is normal and looks intentional. Too much sag looks messy, so balance is key.
Can I leave string lights up year-round?
It depends. Outdoor-rated lights can stay up, but inspect them monthly. Remove or cover during extreme weather. For indoor lights, they’re safe long-term, but dust them regularly to prevent overheating.
What’s the best way to store string lights?
Coil them loosely around a cardboard tube or use a light reel. Avoid tight knots. Store in a dry, cool place. Label each strand by length and type. This makes setup next season a breeze.
How do I create a canopy effect?
Use two parallel rows of hooks (front and back of a pergola or room). Weave the lights back and forth in a zigzag or crisscross pattern. Add a center strand for extra density. This creates a “tent” of light overhead—perfect for weddings or cozy nooks.
Final Thoughts
Hanging string LED lights isn’t just about decoration—it’s about crafting a mood. Whether you’re setting the scene for a romantic dinner or lighting up a kids’ playroom, the right glow makes all the difference. Now that you know how to hang string LED lights for a stunning glow, you can do it with confidence, style, and safety.
Remember: plan your layout, choose the right hardware, leave a gentle sag, manage wires neatly, and test before you commit. A little prep goes a long way. And don’t forget the smart plug or timer—it’s the secret to effortless ambiance.
So grab your lights, gather your tools, and get started. Your space is about to shine. With these steps, you’re not just hanging lights—you’re creating magic.
Ready to glow? Start tonight. Your stunning transformation begins with one hook, one strand, and one brilliant idea.
“`

