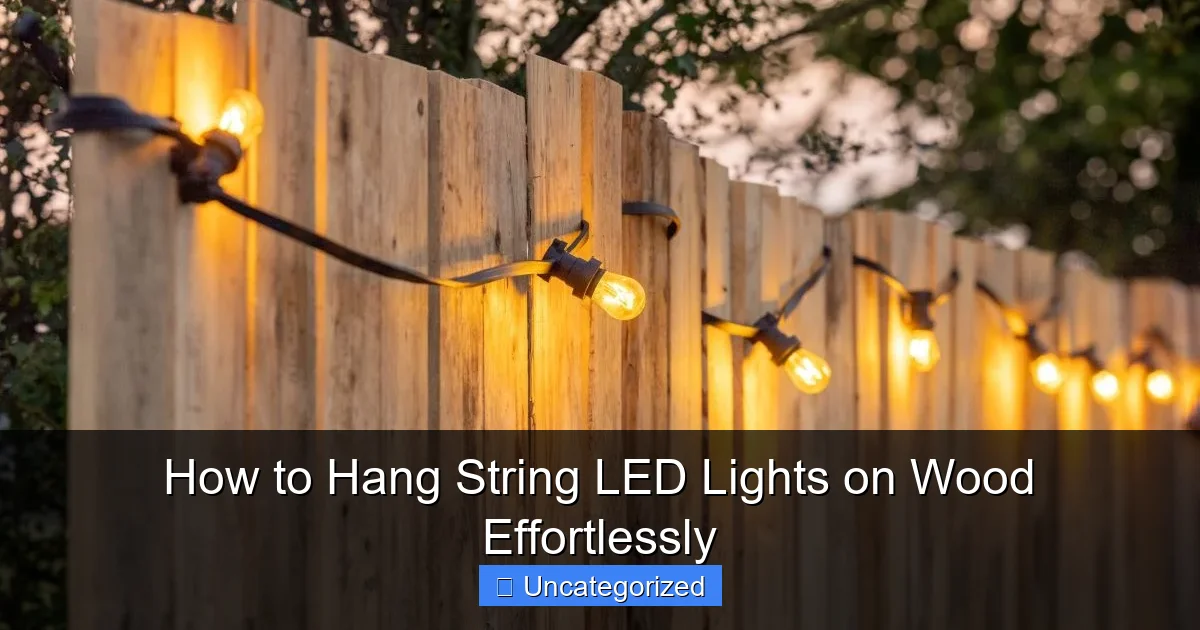
Featured image for how to hang string led lights on wood
Image source: storables.com
Secure string LED lights on wood effortlessly using adhesive clips or small nails—no drilling required. Choose weather-resistant clips for a clean, damage-free look, or use low-impact fasteners like picture hangers for a sturdier hold. Always plan your layout first to ensure even spacing and a professional finish.
How to Hang String LED Lights on Wood Effortlessly
Key Takeaways
- Choose the right hardware: Use hooks or clips designed for wood to prevent damage.
- Plan your layout first: Measure and mark spacing for even, balanced light distribution.
- Secure with adhesive strips: For lightweight strings, use damage-free mounting tape or putty.
- Drill pilot holes: Prevent wood splitting by pre-drilling for nails or screws.
- Hide cords neatly: Route wires along beams or edges for a clean, professional look.
- Test lights before hanging: Ensure all bulbs work to avoid mid-installation fixes.
Why This Matters / Understanding the Problem
You’ve just bought a set of beautiful string LED lights and can’t wait to add a warm, cozy glow to your wooden deck, pergola, or interior accent wall. But when you try to install them, you face a real challenge: how to hang them securely without damaging the wood, leaving unsightly holes, or creating a tangled mess.
Many people struggle with this. They end up using duct tape (which peels off and damages wood), nails (which crack dry wood), or zip ties (which look cheap and break over time). The result? Lights sag, fall, or look messy after a few weeks.
That’s why knowing how to hang string LED lights on wood effortlessly is a game-changer. It’s not just about looks—it’s about durability, safety, and preserving the integrity of your wood surfaces. Whether you’re decorating for a party, setting up a permanent outdoor ambiance, or creating a romantic indoor nook, the right method ensures your lights stay up, look great, and last for years.
With the right tools and techniques, you can achieve a professional-looking setup without spending hours or breaking the bank. This guide walks you through every step, so you can enjoy your glowing space—stress-free.
What You Need
Before you start, gather these tools and materials. Having everything on hand saves time and prevents mid-project trips to the hardware store.
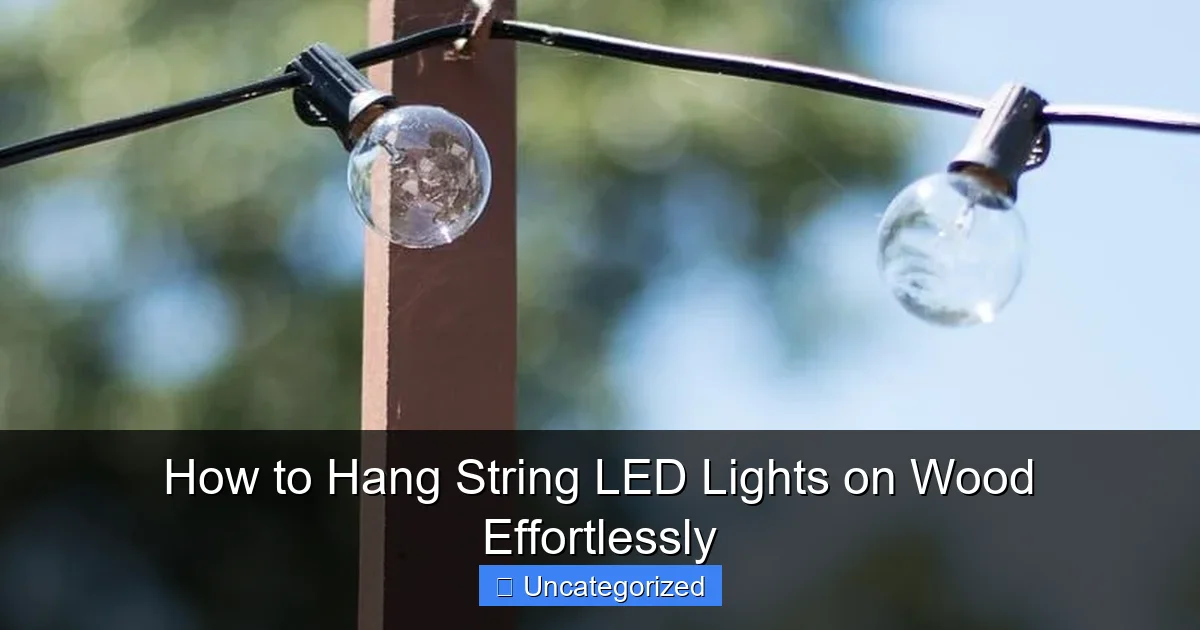
Visual guide about how to hang string led lights on wood
Image source: i.pinimg.com
- String LED lights (indoor/outdoor rated, depending on location)
- Measuring tape or ruler
- Pencil or erasable marker (for marking spots)
- Drill with a small drill bit (1/8” or 3mm)
- Wood-safe fasteners:
- Small wood screws (1” to 1.25”)
- Or cup hooks (ideal for a rustic, removable look)
- Or eye screws (for a more discreet hold)
- Screwdriver (manual or electric)
- Level (to keep lights straight)
- Zip ties (optional, for extra support or bundling)
- Weatherproof sealant (for outdoor installations)
- Extension cord or outdoor-rated power source (if needed)
- Optional: Light clips designed for wood (e.g., plastic or rubber-coated clips)
Pro Tip: Choose LED string lights with a flat, flexible wire. They’re easier to manage, less bulky, and look cleaner when hung. For outdoor use, always pick IP65-rated or higher lights to resist rain and humidity.
Step-by-Step Guide to How to Hang String LED Lights on Wood Effortlessly
Step 1: Plan Your Layout and Measure
Start by deciding where you want your lights. Are they going along the edge of a pergola? Draped in a zigzag pattern across a wooden wall? Or outlining a deck railing?
Grab your measuring tape and sketch a rough plan. Mark key points—like corners, ends, and where you want turns—on paper or in your head. For example, if you’re hanging lights across a 10-foot wooden beam, measure the distance and divide it into 12-inch sections for even spacing.
This planning phase ensures your lights don’t sag, bunch up, or look lopsided. It also helps you estimate how many fasteners you’ll need and where to place them for optimal support.
Pro Tip: Use painter’s tape to temporarily mark spots on the wood. This lets you visualize the layout before drilling or screwing. If you don’t like it, just peel it off—no damage!
Step 2: Choose the Right Fastener for Your Wood Type
Not all wood is the same. Softwood (like pine or cedar) is easier to drill into but can split. Hardwood (like oak or maple) is strong but may require pre-drilling.
Here’s how to pick the best fastener:
- For thick, solid wood (beams, decks, pergolas): Use 1” to 1.25” wood screws or cup hooks. They hold tight and won’t pull out.
- For thin or delicate wood (like shiplap walls or reclaimed wood): Use shorter screws (3/4”) or light-duty eye screws to avoid cracking.
- For a removable, decorative look: Cup hooks add charm and are easy to unscrew later.
- For a minimalist, modern look: Use small, flat-head screws or plastic clips.
Always match the fastener to your wood’s thickness and your design goals. The key to how to hang string LED lights on wood effortlessly is choosing the right anchor point.
Warning: Never use large nails or staples. They damage wood and can create fire hazards if they touch electrical wires.
Step 3: Pre-Drill Pilot Holes (Critical for Preventing Cracks)
Before inserting any screw or hook, pre-drill a small pilot hole using a 1/8” or 3mm drill bit. This prevents the wood from splitting, especially in dry or older wood.
Here’s how:
- Use your pencil to mark each spot where you’ll install a fastener.
- Set your drill to low speed and drill a hole about 3/4” deep at each mark.
- Wipe away sawdust with a dry cloth.
For cup hooks or eye screws, the pilot hole should be just slightly smaller than the screw’s core (not the threads). This lets the threads grip tightly without cracking the wood.
Pro Tip: If you’re working with painted wood, score the paint around the mark with a utility knife first. This stops the paint from peeling when you drill.
Step 4: Install Fasteners Securely
Now, insert your fasteners:
- For wood screws: Use a screwdriver or drill to drive them into the pilot holes. Tighten until snug—don’t over-torque, or you’ll strip the wood.
- For cup hooks or eye screws: Twist them in by hand or with pliers. They should be firm but not buried too deep. You want the loop (or “cup”) to sit just above the surface.
Space fasteners every 12 to 18 inches, depending on the weight of your lights. Heavier strands (like those with larger bulbs) need closer spacing. Lighter, mini-LED strands can go 18 to 24 inches apart.
Use a level to make sure your fasteners are aligned. If they’re crooked, your lights will look sloppy—even if they’re straight!
Common Mistake: Installing fasteners too close to the edge of the wood. This increases the risk of splitting. Always keep at least 1.5 inches from any edge.
Step 5: Attach the String LED Lights
Now for the fun part—hanging the lights!
- Start at one end. Loop the light’s end (usually a plug or connector) around the first fastener.
- For cup hooks: Drape the wire over the hook, letting it rest in the “cup.”
- For screws: Wrap the wire around the screw head or use a small zip tie to loop it securely.
- For eye screws: Thread the wire through the loop and pull it taut.
- Work your way along the path, attaching the lights every 12–18 inches.
Keep the lights taut but not stretched. Too tight, and you risk breaking the wire or pulling out fasteners. Too loose, and they’ll sag.
If you’re creating a zigzag or crisscross pattern, use a second row of fasteners on a parallel beam or wall. This gives your lights structure and visual interest.
Pro Tip: Use clear, UV-resistant zip ties to secure the wire to the fastener. They’re nearly invisible and won’t damage the wood.
Step 6: Manage the Power Cord and Excess Wire
Don’t let the power cord become an eyesore or tripping hazard.
- Route the plug end toward your power source.
- Use zip ties or cord clips to bundle excess wire and keep it tidy.
- For outdoor setups, run the cord along a beam or tuck it behind a trim piece.
- If the cord is long, coil the extra and secure it with a zip tie. Tuck it behind a beam or in a discreet corner.
For a clean look, consider using a weatherproof extension cord that matches your wood’s color (e.g., brown or gray).
Warning: Never run cords across walkways or high-traffic areas. If you must, cover them with a cord protector or use a GFCI outlet for safety.
Step 7: Test and Adjust
Plug in your lights and step back. Check for:
- Even spacing
- No sagging or drooping
- All bulbs lighting up
- No exposed wires
If a section sags, tighten the wire or add an extra fastener. If a bulb flickers, check the connection—sometimes a loose wire just needs a little adjustment.
Use this moment to fine-tune the layout. Move a hook slightly? Add a zip tie? Now’s the time!
Pro Tip: For permanent installations, use a small dab of clear outdoor silicone sealant around the base of each fastener. This protects against moisture and keeps screws from loosening over time.
Step 8: Weatherproof for Outdoor Use (If Applicable)
If your lights are outside, take extra steps to protect them:
- Apply a thin layer of clear sealant around the base of each screw or hook.
- Ensure all connections (plug, adapter, wire splices) are in a covered area or use a weatherproof outlet cover.
- Check that the light strand is rated for outdoor use (look for “IP65” or “wet-rated”).
- Trim any loose zip ties so they don’t collect rainwater.
This step ensures your lights survive rain, snow, and sun. It’s a small effort that makes a big difference in longevity.
Pro Tips & Common Mistakes to Avoid
Pro Tips for a Flawless Finish
- Use a light guide: Before hanging, lay the lights on the ground along your planned path. This helps you visualize spacing and avoid tangles.
- Label your lights: Use a tag or colored zip tie to mark the “top” and “bottom” of each strand. This makes future adjustments easier.
- Go slow with curves: For arched beams or rounded edges, use smaller fasteners (like eye screws) every 6–8 inches for better control.
- Match the mood: Warm white LEDs (2700K) create a cozy vibe. Cool white (4000K) feels modern. Pick the color that fits your space.
- Think about access: Leave one end of the strand accessible so you can unplug it for storage or maintenance.
Common Mistakes (and How to Fix Them)
Mistake 1: Skipping pilot holes.
Result: Cracked wood, loose fasteners.
Fix: Always pre-drill, especially in dry or old wood.
Mistake 2: Over-tightening screws.
Result: Stripped holes, bent hooks.
Fix: Tighten just until snug. Use a manual screwdriver for better control.
Mistake 3: Hanging lights too tightly.
Result: Pulled-out fasteners, broken wires.
Fix: Keep lights taut but with a slight “give.” Test by gently pressing down—there should be a small dip.
Mistake 4: Ignoring the power source.
Result: Tripping hazards, exposed cords.
Fix: Plan your cord path in advance. Use cord covers or tuck wires behind beams.
Mistake 5: Not testing before finalizing.
Result: Lights don’t work, need re-hanging.
Fix: Plug in early. Fix issues before the fasteners are fully set.
FAQs About How to Hang String LED Lights on Wood Effortlessly
Can I use nails or staples instead of screws?
We don’t recommend it. Nails and staples can damage wood, loosen over time, and create fire risks if they pierce the wire. Screws, hooks, or clips are safer and more secure—especially for long-term installations. For how to hang string LED lights on wood effortlessly, fasteners are the way to go.
Will screws or hooks ruin my wood?
Not if you do it right. Pre-drilling and using the right size fastener prevent damage. For removable setups, use cup hooks or plastic clips. When you remove them, fill the holes with wood filler or leave them—they’re barely noticeable on most wood surfaces.
How do I hang lights on a curved or irregular wooden surface?
Use smaller, more frequent fasteners (every 6–8 inches). Eye screws or mini clips work well. For tight curves, consider flexible LED strips instead of string lights—they mold to the shape and are easier to secure.
Can I hang LED string lights on painted wood?
Yes! Just score the paint around each mark with a utility knife before drilling. This prevents peeling. Use a pencil to mark spots, then drill and install as usual. The finish will stay intact.
How do I keep lights from sagging over time?
Use enough fasteners (every 12–18 inches) and keep the wire taut. For long spans (over 15 feet), add a middle support or use a tension wire system. Also, avoid hanging lights in high-wind areas without extra support.
Are there non-permanent options for hanging LED lights on wood?
Yes! Try:
- Rubber-coated clips (stick with adhesive or small nails)
- Command™ Outdoor Light Clips (rated for wood and weather)
- Cup hooks with removable adhesive bases
These are great for temporary setups or rentals.
How do I remove lights without damaging the wood?
Unscrew or unhook gently. For screws, use a screwdriver to back them out. For hooks, twist counterclockwise. Fill holes with wood filler or leave them—they’re small and often blend in. Never yank or pull on the wire.
Final Thoughts
Hanging string LED lights on wood doesn’t have to be stressful. With the right tools, a little planning, and the steps we’ve covered, you can create a stunning, durable display—whether it’s for a cozy evening on the deck or a romantic indoor nook.
Remember, the secret to how to hang string LED lights on wood effortlessly is preparation. Measure, pre-drill, use the right fasteners, and test early. A few extra minutes now saves hours of frustration later.
And don’t forget: your lights should enhance the space, not overwhelm it. Keep spacing even, manage cords neatly, and choose a warm glow that matches your mood.
Now, step back, plug in, and enjoy the magic. Your wood is glowing, your lights are secure, and you did it—effortlessly.
Action Step: Grab your lights, gather your tools, and start with one small section. Once you see how easy it is, you’ll want to light up your whole space. Happy hanging!

