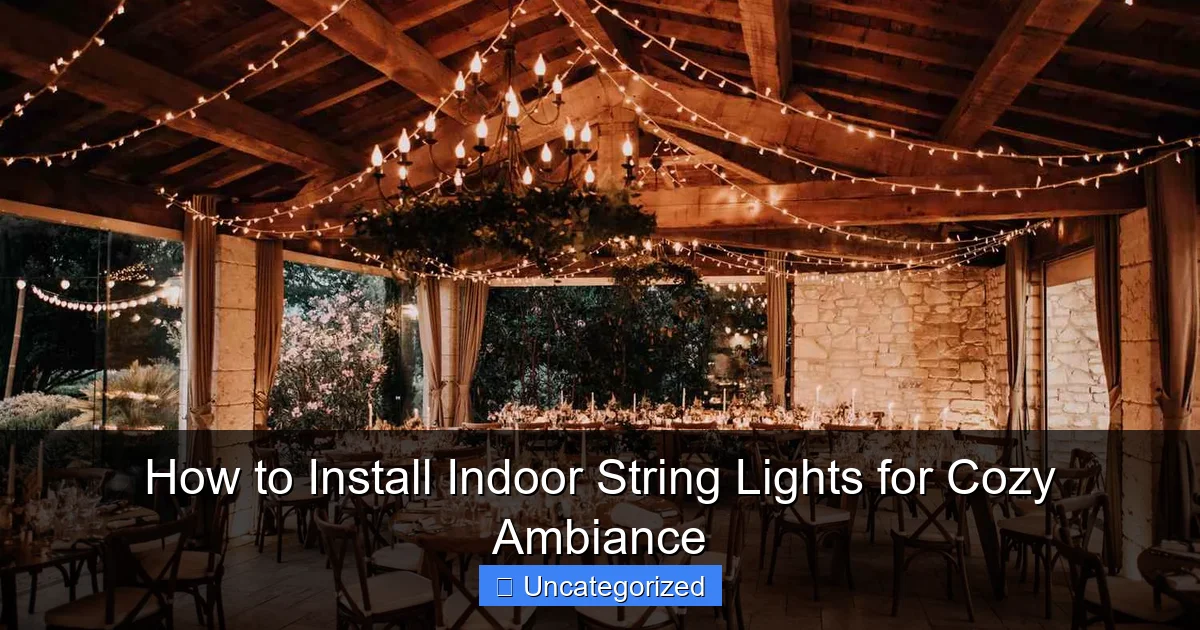
Featured image for how to install indoor string lights
Image source: brides.com
Transform any indoor space into a warm, inviting retreat by installing string lights with simple, damage-free adhesive hooks or clips. Choose a layout—draped along walls, wrapped around beams, or framing a window—and secure the lights at consistent intervals for a polished look. Always check bulb spacing and power source placement before finalizing to ensure even glow and safe operation.
Key Takeaways
- Plan your layout: Measure and map light placement before installation.
- Choose the right hardware: Use hooks, clips, or adhesive strips for secure mounting.
- Prioritize safety: Avoid overloading circuits and check for fire-rated bulbs.
- Hide cords neatly: Tuck wires along trim or behind furniture for a clean look.
- Test before finalizing: Ensure lights work and spacing looks balanced.
- Layer with other lighting: Combine string lights with lamps for richer ambiance.
📑 Table of Contents
Transform Your Space with Indoor String Lights
There’s something magical about the soft, flickering glow of indoor string lights. Whether you’re aiming to create a cozy reading nook, a romantic dining corner, or a festive holiday atmosphere, string lights offer an affordable, versatile, and visually stunning way to elevate your interior decor. Unlike harsh overhead lighting, string lights cast a warm, diffused light that enhances mood, reduces eye strain, and adds a touch of whimsy to any room. From vintage Edison bulbs to delicate fairy lights, the options are endless—and the best part? Installing them is easier than you think.
Indoor string lights are no longer just for holidays or special events. Modern designs blend seamlessly into everyday decor, making them a year-round favorite for homeowners, renters, and interior designers alike. With the right planning, tools, and techniques, you can transform your bedroom, living room, kitchen, or even bathroom into a luminous retreat. This guide walks you through every step of how to install indoor string lights safely, stylishly, and sustainably—ensuring your space radiates warmth, charm, and personality. Whether you’re a DIY novice or a seasoned decorator, you’ll find actionable tips, design inspiration, and practical advice to make your lighting project a glowing success.
Choosing the Right Indoor String Lights
Before you start hammering nails or peeling adhesive strips, it’s crucial to select the right type of string lights for your space and purpose. The market offers a wide variety of options, each with distinct features, power sources, and aesthetic qualities. Making an informed choice ensures your installation is not only beautiful but also safe and long-lasting.
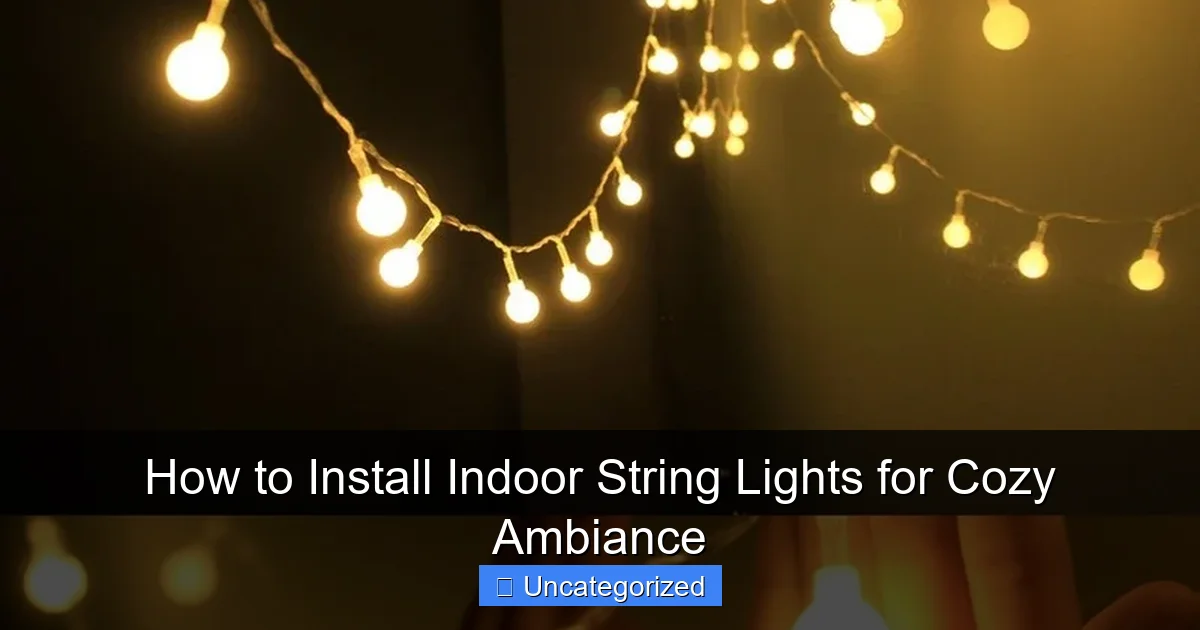
Visual guide about how to install indoor string lights
Image source: 99-cent-store.com
Types of Indoor String Lights
Understanding the different types of string lights helps you match the product to your needs:
- Fairy Lights: Delicate, often battery-powered with tiny LED bulbs. Ideal for wrapping around mirrors, headboards, or shelves. They create a subtle, twinkling effect.
- Edison Bulbs: Larger, vintage-style bulbs with exposed filaments. Best for exposed installations like along walls or ceilings. Adds industrial or rustic charm.
- LED Strip Lights: Flexible strips with adhesive backing. Great for under-cabinet lighting, behind TVs, or outlining doorways. Offers color-changing and dimming options.
- Plug-in String Lights: Traditional corded lights that plug into an outlet. Often used for mantels, stair railings, or ceiling borders. Look for UL-certified models for safety.
- Solar-Powered Indoor Lights: Rechargeable via sunlight or indoor lamps. Ideal for rooms with limited outlets or eco-conscious users.
Key Features to Consider
When evaluating string lights, keep these factors in mind:
- Bulb Type: LED bulbs are energy-efficient, long-lasting (up to 50,000 hours), and cool to the touch. Incandescent bulbs are warmer but less efficient and can overheat.
- Power Source: Battery-operated lights offer portability but require frequent battery changes. Plug-in lights are reliable but need access to outlets. Consider extension cords or power strips if outlets are scarce.
- Length and Spacing: Measure your installation area first. Standard lengths range from 10 to 50 feet. Bulb spacing (2–6 inches) affects brightness and coverage. Closer spacing = more glow.
- Color Temperature: Warm white (2700K–3000K) creates a cozy, inviting ambiance. Cool white (4000K–5000K) is brighter and more modern. RGB (color-changing) lights offer versatility.
- Dimmable and Smart Features: Dimmable lights allow brightness control. Smart lights (Wi-Fi or Bluetooth) can be controlled via apps, voice assistants, or timers—ideal for automation.
Budget and Quality
While it’s tempting to buy the cheapest option, investing in quality string lights pays off. Cheap lights may flicker, overheat, or break quickly. Look for:
- UL, ETL, or CSA certification for electrical safety
- Weather-resistant (IP44 or higher) if near kitchens or bathrooms
- Warranty (at least 1 year)
- Customer reviews mentioning durability and brightness
Pro Tip: For high-traffic areas like hallways, choose shatterproof bulbs. For bedrooms, opt for warm white fairy lights to promote relaxation.
Planning Your Installation Layout
Great lighting starts with a solid plan. A well-thought-out layout ensures even coverage, avoids visual clutter, and enhances your room’s architecture. Rushing into installation without planning often leads to uneven lighting, tangled cords, or the need for costly rework.
Assess Your Space
Begin by analyzing the room:
- Room Size and Shape: Measure the perimeter, wall height, and ceiling height. Note architectural features like beams, alcoves, or crown molding.
- Furniture Placement: Identify focal points (e.g., bed, TV, dining table) and high-traffic zones. Lights should highlight, not obstruct, these areas.
- Natural Light: Rooms with large windows may need brighter or dimmable lights. Darker rooms benefit from layered lighting (ambient + accent).
- Outlet Locations: Map all accessible outlets. If outlets are limited, plan for extension cords, power strips, or battery-powered lights.
Design Ideas by Room
Here are popular layout ideas tailored to different spaces:
- Bedroom: Drape lights around the headboard, along the ceiling perimeter, or in a canopy pattern above the bed. Use warm white fairy lights for a dreamy effect.
- Living Room: Frame the TV wall, outline bookshelves, or hang lights in a zigzag pattern across the ceiling. Edison bulbs add a cozy, lounge-like vibe.
- Dining Room: Suspend lights above the table using hooks or a chandelier-style grid. Pair with dimmers for intimate dinners.
- Kitchen: Install LED strip lights under cabinets or above the island. Use warm white for task lighting or RGB for a pop of color.
- Bathroom: Wrap lights around the mirror or install them inside a floating shelf. Ensure they’re rated for damp environments (IP44).
- Entryway: Hang lights in a vertical cascade from the ceiling or along the staircase railing. Creates a welcoming first impression.
Sketch Your Layout
Use graph paper or a digital tool (like SketchUp or Roomstyler) to sketch your plan. Include:
- Light placement (e.g., “3 feet from ceiling, centered over bed”)
- Power source locations
- Distance between mounting points (e.g., “hooks every 12 inches”)
- Desired lighting effect (e.g., “twinkling,” “steady glow,” “color cycle”)
Pro Tip: Test your layout with painter’s tape or a temporary string before permanent installation. This helps you visualize spacing and avoid over-lighting.
Tools and Materials for a Seamless Installation
Having the right tools and materials on hand saves time, reduces frustration, and ensures a professional-looking finish. The exact items you need depend on your chosen layout and mounting method, but here’s a comprehensive checklist.
Essential Tools
- Measuring Tape: For precise spacing and alignment.
- Level: Ensures straight lines (especially for ceiling or wall runs).
- Pencil or Painter’s Tape: For marking drill points or temporary layouts.
- Stud Finder (optional): Locates studs for secure mounting in drywall.
- Drill and Bits: For installing screws, anchors, or hooks. Use a small bit (1/8”) for pilot holes.
- Screwdriver: For tightening screws or adjusting fixtures.
- Ladder or Step Stool: For reaching high ceilings or walls.
- Extension Cord or Power Strip: For plug-in lights with distant outlets.
Mounting Materials
Choose mounting options based on your wall type and desired permanence:
- Adhesive Hooks or Clips: Best for renters or temporary setups. Use 3M Command Strips (rated for 1–5 lbs) for damage-free removal.
- Screw-in Hooks: Ideal for permanent installations. Use drywall anchors for added support.
- Cup Hooks: Small, decorative hooks for light-duty applications (e.g., fairy lights).
- Ceiling Hooks or Eye Screws: For suspending lights from ceilings. Use toggle bolts for heavy loads.
- Picture Rail Hangers: For crown molding or high walls. Allow flexible placement.
- Wire or Rope: For creating a “light grid” or canopy. Use clear fishing line for an invisible effect.
Safety and Accessories
- Wire Covers or Cord Clips: Hide and secure cords along baseboards or walls. Prevents tripping.
- Dimmer Switch or Remote Control: For adjustable brightness and convenience.
- Timer or Smart Plug: Automate lights to turn on/off at specific times.
- Electrical Tape: For securing loose connections or insulating exposed wires.
- Gloves: Protect hands during installation (especially with sharp hooks).
Pro Tip: For renters, use removable adhesive hooks (e.g., Command™ Outdoor Light Clips) to avoid wall damage. For homeowners, screw-in hooks offer long-term durability.
Step-by-Step Installation Guide
Now that you’ve planned your layout and gathered your tools, it’s time to install! Follow these step-by-step instructions for a flawless, safe, and visually appealing result. We’ll cover three common installation methods: wall-mounted, ceiling-suspended, and adhesive-based.
Method 1: Wall-Mounted String Lights
Ideal for: Bedroom headboards, living room feature walls, or hallway borders.
- Measure and Mark: Use a measuring tape and level to mark hook positions (e.g., every 12 inches along a 10-foot wall). Mark with pencil or painter’s tape.
- Install Hooks: For adhesive hooks, clean the wall with rubbing alcohol, press firmly, and wait 1 hour. For screw-in hooks, drill pilot holes, insert anchors, and tighten hooks.
- Hang the Lights: Start at the power end. Loop the light strand over each hook, ensuring even spacing. For a draped effect, leave 2–3 inches of slack between hooks.
- Secure the Cord: Use cord clips or wire covers to hide excess cord along the wall or baseboard.
- Test the Lights: Plug in and check for even illumination. Adjust spacing if needed.
Method 2: Ceiling-Suspended String Lights
Ideal for: Canopies, zigzag patterns, or chandelier-style installations.
- Plan the Pattern: Sketch your design (e.g., “X” pattern or grid) on paper. Measure ceiling dimensions.
- Mark Anchor Points: Use a level to mark screw positions. For drywall, locate studs or use toggle bolts.
- Install Ceiling Hooks: Drill pilot holes, insert anchors, and screw in hooks. For a grid, use a template to ensure symmetry.
- Hang the Lights: Start at one corner. Use zip ties or fishing line to attach the strand to hooks. Maintain consistent tension.
- Manage the Cord: Route the cord along ceiling beams or down a wall. Use cord covers for a clean look.
- Test and Adjust: Ensure lights hang straight and evenly. Use a ladder for high ceilings.
Method 3: Adhesive-Based Installation (Renter-Friendly)
Ideal for: Mirrors, shelves, or temporary decor.
- Clean the Surface: Wipe with rubbing alcohol to remove dust and grease. Let dry.
- Apply Adhesive Hooks: Press firmly for 30 seconds. Wait 1 hour before hanging lights.
- Wrap or Drape: For mirrors, wrap lights around the frame. For shelves, drape them along the front edge.
- Secure Loose Ends: Use clear tape or small clips to keep cords tidy.
- Test and Refine: Adjust spacing for even glow. Avoid overloading hooks (max 3 lbs).
Pro Tips for Success
- Work in Sections: Install one wall or area at a time to avoid tangling.
- Use a Helper: For large installations, have someone hold the ladder or lights.
- Check for Heat: LED lights stay cool, but incandescent bulbs can overheat. Keep them away from flammable materials.
- Label Cords: Use tags to identify different light strands for easy troubleshooting.
Maintaining and Enhancing Your String Lights
Once installed, your string lights require minimal maintenance—but a little care goes a long way in preserving their beauty and functionality. Proper upkeep also extends their lifespan and ensures safety.
Regular Maintenance
- Clean Bulbs and Cords: Dust with a microfiber cloth every 2–4 weeks. For sticky residue, use a damp cloth (unplug first!).
- Check Connections: Inspect plugs, sockets, and wires for fraying or corrosion. Replace damaged parts immediately.
- Tighten Hooks: Screws and adhesive hooks can loosen over time. Re-secure as needed.
- Test Monthly: Turn on lights for 1–2 hours to ensure all bulbs work. Replace faulty bulbs (if replaceable).
Seasonal and Holiday Upgrades
Adapt your lights for different occasions:
- Holidays: Swap warm white for colored bulbs (red/green for Christmas, orange for Halloween).
- Parties: Add motion sensors or music-synced lights for dynamic effects.
- Seasonal Themes: Pair lights with garlands (e.g., pine for winter, flowers for spring).
Energy Efficiency and Sustainability
- Use Timers: Automate lights to turn off after 4–6 hours. Saves energy and extends bulb life.
- Switch to Solar: For sunlit rooms, use solar-powered lights with indoor charging.
- Recycle Old Lights: Many retailers offer recycling programs for damaged strands.
Data Table: String Light Maintenance Schedule
| Task | Frequency | Notes |
|---|---|---|
| Dust bulbs and cords | Every 2–4 weeks | Use a dry microfiber cloth |
| Check for loose hooks | Monthly | Tighten screws or reapply adhesive |
| Test all bulbs | Monthly | Replace faulty bulbs immediately |
| Inspect cords for damage | Quarterly | Look for fraying or exposed wires |
| Deep clean (if needed) | Annually | Unplug and wipe with mild soap |
Pro Tip: Store seasonal lights in labeled, airtight containers to prevent tangling and moisture damage.
Conclusion: Light Up Your Life
Installing indoor string lights is more than a decor upgrade—it’s a way to transform your home into a sanctuary of warmth and light. By choosing the right lights, planning your layout meticulously, and following safe installation practices, you can create a cozy ambiance that reflects your personality and enhances your daily life. Whether you’re crafting a romantic bedroom retreat, a festive living room, or a functional kitchen, string lights offer endless possibilities for creativity and comfort.
Remember, the key to success lies in preparation. Measure twice, install once. Use quality materials, prioritize safety, and don’t be afraid to experiment with patterns and placements. With the steps and tips in this guide, you’re equipped to tackle any how to install indoor string lights project with confidence. From adhesive hooks for renters to ceiling grids for homeowners, there’s a solution for every space and style. So gather your tools, unleash your inner designer, and let your home shine—literally. After all, the best lighting isn’t just about visibility; it’s about creating moments of joy, relaxation, and connection. Let your string lights be the spark that ignites those moments, one gentle glow at a time.
Frequently Asked Questions
How do I install indoor string lights without damaging my walls?
Use removable adhesive hooks, tension rods, or clip-on fixtures to hang your indoor string lights without nails or screws. These methods provide secure hold while protecting paint and drywall.
What’s the best way to plan the layout for indoor string lights?
Measure your space and sketch a rough layout, considering power source proximity and desired lighting zones. For even coverage, space hooks or anchors 12–18 inches apart along the planned path.
Can I install indoor string lights on a ceiling?
Yes, use ceiling-mounted adhesive hooks, eye screws, or magnetic clips (for metal ceilings) to create a draped or grid pattern. Ensure hooks are rated for the weight of your string lights.
How do I hide the wires when installing indoor string lights?
Route cords along baseboards, behind furniture, or under rugs, using cord clips or raceways for a tidy look. For a seamless effect, choose string lights with transparent or color-matched wires.
Are there battery-powered options for installing indoor string lights in rooms without outlets?
Absolutely! Battery-powered indoor string lights with remote controls let you install them anywhere without relying on wall outlets. Just ensure batteries are accessible for easy replacement.
How do I safely install indoor string lights near curtains or fabrics?
Use LED string lights (which stay cool) and keep a 6-inch clearance from fabrics to prevent heat buildup. Secure lights with non-flammable hooks and avoid wrapping around flammable materials.

