Featured image for how to install led string lights outdoor
Image source: modernelectricaltt.com
Transform your outdoor space instantly by securely mounting LED string lights along fences, pergolas, or trees using weather-resistant hooks or clips. Ensure a professional look and safe installation by planning your layout, checking bulb spacing, and using a timer or dimmer for customizable ambiance. Always connect to a GFCI outlet and avoid overloading circuits to maximize both safety and sparkle.
How to Install LED String Lights Outdoor for Stunning Ambiance
Key Takeaways
- Plan your layout first: Measure and map light placement for balanced, even coverage.
- Choose weatherproof lights: Ensure IP65+ rating for safe, durable outdoor use.
- Use proper mounting hardware: Opt for clips or hooks to avoid damaging surfaces.
- Test lights before installing: Verify functionality to save time and avoid rework.
- Secure connections tightly: Prevent water ingress and ensure consistent power flow.
- Hide cords neatly: Use raceways or clips for a clean, professional appearance.
Why This Matters / Understanding the Problem
Imagine hosting a summer dinner party under a starry sky—except instead of stars, you’ve got a soft, warm glow wrapping around your patio like a hug. That’s the magic of how to install LED string lights outdoor for stunning ambiance.
Outdoor lighting can transform a dull backyard into a cozy, inviting space perfect for relaxation, entertaining, or even date nights. But many homeowners hesitate because they think it’s complicated, expensive, or risky.
The truth? With modern LED string lights, installation is simpler than assembling IKEA furniture. And the payoff? Huge. Whether you’re lighting up a balcony, pergola, or garden path, the right setup creates a mood that candles or harsh floodlights just can’t match.
Yet, without proper planning, you might end up with tangled wires, sagging lines, or lights that flicker in the rain. That’s why this guide focuses on safe, durable, and beautiful results—no guesswork, no regrets.
We’ll show you how to install LED string lights outdoor for stunning ambiance using practical steps, real-world tips, and tools you probably already own. No electrician required (unless you want one).
What You Need
Before you start, gather everything. A little prep now saves headaches later. Here’s your checklist for how to install LED string lights outdoor for stunning ambiance.
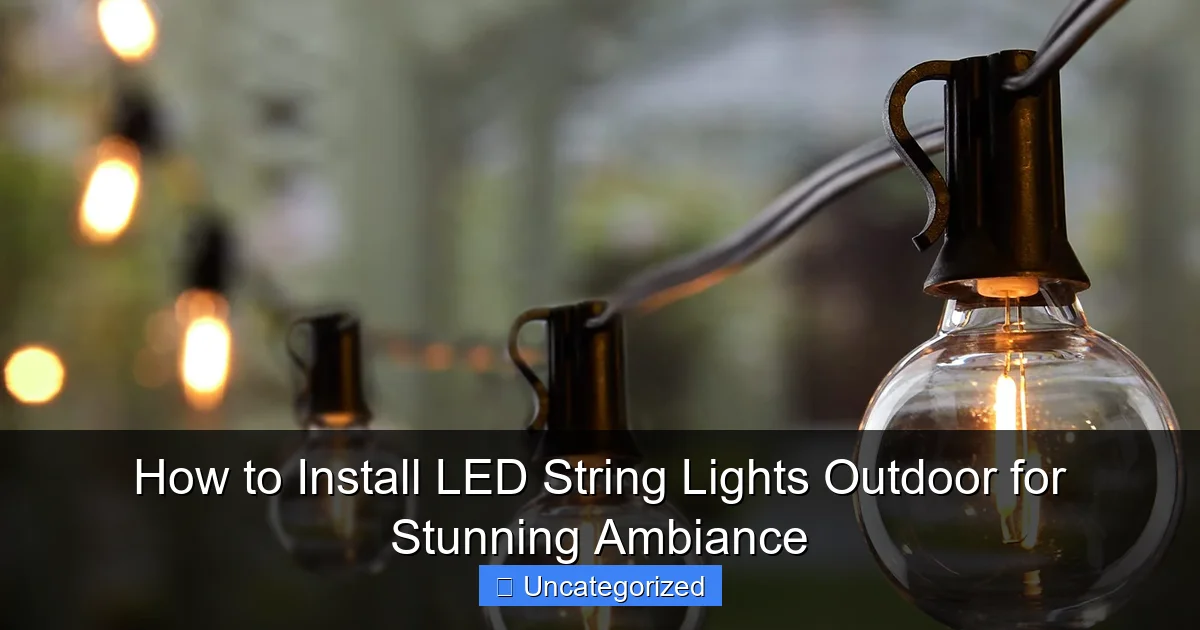
Visual guide about how to install led string lights outdoor
Image source: m.media-amazon.com
- LED string lights (outdoor-rated, weatherproof, preferably with warm white or soft color options)
- Measuring tape (to map your space)
- Stakes, clips, or hooks (plastic-coated metal, stainless steel, or adhesive outdoor mounts)
- Drill & screws (if mounting to wood, pergolas, or eaves)
- Extension cords (outdoor-rated, GFCI-protected)
- Timer or smart plug (optional but highly recommended)
- Zip ties or cord clips (for cable management)
- Ladder (if working at height)
- GFCI outlet or outdoor power source (critical for safety)
- Marker or chalk (to mark mounting points)
Pro Tip: Always buy 10–15% more string lights than you think you need. Gaps happen. You’ll want to drape, layer, or extend coverage without stressing over exact lengths.
Choose LED lights with an IP65 or IP67 rating. That means they’re dust-tight and can handle rain, snow, and humidity—essential for long-term outdoor use.
Also, consider connectable strings (end-to-end plugs) so you can chain multiple sets without overloading circuits. And look for dimmable or smart-enabled models if you want mood control via app or remote.
Step-by-Step Guide to How to Install LED String Lights Outdoor for Stunning Ambiance
Step 1: Plan Your Layout Like a Pro
Before touching a single light, sketch your space. Use graph paper or a free app like SketchUp Free or Roomstyler to visualize where the lights will go.
Ask yourself: What areas do I want to highlight? A dining table? A walkway? A tree canopy? The goal is to create layers of light, not just a single line.
For example, in a backyard with a pergola, you might run lights across the beams, drape them down the posts, and add a few strands along the edge of a fence for depth.
Warning: Avoid wrapping lights directly around tree trunks or branches unless using tree-safe products. Tight wraps can damage bark and restrict growth over time.
Use your measuring tape to calculate distances between mounting points. Write down the total linear feet you’ll need. Then, map out where each string will start and end.
If you’re using multiple strings, plan how they’ll connect. Will you use a splitter? A junction box? Or run them separately to different outlets?
Finally, identify your power source. Is there an outdoor GFCI outlet nearby? If not, you may need an extension cord (rated for outdoor use) or to install a new outlet—best done by a licensed electrician.
Planning is the secret sauce to how to install LED string lights outdoor for stunning ambiance—skip it, and you’ll regret it when lights sag or don’t reach.
Step 2: Choose the Right Mounting Method
Not all surfaces are created equal. Your mounting choice depends on where you’re installing: wood, stucco, brick, vinyl siding, or metal.
- Wood (pergolas, decks, fences): Use stainless steel eye hooks or screws with plastic caps. Drill pilot holes to prevent splitting.
- Stucco or brick: Use plastic anchors and masonry screws. Avoid adhesive hooks—they fail in heat and rain.
- Vinyl siding: Use siding clips (specialized plastic hooks that snap under the lip of the siding). No drilling required!
- Metal (gazebos, railings): Use magnetic clips or zip ties with rubber padding to avoid scratching.
- Concrete or cinderblock: Use masonry screws with plastic anchors or heavy-duty adhesive mounts (like 3M Outdoor Mounting Tape).
For temporary setups (like parties), consider freestanding light poles or ground stakes. These are great for patios with no overhead structure.
Always test the strength of your mounts before hanging lights. Give them a gentle tug. If they wiggle or feel loose, reinforce them.
And remember: the tighter the mount, the less sagging you’ll have. But don’t over-tighten—LED strings aren’t designed for tension.
This step is crucial for achieving that polished, professional look. A poorly mounted light line ruins the ambiance faster than a burnt-out bulb.
Step 3: Install Mounts at Proper Intervals
Now it’s time to put up your hooks, clips, or anchors. Spacing matters.
- For straight runs (fences, eaves, pergolas): Place mounts every 12–18 inches. Closer spacing = less sag.
- For drape or zigzag patterns: Use mounts every 24–36 inches. Let the lights hang naturally between points.
- For trees: Use flexible wire or zip ties to create a spiral pattern, starting at chest height and winding upward. Keep tension loose.
Start by marking your spots with a pencil or chalk. Use a level if you want perfectly straight lines (especially on horizontal runs).
For pergolas, install hooks on the underside of the beams. This hides the hardware and gives a floating effect.
On eaves or gutters, use gutter clips—they hook over the edge without nails or screws. Just snap them on.
For vinyl siding, align the siding clips with the seams. Snap them in place, then attach the light strand’s hanging loop.
If you’re drilling, use the smallest drill bit that fits your screw. This reduces damage to the surface and makes removal easier later.
Once all mounts are in, do a visual check. Are they evenly spaced? Are they secure? Fix any issues now—before the lights go up.
Step 4: Hang the Lights (The Fun Part!)
Now for the moment of truth: hanging the lights. Start at the power source and work outward.
- Unpack your LED strings. Unroll them fully—don’t leave them coiled.
- Plug in the first string to test. Make sure it lights up before hanging.
- Begin at the outlet. Hang the first light near the plug, then drape the strand along your planned path.
- Use the built-in hanging loops (or clips) to attach each light to your mounts. Don’t force it—gentle pressure works best.
- If connecting multiple strings, plug them together before hanging. Test the entire chain.
- For drape effects, let the lights hang 6–12 inches between mounts. For straight lines, keep them taut but not stretched.
If your lights don’t have built-in loops, use zip ties or small S-hooks to attach them to your mounts.
For trees, wrap the lights loosely in a spiral. Start at the base and move upward, leaving space between wraps so branches can grow.
On pergolas, run lights along the top beams, then drape down the posts. This creates a “lantern” effect.
For patios, consider a crisscross pattern over a dining table. Use a central pole or pergola beam as an anchor point.
As you go, keep cords organized. Use zip ties or cord clips to bundle excess wire behind mounts. This prevents tripping and keeps things tidy.
When you’re done, step back and admire your work. Turn the lights on at dusk. Adjust any sagging or misaligned strands.
Step 5: Connect to Power Safely
Safety first. This step is non-negotiable for how to install LED string lights outdoor for stunning ambiance.
- Use an outdoor GFCI outlet. These cut power instantly if there’s a ground fault—like a wet cord or short circuit.
- If your outlet isn’t GFCI-protected, install a weatherproof GFCI outlet cover or use a GFCI extension cord.
- Keep all connections (plugs, splitters) elevated and dry. Use waterproof connection covers or place them in a plastic container with a lid.
- Route cords along walls, under eaves, or through conduit—never across walkways or driveways.
- Use outdoor-rated extension cords. Indoor cords degrade quickly in sun and rain.
For long runs, check the manufacturer’s maximum connection limit. Most LED strings can connect up to 20–30 feet (3–5 sets). Overloading causes voltage drop—dim or flickering lights.
If you need more coverage, use a splitter or run multiple strings to separate outlets.
For permanent setups, consider burying low-voltage landscape wiring (with proper conduit) or installing outdoor-rated junction boxes. Again, consult an electrician if unsure.
Test your setup during rain or sprinkler use. If anything sparks or trips the breaker, disconnect and inspect.
Step 6: Add Smart Controls (Optional but Awesome)
Take your ambiance to the next level with smart controls. These aren’t just convenient—they’re energy savers and mood boosters.
- Smart plugs: Plug your lights into a Wi-Fi-enabled outlet (like Kasa or TP-Link). Control via phone, voice (Alexa, Google), or schedule.
- Smart bulbs: Use LED strings with RGB or color-changing bulbs (like Philips Hue). Change colors for holidays, parties, or relaxation.
- Timers: A simple mechanical or digital timer turns lights on at sunset and off at midnight. No app needed.
- Remote controls: Great for older models without smart features. Dim, turn on/off, or switch modes.
Set your timer to match sunset times (use a free app like Sunrise Sunset). This ensures lights come on automatically—no forgetting.
For parties, use a remote to switch to “twinkle” or “flicker” mode. Instant romance.
And if you have multiple zones (e.g., patio, garden, deck), control them separately. One tap for dinner lighting, another for late-night ambiance.
Smart controls make how to install LED string lights outdoor for stunning ambiance feel effortless—like your backyard has a personal lighting designer.
Step 7: Maintain & Store Properly
LED lights can last 10–20 years—if you treat them right.
- Inspect monthly: Check for loose mounts, frayed cords, or dead bulbs. Replace damaged strings immediately.
- Clean gently: Use a soft brush or microfiber cloth to remove dust. Avoid water or harsh cleaners.
- Winter care: If you live in a snowy climate, consider removing lights or using winter-rated models. Ice buildup can snap wires.
- Storage: When not in use, coil lights loosely and store in a dry, cool place. Use a labeled bin or original packaging.
- Label cords: Use tags or tape to mark which string goes where. Saves time next season.
For permanent installations, inspect mounts annually. Wood can rot, vinyl can warp. Replace as needed.
If a bulb fails, check if it’s replaceable. Many LED strings use sealed units—whole strand replacement is easier than fixing one bulb.
And if you’re taking lights down, do it carefully. Don’t yank or cut cords. Unplug and detach one mount at a time.
Proper care ensures your lights keep creating that magical ambiance for years.
Pro Tips & Common Mistakes to Avoid
Even with a perfect plan, things can go sideways. Here’s how to stay ahead of the curve.
Pro Tip: Use dimmable LED strings. Bright isn’t always better. Dimming creates a softer, more intimate glow—perfect for evenings.
Common Mistake #1: Overloading the circuit. Too many strings on one outlet can trip breakers. Use a power strip with surge protection—but never exceed the rated load.
Pro Tip: Layer your lights. Combine string lights with path lights, lanterns, or candles. This adds depth and avoids a “runway” look.
Common Mistake #2: Ignoring weather ratings. “Indoor/outdoor” doesn’t mean “stormproof.” Only use lights rated IP65 or higher outdoors.
Pro Tip: Use reflective surfaces to amplify light. A white fence, mirror, or metallic planter bounces light and makes the space feel brighter.
Common Mistake #3: Hanging lights too high. If they’re above eye level, you lose the cozy effect. Aim for 7–8 feet for patios, 5–6 feet for dining areas.
Pro Tip: For rental properties, use adhesive hooks or freestanding poles. No drilling, no damage, no landlord issues.
Common Mistake #4: Leaving cords exposed. Trip hazards and UV damage shorten lifespan. Tuck cords behind furniture or use cord covers.
Bonus: Take photos of your setup before and after. Share on social media or save for next year. You’ll forget the details—and wish you had them.
FAQs About How to Install LED String Lights Outdoor for Stunning Ambiance
Can I leave LED string lights outside all year?
Yes—but only if they’re rated for year-round outdoor use (IP65 or higher). In snowy or icy climates, consider removing them or using weatherproof enclosures for connections. Always inspect before each season.
How many strings can I connect together?
Check the manufacturer’s label. Most LED strings allow 3–5 sets (20–30 feet total). Exceeding this causes voltage drop—lights get dimmer toward the end. Use splitters or separate circuits for longer runs.
Do I need a permit to install outdoor lights?
For plug-and-play setups, no. But if you’re running new wiring, adding outlets, or installing low-voltage landscape lighting, check local codes. Some areas require permits for permanent electrical work.
What’s the best color temperature for outdoor ambiance?
Warm white (2700K–3000K) is ideal. It mimics candlelight and feels cozy. Avoid cool white (4000K+)—it looks clinical, not inviting. For parties, RGB or color-changing lights add fun.
How do I prevent sagging in long runs?
Use more mounts (every 12 inches), choose heavier-duty strings, or add a support wire (like thin steel cable) behind the lights. Run the wire first, then clip lights to it.
Are solar-powered LED lights a good option?
For low-use areas (like garden paths), yes. But they’re dimmer and less reliable in cloudy areas. For primary ambiance, stick with plug-in lights. Solar is best for accent lighting.
Can I use string lights on a balcony?
Absolutely! Use adhesive hooks, railing clips, or freestanding poles. Just avoid drilling if you’re renting. Drape lights along railings or create a canopy over a bistro table.
Final Thoughts
Creating a magical outdoor space isn’t about spending a fortune. It’s about intention, creativity, and the right tools.
Now that you know how to install LED string lights outdoor for stunning ambiance, you can transform any backyard, patio, or balcony into a place people never want to leave.
Start small. Maybe just a single strand over your dining table. Then expand. Add layers. Experiment with color, height, and pattern.
Remember: the best lighting feels natural, not forced. It guides the eye, highlights beauty, and makes people feel at ease.
So grab your tools, sketch your plan, and get glowing. Your next dinner party, movie night, or quiet evening under the stars is about to get a whole lot brighter.
And when your friends ask, “Who did your lighting?”—just smile and say, “I did. It’s easier than you think.”
Now go shine. Your ambiance awaits.

