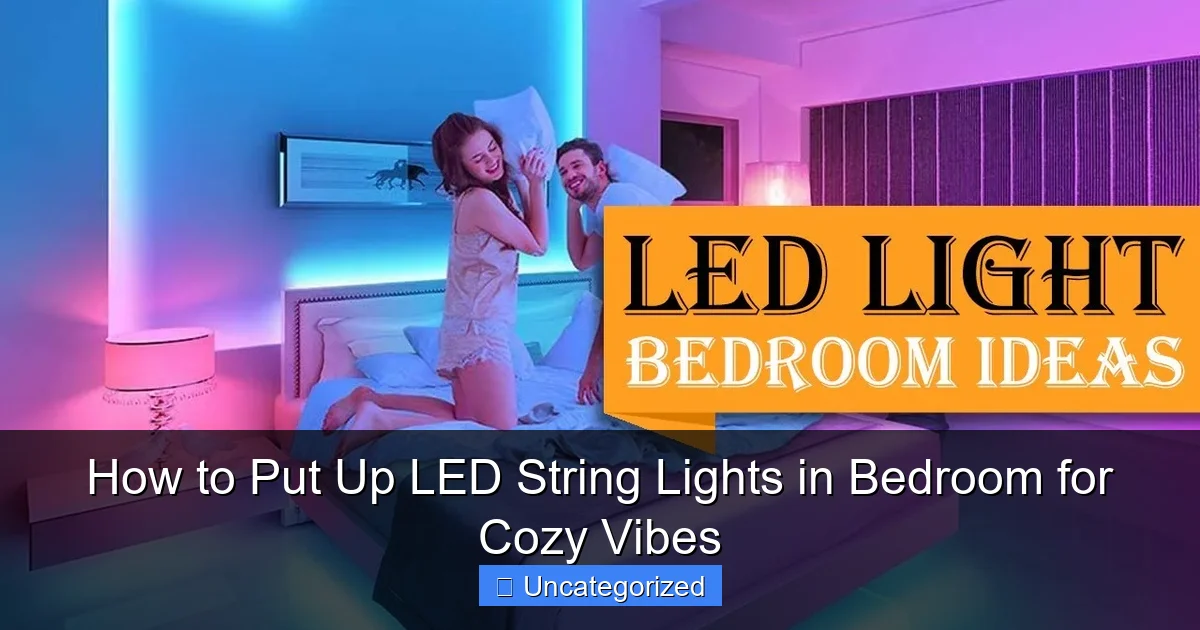
Featured image for how to put up led string lights in bedroom
Image source: i.ytimg.com
Transform your bedroom into a cozy retreat by strategically placing LED string lights along the headboard, walls, or ceiling for soft, ambient glow. Use adhesive hooks, clips, or removable tape to secure the lights without damaging surfaces, ensuring a clean and safe setup. Opt for warm white or color-changing LEDs to instantly elevate the mood and create a relaxing, inviting atmosphere perfect for unwinding.
“`html
How to Put Up LED String Lights in Bedroom for Cozy Vibes
Key Takeaways
- Plan your layout: Sketch light placement before installing for balanced, cozy coverage.
- Use adhesive hooks: Secure lights without nails or damage to walls.
- Hide cords neatly: Tuck wires along edges or behind furniture for a clean look.
- Choose warm white LEDs: Opt for 2700K-3000K for a calming, inviting glow.
- Layer with other lights: Combine with lamps or candles for depth and ambiance.
- Test before finalizing: Check brightness and spacing to avoid over- or under-lighting.
Why This Matters / Understanding the Problem
Ever walked into a bedroom that just felt warm, inviting, and peaceful? Chances are, soft lighting—especially LED string lights—played a big role. But if you’ve ever tried how to put up LED string lights in bedroom for cozy vibes, you know it’s not as simple as hanging them randomly.
Too many lights can feel tacky. Poor placement leads to shadows or glare. And let’s be honest—some setups look like a college dorm disaster. The goal isn’t just brightness; it’s creating a mood. A space where you can unwind, read, or fall asleep feeling calm.
Whether you’re transforming your master bedroom, a teen’s room, or a guest space, the right lighting sets the tone. And LED string lights are perfect: energy-efficient, safe, and versatile. With a little planning, you can achieve that Pinterest-worthy glow—without spending hours or damaging your walls.
That’s why we’re diving deep into how to put up LED string lights in bedroom for cozy vibes. No guesswork. No mess. Just a step-by-step plan that works for renters, homeowners, and anyone who wants a little magic in their nightly routine.
What You Need
Before you start, gather these tools and materials. You don’t need a toolbox—just a few simple items you probably already have.
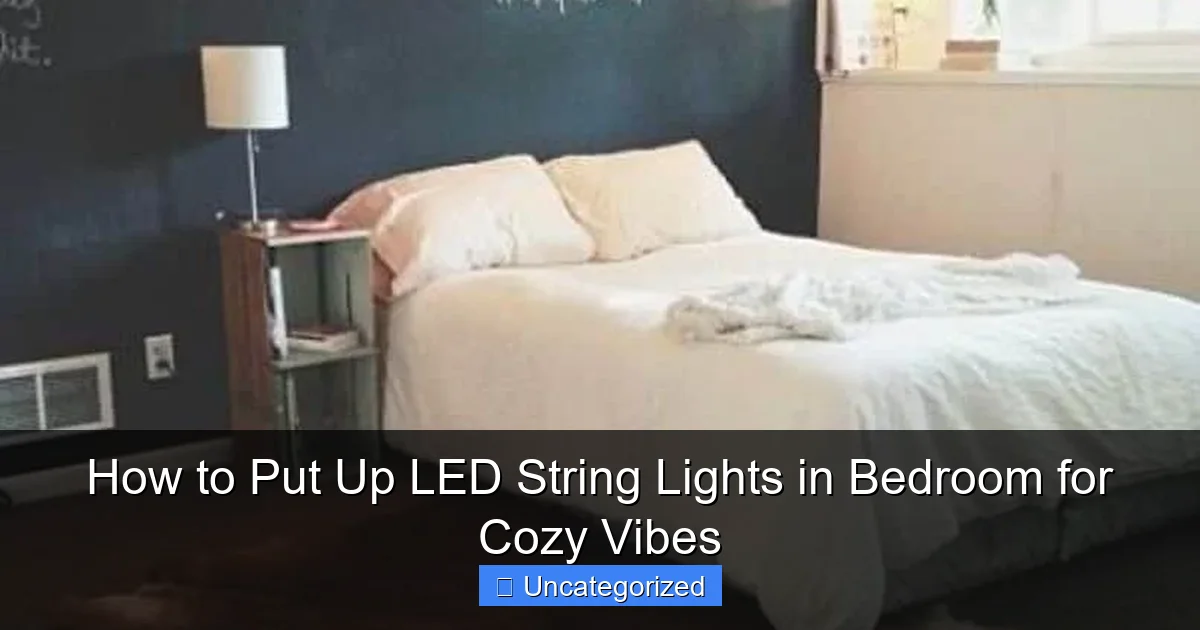
Visual guide about how to put up led string lights in bedroom
Image source: cdn.diys.com
- LED string lights (battery-powered or plug-in, 10–20 ft recommended)
- Command hooks, adhesive clips, or removable mounting tape (renter-friendly!)
- Measuring tape or ruler
- Scissors (for trimming excess wire or zip ties)
- Zip ties or twist ties (to manage cords)
- Pencil or masking tape (for marking spots)
- Timer or smart plug (optional, for automatic on/off)
- Ladder or step stool (if placing lights high up)
Pro Tip: Choose warm white or soft yellow LEDs (2700K–3000K color temperature) for true cozy vibes. Avoid cool blue or daylight white—they feel clinical, not calming.
For renters: Stick to damage-free solutions like 3M Command Strips, adhesive clips, or tension rods. No nails, screws, or permanent glue. For homeowners, you can use small nails or picture hangers—but even then, removable options are safer and easier to adjust.
Step-by-Step Guide to How to Put Up LED String Lights in Bedroom for Cozy Vibes
Let’s get into the nitty-gritty. These steps are designed for real people—no interior design degree required. Whether you want lights around the bed, along the ceiling, or behind furniture, this guide covers it all.
Step 1: Plan Your Layout (The Secret to Success)
Before touching a single hook, sketch your bedroom layout. Decide where you want the lights to go. Think about what areas need mood lighting and which spots are too bright or distracting.
- Headboard area: Frame your bed for instant coziness.
- Ceiling perimeter: Create a soft glow around the room.
- Behind the bed or dresser: Add depth and dimension.
- Along the top of a bookshelf or mirror: Highlight decor.
- Under floating shelves: Cast a warm downlight.
Use painter’s tape or chalk to mark where each hook or clip will go. This helps you visualize spacing and avoid overhangs.
Warning: Don’t overcrowd. Too many lights can feel chaotic. Aim for 6–10 ft of string lights per 100 sq ft of room. For a 12×12 ft bedroom, 12–15 ft is usually perfect.
Also, plan the power source. If using plug-in lights, map the cord route. You don’t want a tripping hazard or visible wires. Battery-powered lights give you more freedom—but remember to replace batteries regularly.
Step 2: Choose the Right Mounting Method (Renter vs. Owner)
This step is crucial. The mounting method affects how long your lights stay up—and whether your landlord will notice.
For Renters (Damage-Free Options):
- Command Picture Hanging Strips: Great for headboards, walls, and ceilings. Holds up to 5 lbs—more than enough for string lights.
- Adhesive LED clips: Small plastic clips that stick to walls. Perfect for guiding lights along edges or corners.
- Tension rods: Place between walls or behind the bed. Drape lights over the rod for a canopy effect.
- Removable mounting tape: Use for temporary setups (e.g., holiday lights).
For Homeowners (More Secure Options):
- Small nails or picture hooks: Use for permanent installations. Hammer lightly to avoid cracking drywall.
- Screw-in hooks: Ideal for heavier strings or outdoor-rated lights brought indoors.
- Track lighting clips: For modern, sleek ceiling runs.
Pro Tip: Test adhesive strength on a hidden area first. Some paints (especially matte or textured) can make Command Strips less effective.
For how to put up LED string lights in bedroom for cozy vibes, removable options are best for most people. They’re easy to adjust, safe, and don’t leave marks.
Step 3: Measure and Mark Your Spots
Grab your measuring tape and pencil. Measure the length of your LED string lights. Then, divide that by the number of mounting points.
For example: If you have a 15-ft string and want 8 clips, place one every 18–24 inches. This keeps the lights taut and prevents sagging.
- Use a level (or phone app) to ensure straight lines—especially on ceilings.
- Mark spots with a pencil or small piece of tape.
- Double-check spacing before sticking anything down.
For headboard installations: Measure from the top edge down 2–3 inches. This keeps the lights visible but not blinding when you’re lying down.
Warning: Avoid placing clips too close to electrical outlets, vents, or ceiling fans. Heat and airflow can damage adhesives or shorten light life.
Step 4: Install the Mounting Hardware
Now it’s time to stick, screw, or clip. Follow the instructions on your chosen hardware.
For Command Strips:
- Clean the wall with rubbing alcohol and let dry.
- Press the strip firmly for 30 seconds.
- Wait 1 hour before hanging the lights (this builds strength).
For Adhesive Clips:
- Peel and stick directly to the wall.
- Press each clip for 10–15 seconds.
- Let sit 30 minutes before use.
For Tension Rods:
- Extend the rod between two walls or behind the bed.
- Adjust until it’s snug (no screws needed).
- Drape lights over the top.
Pro Tip: Use a ladder or step stool for ceiling installations. Always have someone spot you for safety.
Once all mounts are in place, do a quick test. Gently tug each one to make sure it’s secure. Better to catch a loose clip now than after the lights are up.
Step 5: Hang the Lights (Start from the Power Source)
Here’s a key rule: Always start hanging from the power source. This keeps the cord organized and prevents tangles.
- For plug-in lights: Start at the outlet, then work outward.
- For battery-powered: Start at the battery pack, then string along the path.
Clip each bulb or socket into the mount. Don’t stretch the wire—just let it hang naturally. For longer runs, use zip ties every 3–4 ft to guide the cord behind furniture or along baseboards.
For a canopy effect above the bed:
- Hang lights in a zigzag or crisscross pattern between wall mounts.
- Use extra clips to create gentle dips.
- Let the center sag slightly (2–3 inches) for a soft, draped look.
For a ceiling perimeter:
- Run lights along all four walls, just below the ceiling.
- Use corner clips to make smooth 90-degree turns.
- Hide the plug end behind a dresser or nightstand.
Warning: Never cover LED bulbs with fabric or tape. They need airflow to stay cool and last longer.
Step 6: Manage the Cord and Battery Pack
Nothing ruins cozy vibes like a messy cord. Tame the wire with these tricks:
- Zip ties: Bundle excess cord behind furniture or along baseboards.
- Adhesive cord clips: Stick to walls to guide the wire neatly.
- Velcro strips: Wrap around the cord for easy adjustments.
- Hide the battery pack: Tuck it under the bed, in a drawer, or in a decorative box.
For plug-in lights, use a power strip with a switch or a smart plug. This lets you turn lights on/off without reaching behind furniture.
Pro Tip: Use a timer (built-in or smart plug) to turn lights off automatically. This saves energy and ensures you don’t wake up to a bright room.
For renters: If the plug is visible, cover it with a small plant, book stack, or decorative basket. No one needs to see the tech.
Step 7: Test, Adjust, and Enjoy
Turn the lights on. Stand back and look. Are there dark spots? Is the glow too harsh? Make small tweaks:
- Move a clip 2 inches to fix a sag.
- Add a clip to brighten a shadowed area.
- Adjust the battery pack for easier access.
Try different times of day. Lights look different at noon vs. midnight. Make sure the brightness suits your needs.
For extra coziness, layer with other lighting:
- A small table lamp for reading.
- Fairy lights in a mason jar for a bedside accent.
- Dimmer switches for overhead lights.
Warning: Never leave LED string lights on unattended for long periods (e.g., while traveling). While they’re safe, it’s a smart fire safety habit.
Pro Tips & Common Mistakes to Avoid
Even small mistakes can turn your cozy dream into a lighting disaster. Here’s what the pros know—and what newbies often get wrong.
- Use warm white LEDs (2700K–3000K): Cool white (5000K+) feels like a hospital. Warm white mimics candlelight—perfect for relaxation.
- Space lights evenly: Clusters create hot spots. Gaps leave shadows. Aim for 6–12 inches between bulbs.
- Hide the power source: A dangling plug or visible battery pack breaks the mood. Tuck it away.
- Don’t overload circuits: Plug LED lights into a surge protector, not directly into a wall outlet with other high-wattage devices.
- Test adhesive strength: Some paints (like eggshell or satin) reduce stickiness. Use extra strips if needed.
- Use timers or smart plugs: No more forgetting to turn lights off. Set them to turn on at sunset and off at bedtime.
- Choose the right length: Measure your room first. A 10-ft string won’t cover a 15-ft wall.
Common Mistake #1: Hanging lights too high. If they’re near the ceiling, they cast shadows on your face when you’re in bed. Lower placement (just above headboard or at eye level) feels more intimate.
Common Mistake #2: Using too many colors. Stick to one color (white, warm white, or soft pink) for a unified look. Rainbow lights can feel childish or chaotic.
Common Mistake #3: Skipping the layout plan. Random hanging = uneven glow. A quick sketch saves time and frustration.
For how to put up LED string lights in bedroom for cozy vibes, the key is balance: enough light to feel warm, not so much that it feels like a party.
FAQs About How to Put Up LED String Lights in Bedroom for Cozy Vibes
Got questions? We’ve got answers—straight from real users and lighting experts.
1. Can I use LED string lights in a rental apartment?
Absolutely! Use Command Strips, adhesive clips, or tension rods. These leave no damage and are easy to remove. Just avoid nails, screws, or strong glue. Most landlords won’t even notice.
2. How long do LED string lights last?
Most last 25,000–50,000 hours—that’s 5–10 years with regular use. Battery-powered lights may need new batteries every 20–40 hours of use. Rechargeable models are a great upgrade.
3. Are LED string lights safe to leave on all night?
Yes, but with caveats. LEDs generate very little heat, so they’re safer than incandescent bulbs. However, it’s best to use a timer or smart plug to turn them off after a few hours. Never cover them with fabric or leave them on while away for days.
4. How do I hide the cord without damaging walls?
Use adhesive cord clips to guide the wire along baseboards or behind furniture. For plug-in lights, run the cord behind a dresser or nightstand. For battery packs, tuck them in a drawer or under a bed skirt.
5. What’s the best placement for a cozy bedroom?
Top choices: around the headboard, along the ceiling perimeter, or behind the bed in a canopy style. Avoid placing lights directly above your pillow—it can be too bright when lying down.
6. Can I cut or shorten LED string lights?
It depends. Some strings have cut lines marked every few bulbs. Cutting elsewhere can ruin the circuit. Check the manual first. If unsure, buy a shorter string or use zip ties to bundle excess.
7. Do I need a dimmer for cozy vibes?
Not required, but helpful. Many LED strings have built-in dimmers or multiple brightness settings. If yours doesn’t, use a smart plug with dimming capability or layer with other lights (like a soft table lamp).
Final Thoughts
Creating cozy vibes in your bedroom isn’t about spending a fortune. It’s about thoughtful details—and lighting is one of the most powerful. With the right setup, LED string lights can transform your space from plain to peaceful in under an hour.
Remember: how to put up LED string lights in bedroom for cozy vibes isn’t just about hanging them. It’s about placement, spacing, cord management, and choosing the right color temperature. A little planning goes a long way.
Start small. Try framing your headboard first. Then expand to the ceiling or shelves. Use removable hardware so you can adjust as needed. And don’t forget the timer—so you can drift off to soft light, not a bright glow.
Your bedroom should feel like a sanctuary. With these tips, it can be. Now go grab those lights, turn off the overhead, and enjoy your new cozy corner of the world.
Happy lighting!
“`

