Featured image for how to shorten a string of 50 led lights
Image source: res.cloudinary.com
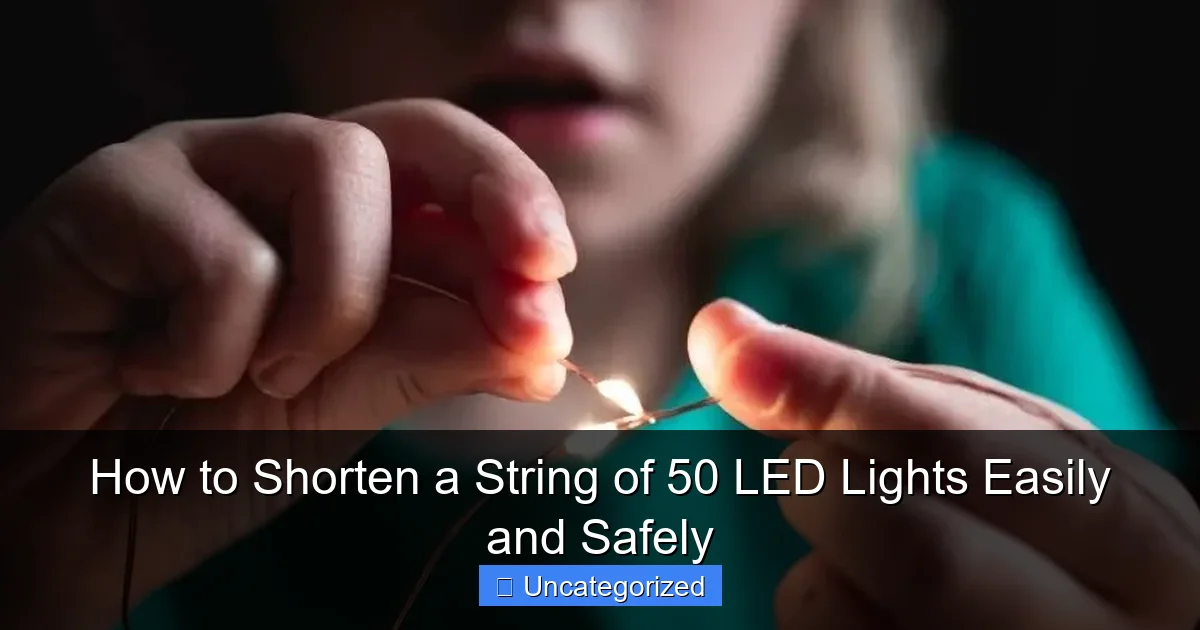
Always cut LED light strings at the designated cut points—usually marked by a pair of scissors icon near each bulb socket—to ensure safety and prevent damage to the circuit. Use sharp wire cutters and strip the wires carefully if removing extra bulbs, then insulate the end with electrical tape or a connector cap to maintain waterproofing and functionality. This method lets you customize your 50-light string without risking shorts or fire hazards.
How to Shorten a String of 50 LED Lights Easily and Safely
Key Takeaways
- Cut only at marked points to avoid damaging the circuit.
- Unplug before cutting for safety and precision.
- Use sharp wire cutters for clean, fray-free cuts.
- Seal cut ends properly to prevent moisture damage.
- Test lights after shortening to ensure functionality.
- Keep extra connectors for future adjustments or repairs.
Why This Matters / Understanding the Problem
You’ve got a beautiful string of 50 LED lights—perfect for wrapping around a tree, draping along a mantle, or brightening up a bedroom. But what if it’s just a little too long? Maybe you end up with a tangled mess or lights dangling where you don’t want them. That’s where learning how to shorten a string of 50 LED lights easily and safely comes in handy.
Unlike old incandescent holiday lights, LED strings are more energy-efficient, last longer, and often come with smart features like timers or color modes. But they’re also more delicate in their wiring. Cutting them the wrong way can break the circuit, ruin the whole strand, or even create a safety hazard. The good news? With the right approach, you can trim your lights without losing function or style.
This guide walks you through the process step by step, focusing on how to shorten a string of 50 LED lights easily and safely—so you get a perfect fit every time. Whether you’re decorating for the holidays, setting up mood lighting, or just organizing your space, this method keeps your lights working and looking great.
What You Need
Before you start, gather the right tools. Having everything ready makes the job faster and reduces the risk of mistakes. Here’s your quick checklist:
Visual guide about how to shorten a string of 50 led lights
Image source: oillampman.com
- String of 50 LED lights (make sure they’re unplugged and cool)
- Wire cutters or sharp scissors (preferably small, precision ones)
- Electrical tape (18–20 mil vinyl, UL-listed)
- Heat-shrink tubing (optional but recommended) (3/16″ or 1/8″ diameter)
- Heat source (candle, lighter, or heat gun for shrinking tubing)
- Multimeter (optional) – helps test continuity if you’re unsure
- Needle-nose pliers – for bending and securing wires
- Marker or masking tape – to mark where to cut
- Small piece of sandpaper (400+ grit) – for cleaning wire ends
Bonus: A work surface with good lighting and a magnifying glass (if your eyes need help) can make the process easier, especially with tiny wires.
Note: This method works best for non-parallel LED strings (where all bulbs are on a single circuit). If your lights are in parallel (each bulb has its own path), cutting may disable only part of the strand—check your manual first.
Step-by-Step Guide to How to Shorten a String of 50 LED Lights Easily and Safely
Step 1: Unplug and Inspect the Light String
Start by unplugging the lights from any power source. Even if they’re battery-powered, remove the batteries. Safety first—never work on live circuits.
Now, lay the string out flat on a clean surface. Look closely at the wiring. Most 50-bulb LED strings have two main wires (positive and negative) running through the entire length, with tiny wires branching off to each bulb.
Check for any cut points—some manufacturers design strings with pre-marked sections (like every 10 bulbs) where it’s safe to trim. These are often labeled or have slightly thicker insulation. If yours has them, use them! If not, don’t worry—we’ll help you find the right spot.
Pro Tip: Take a photo of the full string before cutting. It’s your backup plan if something goes wrong.
Step 2: Decide How Many Bulbs to Remove
Measure where you want the lights to end. For example, if you’re wrapping a 4-foot banister and each bulb is 2 inches apart, you’ll need about 24 bulbs (48 inches ÷ 2). That means you’ll cut off the last 26 bulbs.
Use a marker or small piece of masking tape to label the bulb just before where you plan to cut. This is your “keep” section. The bulbs after this point will be removed.
Important: Never cut between two bulbs unless you know the wiring layout. LEDs are usually soldered in series, so cutting mid-wire without reconnecting can break the circuit.
Instead, cut after the last bulb you want to keep, leaving the bulb’s base and its tiny branch wires intact. This preserves the circuit up to that point.
Example: If you want 24 bulbs, count 24 from the plug end, then mark the 25th bulb’s base as your cut point.
Step 3: Identify the Main Power Wires
Now, look closely at the base of the last bulb you’re keeping. You’ll see two thin wires (sometimes twisted together) that connect to the bulb—these are the branch wires.
Behind those, you’ll find two thicker, continuous wires running the entire length. These are the main positive and negative wires that power the whole string.
Use your fingers or a magnifying glass to trace them back. They’re usually colored (red = positive, green or black = negative), but not always. If they’re not labeled, don’t guess—use a multimeter in continuity mode to identify them later.
Once you’ve confirmed the main wires, bend the branch wires (going to the bulb) slightly to the side. You want to access the main wires without cutting them accidentally.
Warning: Cutting the main wires too close to the bulb base can damage the solder joint. Leave at least 1/2 inch of wire after the bulb’s connection.
Step 4: Cut the Main Wires Carefully
With the branch wires moved aside, take your wire cutters and cut the two main wires just behind the last bulb you’re keeping. Aim for about 1 inch from the bulb’s base.
Make clean, straight cuts—don’t crush or fray the wires. If the insulation is thick, you may need to score it with the cutter’s tip before slicing.
Now, gently pull the cut end apart to expose the inner copper strands. You should see 2–4 strands per wire. Use sandpaper to clean off any coating or oxidation (this helps with soldering later).
If your lights have a third wire (common in color-changing or smart strings), don’t cut it! These control signals or data. Instead, insulate it separately with electrical tape—don’t leave it bare.
At this point, you’ve shortened the string. But the exposed wires are dangerous and could short out. That’s why the next steps are crucial.
Step 5: Insulate the Cut Ends (Two Methods)
You have two safe ways to finish: electrical tape (quick) or heat-shrink tubing (more durable). Choose based on where the lights will be used.
Method A: Electrical Tape (Best for Indoor, Short-Term Use)
- Twist the exposed copper strands of each wire to keep them neat.
- Wrap each wire end with 3–4 layers of electrical tape, starting 1 inch below the cut and going 1 inch above.
- Make sure the tape overlaps by at least 50% with each wrap—no gaps!
- Then, wrap both wires together with another layer to keep them separated and secure.
This method is great for mantels, bookshelves, or indoor holiday decor. Just remember: tape can loosen over time, especially near heat sources.
Method B: Heat-Shrink Tubing (Best for Outdoor or Long-Term Use)
- Slide a 2-inch piece of heat-shrink tubing over the cut end before you cut the wires (if you forgot, use tape as backup).
- After cutting, twist the copper strands.
- Slide the tubing so it covers the exposed wires and part of the insulation.
- Use a lighter, candle, or heat gun to shrink the tubing evenly. Move the heat source back and forth—don’t hold it in one spot.
- For extra safety, slide a second piece of tubing over both wires together.
Heat-shrink creates a waterproof, snug seal. It’s perfect for porch railings, trees, or any spot exposed to rain or humidity.
Pro Tip: If you don’t have heat-shrink, use dual-wall adhesive-lined heat-shrink for even better protection.
Step 6: Test the Lights
Now, plug in the shortened string (or insert batteries). Do the remaining bulbs light up? If yes—great! If not, don’t panic. Here’s what to check:
- Are the main wires touching? If so, unplug and re-insulate.
- Is the plug end damaged? Look for frayed wires or loose connections near the plug.
- Did you cut a data wire? If your lights have color modes or timers, cutting a third wire might disable those features (but not the power).
- Use a multimeter: Set it to continuity mode. Touch one probe to the positive wire at the plug and the other to the cut end’s positive wire. If it beeps, the circuit is intact.
If only part of the string works, you may have a parallel circuit—common in high-end or commercial lights. In that case, shortening requires reconnecting wires, which is more advanced (see FAQs).
For most 50-bulb strings, though, this test should pass. If it does, you’ve successfully learned how to shorten a string of 50 LED lights easily and safely!
Step 7: Store or Reuse the Extra Section (Optional)
The cut-off end isn’t trash! You can repurpose it for smaller projects:
- Use the extra bulbs to make a mini garland for a wreath or table centerpiece.
- Cut and rewire them into a battery-powered nightlight (use a 3V coin battery and a switch).
- Keep the wires for crafts or electronics projects.
Just remember to insulate the cut end of the leftover section too—don’t leave bare wires lying around.
Pro Tips & Common Mistakes to Avoid
Even with careful steps, things can go wrong. Here’s how to avoid the most common pitfalls:
- Don’t cut between bulbs. LEDs are often soldered directly to the wires. Cutting mid-wire without reconnecting breaks the circuit.
- Never leave wires bare. Exposed copper can short out or shock you. Always insulate—no exceptions.
- Don’t use regular tape. Duct tape, packing tape, or masking tape can melt, loosen, or catch fire. Use only electrical tape or heat-shrink.
- Don’t cut the plug end. The plug contains resistors and fuses. Cutting it can damage the whole string.
- Don’t ignore the third wire. In RGB or smart lights, cutting the data wire disables color changes or app control. Insulate it, don’t cut it.
- Don’t rush the insulation. Take your time. A poorly sealed end will cause problems later, especially outdoors.
- Don’t forget to test. Always plug in after cutting. It’s the only way to know if your circuit is intact.
Pro Tip: Label your shortened string with the number of bulbs left (e.g., “24 bulbs”) using a small tag. It helps when you store or reuse it next season.
Bonus: For extra durability, coat the insulated end with a dab of dielectric grease (used for electrical connections). It prevents corrosion and moisture damage—especially useful for outdoor use.
Another pro move: If you’re shortening multiple strings, standardize the length. Cut all to the same number of bulbs. This makes storage easier and ensures uniform brightness.
FAQs About How to Shorten a String of 50 LED Lights Easily and Safely
1. Can I cut any LED light string?
Most series-wired LED strings (where all bulbs share one circuit) can be shortened. But parallel-wired strings (each bulb has its own path) are trickier. If you cut one branch, only that bulb goes out. However, the main wires still need to be insulated. Check your manual or look for “parallel” in the product description. If unsure, stick to series strings.
2. What if my lights have color modes or a timer?
Many smart LED strings have a third wire for data or control signals. If you cut it, the lights may still turn on, but you’ll lose color changes, brightness settings, or timer functions. To keep these features, don’t cut the third wire. Insulate it separately. Or, use the shortened string for static white light only.
3. Can I reconnect the cut end to make a loop?
Technically, yes—but it’s not recommended. Reconnecting requires soldering and matching wire polarity. A mistake can short the circuit or overload the plug. For loops, buy a light string coupler (available online) or use a plug-and-socket extension instead. It’s safer and easier.
4. What if I cut too many bulbs?
Unfortunately, you can’t easily “re-add” bulbs. But you can extend the string with a new section. Use a light string connector or splice in a matching set (same voltage and wiring). Just make sure the total length doesn’t exceed the power source’s limit (usually 200–300 bulbs max for 120V).
5. Are shortened LED strings safe outdoors?
Yes—if insulated properly. Use heat-shrink tubing or heavy-duty electrical tape. Avoid cutting near metal objects (like gutters) that could conduct electricity. For extra protection, plug into a GFCI outlet (ground fault circuit interrupter), which shuts off power if a short occurs.
6. Why do some LED strings have “cut here” marks?
Some manufacturers design strings with modular sections (e.g., every 10 bulbs). These are safe cut points because the wiring is reinforced or the circuit is designed to handle breaks. Always use these marks if available. They’re the easiest way to shorten without soldering or testing.
7. Can I shorten battery-powered LED strings?
Yes! The process is the same. Just remove the batteries first. Battery-powered strings often run on 3V (2 AA batteries) or 4.5V (3 AA batteries). Cutting won’t affect voltage, but always insulate the ends. Note: Some have a third wire for a switch—don’t cut it.
Final Thoughts
Learning how to shorten a string of 50 LED lights easily and safely gives you more control over your decor. No more tangled wires, wasted space, or lights that don’t fit. With just a few tools and careful steps, you can customize any strand to your space.
Remember: unplug first, cut after the last bulb, insulate thoroughly, and test before hanging. These four rules keep your project safe and successful.
And don’t throw away the extras! Repurpose them for crafts, mini lights, or storage. LED lights are durable—make the most of them.
Next time you’re setting up for the holidays, a party, or just a cozy night in, you’ll know exactly how to adjust your lights for the perfect fit. No more guessing, no more frustration.
Now grab your cutters, mark your spot, and get trimming. Your space—and your sanity—will thank you.

