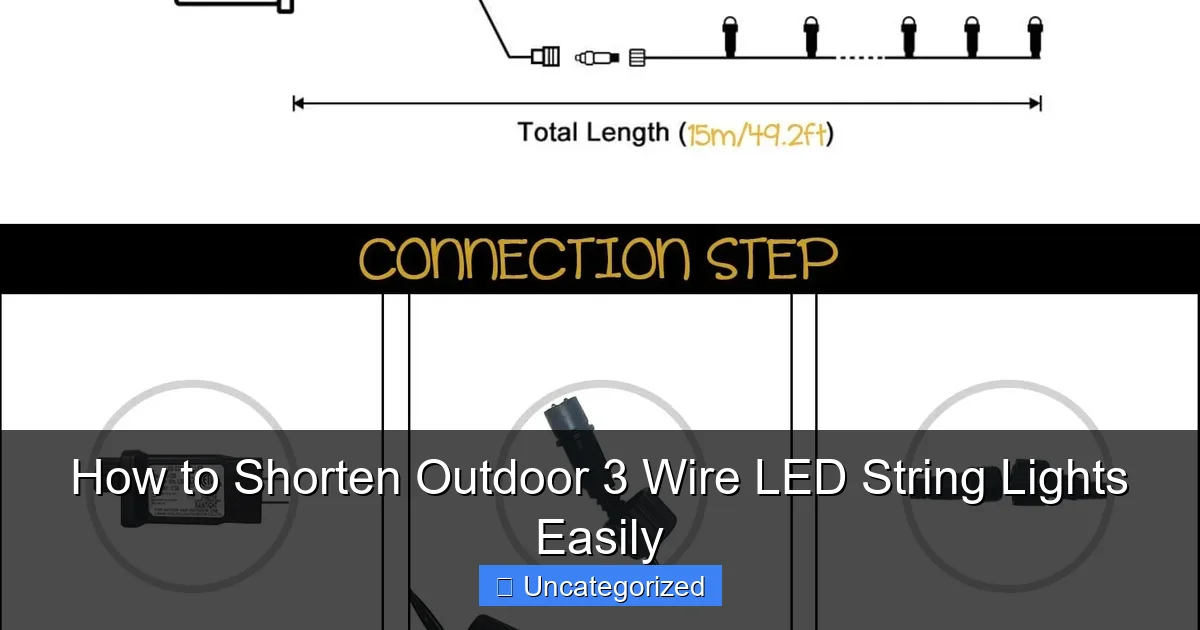
Featured image for how to shorten outdoor 3 wire led string lights
Image source: i2.wp.com
Shorten your outdoor 3-wire LED string lights safely by cutting only the positive (marked) wire and insulating all exposed ends to maintain waterproof integrity. Always disconnect power first and use wire strippers, solder, and heat-shrink tubing for a secure, weatherproof connection. Never cut neutral or ground wires—this preserves functionality and safety.
“`html
How to Shorten Outdoor 3 Wire LED String Lights Easily
Key Takeaways
- Identify the cut point: Locate the designated cutting mark on the wire before trimming.
- Use sharp wire cutters: Ensure clean, precise cuts to avoid damaging internal wiring.
- Seal ends properly: Apply waterproof caps or silicone to prevent moisture ingress.
- Test before installing: Verify functionality after shortening to catch errors early.
- Follow manufacturer guidelines: Adhere to spacing rules for bulb removal and wire handling.
- Preserve wire integrity: Avoid cutting too close to solder joints or connectors.
Why This Matters / Understanding the Problem
Outdoor 3 wire LED string lights are a popular way to add ambiance to patios, decks, and backyards. But what happens when your string is just too long for your space? You might end up with tangled cords, messy loops, or even safety hazards from excess wire dangling near walkways.
That’s where knowing how to shorten outdoor 3 wire LED string lights easily becomes a game-changer. Unlike single-wire lights, 3 wire systems have multiple internal circuits—typically for different sections or color channels—so cutting them wrong can ruin the entire strand. This guide walks you through the process safely and effectively, so you can customize your lighting without buying new lights or calling an electrician.
Whether you’re setting up for a summer party, holiday decor, or year-round backyard vibes, shortening your LED lights gives you control over placement, appearance, and safety. Let’s get started.
What You Need
Before you begin, gather the right tools and materials. Having everything on hand saves time and prevents mistakes. Here’s a quick checklist:
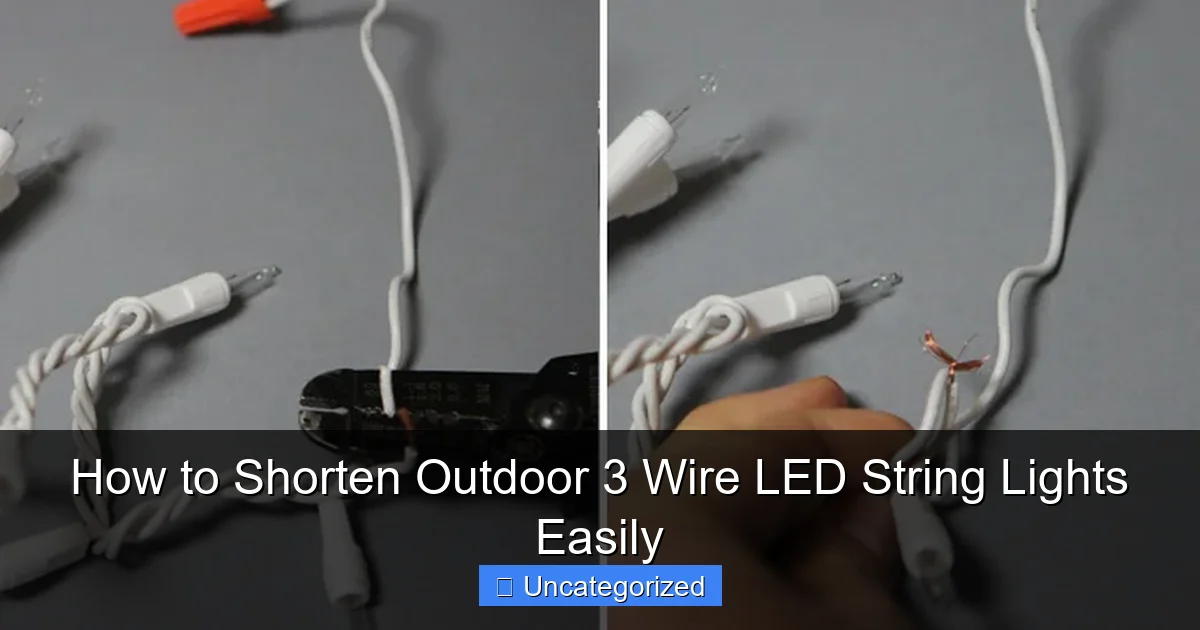
Visual guide about how to shorten outdoor 3 wire led string lights
Image source: grayhousestudio.com
- Wire cutters or sharp scissors – For cleanly cutting the outer sheathing.
- Wire strippers – To expose the internal wires without damaging them.
- Multimeter (optional but recommended) – To test voltage and confirm which wires control which sections.
- Heat shrink tubing or electrical tape – For insulating splices and protecting connections.
- Heat gun or lighter (if using heat shrink) – To seal the insulation.
- Waterproof silicone sealant (optional) – For extra weather protection.
- Marker and measuring tape – To mark the exact cut point.
- Extra 3-wire LED connector or end cap (if replacing the end) – To maintain weather resistance.
Pro Tip: Always unplug your lights before working on them. Even low-voltage LED strings can pose a risk if mishandled, especially in wet outdoor conditions.
Understanding how to shorten outdoor 3 wire LED string lights easily starts with preparation. The right tools ensure you don’t damage the delicate internal wiring or compromise the waterproofing.
Step-by-Step Guide to How to Shorten Outdoor 3 Wire LED String Lights Easily
Now that you’re equipped, let’s dive into the process. This method works for most commercial-grade 3 wire LED strings (like those used in landscape lighting or decorative strands). We’ll cover how to identify the wires, cut safely, and reseal the connection for outdoor use.
Step 1: Identify the Desired Cut Point
Measure your space and determine where you want the lights to end. Use a measuring tape and mark the spot with a small piece of tape or a marker on the outer sheathing. Remember: once you cut, you can’t add it back, so double-check your measurements.
Look for a section between LED bulbs—never cut directly through a bulb socket. Most 3 wire LED strings have bulbs spaced every 6 to 12 inches. Find a gap that gives you enough slack to work with (at least 1–2 inches).
Warning: Cutting too close to a bulb socket can damage the internal contacts and ruin the entire strand. Always leave a buffer zone.
When learning how to shorten outdoor 3 wire LED string lights easily, precision matters. A clean, intentional cut point sets the stage for a successful modification.
Step 2: Unplug and Test the Circuit
Before touching any wires, unplug the string from the power source. This is non-negotiable for safety.
Use a multimeter set to DC voltage (usually 12V or 24V for LED strings) to test the plug. Touch the probes to the plug’s terminals. You should see a reading when the lights are on. If not, check the power supply or transformer.
Next, plug in the lights and observe which sections are lit. Most 3 wire systems use:
- Red wire: Power (positive)
- Black or white wire: Ground (negative)
- Green or blue wire: Control/data (for color-changing or dimming features)
Turn the lights on and off, or cycle through color modes if applicable. Use the multimeter to trace which wire carries the control signal. This step is crucial—cutting the wrong wire can disable smart features or dimming.
Understanding the circuit is a key part of how to shorten outdoor 3 wire LED string lights easily. Skipping this step risks turning your lights into a static, unresponsive strand.
Step 3: Cut the Outer Sheathing
Now, carefully cut through the outer rubber or plastic sheathing at your marked point. Use sharp wire cutters or a utility knife. Make a shallow, circular cut—just deep enough to slice the outer layer without nicking the inner wires.
Gently peel back the sheathing about 1–2 inches on both sides of the cut. You should see three insulated wires inside: red, black (or white), and green (or blue). They’re usually color-coded and slightly different in thickness or texture.
Use your fingers or pliers to separate the wires so they’re clearly visible. This gives you room to work and reduces the risk of accidental cross-wiring later.
Pro Tip: If the sheathing is tough, use a hairdryer to warm it for 30 seconds. Heat makes rubber more pliable and easier to cut cleanly.
This step is where many DIYers go wrong—cutting too deep and damaging the inner wires. Take your time. How to shorten outdoor 3 wire LED string lights easily depends on clean, precise cuts.
Step 4: Cut and Strip the Inner Wires
Now, cut each inner wire individually. Use your wire cutters to snip the red, black, and green wires about 1 inch apart from each other (so they don’t touch when reconnected).
Strip about 1/2 inch of insulation from the end of each wire on the main strand (the side still connected to the plug). Use wire strippers for a clean, even strip—don’t use your teeth or scissors, which can nick the copper.
Leave the other cut end (the excess strand) unstripped for now. We’ll deal with it in the next step.
Why cut them at different lengths? This prevents accidental short circuits when you reseal the connection. It’s a small detail that makes a big difference in safety and reliability.
Step 5: Test the Cut Section
Before proceeding, test the main strand (the part still plugged in). Plug it in and turn it on. All bulbs after the cut should go dark—that’s expected. The bulbs before the cut should still light up normally.
If the lights don’t work at all, double-check your cut. Did you sever a critical wire? Use the multimeter to test continuity between the plug and the cut end. If there’s no connection, you may have cut too close to a bulb socket or damaged the internal wiring.
If the lights work, unplug again. Now, inspect the excess strand. If it’s not needed, you can safely discard it—or store it for future use (e.g., repairing another set).
Testing confirms that your modification didn’t break the circuit. This step is essential for how to shorten outdoor 3 wire LED string lights easily and confidently.
Step 6: Prepare for Resealing (Two Options)
Now you have two choices: cap the end or reconnect with a waterproof connector. The best method depends on your setup and weather exposure.
Option A: Cap the End (For Permanent Shortening)
This is best if you’re sure you won’t need to re-extend the strand later.
- Slide a piece of heat shrink tubing (large enough to cover all three wires) over the main strand, past the cut.
- Twist the red, black, and green wires together in a small bundle. Do not connect them to each other—just group them so they fit inside the cap.
- Insert the wires into a waterproof end cap (available at hardware stores or online). These are silicone or plastic covers designed for outdoor LED strings.
- Apply waterproof silicone sealant around the base of the cap for extra protection.
- Slide the heat shrink tubing over the cap and use a heat gun to shrink it tightly.
This method seals the end completely and prevents moisture from entering the wires.
Option B: Use a Waterproof 3-Wire Connector (For Reusability)
Ideal if you might want to reattach the extra strand later or connect to another light string.
- Use a 3-wire waterproof splice connector (like a gel-filled butt connector or a screw-terminal block with a weatherproof housing).
- Strip the wires on the main strand (already done) and the excess strand (if reattaching).
- Match the colors: red to red, black to black, green to green.
- Secure each wire into the connector. If it’s a screw-terminal type, tighten the screws firmly.
- Snap the housing closed or seal with silicone.
Both methods work, but capping is simpler for permanent shortening. How to shorten outdoor 3 wire LED string lights easily often comes down to choosing the right sealing method.
Step 7: Final Test and Weatherproofing
Plug in the lights and test them again. All bulbs before the cut should illuminate. If you used a connector and reattached the excess, test that section too.
Now, inspect your seal. Is it tight? Are there any exposed wires? If you used heat shrink, it should be smooth and snug. If you used a cap, the silicone should be evenly applied.
For extra durability, especially in rainy climates, apply a thin layer of dielectric grease to the inside of the cap or connector. This repels moisture and prevents corrosion.
Hang the lights in your space and run them for 30 minutes. Check for hot spots, flickering, or dimming—signs of poor connections or shorts.
Warning: Never use regular electrical tape alone for outdoor connections. It degrades in UV light and moisture, leading to failure within weeks.
This final test ensures your lights are safe, functional, and ready for outdoor use. How to shorten outdoor 3 wire LED string lights easily means doing it right—not just cutting, but sealing and testing.
Pro Tips & Common Mistakes to Avoid
Even with a solid plan, small errors can ruin your project. Here are pro tips and pitfalls to watch out for:
- Label your wires. Use masking tape to mark red, black, and green on both sides before cutting. Color codes can fade over time.
- Work in a dry, well-lit area. Avoid doing this in the rain or on damp grass. Moisture increases the risk of shorts.
- Don’t cut the control wire by mistake. The green/blue wire is often thinner or has a different texture. Use the multimeter to confirm its function.
- Use heat shrink, not tape. Heat shrink provides a permanent, waterproof seal. Electrical tape peels and cracks outdoors.
- Check for manufacturer warnings. Some LED strings have internal fuses or microchips. Cutting them may void warranties or damage the system.
- Keep a spare connector. Buy an extra waterproof connector or end cap. If you mess up, you can start over without buying a new strand.
Common Mistake: Cutting all three wires at the same length. This increases the chance of accidental contact when sealing. Always stagger the cuts.
Another big mistake? Rushing. Take your time. How to shorten outdoor 3 wire LED string lights easily isn’t about speed—it’s about doing it once and doing it right. A 10-minute job can save you hours of frustration later.
Also, remember: not all LED strings are created equal. Cheap, non-waterproof strands may not have proper internal insulation. If you see bare copper or frayed wires, consider replacing the entire set instead of modifying it.
FAQs About How to Shorten Outdoor 3 Wire LED String Lights Easily
Got questions? We’ve got answers. Here are the most common concerns people have when modifying their outdoor LED lights.
Can I cut any 3 wire LED string lights?
Most commercial-grade 3 wire LED strings can be shortened, especially if they’re designed for outdoor use. However, avoid cutting:
- Strings with built-in timers or smart controls (e.g., Wi-Fi or app-based).
- Cheap, non-waterproof strings with thin insulation.
- Strings with integrated microchips (common in color-changing models).
If in doubt, check the manufacturer’s website or packaging. Look for phrases like “cuttable” or “customizable length.”
Will shortening my lights affect brightness or performance?
No—if you do it correctly. The voltage and current remain the same for the remaining bulbs. However, if you cut too close to a bulb or damage the wiring, you may see flickering or dimming.
Also, ensure your power supply matches the shortened strand. Most LED transformers are designed for a range of lengths, but extremely short strands (e.g., under 5 feet) might not draw enough load, causing the transformer to overheat.
Can I reattach the cut-off piece later?
Yes, if you used a waterproof connector (Option B above). Just make sure the wires are clean and undamaged. If you capped the end, you’ll need to cut off the cap and re-splice—messier, but doable.
For a seamless reattachment, use a 3-wire male-to-female extension cable. It’s cleaner than splicing and easier to disconnect later.
What if my lights have more than three wires?
Some advanced LED strings have 4 or 5 wires (e.g., for RGBW or addressable LEDs). These are not recommended for DIY shortening. They require precise data signal management, and cutting them can corrupt the entire circuit.
For multi-wire systems, contact the manufacturer or use a professional installer. How to shorten outdoor 3 wire LED string lights easily doesn’t apply to complex setups.
Is it safe to modify outdoor lights myself?
Yes, as long as you:
- Unplug the lights.
- Use proper insulation (heat shrink, waterproof connectors).
- Test the connection before hanging.
Low-voltage LED strings (12V or 24V) are much safer than high-voltage lines. Still, treat them with respect—especially in wet conditions.
How do I know if my seal is truly waterproof?
After sealing, submerge the connection in a bowl of water (unplugged!) for 24 hours. If no condensation forms inside the cap or connector, it’s likely waterproof.
Alternatively, run the lights for a few hours in the rain (if safe and permitted). No flickering or failure? You’re good to go.
Can I shorten lights that are already hung?
Technically yes, but it’s risky. Removing the strand from the wall or tree gives you better access and reduces tension on the wires. Always work on a flat, stable surface.
Final Thoughts
Learning how to shorten outdoor 3 wire LED string lights easily gives you the freedom to design your outdoor lighting exactly how you want it. No more tangled excess cords, no more lights stretching beyond your patio—just clean, customized illumination.
Remember: the key to success is patience. Measure twice, cut once. Test before you seal. Use the right tools, especially heat shrink and waterproof connectors. And never skip the final test—your safety and the longevity of your lights depend on it.
Whether you’re lighting up a small balcony or a sprawling backyard, this skill saves money, reduces clutter, and makes your space look professionally designed.
Now that you know how to do it, go ahead—grab your tools, unplug your lights, and make them fit your space perfectly. With this guide, you’ve got everything you need to shorten your LED string lights safely, effectively, and with confidence.
Happy lighting!
“`

