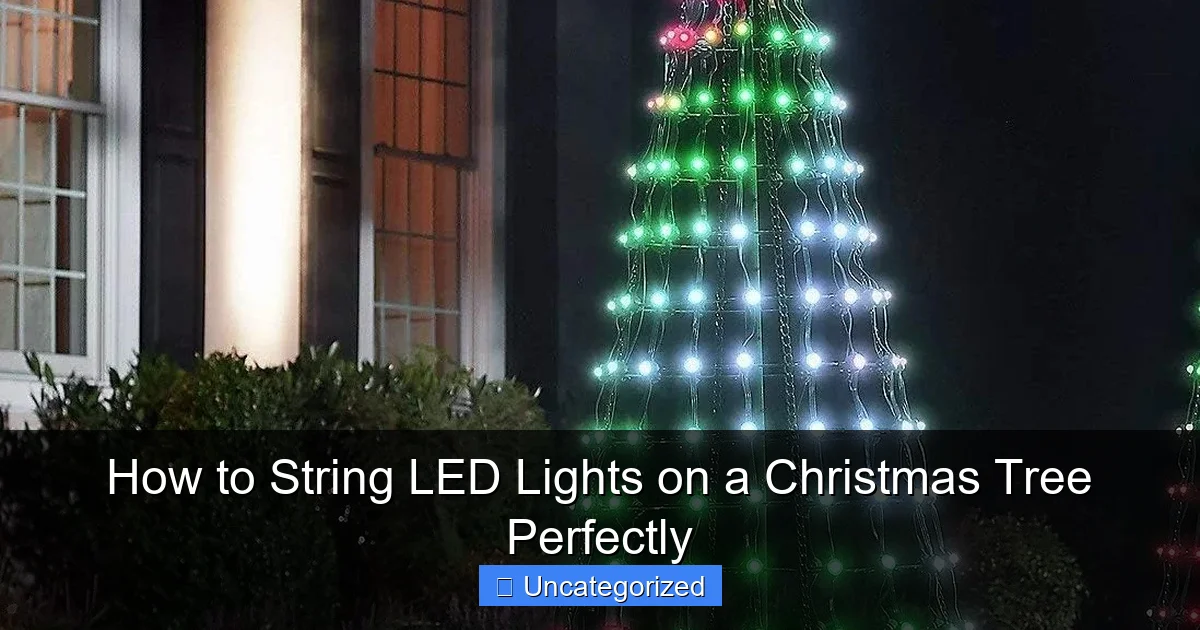
Featured image for how to string led lights on a christmas tree
Image source: images-na.ssl-images-amazon.com
Start from the base and work upward in a spiral pattern to evenly distribute LED lights and eliminate dark spots on your Christmas tree. Use zip ties or light clips to secure strands at the trunk, ensuring a clean, professional look without drooping or tangles. This method maximizes brightness and creates a flawless glow from every angle.
How to String LED Lights on a Christmas Tree Perfectly
Key Takeaways
- Plan your layout: Sketch light placement before starting for balanced coverage.
- Start from the base: Wrap lights upward in zigzag or spiral for even distribution.
- Test lights first: Ensure all bulbs work to avoid mid-decoration fixes.
- Layer lights: Combine string types (e.g., warm + cool) for depth and glow.
- Hide the power source: Tuck plugs near the trunk for a seamless look.
- Secure with care: Use light clips, not staples, to protect cords and branches.
Why This Matters / Understanding the Problem
Every year, millions of families face the same holiday headache: tangled wires, dark spots on the tree, and lights that blink out halfway through December. You’ve bought the best LED Christmas lights, but if you don’t know how to string LED lights on a Christmas tree perfectly, all that magic fizzles.
Uneven lighting ruins the festive mood. Some areas shine too bright while others stay dark. And let’s not forget the frustration of plugging in a strand only to find half the bulbs aren’t working. The truth? It’s not the lights—it’s the method.
Whether you’re decorating a 7-foot artificial tree or a real fir, mastering the art of light placement ensures a warm, balanced glow from top to bottom. This guide walks you through how to string LED lights on a Christmas tree perfectly, so your tree becomes the centerpiece it deserves to be.
You’ll learn how to avoid common pitfalls, use the right tools, and create a professional-looking display—without spending hours untangling cords. By the end, your holiday setup will be faster, safer, and way more beautiful.
Pro Tip: Start with fully functional lights. Test each strand before hanging. A single faulty bulb can break the circuit in older series-wired sets.
What You Need
Before you dive into how to string LED lights on a Christmas tree perfectly, gather these essentials. Having the right tools saves time and prevents frustration.

Visual guide about how to string led lights on a christmas tree
Image source: cdn.christmaslightsetc.com
- LED Christmas lights (warm white, multicolor, or color-changing—your choice)
- Extension cords (rated for indoor/outdoor use, if needed)
- Light tester (optional but highly recommended)
- Zip ties or twist ties (for securing cords)
- Tree skirt or base cover (to hide plugs and cords)
- Step ladder (for tall trees)
- Timer or smart plug (for automatic on/off control)
- Scissors (to trim zip ties)
- Work gloves (to protect hands from pine needles)
- Measuring tape (to estimate light length needed)
Bonus: If you have a pre-lit tree, you can still add extra strands for depth. Just make sure the total wattage doesn’t exceed your outlet’s capacity.
Warning: Never daisy-chain more than three strands unless the manufacturer specifically allows it. Overloading circuits is a fire hazard.
Choose LED lights over incandescent—they’re cooler, more energy-efficient, and last longer. For a 7-foot tree, plan on 700–1,000 LEDs. Use the rule of thumb: 100 lights per foot of tree height.
Step-by-Step Guide to How to String LED Lights on a Christmas Tree Perfectly
Step 1: Test Every Light Strand Before You Start
Don’t wait until the lights are on the tree to discover a problem. Plug in each strand and check for:
- Dead bulbs
- Flickering sections
- Damaged wires or frayed insulation
- Proper connection between male and female ends
Use a light tester (available at hardware stores for under $10) to identify which bulbs are out. This saves you from removing half the tree later.
If you have older sets with series wiring (where one bad bulb kills the whole strand), replace them with modern parallel-wired LED lights. These keep working even if a few bulbs fail.
Real-Life Scenario: Last year, my sister spent 20 minutes stringing lights—only to find one dead strand. She had to take everything down. Test first, hang second.
This step is crucial for how to string LED lights on a Christmas tree perfectly. It’s the foundation of a smooth process.
Step 2: Start at the Bottom and Work Upward
Most people make the mistake of starting at the top. That leads to awkward reaching, uneven spacing, and tangled cords.
Instead, begin at the base of the tree. Plug in the first strand and lay the male end near the outlet. Then, drape the strand around the lowest branches, weaving it through the center of the tree—not just around the outside.
Think of it like wrapping a gift: you want the lights to hug the tree from the inside out. This fills dark spots and creates depth.
As you move up, keep the strand taut but not tight. Let it follow the natural shape of the branches. Don’t force it—this can damage the wire or pull branches out of alignment.
Pro Tip: Use a “layered” approach. Place one strand at the front, another at the back, and a third on the sides. This ensures 360-degree coverage.
For a 7-foot tree, plan 6–8 vertical passes from bottom to top. Each pass should cover a new section of the tree, overlapping slightly with the previous one.
Step 3: Weave Lights Through the Tree (Not Just Around It)
The secret to professional-looking lighting? Weaving.
Don’t just loop the lights around the perimeter. Instead, push the strand into the tree, letting it snake between branches and into the core.
Here’s how:
- Hold the strand at a 45-degree angle.
- Slide it between two branches, aiming toward the trunk.
- Let it rest 6–8 inches deep, then pull the excess out the other side.
- Repeat every 6–8 inches as you move up.
This creates a “3D” effect. From any angle, you’ll see lights—not just a ring around the edge.
For sparse areas (like the back or inner branches), add extra loops. For dense areas, use fewer passes. Adjust as needed.
Common Mistake: Hanging lights only on the outside makes the tree look like a glowing tube. Weaving adds dimension and warmth.
This technique is essential for how to string LED lights on a Christmas tree perfectly. It transforms a flat display into a lush, radiant centerpiece.
Step 4: Connect Strands Safely and Strategically
Most trees need multiple strands. The key is safe and clean connections.
Never connect more than three strands in a row unless the packaging says it’s safe. For longer runs, use a splitter or extension cord at the base.
Here’s a better method:
- Run the first strand from bottom to top.
- At the top, don’t plug in the next strand yet.
- Instead, run the second strand down the tree, starting from the top.
- Connect the two strands at the midpoint (around 3–4 feet high).
This “top-to-bottom” approach reduces strain on the connections and hides plugs in the middle of the tree, where they’re less visible.
Use zip ties to secure the male/female connection point to a branch. This prevents accidental unplugging.
For even better results, use a light clip system (like the ones from Twinkly or GE). These clips hold strands in place and keep connections tidy.
Warning: Never leave exposed plugs hanging. Moisture or pets can damage them. Always tuck connections into the tree or cover them.
Step 5: Balance Light Density and Avoid Clumping
Too many lights in one area = hot spots. Too few = dark zones.
Strive for even spacing. Aim for 6–8 inches between each vertical pass. Use your hand as a guide—hold it flat, and space each run about one hand-width apart.
For a natural look, vary the density:
- Use tighter spacing (4–6 inches) on the lower third (most visible).
- Medium spacing (6–8 inches) on the middle third.
- Lighter spacing (8–10 inches) on the top third (less visible).
Also, alternate light colors or types if using multiple strands. For example, run warm white on one side and cool white on the other. This adds visual interest without overwhelming the tree.
For multicolor sets, mix them throughout—don’t cluster all reds together. Scatter colors evenly for a festive, balanced glow.
Pro Tip: Step back every few minutes. View the tree from across the room. This helps you spot gaps or clumps early.
Step 6: Handle the Tree Topper and Top Section Carefully
The top of the tree is tricky. It’s narrow, and the star or angel needs space.
Here’s how to light it right:
- Leave the top 12–18 inches unlit.
- Install the tree topper first (or last, if it has its own lights).
- Run one final strand from the top down, but only cover the last 18 inches.
- Weave this strand tightly around the top branches, avoiding the topper base.
If your topper has lights, plug it into the last strand. Make sure the cord doesn’t dangle in front of the star.
For extra sparkle, add a small strand of micro LED lights around the topper. These tiny lights add shimmer without bulk.
Never wrap lights around the topper’s base. It can damage the wiring and create a fire risk.
Common Mistake: Over-lighting the top makes the tree look top-heavy. Keep it simple and elegant.
Step 7: Secure Cords and Hide Wiring
Messy cords ruin the look. Here’s how to keep everything clean:
- Run the main power cord down the back of the tree, along the trunk.
- Use clear zip ties or green twist ties every 12 inches to secure it.
- Hide the cord under branches or behind the tree skirt.
- Use a tree base cover to conceal plugs and extension cords.
- For floor-level outlets, route the cord under rugs or behind furniture.
If you have a pre-lit tree, you can still add extra strands. Just plug them into a separate outlet or use a timer to sync the on/off cycles.
For a polished finish, use a light timer. Set it to turn on at dusk and off at bedtime. This saves energy and prevents overheating.
Pro Tip: Label your strands with masking tape. Write “Bottom,” “Middle,” or “Top.” This makes next year’s setup a breeze.
Step 8: Final Inspection and Adjustments
Step back and view the tree from all angles:
- Is the light even?
- Are there any dark spots?
- Are cords hidden?
- Is the topper secure?
Make small adjustments:
- Push a few extra lights into sparse areas.
- Loosen any overly tight strands.
- Re-secure any loose zip ties.
- Check that all plugs are tucked away.
Turn on the lights and let them glow for 10 minutes. Watch for flickering, dim sections, or hot spots.
This final check ensures you’ve mastered how to string LED lights on a Christmas tree perfectly.
Real-Life Scenario: My neighbor once spent an hour adjusting lights—only to realize the tree was crooked. Always check the tree’s alignment before finalizing.
Pro Tips & Common Mistakes to Avoid
Even pros make mistakes. Here are the top tips and traps to dodge:
- Don’t overdo it. More lights aren’t always better. 700–1,000 LEDs per 7-foot tree is ideal. Overloading looks gaudy and increases fire risk.
- Use a light meter. If you’re a perfectionist, measure lux levels with a smartphone app. Aim for 50–100 lux at eye level.
- Mix light types. Combine steady-on, twinkling, and color-changing strands for depth. Just keep the total wattage under 500 watts.
- Protect outdoor lights. If your tree is near a window, use outdoor-rated LED strands. They’re weatherproof and brighter.
- Store lights properly. After the holidays, wrap each strand around a cardboard rectangle. Label it and store in a dry place.
Common Mistake #1: Using extension cords not rated for Christmas lights. Always check the wattage rating. Most indoor cords max out at 1,000 watts.
Common Mistake #2: Forgetting to turn off the lights when you leave the house. Use a timer or smart plug. It’s safer and saves energy.
Common Mistake #3: Ignoring the tree’s shape. A full tree needs more lights than a narrow one. Adjust your plan based on the tree’s silhouette.
For a professional touch, add lighted garland or icicle lights after the main strands. This adds layers without cluttering the base.
And remember: the goal isn’t perfection—it’s a tree that feels warm, inviting, and joyful. If it makes you smile, you’ve done it right.
FAQs About How to String LED Lights on a Christmas Tree Perfectly
Q: How many LED lights do I need for a 7-foot tree?
A: For a 7-foot tree, use 700–1,000 LEDs. This gives full coverage without overcrowding. For a fuller tree, go with the higher end. For a slim tree, 500–700 may suffice. Always check the manufacturer’s recommendations.
Q: Can I connect multiple LED light strands?
A: Yes, but only up to three in a row unless the packaging says otherwise. For longer runs, use a splitter or extension cord at the base. Never exceed the circuit’s 1,500-watt limit for indoor outlets.
Q: Should I start stringing lights at the top or bottom?
A: Always start at the bottom. This gives you better control, reduces tangles, and makes it easier to hide cords. Working upward also lets you adjust spacing as you go.
Q: How do I fix a dark spot on my tree?
A: Weave an extra strand into the dark area. Push it deep into the branches, then pull it out the other side. Use a light tester to ensure the strand is working. For small gaps, add a few extra loops with a spare strand.
Q: Are LED Christmas lights safe for real trees?
A: Yes. LED lights produce very little heat, so they won’t dry out a real tree. They’re also more energy-efficient and last longer. Just make sure the tree stays watered—dry needles are a fire risk, regardless of light type.
Q: Can I use battery-powered LED lights?
A: Yes, but they’re better for small trees or accent lighting. Battery packs last 8–12 hours, so they’re not ideal for all-night displays. Use them for tabletop trees, wreaths, or garlands.
Q: How do I store my LED lights after the holidays?
A: Wrap each strand around a piece of cardboard (like a file folder). Label it with a marker. Store in a plastic bin in a cool, dry place. Avoid wrapping around your hand—this can damage the wires.
Final Thoughts
Learning how to string LED lights on a Christmas tree perfectly isn’t about following a rigid formula—it’s about creating a tree that feels like home.
With the right tools, a little patience, and these step-by-step tips, you can transform your holiday centerpiece from “meh” to magical. Test your lights, start at the bottom, weave them in, and hide the cords. Balance density, check your work, and enjoy the glow.
Remember: the best-lit tree isn’t the one with the most lights—it’s the one that brings joy. Whether you prefer warm white, multicolor, or twinkling strands, the goal is warmth, not perfection.
This year, skip the tangled mess and uneven glow. Use this guide to create a display that wows guests, delights family, and lasts all season.
And when January comes, take down the lights with care. Store them properly, and next year’s setup will be even easier.
Happy decorating—and may your tree shine bright!
Actionable Advice: Print this guide and keep it with your holiday supplies. Refer to it every year. Over time, you’ll refine your technique and make how to string LED lights on a Christmas tree perfectly second nature.

