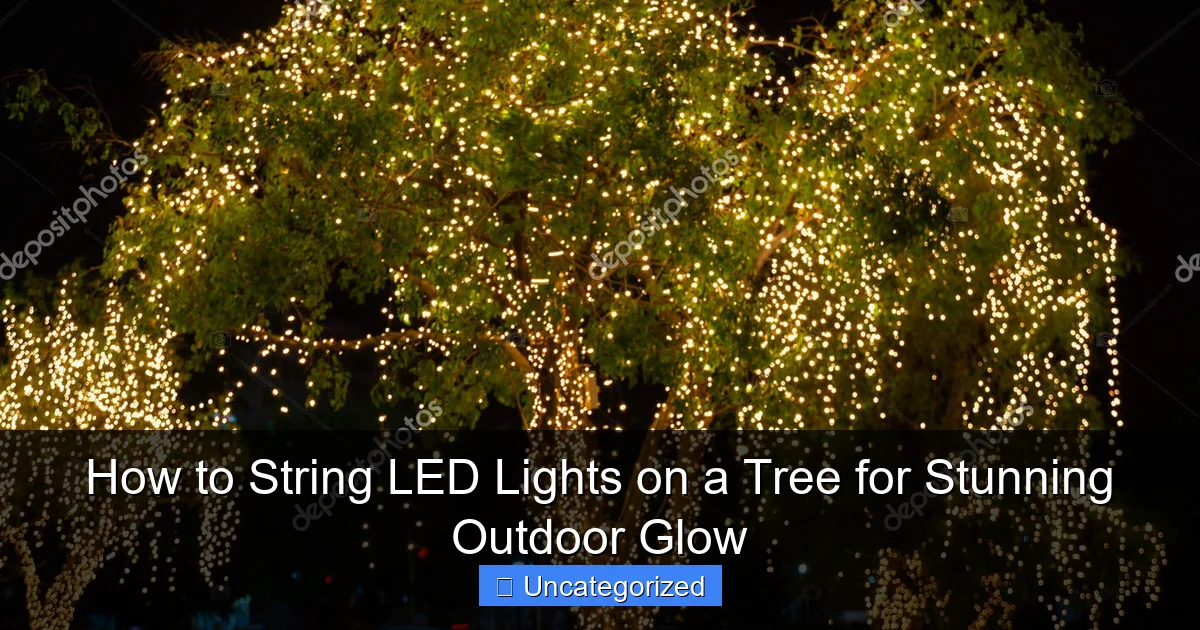
Featured image for how to string led lights on a tree
Image source: st4.depositphotos.com
Wrap LED lights evenly around the tree trunk and branches starting from the base, using a ladder for taller sections and securing strands with outdoor-rated clips or zip ties to prevent sagging. Choose weatherproof, warm-white LEDs in a grid or spiral pattern for balanced illumination, and plug into a GFCI outlet with a timer for effortless, dazzling nighttime ambiance.
How to String LED Lights on a Tree for Stunning Outdoor Glow
Key Takeaways
- Plan your layout: Sketch light placement before starting for balanced coverage.
- Use outdoor-rated lights: Ensure durability and safety in all weather conditions.
- Start from the base: Work upward for even spacing and fewer tangles.
- Secure with clips: Avoid nails; use plastic hooks or zip ties instead.
- Hide power sources: Conceal cords and timers under mulch or foliage.
- Test before hanging: Check for dead bulbs or faulty strands first.
Why This Matters / Understanding the Problem
Transforming your backyard into a magical nighttime oasis isn’t just for holidays—it’s a year-round joy. Whether you’re hosting a summer barbecue or enjoying a quiet evening under the stars, learning how to string LED lights on a tree for stunning outdoor glow can elevate your outdoor space from ordinary to extraordinary.
But here’s the catch: many people struggle with tangled cords, uneven lighting, or lights that don’t last through the season. Poor placement can result in dim spots, glare, or even safety hazards. The good news? With the right approach, you can create a professional-looking display that’s safe, beautiful, and energy-efficient.
LED lights are the go-to choice because they use less power, generate less heat, and last longer than traditional incandescent bulbs. But to get the most out of them, you need a smart plan. This guide walks you through every step—from prep to plug-in—so your trees shine bright and stay safe all year.
Whether you’re decorating a small ornamental tree or wrapping a towering oak, mastering how to string LED lights on a tree for stunning outdoor glow is easier than you think. Let’s get started.
What You Need
Before you climb that ladder (or call a friend to help), gather these essential tools and materials. Having everything ready saves time and prevents mid-project frustration.
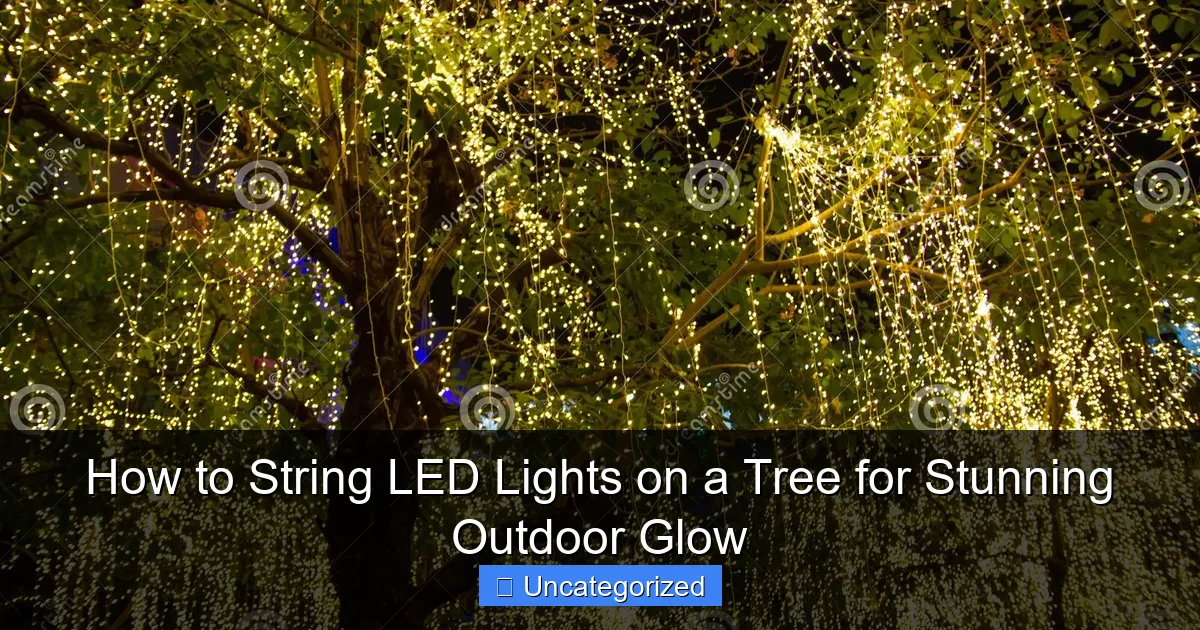
Visual guide about how to string led lights on a tree
Image source: thumbs.dreamstime.com
- LED string lights (outdoor-rated): Choose weatherproof, low-voltage LED strands. Look for “IP44” or higher for water resistance. Consider warm white for a cozy feel or multicolor for festive vibes.
- Measuring tape: Helps estimate how many lights you’ll need based on tree size.
- Extension cords (outdoor-rated, heavy-duty): Use GFCI-protected cords for safety. Match the amperage to your light load.
- Light clips or zip ties: Tree-friendly clips designed for branches and trunks avoid damage. Avoid nails or screws.
- Ladder or step stool: A sturdy, non-conductive ladder is key for safety. Use one with a wide base.
- Gloves: Protect your hands from rough bark and cold branches.
- Timer or smart plug: Automate your lights so they turn on at dusk and off at bedtime.
- Scissors or wire cutters: For trimming zip ties or adjusting cords.
- Optional: Light tester: Quickly checks if your strands are working before installation.
Pro Tip: Always unplug lights before handling them. Safety first—especially when working outdoors and near trees.
Step-by-Step Guide to How to String LED Lights on a Tree for Stunning Outdoor Glow
Step 1: Choose the Right Lights for Your Tree
Not all LED lights are created equal. For outdoor use, you need lights specifically rated for the elements. Check the packaging for “outdoor use” and “weatherproof” labels. Look for the IP (Ingress Protection) rating—IP44 or higher means protection from splashing water.
Consider the color temperature too. Warm white (2700K–3000K) gives a soft, inviting glow perfect for patios and gardens. Cool white (4000K+) is brighter and better for security lighting. Multicolor sets are fun for holidays or parties.
Also, decide between plug-in and solar-powered options. Plug-in lights are brighter and more consistent, while solar lights are eco-friendly and don’t need outlets—but may dim on cloudy days.
For how to string LED lights on a tree for stunning outdoor glow, start with plug-in LEDs for reliability. You can always add solar accents later.
Warning: Never use indoor-only lights outdoors. They can short-circuit, overheat, or create fire hazards.
Step 2: Measure Your Tree and Plan Your Layout
Before buying lights, measure your tree’s height and canopy width. A rough rule: 100 LED bulbs per 5 feet of tree height works well for full coverage.
For example, a 15-foot tree needs about 300 LEDs. But if you’re wrapping multiple trunks or large branches, add 20% extra.
Now, sketch a quick plan. Decide if you want:
- Trunk wrapping: Vertical or spiral around the main trunk.
- Branch wrapping: Focus on major limbs for a “candles in the tree” effect.
- Canopy drape: Drape lights from branch tips to the ground for a waterfall look.
- Combination: Mix trunk and branch wrapping for depth.
Use painter’s tape or chalk to mark key points on the tree. This helps visualize spacing and avoid over- or under-lighting.
Planning is crucial for achieving that perfect stunning outdoor glow—no guesswork, no wasted lights.
Step 3: Test All Light Strands Before Installation
Plug in each strand and check for:
- Dead bulbs or flickering sections
- Damaged cords or frayed wires
- Proper end-to-end connectivity (if using multiple strands)
Fix or replace any faulty strands now. It’s much harder to troubleshoot once they’re up in the tree.
If you’re using multiple strands, test them connected together. Some sets have male/female connectors—make sure they’re compatible and sealed with silicone tape to prevent moisture.
This step ensures your how to string LED lights on a tree for stunning outdoor glow project starts strong and stays bright.
Pro Tip: Keep a spare strand on hand. Trees are unpredictable—branches can break, animals can chew wires.
Step 4: Start at the Power Source
Always begin near the outdoor outlet or GFCI-protected extension cord. This keeps excess cord off the ground and reduces tripping hazards.
Place the first strand’s plug end near the outlet. Then, run the lights up the trunk or along a major branch—whichever is closer.
Why start here? It prevents dangling cords that could short-circuit in wet grass or snow. It also makes it easier to add more strands later without tangles.
Use a light clip or zip tie every 6–12 inches to secure the strand. For bark, use tree-safe clips that grip without piercing. For smooth branches, soft zip ties work well.
Keep tension light—don’t pull the cord tight. LEDs are durable, but over-tightening can break solder points.
Step 5: Wrap the Trunk (If Desired)
For a classic look, wrap the trunk in a spiral pattern. Start at the base and move upward, leaving 6–12 inches between loops.
Use clips every 8–10 inches to prevent sagging. Avoid wrapping too tightly—trees expand and contract with temperature and moisture.
For thick trunks, use multiple shorter strands instead of one long one. Connect them end-to-end, sealing each connection with electrical tape and a plastic bag for extra water protection.
If your tree has multiple trunks, wrap each one separately. This creates depth and symmetry.
Remember: the goal is a soft, even glow—not blinding brightness. Overlapping too much can create hotspots.
Warning: Never wrap lights around a tree’s root flare (where trunk meets soil). This can damage the bark and invite pests.
Step 6: Illuminate the Branches
Now for the magic—lighting the branches. This is where your tree comes alive.
Start with the main scaffold branches (the thickest ones). Run lights along their length, from trunk to tip. Use clips every 8–12 inches.
For a natural look, follow the branch’s curve. Don’t force straight lines. Let the lights flow with the tree’s shape.
For secondary branches, you can:
- Light every other branch for subtlety
- Use shorter strands on smaller limbs
- Skip very thin or fragile branches
Create layers by lighting branches at different heights. Lower branches can be brighter; upper ones more subtle. This adds dimension.
For a “starry sky” effect, drape shorter strands from branch tips downward, letting them hang like icicles. Use clips at the top and let the rest dangle freely.
Step 7: Drape or Weave for a Canopy Effect
For a dramatic stunning outdoor glow, drape lights from the canopy to the ground. This works best on trees with low-hanging branches or a wide canopy.
Attach one end of a strand to a branch tip (use a clip or loop). Let the rest hang down like a curtain. Secure the bottom end to a stake or ground clip.
Weave multiple strands at different heights for a 3D effect. Vary lengths—some short, some long—to mimic falling stars.
For a “web” look, run horizontal strands between branches. Connect them with vertical drops. Use a grid pattern (like a tic-tac-toe board) for symmetry.
Be careful not to obstruct pathways. Keep drape ends at least 3 feet above the ground for safety.
Step 8: Connect Multiple Strands Safely
If you’re using more than one strand, connect them end-to-end. Most LED sets have male/female plugs—just snap them together.
But here’s the key: don’t exceed the manufacturer’s recommended number of connected strands. Most allow 3–5 strands in series. Check the box or manual.
Why? Too many lights can overload the circuit, cause dimming, or trip a breaker.
For large trees, use a multi-outlet power strip with a GFCI. Run separate strands from different outlets to balance the load.
Seal every connection with electrical tape and a waterproof sleeve. This prevents moisture damage, especially in rainy climates.
Step 9: Secure All Cords and Cables
Exposed cords are a tripping hazard and can be chewed by animals. Secure all extension cords and jumpers.
Use:
- Outdoor-rated cord clips on fences, railings, or stakes
- Zip ties to anchor cords to trees (but not tightly around trunks)
- Conduit or tubing for cords running across lawns or driveways
Keep cords off wet ground. Elevate them with stakes or run them along dry paths.
For cords crossing walkways, use ramp covers or bury them under mulch (with conduit for protection).
Step 10: Install a Timer or Smart Plug
Manually turning lights on/off every night is a chore. Automate it!
Plug your extension cord into a timer or smart plug. Set it to turn on at sunset and off after 4–6 hours.
Smart plugs let you control lights via phone or voice (Alexa, Google Assistant). Some even have motion sensors or scheduling based on sunrise/sunset.
This saves energy and ensures your stunning outdoor glow appears like clockwork.
Bonus: Use a light sensor so lights only turn on when it’s dark—no need to adjust for seasons.
Step 11: Final Inspection and Adjustments
Step back and look at your work. Walk around the tree. Check for:
- Uneven lighting (add or remove strands)
- Glare (angle lights downward or inward)
- Sagging cords (tighten clips)
- Exposed wires (cover with tape or conduit)
Turn the lights on at night. See how they look from different angles. Adjust as needed.
Ask a friend for feedback. Fresh eyes catch things you might miss.
This final tweak makes the difference between “nice” and “wow.”
Pro Tips & Common Mistakes to Avoid
Even the best plans can go wrong. Here’s how to avoid pitfalls and get professional results.
- Don’t overload circuits: Check your outlet’s amperage. Most outdoor circuits are 15A—don’t exceed 80% capacity (about 1,440 watts).
- Use GFCI outlets: These cut power instantly if a short occurs. Required by code in most areas.
- Protect connections: Every plug-in joint is a weak point. Seal with tape and plastic bags.
- Respect tree health: Avoid piercing bark. Use clips, not nails. Remove lights seasonally to let bark breathe.
- Layer for depth: Combine trunk, branch, and canopy lighting for a rich, multi-dimensional glow.
- Test in daylight: Fix any issues before sunset. It’s much easier to see problems in the light.
- Store properly: When taking lights down, coil them loosely and store in a dry, cool place. Use original boxes or storage reels.
Pro Tip: Use net lights for large canopies. They drape over branches like a sheet, saving hours of wrapping.
Common Mistake: Wrapping lights too tightly. Trees grow and expand. Loose wrapping prevents damage.
Pro Tip: For multi-trunk trees, use color-coded clips to keep strands organized. Red for trunk, blue for branches, etc.
Remember, the goal isn’t perfection—it’s creating a warm, inviting space. A few imperfections add character.
FAQs About How to String LED Lights on a Tree for Stunning Outdoor Glow
1. How many LED lights do I need for my tree?
As a rule, use 100 bulbs per 5 feet of tree height. For a 10-foot tree, 200 LEDs. For a 20-foot tree, 400. Add 20% more if wrapping branches or using multiple trunks. Always measure first!
2. Can I leave LED lights on a tree all year?
It’s not recommended. While LED lights are durable, constant exposure to sun, rain, and temperature swings can degrade cords and connectors. Remove lights after the holiday season or special event. Store them indoors. This extends their life and protects your tree’s bark.
3. Are solar-powered lights good for tree lighting?
They’re great for low-light accents or small trees. But solar lights are dimmer and less reliable than plug-in LEDs. Use them for subtle glow or in areas without outlets. For a stunning outdoor glow, combine solar with plug-in lights for the best of both worlds.
4. How do I prevent lights from tangling?
Start at the power source. Work in one direction—up, then out. Use clips every 6–12 inches to keep strands taut. For storage, coil lights around a reel or cardboard tube. Never just toss them in a box.
5. Can I use regular zip ties on tree branches?
Yes, but use soft, UV-resistant zip ties. Avoid metal ties or anything that digs into bark. Remove them when taking lights down. For extra safety, use tree-friendly light clips designed for branches.
6. What if my tree has thick, rough bark?
No problem! Use heavy-duty clips that grip bark without slipping. Or, attach a small wooden block to the trunk with tree-safe adhesive, then clip lights to the block. Avoid drilling or nailing.
7. How do I make my lights look professional?
Focus on even spacing and layered lighting. Combine trunk, branch, and canopy lights. Use a timer for consistent timing. Step back and adjust from multiple angles. And don’t forget the power source—hide cords and use a clean, organized setup.
Final Thoughts
Learning how to string LED lights on a tree for stunning outdoor glow is a skill that pays off every time you step into your backyard. It’s not just about decoration—it’s about creating memories, extending your living space, and bringing joy to your home.
Start small. Try a single strand on one tree. Master the basics—then expand. Use the steps here to build a lighting plan that fits your space, style, and budget.
And remember: safety first. Use outdoor-rated gear, GFCI protection, and secure cords. Respect your tree’s health. A little care goes a long way.
When your lights finally glow at night, take a moment to enjoy it. Invite friends over. Sip a drink. Watch the stars. That’s the magic of a well-lit tree.
Now, grab your lights, gather your tools, and make your outdoor space shine. Your stunning outdoor glow is just a few clips away.
Ready to start? Begin tonight. Your backyard is waiting.

