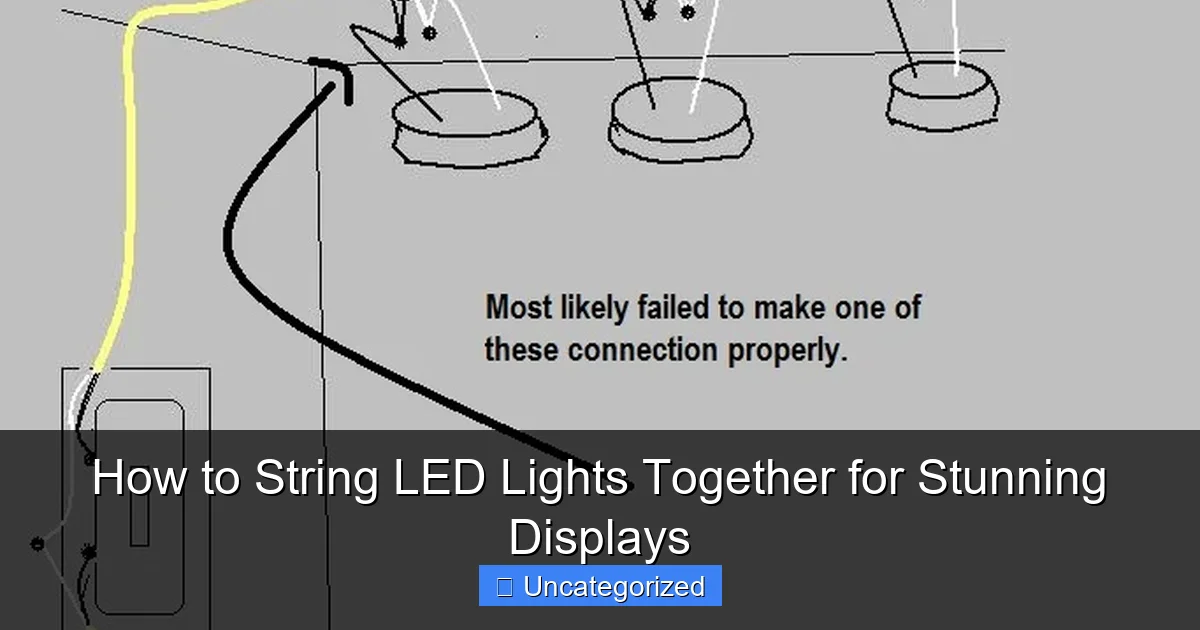
Featured image for how to string led lights together
Image source: askmehelpdesk.com
Connecting LED lights together is simple and safe when you match voltage and use compatible connectors. Whether you’re linking strips, strings, or modules, always check manufacturer specs to avoid overloads and ensure seamless illumination. With the right tools and planning, you can create dazzling, custom lighting displays for any space or occasion.
How to String LED Lights Together for Stunning Displays
Key Takeaways
- Plan your layout: Sketch your design before stringing lights to avoid mistakes.
- Use compatible sets: Ensure all LED strands are connectable and same voltage.
- Check power limits: Never exceed manufacturer’s max connected strands to prevent damage.
- Secure connections: Use electrical tape or clips to protect joints from weather.
- Test as you go: Verify each strand works before adding the next for easy fixes.
- Optimize power placement: Position the power source centrally to balance load and reduce strain.
Why This Matters / Understanding the Problem
Imagine decorating your patio for a summer party, only to find that your LED lights flicker, dim, or stop working halfway through the string. It’s frustrating—and avoidable. Whether you’re lighting up your home for the holidays, setting the mood for an outdoor wedding, or creating a cozy ambiance in your bedroom, how to string LED lights together for stunning displays is a skill every DIY decorator needs.
Unlike old incandescent bulbs, LED lights are energy-efficient, long-lasting, and safer. But they come with unique rules when it comes to connecting multiple strands. Plug-and-play doesn’t always mean “plug as many as you want.” Without proper planning, you risk overloading circuits, damaging lights, or ending up with a dim, patchy display.
That’s where this guide comes in. We’ll walk you through the right way to connect LED light strands—safely, beautifully, and without burning out your setup. Whether you’re working indoors, outdoors, or on a large-scale event, this guide covers everything from basic connections to advanced techniques. By the end, you’ll know exactly how to string LED lights together for stunning displays that shine bright and last long.
Quick Insight: LED lights are low-wattage, but that doesn’t mean you can daisy-chain unlimited strands. Each set has a max connection limit—usually 25–50 lights—based on voltage and wattage. Exceeding this can lead to voltage drop, flickering, or total failure.
What You Need
Before you start, gather the right tools and materials. Using the correct supplies ensures a safe, professional-looking result. Here’s your checklist for how to string LED lights together for stunning displays:
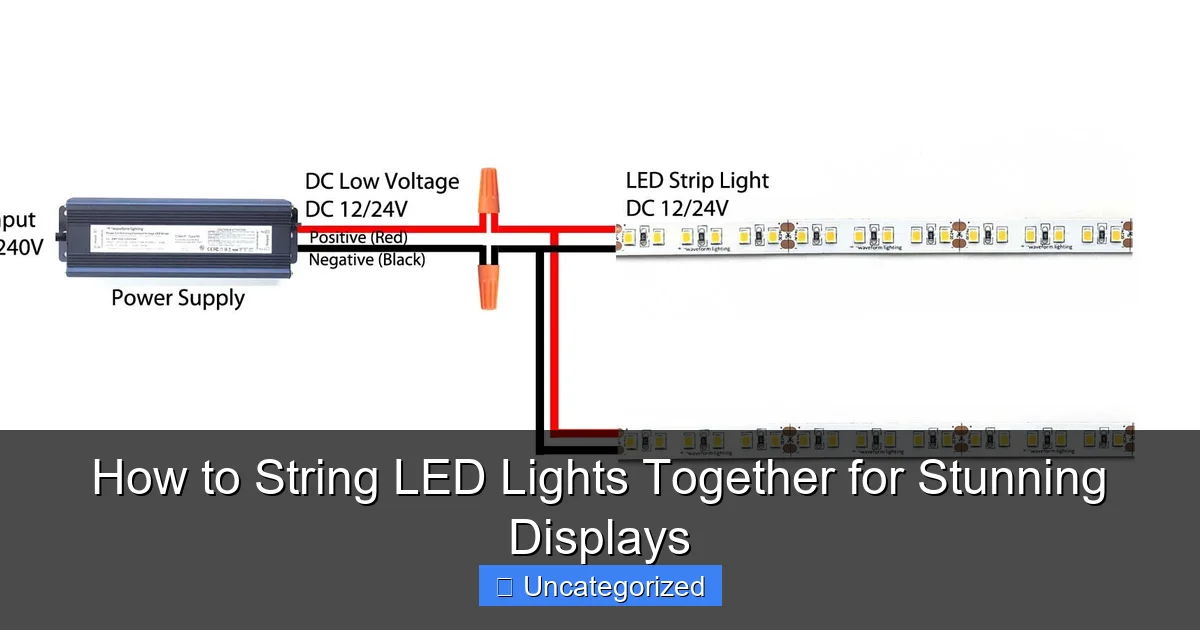
Visual guide about how to string led lights together
Image source: waveformlighting.com
- LED light strands: Choose weatherproof (IP44 or higher) for outdoor use. Indoor sets are fine for bedrooms, living rooms, etc.
- Extension cords (outdoor-rated): Use heavy-duty, grounded cords if connecting multiple sets.
- Timer or smart plug: Helps automate your display and prevents overuse.
- Light clips, hooks, or adhesive mounts: For securing lights to eaves, fences, trees, or walls.
- Zip ties or wire clips: Great for managing excess cord and keeping lines neat.
- Power strip with surge protection: Especially important for large displays.
- Voltage tester (optional but recommended): Ensures no live wires when troubleshooting.
- Measuring tape: Helps plan spacing and coverage.
- Scissors or wire cutters: For trimming zip ties or adjusting cords.
Pro tip: Always check the manufacturer’s label on your LED lights. Look for the maximum number of connectable strands (e.g., “Connect up to 30 strands”) and total wattage. This is your safety baseline.
For large displays (like wrapping a whole house), consider using a low-voltage LED system with a transformer. These are safer for long runs and reduce voltage drop.
Step-by-Step Guide to How to String LED Lights Together for Stunning Displays
Step 1: Plan Your Layout and Measure the Space
Before plugging in anything, sketch out your design. Are you outlining your roofline? Creating a canopy over a deck? Wrapping trees? Planning prevents costly mistakes.
Use a measuring tape to determine the total length of your display. For example, if your front porch is 30 feet long and you want lights every 6 inches, you’ll need about 60 feet of lights. Add 10–15% extra for curves, overlaps, or mistakes.
Now, check each light strand’s length. A 25-foot strand might only cover 23 feet after accounting for the power cord. Multiply the number of strands needed, then compare it to the maximum connectable limit listed on the packaging.
Example: If your 25-foot LED strands say “Max 20 connectable,” and you need 100 feet total, you can safely connect four strands in one line. But for 150 feet, you’ll need two separate circuits.
Mark your power source locations. You don’t want to string lights across your yard only to realize the plug is too far. Use extension cords strategically to avoid overloading one outlet.
Step 2: Check Voltage, Wattage, and Compatibility
Not all LED lights are created equal. Some run on 120V (standard household voltage), while others use 24V or 12V with a transformer. Mixing incompatible types can damage your lights or create uneven brightness.
Always use lights from the same product line when possible. If you must mix, ensure they’re the same voltage and wattage per strand. For example, don’t connect a 5W strand to a 10W strand—this can cause overheating in the lighter set.
Calculate total wattage: Number of strands × Watts per strand. Most standard outlets handle up to 1,800 watts (15 amps at 120V). For example, 30 strands at 5W = 150W—well within limits. But 100 strands at 10W = 1,000W—still safe, but close to the edge.
Use a wattage calculator (many are free online) to double-check. If you’re close to the limit, split the load across multiple circuits.
Warning: Never exceed the manufacturer’s max connectable number. Even if the wattage seems low, internal wiring in the plug can overheat and fail.
Step 3: Test Each Strand Before Installing
Plug in each light strand individually and check for:
- Even brightness across all bulbs
- No flickering or dimming
- Proper function of any special modes (twinkle, fade, etc.)
If a strand fails, set it aside. Trying to troubleshoot a broken set while it’s installed is a headache. Replace or repair it now.
This step also helps you identify the “end” of each strand. LED lights often have a male plug on one end and a female socket on the other. The male plug connects to power; the female socket allows you to attach the next strand.
For outdoor displays, use a GFCI outlet or GFCI extension cord. This cuts power instantly if there’s a short, preventing shocks or fires.
Step 4: Connect Strands Safely (Daisy-Chain or Use Power Injection)
Now it’s time to connect. There are two main methods:
Method 1: Daisy-Chaining (Standard)
- Plug the male end of the first strand into the power source (outlet or extension cord).
- Take the female end of the first strand and plug in the male end of the second strand.
- Repeat until you reach your desired length—but never exceed the max connectable number.
Method 2: Power Injection (For Long Runs)
When connecting more than 50 feet or using multiple branches, voltage drop can cause lights at the end to dim. To fix this:
- Run a separate extension cord to the middle or end of the line.
- Plug a new set of lights into that cord, then connect them to the main line using a T-connector or splitter.
- This “injects” fresh power, keeping brightness even.
For example, if you have a 100-foot run, connect 30 feet from the start, then use a power injection at 60 feet to feed another 40 feet. This prevents the last 10 feet from being dim.
Use weatherproof connectors for outdoor use. Cover plug junctions with electrical tape or silicone caps to keep out moisture.
Step 5: Secure Lights with the Right Mounting Tools
Hanging lights isn’t just about looks—it’s about safety and longevity. Poor mounting can cause sagging, breakage, or electrical hazards.
Use these tools based on your surface:
- Eaves, gutters, and shingles: Use gutter hooks or plastic clips. Avoid nails or staples—they can damage roofing and create fire risks.
- Walls and siding: Use adhesive light clips or small hooks. For brick or stucco, use masonry anchors or removable adhesive strips.
- Trees and poles: Wrap lights with zip ties or use spiral tree lights. Don’t tie tightly—allow room for growth.
- Fences and railings: Use fence clips or zip ties. Keep cords off the ground to prevent tripping.
Space clips every 12–18 inches to prevent sagging. For long horizontal runs (like rooflines), use a support wire (like a thin steel cable) and attach lights to it with small hooks. This takes the weight off the light cord.
Pro Tip: For a professional look, align lights so the bulbs face outward (not up or down). This maximizes visibility and creates a clean, polished effect.
Step 6: Manage Cords and Hide Power Sources
Nothing ruins a stunning display like messy cords. Use these tricks to keep things tidy:
- Run extension cords along baseboards, under eaves, or through bushes.
- Use zip ties to bundle excess cord into loops. Hang the loops on hooks to keep them off the ground.
- Paint cords to match walls or use cord covers.
- Use a power box (a small plastic container) to house multiple plugs and protect them from weather.
For outdoor setups, bury cords under mulch or use cord covers rated for outdoor use. Never run cords across walkways without protection—tripping hazards are real.
Use a timer or smart plug to turn lights on at sunset and off at bedtime. This saves energy and prevents overuse. Smart plugs let you control lights from your phone—perfect for last-minute adjustments.
Step 7: Test the Entire System and Troubleshoot
Once everything is connected and mounted, plug in the main power source. Watch for:
- Even brightness across all sections
- No flickering or buzzing
- All special modes working (if applicable)
If one section is dim or out, unplug the whole line and work backward:
- Check the last working strand—is its female socket damaged?
- Inspect the plug connection—is it loose or corroded?
- Test the next strand individually.
Common issue: Voltage drop. If lights get dimmer toward the end, use power injection (Step 4) or shorten the chain.
Use a non-contact voltage tester to check for live wires before handling plugs. Safety first!
Step 8: Maintain and Store Properly
After the season (or event), don’t just toss lights in a box. Proper storage extends their life.
- Unplug everything and let lights cool.
- Remove clips and untangle cords gently.
- Inspect for damaged wires, cracked bulbs, or corroded plugs.
- Coil cords loosely (never tightly) and store in a cool, dry place.
- Use labeled bins or bags to separate sets.
For outdoor lights, wipe down plugs and bulbs with a dry cloth. Store in a sealed plastic container to prevent moisture damage.
Pro Tip: Take a photo of your setup before dismantling. It’ll help you recreate it next year—and make improvements!
Pro Tips & Common Mistakes to Avoid
Pro Tip #1: Use a light stringer tool (a long, flexible rod with a hook) to hang lights on tall eaves or trees. Saves your back and reduces ladder use.
Pro Tip #2: For a “floating” effect, hang lights between two trees using a support wire. Attach lights to the wire with small hooks—no poles needed.
Pro Tip #3: Use RGB LED strips for custom colors. Connect them with a controller and app for dynamic effects (e.g., fade, chase, music sync).
Pro Tip #4: For large events, rent a LED light controller with DMX programming. It lets you sync hundreds of lights with music or video.
Now, the mistakes—don’t fall into these traps:
- Ignoring the max connectable limit: Just because it lights up doesn’t mean it’s safe. Overloaded plugs can melt or spark.
- Using indoor lights outdoors: Indoor-rated LEDs aren’t waterproof. Rain or snow can ruin them fast.
- Overloading one outlet: Even with low wattage, too many strands on one circuit can trip the breaker. Use multiple outlets or circuits.
- Stapling or nailing cords: This damages insulation and creates fire hazards. Use clips instead.
- Leaving lights on 24/7: It wastes energy and shortens bulb life. Use a timer to run lights 4–6 hours per night.
- Mixing old and new strands: Older LEDs may have different voltage or brightness, causing uneven light.
One homeowner connected 40 strands (max 25) and ended up with a melted plug and a $200 repair bill. Don’t be that person. Follow the rules, and your how to string LED lights together for stunning displays project will be safe and beautiful.
FAQs About How to String LED Lights Together for Stunning Displays
Can I connect different brands of LED lights together?
Technically, yes—but only if they have the same voltage and wattage. For example, two 120V, 5W strands from different brands should work. But differences in internal wiring or plug design can cause issues. For best results, stick to the same brand and product line. This ensures consistent brightness and safe connections for your stunning display.
How many LED light strands can I safely connect?
It depends on the model. Most standard 120V LED strands allow 25–50 connections. Check the label. For example, a 25-foot strand might say “Max 30 connectable.” Never exceed this number. If you need more, use power injection or separate circuits. This prevents voltage drop and overheating in your LED display setup.
Why are my LED lights dimming at the end of the string?
This is voltage drop—a common issue in long runs. As electricity travels down the cord, resistance increases, reducing power to the last bulbs. Fix it by: (1) shortening the chain, (2) using power injection, or (3) switching to low-voltage LED systems (like 24V with a transformer). For large displays, this is a must-know for maintaining brightness.
Are there waterproof connectors for outdoor LED lights?
Yes! Use weatherproof plug covers (rubber boots), silicone sealant, or electrical tape to seal connections. For permanent outdoor setups, consider in-line waterproof junction boxes. These keep moisture out and are essential for long-term outdoor LED installations.
Can I cut LED light strands to size?
Only if the packaging says “cuttable.” Some LED strips have marked cut lines every 3–6 inches. Use scissors or wire cutters at those points. Never cut between bulbs—this breaks the circuit. For string lights with fixed bulbs, do not cut. Instead, buy shorter strands or use zip ties to bundle excess.
What’s the safest way to power a large LED display?
Use a dedicated circuit or multiple outlets on different circuits. Avoid extension cords longer than 50 feet. Use a power strip with surge protection and a GFCI outlet for outdoor setups. For very large displays (e.g., 200+ feet), use a low-voltage system with a transformer. This reduces fire risk and voltage drop.
How do I make my LED display look professional?
Focus on symmetry and spacing. Use clips every 12–18 inches to prevent sagging. Align bulbs so they face the same direction. Hide cords behind structures or use cord covers. Add layers—like string lights under a pergola with hanging bulbs below. Use a timer for consistent on/off times. And take a photo each year to track improvements in your stunning LED display.
Final Thoughts
Creating a stunning LED light display isn’t about buying the most lights—it’s about how you connect and install them. With the right planning, tools, and techniques, you can transform any space into a magical glow zone.
Remember: how to string LED lights together for stunning displays starts with safety. Check wattage, respect connection limits, and use proper mounting. Then, focus on design—spacing, symmetry, and cord management make all the difference.
Whether you’re lighting up your home for the holidays, setting the mood for an event, or just enjoying a cozy night on the patio, this guide gives you the confidence to do it right. Test as you go, maintain your setup, and store lights properly for years of use.
Now it’s your turn. Grab your lights, plan your layout, and start stringing. With a little effort, your display will shine brighter, last longer, and impress everyone who sees it. Light up your world—safely, beautifully, and with style.
Need inspiration? Try a “light canopy” over your deck using support wires and hanging bulbs. Or wrap trees with spiral LEDs for a fairy-tale effect. The possibilities are endless when you master how to string LED lights together for stunning displays.

