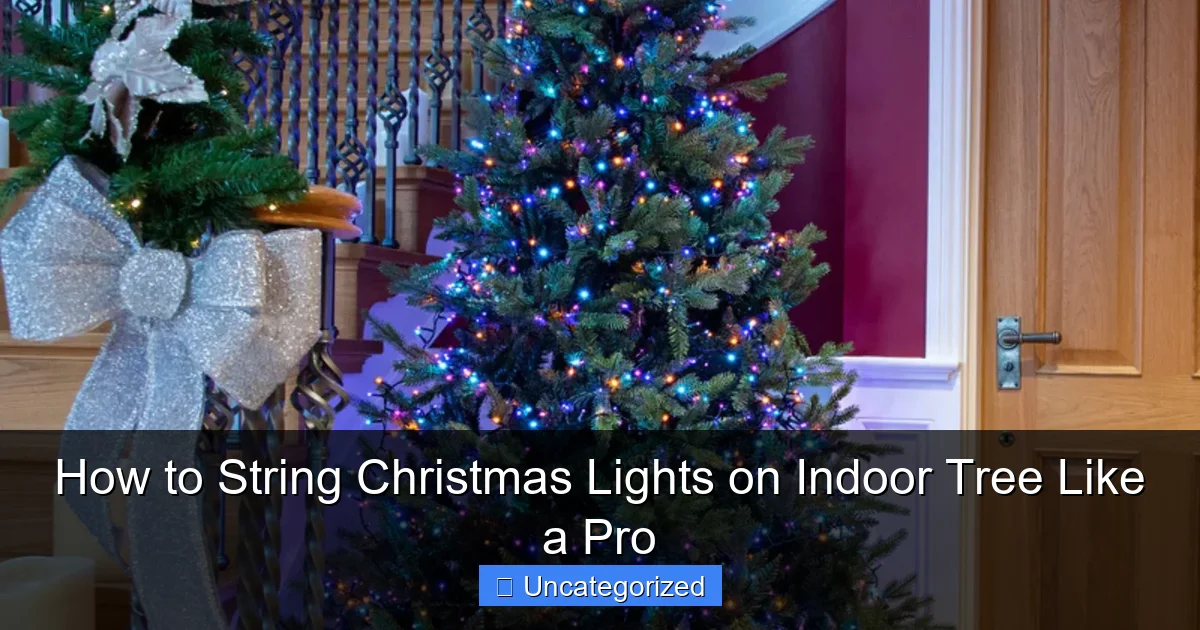
Featured image for how to string christmas lights on indoor tree
Image source: cdn.shopify.com
Wrap your indoor tree like a pro by starting at the base and working upward in a spiral pattern, ensuring lights are evenly spaced for a balanced glow. Use UL-listed indoor lights and secure each strand with light clips or twist ties to avoid sagging and hot spots. Finish by fluffing branches and testing connections for a flawless, twinkling display.
Key Takeaways
- Plan your layout: Sketch light placement before starting for even coverage.
- Use the right lights: Choose LED or low-heat bulbs for indoor safety.
- Start from the base: Wrap lights upward, securing with twist ties or clips.
- Layer lights properly: Weave strands through branches, not just around the trunk.
- Test as you go: Check connections and spacing to avoid overloading circuits.
- Hide the cords: Tuck wires into branches for a clean, professional look.
📑 Table of Contents
How to String Christmas Lights on Indoor Tree Like a Pro
The holiday season is a time of joy, warmth, and festive decorations that transform our homes into magical winter wonderlands. One of the most enchanting additions to any holiday decor is a beautifully illuminated indoor tree. Whether you’re adorning a traditional Christmas tree, a potted evergreen, or even a creative alternative like a branch or ladder tree, stringing lights properly can elevate your display from ordinary to extraordinary. The soft glow of twinkling lights not only brings a cozy ambiance but also serves as a centerpiece for holiday gatherings and family memories.
However, many people struggle with the process of stringing Christmas lights on an indoor tree. Tangled wires, uneven distribution, and lights that are too bright or too dim can turn this joyful task into a frustrating chore. The key to a professional-looking result lies in careful planning, the right tools, and a methodical approach. In this guide, we’ll walk you through every step of the process, from choosing the perfect lights to achieving that flawless, twinkling effect that will impress your guests and make your holiday season shine brighter than ever. Whether you’re a first-time decorator or a seasoned holiday enthusiast, these expert tips and tricks will help you string Christmas lights on your indoor tree like a true pro.
Choosing the Right Christmas Lights for Your Indoor Tree
Selecting the appropriate Christmas lights is the foundation of a stunning indoor tree display. With so many options available, it’s essential to consider factors such as light type, color, brightness, and safety to ensure your tree not only looks beautiful but also functions safely throughout the holiday season.
Visual guide about how to string christmas lights on indoor tree
Image source: bargainlow.com
Types of Christmas Lights
The first decision you’ll need to make is the type of lights you want to use. The most common options include:
- Incandescent Lights: These are the traditional bulbs that have been used for decades. They emit a warm, classic glow but consume more energy and can get hot, which may be a concern for indoor use, especially with flammable materials nearby. Modern incandescent lights are often designed with safety features like shatterproof bulbs and lower wattage.
- LED Lights: LED (Light Emitting Diode) lights are the most popular choice today. They are energy-efficient, produce very little heat, and last significantly longer than incandescent bulbs—often up to 25,000 hours. LEDs come in a variety of colors, including warm white, cool white, multicolor, and even color-changing options.
- Mini Lights: These are small, closely spaced bulbs that create a delicate, twinkling effect. They are ideal for indoor trees because they blend well with branches and foliage, providing a soft, even glow without overwhelming the tree’s natural beauty.
- Net Lights: Pre-strung on a mesh grid, net lights are perfect for draping over the tree’s surface, especially if you want uniform coverage without the hassle of wrapping each branch. They are particularly useful for larger trees or those with dense foliage.
- String Lights with Shapes: These include lights shaped like stars, snowflakes, or other holiday symbols. They add a whimsical touch but may not be suitable for all tree styles, especially if you prefer a more traditional or minimalist look.
Color and Brightness Considerations
The color of your lights can dramatically affect the mood and aesthetic of your indoor tree. Here are some popular choices and their effects:
- Warm White: This classic option mimics the soft glow of candlelight, creating a cozy, inviting atmosphere. It pairs well with traditional red and green decorations and is a safe choice for most home decors.
- Cool White: Cool white lights have a bluer hue and provide a crisp, modern look. They work well in contemporary or minimalist settings and can give your tree a frosty, snowy appearance.
- Multicolor: Bright, colorful lights bring a playful, festive energy. They are perfect for family homes, especially if you have young children who enjoy vibrant decorations. However, they can sometimes clash with certain color schemes, so consider your overall decor before choosing this option.
- Color-Changing LEDs: These lights cycle through different colors or can be controlled via remote or app. They add dynamic flair and are ideal for those who want to change the ambiance throughout the season. However, they may not be suitable for a traditional or elegant look.
Brightness is another important factor. For indoor trees, avoid overly bright or blinding lights, as they can be harsh on the eyes, especially in a dimly lit living room. Instead, opt for lights with a soft, diffused glow. Many LED lights come with adjustable brightness settings, allowing you to customize the intensity to your preference.
Safety and Energy Efficiency
When decorating indoors, safety should always be a top priority. Here are some safety tips to keep in mind:
- Check for UL Certification: Ensure your lights are certified by Underwriters Laboratories (UL) or another recognized safety organization. This guarantees that the lights meet safety standards and are suitable for indoor use.
- Inspect for Damage: Before using any lights, inspect them for frayed wires, broken bulbs, or other signs of damage. Damaged lights can pose fire hazards or electrical risks.
- Use Low-Wattage Lights: Indoor trees don’t require high-wattage lights. In fact, lower-wattage lights (especially LEDs) are safer and more energy-efficient. They also reduce the risk of overheating.
- Consider Smart Lights: Smart LED lights can be controlled via smartphone apps, allowing you to turn them on or off remotely, set timers, or even sync them with music. This adds convenience and reduces the risk of leaving lights on accidentally.
Example: If you have a 6-foot indoor tree with dense branches, a set of 300 warm white LED mini lights would provide even coverage without overwhelming the tree. For a more dramatic effect, you could layer in 100 net lights for the base and 200 mini lights for the branches. Always check the manufacturer’s recommendations for the maximum number of light strands you can safely connect in a series.
Preparing Your Indoor Tree for Lighting
Before you begin stringing lights, proper preparation of your indoor tree is crucial. This ensures that the lights adhere well to the branches, are distributed evenly, and last throughout the holiday season without causing damage to the tree or your home.
Cleaning and Fluffing the Tree
Whether you’re using an artificial tree or a real potted evergreen, start by cleaning and fluffing the branches to create a full, natural appearance. This step is often overlooked but makes a significant difference in how the lights sit on the tree.
- Artificial Trees: Remove the tree from its storage bag and let it sit for a few hours to allow any compressed branches to expand. Then, use your hands or a soft brush to gently fluff out each branch, working from the bottom up. Pay special attention to the inner branches, which often get flattened during storage. Fluffing ensures that the lights can be wrapped around the branches without gaps.
- Real Trees: If you have a real tree, check for loose needles and gently remove them. Use a soft cloth to wipe down any dusty or sticky areas. Real trees may need more frequent watering to keep the needles fresh, which also helps the branches remain supple and easier to work with.
Pro Tip: For artificial trees, consider using a tree fluffing tool or a hairdryer on a low, cool setting to help branches regain their shape more quickly.
Securing the Tree Base
A stable tree is essential for safe and effective lighting. Ensure your tree stand is secure and level. For artificial trees, tighten the stand’s screws or bolts. For real trees, make sure the base is properly watered and the stand is filled with enough water to prevent the tree from drying out too quickly. A dry tree is more flammable and less resilient to the weight of lights.
Planning the Lighting Layout
Before you start stringing lights, take a few minutes to plan your layout. This prevents mistakes and ensures even coverage. Here’s how to do it:
- Measure the Tree: Measure the height and width of your tree. This helps you determine how many light strands you’ll need. As a general rule, you’ll need about 100 lights per foot of tree height. For example, a 6-foot tree would require approximately 600 lights.
- Sketch a Diagram: On a piece of paper, sketch your tree and mark where you plan to place each light strand. Consider starting at the base and working upward in a spiral pattern, or use a zigzag method for even distribution. If using net lights, plan where you’ll drape them.
- Test the Lights: Before attaching them to the tree, plug in each light strand to ensure they are working. This saves you the frustration of discovering a faulty strand halfway through the process.
- Consider the Power Source: Identify the nearest outlet and plan your lighting path to minimize the use of extension cords. If you must use an extension cord, choose one rated for indoor use and ensure it’s not overloaded.
Using Protective Measures
To protect your tree and home, take these additional precautions:
- Use Tree Clips or Hooks: Instead of using wire or tape, which can damage branches or leave residue, use plastic tree clips or hooks designed for lights. These gently grip the branches and can be easily removed after the season.
- Protect Flooring: Place a tree skirt or protective mat under the tree to catch any falling needles or water drips. This also hides the tree stand and any cords, keeping the area neat.
- Check for Heat: If using incandescent lights, monitor the tree for heat buildup, especially near the trunk. LED lights are safer in this regard, but it’s still good practice to check periodically.
Example: For a 7-foot artificial tree, you might use three 200-light warm white LED strands and one net light strand (100 lights). Start by draping the net lights over the lower third of the tree, then wrap the mini light strands in a spiral from the bottom to the top, ensuring each branch is covered. Use tree clips every 6-8 inches to secure the lights without damaging the branches.
Step-by-Step Guide to Stringing Christmas Lights
Now that your tree is prepared, it’s time to string the lights. This step-by-step guide will help you achieve a professional, even glow that highlights your tree’s natural shape and beauty.
Step 1: Start at the Base
Begin by placing the plug end of the first light strand near the tree’s base, close to an outlet. This minimizes the need for extension cords and ensures the plug is easily accessible. If using multiple strands, connect them in series (end-to-end) before starting, but only plug in the first strand to test.
Step 2: Work in a Spiral Pattern
For a classic, even look, wrap the lights in a spiral around the tree, starting at the bottom and moving upward. Here’s how to do it:
- Hold the first strand and drape it over the lowest branches, ensuring the lights face inward toward the tree’s center.
- Wrap the strand in a gentle spiral, moving upward at a 45-degree angle. Keep the spacing between wraps consistent (about 6-8 inches).
- As you wrap, gently tuck the lights into the branches, ensuring they are snug but not too tight. This prevents the lights from slipping and ensures even coverage.
- When you reach the top, leave enough cord to reach the next strand (if connecting) or to plug into an outlet.
Pro Tip: For larger trees, consider using the “zigzag” method instead of a spiral. Start at one side of the tree and zigzag the lights up to the top, then move to the other side and zigzag back down. This provides even coverage and is especially effective for trees with dense foliage.
Step 3: Use Net Lights for Uniform Coverage
If you’re using net lights, drape them over the tree’s surface, starting at the base. Align the net’s grid with the branches, ensuring the lights are evenly distributed. Net lights are ideal for the lower and middle sections of the tree, where a dense, uniform glow is desired. Secure the net with tree clips at the corners and edges.
Step 4: Fill in Gaps and Layer Lights
After the initial spiral or net application, step back and examine the tree. Look for any dark spots or areas with sparse lighting. Use additional light strands to fill in these gaps, focusing on the inner branches and areas near the trunk. Layering lights (e.g., using net lights on the base and mini lights on the branches) adds depth and dimension to your display.
Step 5: Secure and Adjust
Once all lights are in place, go around the tree and secure any loose strands with tree clips or hooks. Adjust the lights to ensure they are evenly spaced and not bunched up in any area. For a more natural look, allow some lights to drape slightly below the branch tips, creating a “weeping” effect.
Step 6: Test and Finalize
Plug in the lights and step back to assess the overall effect. Check for:
- Even Distribution: Are all branches illuminated, or are there dark spots?
- Brightness: Is the glow soft and inviting, or too harsh?
- Alignment: Are the lights following the tree’s natural shape, or do they look haphazard?
Make any necessary adjustments, then secure all plugs and cords with cord clips or ties to keep them organized and out of sight.
Example: For a 6-foot tree with 300 mini lights, start at the base and spiral upward, tucking each light into the branches. After reaching the top, add a second strand of 200 lights to fill in gaps, focusing on the inner branches. Use net lights on the lower third for a dense glow. Secure all lights with clips and test the brightness. Adjust any strands that are too loose or too tight.
Advanced Techniques for a Professional Look
Once you’ve mastered the basics, these advanced techniques will take your indoor tree lighting to the next level, creating a display that looks like it was done by a professional decorator.
Layering Different Light Types
Combining different types of lights adds depth and visual interest. Here are some popular layering techniques:
- Mini Lights + Net Lights: Use net lights on the lower and middle sections for uniform coverage, then layer mini lights on the branches for a twinkling effect. This creates a balanced look with both density and sparkle.
- Warm White + Cool White: Mix warm white mini lights with cool white net lights for a dynamic contrast. Warm white adds coziness, while cool white provides a crisp, modern touch.
- Color-Changing + Solid Colors: Use color-changing LEDs as an accent, such as on the tree topper or a focal branch, while keeping the rest of the tree in a single color (e.g., warm white). This adds movement and excitement without overwhelming the tree.
Creating a “Weeping” Effect
To mimic the look of a tree dripping with light, allow some light strands to hang slightly below the branch tips. This technique works best with mini or fairy lights and creates a magical, ethereal glow. Use longer strands and gently drape them so they hang 6-12 inches below the branches.
Highlighting the Tree’s Structure
Use lights to accentuate the tree’s natural shape. For example:
- Trunk Lighting: Wrap a strand of lights around the trunk, starting at the base and moving upward. This draws attention to the tree’s center and adds symmetry.
- Branch Tips: Place a few extra lights at the tips of the outer branches to create a “starburst” effect. This makes the tree look fuller and more vibrant.
Using Smart Lighting Features
If you have smart LED lights, take advantage of their features:
- Twinkle or Flicker Modes: Set the lights to twinkle or flicker to simulate the effect of candlelight. This adds movement and charm.
Music Sync: Sync the lights to your holiday playlist for a synchronized light show. This is perfect for parties or gatherings.
Timer Settings: Program the lights to turn on at sunset and off at bedtime, ensuring they’re always lit during peak viewing hours.
Adding a Tree Topper Light
A lighted tree topper (e.g., a star, angel, or bow with built-in lights) completes the display. Choose a topper that complements your light color and style. Secure it with a sturdy tree topper stand or clip to prevent it from falling.
Example: For a modern, minimalist tree, use cool white LED mini lights in a spiral pattern, then add a lighted silver star topper. For a cozy, traditional look, layer warm white net lights with twinkling mini lights and a classic angel topper.
Maintaining and Removing Christmas Lights
Proper maintenance ensures your lights stay safe and functional throughout the holiday season, while careful removal preserves their quality for next year.
Daily and Weekly Maintenance
During the holiday season, check your lights regularly:
- Inspect for Damage: Look for flickering bulbs, frayed wires, or overheating. Replace any damaged strands immediately.
- Monitor Heat: If using incandescent lights, check for excessive heat near the trunk or branches. Turn off the lights if they feel too hot.
- Keep the Tree Watered: For real trees, ensure the stand is filled with water to prevent the tree from drying out. Dry trees are more flammable.
Removing Lights at the End of the Season
When the holidays are over, remove the lights carefully to avoid damaging the tree or the lights themselves:
- Unplug and Turn Off: Always unplug the lights before removing them to avoid electrical hazards.
- Remove Clips and Hooks: Gently remove tree clips or hooks, starting from the top. Avoid yanking or pulling, as this can damage branches or light sockets.
- Unwind the Lights: Start at the top and work downward, unwinding the lights in reverse order of how they were applied. Coil each strand neatly as you go.
- Check for Damage: As you remove the lights, inspect each strand for damage. Set aside any that need repair or replacement.
Storing Lights Properly
Proper storage prevents tangles and extends the life of your lights:
- Use Storage Reels: Wind lights onto storage reels or cardboard strips to prevent tangling. Avoid wrapping them around your hand or arm, as this can damage the wires.
- Label Strands: Label each strand with its color, type, and number of lights (e.g., “200 Warm White LED Mini”) for easy identification next year.
- Store in a Cool, Dry Place: Keep lights in a sealed plastic bin or bag to protect them from dust, moisture, and pests.
- Test Before Storage: Plug in each strand before storing to ensure they still work. This saves time next year.
Example: After the holidays, remove the lights from your 6-foot tree in 20 minutes, coiling each strand onto a storage reel. Store them in a labeled bin with a desiccant packet to prevent moisture. Test all strands before sealing the bin.
Conclusion
Stringing Christmas lights on an indoor tree doesn’t have to be a daunting task. With the right preparation, tools, and techniques, you can create a stunning, professional-quality display that brings joy and warmth to your home. From choosing the perfect lights and preparing your tree to mastering advanced layering techniques and ensuring safe maintenance, every step contributes to a magical holiday centerpiece.
Remember, the key to success lies in attention to detail—fluffing branches, planning your layout, and using tree clips for secure, damage-free attachment. Whether you prefer a classic warm white glow, a vibrant multicolor display, or a modern smart lighting setup, these tips will help you achieve the look you desire. And by storing your lights properly, you’ll ensure they remain in top condition for many holiday seasons to come.
This year, take your indoor tree lighting to the next level. With patience, creativity, and the guidance provided in this article, you’ll not only impress your guests but also create a cherished holiday tradition that your family will look forward to year after year. So grab your lights, plug in your favorite holiday music, and let the magic begin—your indoor tree is about to shine brighter than ever!
| Tree Height (Feet) | Recommended Light Count | Suggested Light Types | Max Connected Strands (LED) |
|---|---|---|---|
| 4 | 400 | Mini, Net | 5-7 |
| 6 | 600 | Mini, Net, Color-Changing | 8-10 |
| 7 | 700 | Mini, Net, Twinkle | 9-11 |
| 8 | 800 | Mini, Net, Layered | 10-12 |
Frequently Asked Questions
How do I string Christmas lights on an indoor tree without tangling them?
Start by untangling the lights and plugging them in to test functionality. Work from the top down, draping lights evenly around branches while gently securing them with twist ties or hooks to avoid snags.
What type of Christmas lights work best for indoor trees?
LED string lights are ideal for indoor trees—they’re energy-efficient, cool to the touch, and come in warm white or multicolor options. Battery-powered fairy lights are also great for smaller trees or hard-to-reach outlets.
How many Christmas lights do I need for my indoor tree?
Measure your tree’s height and width, then use a rule of thumb: 100 lights per foot of tree height for a standard look. For a fuller effect, opt for 150–200 lights per foot, especially on wider trees.
Can I string lights on a live indoor tree safely?
Yes, but use low-heat LED lights to prevent drying out the tree. Avoid overloading circuits and unplug lights when unattended to reduce fire risk—always follow manufacturer safety guidelines.
How do I hide the cords when stringing Christmas lights on an indoor tree?
Weave the plug and excess cord through the center of the tree trunk or behind dense branches. Use green or clear zip ties to blend cords into the foliage, and route the main plug to an outlet discreetly.
What’s the easiest way to evenly distribute lights on an indoor tree?
Use the “zigzag” method: drape lights diagonally across branches instead of wrapping them straight around. This ensures even coverage and prevents clumping, especially on larger indoor trees.

