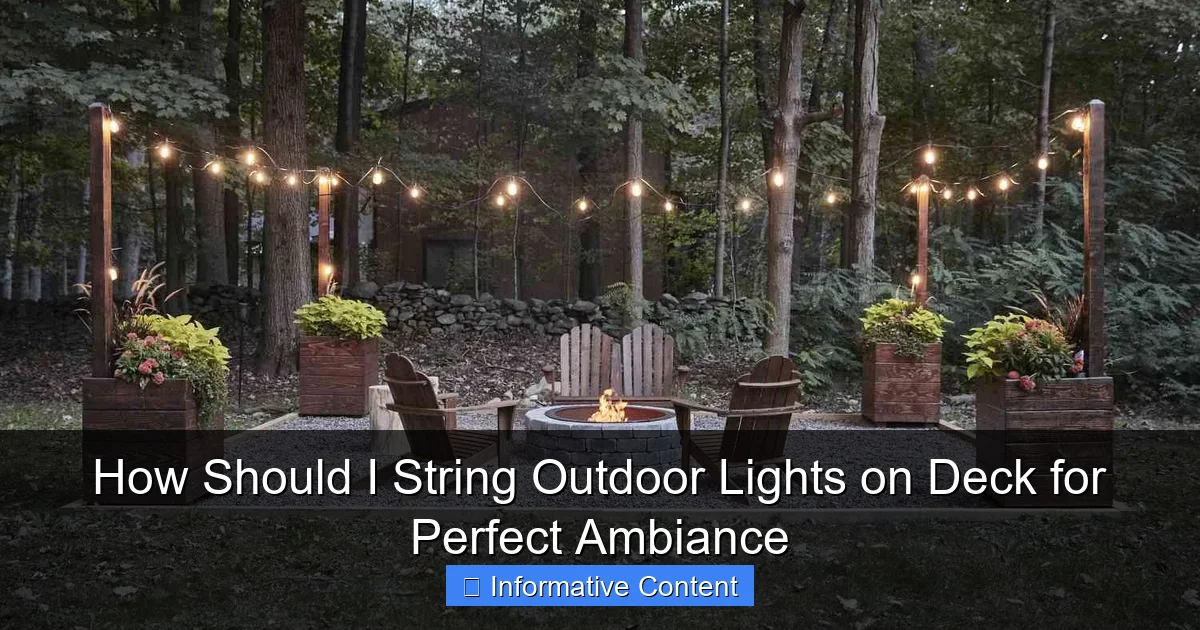
Featured image for how should i string outdoor lights on deck
Image source: thespruce.com
Plan your layout strategically to create a balanced, inviting glow—start by measuring your deck and spacing lights evenly along railings, posts, or overhead beams. Use weather-resistant, LED string lights with clips or adhesive hooks for secure, damage-free installation that enhances ambiance while enduring the elements.
Key Takeaways
- Plan your layout first: Sketch light placement to avoid over- or under-lighting key deck areas.
- Choose weatherproof lights: Use UL-rated outdoor lights for safety and durability in all conditions.
- Secure lights properly: Use hooks, clips, or zip ties to prevent sagging or damage from wind.
- Layer lighting types: Combine string, path, and accent lights for depth and ambiance.
- Use dimmers or timers: Control brightness and automate on/off times for convenience and energy savings.
- Hide cords neatly: Tuck wires along railings or edges to maintain a clean, professional look.
📑 Table of Contents
- How Should I String Outdoor Lights on Deck for Perfect Ambiance
- 1. Choosing the Right Outdoor String Lights
- 2. Planning Your Lighting Layout
- 3. Safe & Secure Installation Methods
- 4. Power Solutions & Cord Management
- 5. Styling & Ambiance: Creating the Perfect Mood
- 6. Maintenance & Longevity: Keeping Lights Looking Great
How Should I String Outdoor Lights on Deck for Perfect Ambiance
There’s something magical about stepping onto your deck after dark, only to be greeted by a soft, warm glow that transforms the space into a cozy retreat. Whether you’re hosting a summer barbecue, enjoying a quiet evening with a book, or sharing a meal with loved ones, the right outdoor lighting can elevate your deck from functional to unforgettable. But if you’ve ever stared at a box of string lights and wondered, “How should I string outdoor lights on deck?”—you’re not alone. Lighting isn’t just about visibility; it’s about mood, safety, and making the most of your outdoor living space.
As someone who once spent a whole weekend untangling lights and rewiring connections just to achieve *that* perfect ambiance, I can tell you—it doesn’t have to be this hard. With a little planning, the right tools, and a few pro tips, you can create a deck lighting setup that’s not only beautiful but also durable and functional. Whether you’re going for a rustic, romantic, modern, or festive vibe, this guide walks you through every step—from choosing the right lights to installing them safely and stylishly. So grab a cup of coffee, and let’s turn your deck into a nighttime paradise.
1. Choosing the Right Outdoor String Lights
Before you even think about hanging, you need to pick the right lights. Not all string lights are created equal, and choosing the wrong type can lead to dim illumination, frequent replacements, or even safety hazards. The goal is to balance aesthetics, durability, and practicality.
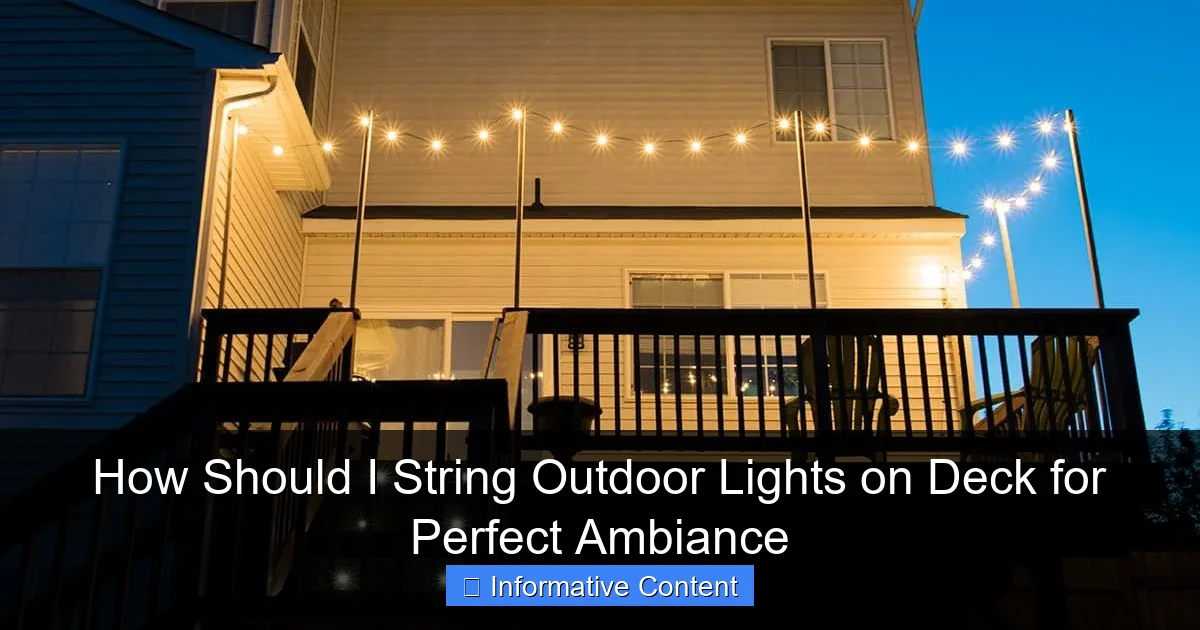
Visual guide about how should i string outdoor lights on deck
Image source: cravingsomecreativity.com
Types of Outdoor String Lights
- LED String Lights: The most popular choice today. They’re energy-efficient, long-lasting (up to 25,000 hours), and come in a variety of colors and bulb shapes. LED lights produce less heat, making them safer for outdoor use, especially near wood decks.
- Incandescent String Lights: These give off a warm, classic glow but use more energy and burn out faster. They’re great for temporary setups or holiday lighting but not ideal for year-round use.
- Solar-Powered String Lights: Eco-friendly and easy to install—no wiring needed. However, they depend on sunlight and may not shine as brightly or last as long on cloudy days or in shaded areas.
- Smart String Lights: These can be controlled via app or voice assistant, allowing you to adjust brightness, color, and even set schedules. Great for tech lovers, but they’re pricier and require a Wi-Fi connection.
Key Features to Consider
- Weather Resistance: Look for lights with an IP44 or higher rating. This means they’re protected against splashing water and small solid particles—essential for outdoor use.
- Bulb Shape & Spacing: Globe bulbs give a soft, diffused glow; Edison-style bulbs add vintage charm; mini bulbs offer a twinkling effect. Spacing matters too—12–18 inches between bulbs is ideal for even coverage.
- Length & Connectability: Measure your deck’s perimeter or desired lighting area. Many outdoor strings are connectable, meaning you can plug multiple strands together. Just don’t exceed the manufacturer’s recommended max (usually 3–4 strands).
- Plug-In vs. Battery/Solar: Plug-in lights offer consistent brightness and longer run time. Battery or solar options are easier to install but require maintenance (changing batteries or cleaning solar panels).
Pro Tip: Mix & Match for Depth
Don’t limit yourself to one type. For example, use warm white LED string lights along the railing for general ambiance, then add solar fairy lights in planters or around steps for a whimsical touch. Layering different styles adds visual interest and depth.
2. Planning Your Lighting Layout
Great lighting starts with a great plan. Jumping straight into hanging lights without a layout can lead to uneven coverage, dark spots, or tangled wires. Think of your deck as a canvas—where do you want the light to go?
Identify Key Lighting Zones
- Perimeter Lighting: Run lights along the deck railing, posts, or outer edges. This defines the space and adds a soft glow around the entire area. Ideal for social gatherings.
- Overhead Lighting: Hang lights across the deck from posts, pergola beams, or eaves. This mimics “canopy lighting” and creates a cozy, intimate feel. Great for dining or lounging.
- Accent Lighting: Use lights to highlight specific features—planters, steps, a water feature, or a built-in grill. This adds drama and guides movement.
- Task Lighting: If you have a kitchen or bar area on your deck, add brighter, focused lights (like LED puck lights) for food prep or reading.
Sketch a Lighting Diagram
Grab a notepad or use a free app like SketchUp Free or Canva to sketch your deck. Mark where you plan to hang lights, where outlets are, and where you’ll run extension cords. This helps you estimate how many feet of lighting you’ll need and avoid overloading circuits.
Measure & Calculate
- Measure the length of railings, beams, or areas you plan to light.
- Add 10–15% extra for draping, curves, or overlap.
- Check the wattage of your lights and your outdoor outlet’s capacity. Most standard outlets handle up to 1,800 watts (15 amps). Use a power strip with surge protection if connecting multiple strands.
Example: A 20×15 Foot Deck
Let’s say your deck has a 20-foot front edge, two 15-foot side railings, and a pergola with four 10-foot beams. You might plan:
– 20 ft + 15 ft + 15 ft = 50 ft for railings (use 2x 25-ft LED strings, connectable)
– 40 ft overhead (4x 10-ft strands, hung diagonally or in a crisscross pattern)
– 10 ft accent lighting (solar fairy lights in planters)
– Total: ~100 ft of lighting, powered by two outdoor-rated extension cords.
3. Safe & Secure Installation Methods
Now comes the fun part—hanging the lights! But safety first. Poor installation can lead to tripping hazards, damaged lights, or even electrical issues. The goal is to secure lights without harming your deck or risking a fall.
Tools & Materials You’ll Need
- Outdoor-rated string lights
- Extension cords (outdoor, GFCI-protected)
- Light clips or hooks (screw-in, adhesive, or tension-based)
- Measuring tape
- Drill (if installing permanent hooks)
- Ladder (for overhead lighting)
- Zip ties (for securing loose cords)
- Timer or smart plug (optional)
Best Ways to Hang Lights (Without Damaging Your Deck)
- Adhesive Clips: Perfect for railings or smooth surfaces. Look for weatherproof, removable clips that won’t leave residue. Great for renters or seasonal lighting.
- Screw-in Hooks: More permanent and secure. Use stainless steel or coated hooks to prevent rust. Ideal for pergolas or deck posts. Drill pilot holes first to avoid splitting wood.
- Tension Rods & Hooks: For pergolas or beams, use adjustable tension rods with hooks at each end. No drilling needed—just adjust the length to fit snugly between supports.
- Rail Mounts: Specialty clips designed to snap onto deck railings. They’re sturdy and blend in with the design.
- Zip Ties (Temporary): Useful for quick setups or securing cords. Use UV-resistant ties so they don’t degrade in sunlight.
Installation Tips for Common Deck Features
- Along Railings: Space clips every 12–18 inches. Drape lights in a gentle wave or zigzag for a relaxed look. Avoid tight, straight lines—they look too rigid.
- Overhead (Pergola or Eaves): Use hooks at each end of a beam, then run the light strand in a crisscross or “X” pattern for a starry-sky effect. Leave a slight sag (1–2 inches) for movement in the wind.
- On Posts: Wrap lights around posts in a spiral. Use a helper to hold the strand while you secure it with clips or ties.
- Near Steps: Run lights along the handrail or under the lip of each step. This improves visibility and adds elegance.
Safety First: Electrical & Physical
- Use GFCI-protected outlets (ground fault circuit interrupter). These cut power if they detect moisture or a short—critical for outdoor safety.
- Keep cords off walkways. Run them under railings, along beams, or use cord covers to prevent tripping.
- Never staple or nail through light strands. It can damage insulation and create fire hazards.
- Test all lights before hanging. Replace any with frayed wires or flickering bulbs.
4. Power Solutions & Cord Management
Nothing ruins ambiance like a messy tangle of cords. Plus, exposed wires are a safety hazard and can degrade in the elements. The key is to hide, protect, and organize your power sources.
Outdoor Outlets & Extension Cords
- Use outdoor-rated extension cords with thick insulation and three-prong plugs. Look for “SJTW” or “SJTOW” labels—these are designed for outdoor use.
- Choose cords with weatherproof covers on the plug ends. These keep moisture out when not connected.
- Never daisy-chain more than 3–4 cords. Overloading can overheat and cause fires.
- If you don’t have an outdoor outlet, consider installing one (with a permit and professional help). Or use a weatherproof junction box with a GFCI outlet.
Creative Cord Hiding Techniques
- Under Railings: Run cords behind or under deck railings. Use zip ties or clips to keep them flush and out of sight.
- Along Beams: Tuck cords into the grooves of pergola beams or use cord raceways (plastic channels that snap over wires).
- Inside Planters: Run cords through large planters with drainage holes. Use a small hole at the back to feed the cord out discreetly.
- Under Furniture: Route cords under benches or tables, then out the back. Use furniture with open bases for easy access.
Smart Power Options
- Smart Plugs: Plug your lights into a Wi-Fi-enabled smart plug (like TP-Link Kasa or Wemo). Control lights with your phone or voice assistant (Alexa, Google Home).
- Timers: Set lights to turn on at sunset and off at bedtime. No more remembering to flip switches.
- Solar Charging Stations: For solar lights, place the panel in a sunny spot (like a railing) and run the wire to the lights below.
Pro Tip: Label Your Cords
Use colored zip ties or tags to label cords by zone (e.g., “Pergola,” “Railing,” “Planters”). This makes troubleshooting or seasonal removal much easier.
5. Styling & Ambiance: Creating the Perfect Mood
Now that your lights are safely installed, it’s time to style them for maximum ambiance. Lighting isn’t just about visibility—it’s about emotion. The right setup can make your deck feel warm, inviting, or even magical.
Color Temperature: Warm vs. Cool
- Warm White (2700K–3000K): The most popular choice. It mimics candlelight and creates a cozy, inviting atmosphere. Best for dining, lounging, or romantic evenings.
- Cool White (4000K–5000K): Brighter and more modern. Good for task lighting or a contemporary deck design. Can feel a bit clinical if overused.
- Colored Lights: Use sparingly for parties or holidays. Red for Valentine’s, blue for a beachy vibe, or multicolor for a festive look.
Layering Lights for Depth
Think in layers:
– Base Layer: General ambient lighting (railing or overhead strings)
– Middle Layer: Accent lighting (planters, steps, art)
– Top Layer: Task lighting (under-counter LEDs, reading lamps)
This creates a dynamic, multi-dimensional space that feels rich and intentional.
Patterns & Arrangements
- Crisscross Overhead: Hang lights in an “X” or grid pattern across a pergola. Creates a starry-sky effect.
- Wave or Zigzag: Drape lights in a gentle wave along railings. Softer and more organic than straight lines.
- Spiral Wrap: Wrap lights around deck posts or pillars. Great for visual interest.
- Canopy Drape: Let lights hang down from a pergola like vines. Use sheer fabric or netting to diffuse the light.
Seasonal & Thematic Ideas
- Summer: Bright white or soft yellow with solar fairy lights in planters.
- Fall: Warm amber or orange lights with pumpkins and mums.
- Winter: Cool white or blue with icicle lights for a frosty glow.
- Holidays: Use themed bulbs (e.g., snowflakes, stars) or color-changing smart lights.
6. Maintenance & Longevity: Keeping Lights Looking Great
Outdoor lights face sun, rain, wind, and dust. A little maintenance goes a long way in keeping them beautiful and functional for years.
Seasonal Care Tips
- Spring: Inspect for damage. Replace burnt-out bulbs. Clean solar panels with soapy water.
- Summer: Check for loose clips or sagging strands. Trim overgrown plants that block lights.
- Fall: Clear leaves and debris from light strands. Store seasonal lights in a dry, cool place.
- Winter: In snowy areas, remove lights or use heavy-duty, cold-weather-rated strands. Snow buildup can damage bulbs.
Cleaning & Storage
- Wipe bulbs and cords with a damp cloth (unplugged, of course).
- Use a soft brush to remove dust from clips and hooks.
- Store lights in original boxes or use light storage reels to prevent tangling.
- Label storage containers by season or zone.
Troubleshooting Common Issues
- Flickering Lights: Check connections, replace bulbs, or test with a different outlet.
- Dim Lights: Could be low voltage (too many strands connected) or a failing power source.
- Water in Bulbs: Replace immediately. Water can cause shorts or corrosion.
- Sagging Strands: Add more clips or adjust tension. Don’t let lights touch the ground.
Data Table: Recommended Outdoor String Lights by Use Case
| Use Case | Recommended Type | Key Features | Avg. Lifespan | Best For |
|---|---|---|---|---|
| Year-Round Ambiance | Connectable LED String Lights | IP44, warm white, 25-ft strands | 25,000 hours | Deck railings, pergolas |
| Temporary/Seasonal | Incandescent or Solar Fairy Lights | Low cost, easy setup, no wiring | 1,000–5,000 hours | Holidays, parties, planters |
| Smart Control | Smart LED String Lights | App/voice control, color-changing | 20,000 hours | Tech lovers, mood lighting |
| Eco-Friendly | Solar-Powered String Lights | No electricity, daylight charging | 2–3 years (batteries) | Remote decks, shaded areas |
Creating the perfect outdoor lighting on your deck isn’t just about hanging lights—it’s about crafting an experience. From choosing weatherproof LED strands to planning a thoughtful layout, every decision shapes the mood of your outdoor space. Remember, the goal isn’t to flood your deck with light but to guide the eye, highlight key features, and invite relaxation.
As you string your lights, think of it as a personal touch—a way to say, “This space is for joy, connection, and peace.” Whether you’re going for a minimalist glow or a festive sparkle, the right setup will make your deck feel like an extension of your home, not just a platform off the back door. And with proper installation, power management, and seasonal care, your lights can shine beautifully for years.
So go ahead—grab those clips, sketch your layout, and let the magic begin. The perfect ambiance is just a few well-placed lights away. After all, the best memories are made under the stars… or at least under a canopy of warm, twinkling bulbs. Now, when someone asks, “How should I string outdoor lights on deck?”—you’ll have the answer, and the proof, right in your own backyard.
Frequently Asked Questions
How should I string outdoor lights on deck for even lighting?
To achieve even lighting, plan your layout by measuring the perimeter of your deck and spacing bulbs 6–12 inches apart. Use LED string lights with consistent brightness and connect multiple strands end-to-end if needed. Avoid overloading circuits by checking the manufacturer’s wattage limits.
What type of outdoor lights work best for a deck?
Weather-resistant LED string lights with an IP65 rating are ideal for decks, as they withstand rain and UV exposure. Opt for warm white or soft yellow bulbs to create a cozy ambiance. Solar-powered options are great for off-grid areas.
Can I attach string lights to a wooden deck without damaging it?
Yes! Use removable adhesive hooks, zip ties, or low-profile clips designed for outdoor use to avoid drilling into wood. For railings, wrap lights around or use adjustable clamps to keep the setup secure yet damage-free.
How do I power outdoor lights on a large deck?
For large decks, use extension cords rated for outdoor use or install a weatherproof outlet nearby. If running wires is tricky, choose solar-powered lights or battery-operated LED strings with timers for convenience.
How should I string outdoor lights on deck for a layered look?
Combine overhead string lights with ground-level LED strips or lanterns to add depth. Drape lights along railings, pergolas, and stairs, varying heights for visual interest. Use dimmers to adjust brightness for different moods.
Are there safety tips for installing deck lights?
Always use UL-listed outdoor-rated lights and keep connections dry with waterproof covers. Secure cords to prevent tripping hazards and avoid overloading circuits. Turn off lights during storms to prevent electrical risks.

