Featured image for where to hang outdoor string lights
Image source: thecreativityexchange.com
Hang outdoor string lights along fences, pergolas, or tree branches to instantly elevate your outdoor ambiance. For optimal effect, drape them in zigzag or parallel patterns 8–10 feet above ground to ensure visibility without obstruction. Choose durable, weather-resistant fixtures and anchor them securely to create a magical, inviting atmosphere perfect for entertaining or relaxing.
Key Takeaways
- Measure your space first: Plan light placement to avoid over- or under-lighting key areas.
- Use existing structures: Hang lights on pergolas, fences, or trees for easy installation.
- Create zones: Define dining, lounging, and pathways with strategic light placement.
- Prioritize height: Hang lights 8–10 feet high for safety and balanced illumination.
- Weatherproof connections: Use outdoor-rated lights and seal all plugs for durability.
- Layer lighting: Combine string lights with lanterns or spotlights for depth.
📑 Table of Contents
- Where to Hang Outdoor String Lights for Perfect Ambiance
- 1. Overhead Canopies and Patios: Creating a Cozy Ceiling Effect
- 2. Along Fences and Railings: Simple, Safe, and Stylish
- 3. Trees and Shrubs: Nature-Inspired Lighting
- 4. Along Roofs and Eaves: Elevated Elegance
- 5. Creative Spaces: Unexpected Places for Extra Charm
- 6. Practical Tips: Safety, Tools, and Maintenance
Where to Hang Outdoor String Lights for Perfect Ambiance
There’s something magical about stepping outside on a warm evening and being greeted by the soft, golden glow of outdoor string lights. Whether it’s a cozy patio, a backyard gathering, or a quiet moment under the stars, string lights have the power to transform any outdoor space into a warm, inviting retreat. I still remember the first time I hung them in my own backyard—I was skeptical at first. Would they look tacky? Would they be too bright? But the moment I turned them on, I knew I’d found the secret ingredient to perfect outdoor ambiance. It felt like my backyard had been wrapped in a warm hug.
But here’s the thing: hanging outdoor string lights isn’t as simple as just draping them across a few trees. The placement, spacing, and even the type of fixtures you use can make or break the effect. Done right, they create a dreamy, Pinterest-worthy atmosphere. Done poorly, they can look messy, uneven, or worse—create tripping hazards or damage your home’s exterior. So, where should you hang outdoor string lights to get that perfect glow? That’s what we’re diving into today. Whether you’re planning a romantic dinner under the stars, a backyard BBQ, or just want to enjoy your garden after dark, this guide will help you hang your lights with confidence and style. And don’t worry—no fancy tools or electrical engineering degree required.
1. Overhead Canopies and Patios: Creating a Cozy Ceiling Effect
One of the most popular and effective ways to hang outdoor string lights is by creating an overhead canopy, especially over patios, decks, or pergolas. This method mimics the feeling of being indoors, with a ceiling of warm light that defines your outdoor living space. It’s like building a room without walls—perfect for entertaining or just unwinding after a long day.
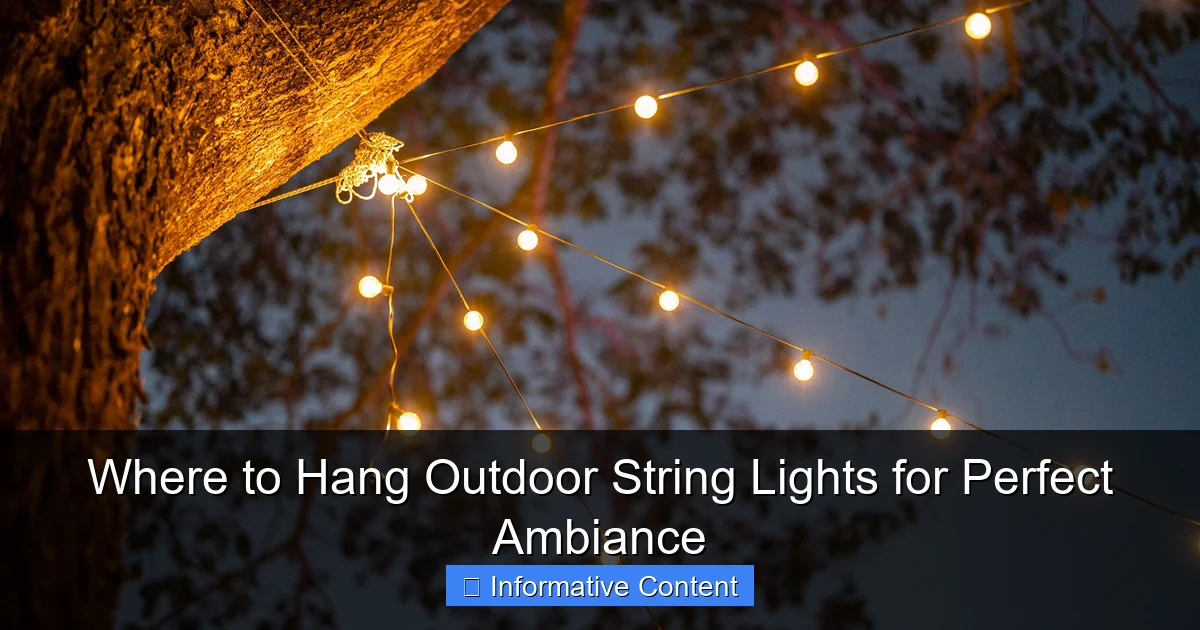
Visual guide about where to hang outdoor string lights
Image source: cdn.mos.cms.futurecdn.net
Use Your Existing Structures
Start by looking at what you already have. If you have a covered patio, pergola, or gazebo, you’re in luck. These structures provide natural anchor points for your lights. Simply attach the string lights to the beams using s-hooks, zip ties, or light clips designed for outdoor use. For a clean look, run the lights parallel to the beams in a grid pattern or zigzag them diagonally for a more dynamic effect. I once zigzagged lights over my pergola and loved how the crisscross pattern cast playful shadows on the ground—like a starry net overhead.
Pro tip: Avoid using nails or screws directly into wood unless you’re okay with permanent holes. Instead, use adhesive-backed light clips or magnetic hooks if you’re renting or want a damage-free solution. These work great on vinyl, metal, or painted surfaces.
Create a DIY Frame with Poles or Posts
No pergola? No problem. You can create your own frame using freestanding poles, shepherd’s hooks, or even repurposed wooden fence posts. Drive metal or plastic poles into the ground (or use weighted bases for stability) and connect them with string lights. For a more permanent look, consider installing outdoor-rated poles with crossbars at the top. I once used two tall shepherd’s hooks and a horizontal bamboo pole to create a simple canopy over my bistro table—cost less than $30 and looked like a professional job.
When spacing poles, aim for 8 to 10 feet apart. Too close and the lights will look cluttered; too far and they’ll sag or require extra support. Use a level to ensure your crossbar is straight—no one wants lopsided lighting!
Mind the Height and Sag
Height matters. Hang your lights at least 7 to 8 feet above the ground to avoid head bumps and ensure even light distribution. If you’re using a long run of lights, plan for sag. Most string lights will naturally dip between anchor points, so allow for a gentle curve—about 1 to 2 inches of sag per foot of span. For longer runs (over 20 feet), use a support wire (like a thin steel cable) to hang the lights from. This prevents sagging and extends the life of your lights by reducing strain on the bulbs.
2. Along Fences and Railings: Simple, Safe, and Stylish
Fences and railings are often overlooked, but they’re some of the easiest and safest places to hang outdoor string lights. They provide a linear, structured path for your lights and can instantly elevate the look of your yard or balcony.
Wrap or Attach Along the Top Rail
The simplest method is to drape or wrap the lights along the top of your fence or railing. Use zip ties or outdoor-rated adhesive clips every 12 to 18 inches to keep them secure. For a neater look, run the lights in a straight line along the top edge. If your fence has pickets, you can weave the lights in and out for a more decorative effect—like a string of pearls along the top.
I once wrapped lights around a white picket fence in a spiral pattern and was amazed at how it looked like a glowing ribbon at night. It was subtle, elegant, and didn’t require any drilling.
Use Railing Hooks or Clips
For balconies or deck railings, railing-mounted hooks are a game-changer. These clip onto the railing without damaging it and provide a secure anchor point. You can run the lights horizontally along the railing or vertically down the posts. Vertical drops create a “chandelier” effect and are great for small spaces.
Caution: Don’t overload the railing. Most are not designed to support heavy loads. Stick to lightweight LED string lights and avoid draping them over the edge where they might get caught in the wind or by passersby.
Combine with Planters or Trellises
Want to add greenery? Attach your lights to a trellis or use planter-mounted hooks to run the lights from planter to planter. This works especially well on narrow decks or balconies where space is tight. I once used large planters with built-in hooks to run lights across my small balcony—created a cozy nook that felt twice as big at night.
3. Trees and Shrubs: Nature-Inspired Lighting
Hanging string lights in trees and shrubs brings a whimsical, fairy-tale feel to your yard. It’s like turning your garden into an enchanted forest. But it requires a bit more planning to avoid damaging your plants and to ensure the lights stay put.
Wrap the Trunk and Branches
For large trees, start by wrapping the lights around the trunk in a spiral pattern. Use soft, flexible ties (like garden tape or fabric strips) instead of metal zip ties, which can damage bark. Then, extend the lights into the branches. Drape them gently—don’t pull or stretch. The goal is to highlight the natural shape, not overpower it.
I once wrapped a maple tree with warm white lights and loved how it looked like a glowing sculpture at night. Just remember: don’t wrap too tightly. Trees grow, and tight ties can girdle the bark over time.
Use Tree Straps or Rope Anchors
For larger installations, use tree-friendly straps or rope anchors to secure the lights to the ground or another tree. These distribute pressure and prevent damage. You can create a “web” of lights between multiple trees, which is perfect for large yards or event spaces. I once used this method at a friend’s wedding—lights crisscrossed between three oaks, creating a magical canopy over the dance floor.
Mind the Roots and Wildlife
Be careful not to drive stakes or poles too deep, as you might damage tree roots. Also, avoid leaving lights on all night. While they’re beautiful, constant light can disrupt nocturnal animals and insects. Use a timer to turn them off by 11 PM. And always use LED lights—they’re cooler, safer, and more energy-efficient.
4. Along Roofs and Eaves: Elevated Elegance
Hanging string lights along the eaves or roofline of your house or garage adds a touch of elegance and can make your entire property feel more inviting. It’s a favorite for holiday lighting, but it works year-round.
Use Gutter Clips or Eave Hooks
Special gutter clips and eave hooks are designed to hang lights without damaging your roof or gutters. They hook over the edge and hold the lights securely. Run the lights along the peak of the roof or around the perimeter of your house. For a festive look, zigzag them from one end to the other.
I once hung lights along my garage eaves and was surprised at how much brighter my driveway felt. It wasn’t just about ambiance—it improved safety too.
Consider the Roof Pitch and Material
Flat or low-pitched roofs are easier to work with. Steep roofs may require a ladder or professional help. Avoid hanging lights on slate or tile roofs, as clips can crack the material. For metal or asphalt shingles, use soft rubber-backed clips to prevent scratches.
Plan for Power Access
Roofline lights often require longer extension cords or outdoor outlets. Use GFCI-protected outlets and weatherproof cord covers to keep everything safe. I once ran a cord across my lawn and tripped over it in the dark—lesson learned! Now I use cord covers or bury them under mulch.
5. Creative Spaces: Unexpected Places for Extra Charm
Why stop at the obvious spots? String lights can go almost anywhere—adding charm to unexpected corners of your outdoor space.
Over a Dining Table or Fire Pit
Hang a single strand or cluster of lights directly over your outdoor dining table or fire pit. Use a central pole or a low-hanging branch to create a “chandelier” effect. I once hung a cluster of Edison bulbs over my fire pit and loved how it cast a warm, flickering glow—perfect for s’mores and storytelling.
Along a Path or Walkway
Line your garden path or front walkway with low-hanging lights. Use stake lights or low shepherd’s hooks to run the lights 12 to 18 inches above the ground. This adds both safety and ambiance. I once did this for a garden party and guests said it felt like walking through a glowing tunnel.
In a Pergola or Arbor with Vines
If you have a vine-covered arbor or pergola, weave the lights into the vines for a natural, organic look. The leaves will diffuse the light, creating a soft, dappled effect. Just make sure the vines are sturdy enough to support the weight.
On a Fence Gate or Archway
Highlight your backyard entrance with lights. Hang them over a gate or archway to create a welcoming “doorway” effect. I once added lights to my garden gate and loved how it made my backyard feel like a private retreat.
6. Practical Tips: Safety, Tools, and Maintenance
No matter where you hang your lights, safety and maintenance are key. A little planning now can save you headaches later.
Choose the Right Lights
Not all string lights are created equal. Look for outdoor-rated, weather-resistant lights with IP65 or higher ratings. LED lights are best—they use less power, last longer, and don’t get hot. Avoid incandescent bulbs, which can overheat and pose a fire risk.
Use the Right Tools and Accessories
Stock up on essentials: zip ties, adhesive clips, s-hooks, extension cords, timers, and a voltage tester. A ladder with stabilizers is a must for high installations. And always use outdoor-rated extension cords—indoor cords can short out in the rain.
Test Before You Hang
Always test your lights before hanging them. Plug them in to check for dead bulbs or frayed wires. Nothing’s worse than hanging 20 feet of lights only to find one bulb out.
Maintain and Store Properly
After the season, take down your lights gently. Avoid yanking or twisting. Store them in a cool, dry place, preferably in the original box or a labeled storage bin. I once left my lights outside over winter—half the bulbs died. Lesson learned: always store them indoors.
Data Table: Recommended Hanging Methods by Space
| Outdoor Space | Best Hanging Method | Recommended Height | Tools/Accessories | Notes |
|---|---|---|---|---|
| Patio/Pergola | Grid or zigzag pattern | 7–8 feet | S-hooks, zip ties, support wire | Use support wire for spans >20 ft |
| Fence/Railing | Top rail or vertical drops | 6–7 feet | Adhesive clips, railing hooks | Avoid overloading railing |
| Tree/Shrub | Spiral wrap or web between trees | 6–8 feet | Tree straps, soft ties | Don’t wrap too tightly |
| Roof/Eaves | Peak or perimeter | 8–10 feet | Gutter clips, eave hooks | Use GFCI outlets |
| Path/Walkway | Low-hanging line | 12–18 inches | Stake lights, shepherd’s hooks | Great for safety |
| Dining Area | Chandelier cluster | 6–7 feet | Pole, central hook | Use dimmable lights for mood |
Hanging outdoor string lights isn’t just about lighting up your yard—it’s about creating moments. Whether it’s a quiet evening with a book, a lively BBQ with friends, or a romantic dinner under the stars, the right placement can turn any space into something special. The key is to work with what you have, plan for safety and longevity, and don’t be afraid to get creative.
Remember, perfect ambiance isn’t about perfection. It’s about feeling. If your lights make you smile when you step outside, you’ve done it right. So grab your lights, pick a spot, and start stringing. Your backyard is waiting to shine. And who knows? Maybe next summer, you’ll be the one sharing your favorite “where to hang outdoor string lights” tip with a friend—just like I did.
Frequently Asked Questions
Where should I hang outdoor string lights for the best ambiance?
For perfect ambiance, hang outdoor string lights along patios, pergolas, or tree branches to create a warm, inviting glow. Drape them in zigzag patterns between anchor points for balanced coverage without overwhelming the space.
Can I hang outdoor string lights on trees without damaging them?
Yes, use soft, adjustable zip ties or nylon cord to secure lights around tree branches without cutting into the bark. Avoid staples or nails to protect the tree’s health while achieving a natural, floating effect.
What are the best places to hang outdoor string lights for a small yard?
In compact yards, focus on vertical spaces like fences, railings, or a single overhead line between walls. This maximizes the area without cluttering the ground, creating cozy intimacy.
How do I hang outdoor string lights without drilling holes?
Use adhesive hooks, tension rods, or clamp-on fixtures to mount lights on surfaces like gutters, railings, or existing structures. These methods are renter-friendly and preserve your outdoor space’s integrity.
Where to hang outdoor string lights for a wedding or event?
For events, frame key areas like dance floors, dining tables, or entryways with string lights overhead. Suspend them between poles or trees to guide guests and highlight the venue’s focal points.
Are there safety tips for hanging outdoor string lights near water features?
Always use UL-rated wet-location lights near pools or fountains, and keep connections elevated or covered. Ensure cords are secured away from water to prevent tripping or electrical hazards.

