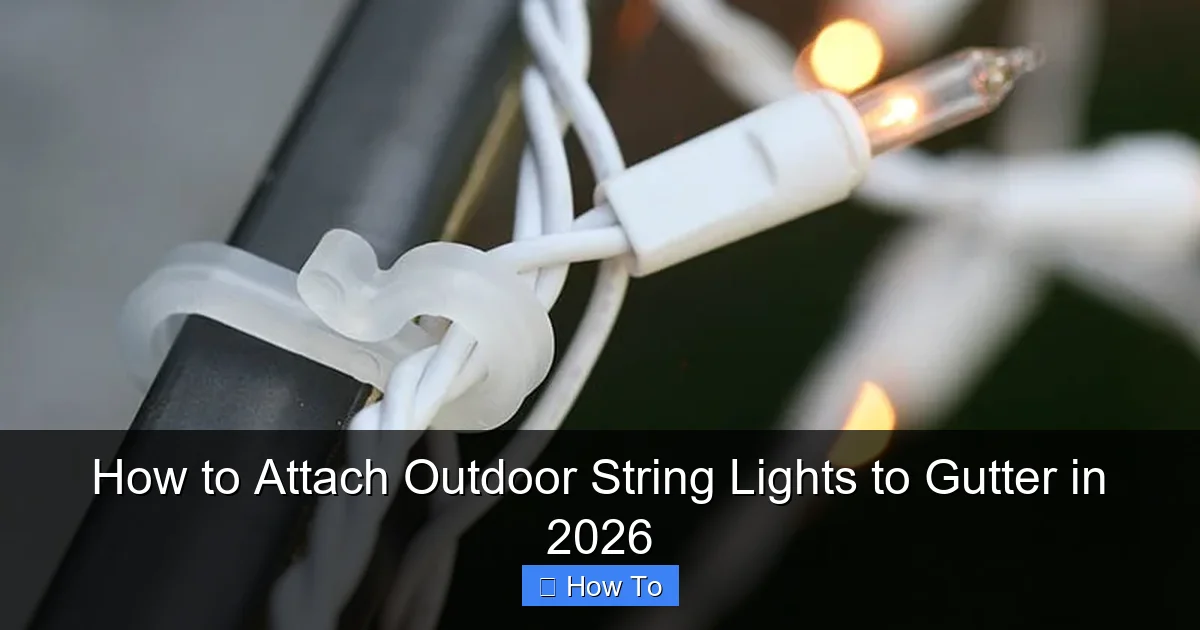
Featured image for how to attach outdoor string lights to gutter
Image source: cdn.christmaslightsetc.com
Attaching outdoor string lights to your gutter in 2026 is easiest and safest using modern, damage-free clips designed specifically for seamless gutters. These innovative fasteners grip securely without drilling, preserving your home’s exterior while ensuring a clean, professional look. Always measure spacing, use LED bulbs for efficiency, and follow weatherproofing best practices for a stunning, long-lasting display.
How to Attach Outdoor String Lights to Gutter in 2026
Key Takeaways
- Use gutter clips: Opt for snap-on clips designed for gutters to avoid damage.
- Check light spacing: Match clip placement to bulb spacing for a balanced look.
- Secure in daylight: Install during daylight for better visibility and safety.
- Avoid overloading: Limit weight to prevent sagging or gutter strain.
- Weatherproof connections: Use outdoor-rated lights and seal plugs from moisture.
- Plan layout first: Map light path to minimize extension cords and gaps.
Why This Matters / Understanding the Problem
Let’s be honest: nothing transforms a backyard or patio quite like a set of soft, twinkling outdoor string lights. Whether it’s for a summer barbecue, a cozy fall evening, or holiday cheer, these lights create magic. But here’s the catch—**how to attach outdoor string lights to gutter in 2026** without damaging your home, creating a tripping hazard, or ending up with a saggy, uneven mess?
I learned this the hard way. A few years back, I used flimsy plastic clips that snapped after a light rainstorm. My lights dangled like sad party streamers. Then I tried duct tape (yes, really), which left a sticky residue on the aluminum. Not my finest moment.
The good news? In 2026, we’ve got better tools, smarter techniques, and more durable materials. Attaching lights to your gutter isn’t just about aesthetics—it’s about safety, longevity, and doing it right the first time. Whether you’re renting or own your home, this method works for most standard gutters (aluminum, vinyl, or steel). And the best part? You don’t need to be a DIY pro.
This guide walks you through **how to attach outdoor string lights to gutter in 2026** using modern, damage-free methods that hold up through wind, rain, and seasons. No leaks. No scratches. Just beautiful, even lighting.
What You Need
Before you start, let’s gather your gear. The right tools make all the difference—especially when you’re working on a ladder.
- Outdoor-rated string lights (LED, weatherproof, with proper IP rating—look for IP44 or higher)
- Gutter hooks or gutter clips (plastic, vinyl-coated, or silicone; avoid metal that can scratch)
- Measuring tape (to space lights evenly)
- Ladder with stabilizers (safety first—no wobbly chairs or leaning)
- Extension cord (outdoor-rated) with GFCI protection
- Zip ties (optional) for securing loose wires or reinforcing clips
- Work gloves (protect your hands from sharp edges)
- Marker or chalk (for marking clip placement)
- Level (optional)—if you want perfectly straight lines
Pro Tip: Skip the cheap, flimsy clips from discount stores. In 2026, look for *silicone-coated gutter hooks* or *universal gutter hangers*. They’re more expensive upfront but last years and won’t crack in cold weather.
Bonus: If you have a smart home setup, consider smart string lights that connect to your phone or voice assistant. They’re not just cool—they’re energy-efficient and easier to control from the ground.
Step-by-Step Guide to How to Attach Outdoor String Lights to Gutter in 2026
Step 1: Plan Your Layout (Before You Climb)
Don’t just start hanging lights like a kid with tinsel. A little planning prevents a big headache.
Start by measuring the length of your gutter where you want the lights. Decide how far apart you want the bulbs—usually 6 to 12 inches. More bulbs = more glow, but more clips = more work.

Visual guide about how to attach outdoor string lights to gutter
Image source: i.ytimg.com
Sketch a rough diagram. Mark where you’ll place each clip. If you’re wrapping around a corner (like from the front to the side of the house), plan for extra clips there—corners take more strain.
Also, locate your nearest outdoor outlet. You’ll want the plug end close to it. If the cord is too short, use an outdoor extension cord with GFCI (Ground Fault Circuit Interrupter). Safety tip: never plug string lights into an indoor outlet via an extension cord through a window. That’s a fire hazard.
Pro Insight: I once ran a cord through a slightly open window—big mistake. Rain dripped in, shorted the connection, and tripped the breaker. Now I always use a proper outdoor outlet or a weatherproof box.
Step 2: Choose the Right Gutter Clips
Not all clips are created equal. In 2026, the best options are:
- Silicone-coated plastic clips: Gentle on gutters, won’t scratch or rust. Great for aluminum or vinyl.
- Adjustable gutter hangers: Fit different gutter shapes (K-style, half-round, etc.). Look for “universal” in the product name.
- Clip-on hooks with rubber padding: Ideal for delicate surfaces. Some even have a built-in channel for the wire.
Avoid metal clips unless they’re specifically labeled “non-scratch.” Steel can dent aluminum gutters or cause rust stains over time.
Pro tip: Buy 10–20% more clips than you think you need. Corners, windy areas, and the first/last clips often need extra support.
When you’re shopping, look for keywords like “outdoor string light clips,” “gutter hooks for lights,” or “no-damage light hangers.” These phrases will help you find the right gear for **how to attach outdoor string lights to gutter in 2026** without trial and error.
Step 3: Clean and Inspect the Gutter
This step is easy to skip, but it’s crucial.
Use a soft brush or damp cloth to wipe down the top edge of your gutter. Remove dirt, debris, or old adhesive residue. A clean surface ensures clips grip properly and don’t slip.
While you’re up there, check for loose screws, sagging sections, or clogs. If your gutter is damaged, fix it before hanging lights. A weak gutter can’t hold weight—even lightweight lights can add strain over time.
Also, make sure the gutter isn’t full of leaves or standing water. Wet gutters are slippery and dangerous to work on.
Warning: Never lean on the gutter. It’s not designed to hold your weight. Always use a stable ladder with a stabilizer bar that rests against the wall, not the gutter.
Step 4: Mark Clip Positions
Now, climb up (safely!) and start marking.
Use a marker or chalk to place a small dot every 6–12 inches along the top edge of the gutter. For straight runs, 8 inches apart is a sweet spot. For corners or high-wind areas, go every 6 inches.
If you’re using a level, run a string line or laser level to keep your marks perfectly aligned. I used to eyeball it—until I realized one side was 3 inches lower than the other. Oops.
For corners, place a clip on each side, about 2–3 inches from the bend. This helps the lights curve smoothly without pulling.
This step might feel tedious, but it’s the secret to a professional-looking install. Skipping it leads to uneven spacing and sagging lights.
Step 5: Attach the Clips
Time to put the clips on.
Most modern gutter clips simply snap over the top lip of the gutter. Gently press them into place—don’t force it. If it doesn’t fit, check the gutter type. Some clips are designed for K-style gutters only.
For vinyl-coated or silicone hooks, make sure the soft side faces the gutter. This protects the surface and improves grip.
Once the clip is on, wiggle it slightly. It should feel snug but not tight. If it slides, reposition or try a different model.
Work in sections. Install 5–10 clips at a time, then move your ladder. This keeps you from overreaching or losing balance.
Pro Tip: If you’re working alone, use a tool belt to keep clips, markers, and gloves handy. Nothing’s worse than climbing down every 2 minutes to grab something.
Step 6: Run the String Lights
Now the fun part: hanging the lights.
Start at the end closest to your power source. Plug in the lights and turn them on—just for a second—to test that they work. You don’t want to hang a broken strand.
Then, unplug them. Safety first.
Begin at one end of the gutter and hook the first bulb socket into the first clip. Most clips have a slot or hook designed to hold the socket or the wire.
Work your way along, attaching each bulb or every other bulb, depending on the clip design. Some clips hold the wire; others grip the socket. Read the instructions.
Keep tension even. Don’t pull too tight—this can stretch the cord or pull clips loose. But don’t let it sag too much, either. Aim for a gentle, straight line with a slight curve (like a catenary).
At corners, let the lights bend naturally. Don’t force sharp 90-degree turns. Use extra clips to guide the curve.
If your lights have built-in clips (some do!), you can skip the gutter clips and attach them directly to the gutter lip. But I still recommend using extra support clips every few feet—especially in windy areas.
Step 7: Secure the Cord and Plug
Once the lights are up, don’t forget the cord.
Use zip ties or adhesive cord clips to secure the power cord along the wall or fascia. Keep it off the ground to prevent tripping and water exposure.
Make sure the plug end hangs down freely—don’t coil it tightly or leave it sitting in a puddle. If possible, place it under an eave or in a weatherproof outlet cover.
For long runs, consider a cord cover or raceway. These are plastic channels that hide and protect the wire. They’re not always needed, but they look clean and reduce wear.
Finally, test the lights again. Walk around and check for dark spots, flickering, or loose clips.
Step 8: Adjust and Finalize
Step back and take a look.
Are the lights straight? Evenly spaced? No sagging or pulling?
Make small adjustments. If a clip is loose, reposition it. If a bulb is crooked, twist it gently into place.
Use a level or string line to double-check alignment. I once thought my lights were perfect—until my neighbor said, “Uh, one side is drooping.” A quick fix with an extra clip, and it looked flawless.
Trim any excess zip ties with scissors. You don’t want sharp edges sticking out.
And voilà! You’ve mastered **how to attach outdoor string lights to gutter in 2026**—safely, cleanly, and beautifully.
Pro Tips & Common Mistakes to Avoid
Let’s talk about what can go wrong—and how to avoid it.
Common Mistake #1: Using the wrong clips. I tried metal S-hooks once. They scratched my gutter and rusted within a year. Stick with plastic, vinyl, or silicone-coated options.
Common Mistake #2: Overloading the gutter. If you’re hanging multiple strands, use clips with higher weight ratings. Or, consider using a separate mounting strip (like a fascia board) for extra support.
Common Mistake #3: Ignoring wind. In windy areas, lights can sway and pull clips loose. Add extra clips every 4–5 feet, and use zip ties to secure the cord to the wall.
Pro Tips:
- Use a timer or smart plug to turn lights on/off automatically. Saves energy and keeps them from running all night.
- Label your clips if you plan to take lights down seasonally. I use a permanent marker to write “Front” or “Side” on each clip. Makes reinstallation a breeze.
- Store lights properly when not in use. Wrap them around a cardboard tube or use a storage reel. Prevents tangles and bulb damage.
- Check clips annually. Cold winters can make plastic brittle. Replace any that are cracked or loose.
- For steep roofs, use a ladder stabilizer and a helper. Never work alone on high gutters.
One last thing: if your gutters are old or poorly installed, consider reinforcing them before hanging lights. A $20 gutter hanger kit can save you from a $200 repair.
And remember—this method works for permanent or semi-permanent installs. If you want to take lights down every season, use clips that are easy to remove and reattach. No nails, no screws, no damage.
FAQs About How to Attach Outdoor String Lights to Gutter in 2026
Can I use nails or screws to attach lights to my gutter?
Nope. Drilling into gutters can cause leaks, rust, and void warranties. Plus, it’s a pain to patch later. Stick with gutter clips designed for this purpose. They’re safe, reusable, and won’t damage your home.
What if my gutter is vinyl or very thin aluminum?
Use extra-gentle clips—like silicone-coated or soft plastic ones. Avoid metal or rigid hooks. You can also add a small piece of rubber or foam tape between the clip and gutter for extra protection. The goal is to distribute pressure evenly.
How do I keep the lights from sagging in the middle?
Sagging happens when clips are too far apart or the cord is too heavy. Use more clips (every 6–8 inches), and make sure each clip is secure. For long runs, add a center support—like a small hook on the fascia board. Also, choose lightweight LED lights instead of heavy incandescent strands.
Can I attach lights to the downspout?
Yes, but be careful. Downspouts are often thinner and less stable than gutters. Use a clip designed for downspouts, or wrap the cord around it with a zip tie (not too tight). Never block the water flow. And avoid covering the outlet—it needs to drain properly.
Are there clips that work with smart string lights?
Absolutely. Most smart lights use the same bulb and cord design as traditional ones. Just make sure the clips can hold the socket or wire. Some smart lights have thicker cords—test fit before buying in bulk.
What’s the best time of year to install gutter lights?
Spring or early fall is ideal. Temperatures are mild, gutters are clean, and you’re not rushing for a holiday deadline. Avoid installing during rain or extreme heat. Wet gutters are slippery, and hot plastic clips can warp.
Can I leave the lights up year-round?
You can—but I recommend taking them down in winter if you get heavy snow or ice. Snow buildup can pull clips loose. If you leave them up, use heavy-duty clips and check them monthly. Or, use lights rated for continuous outdoor use and install them on a removable mounting strip.
Final Thoughts
Attaching outdoor string lights to your gutter doesn’t have to be stressful or damaging. With the right tools and a little patience, you can create a stunning, safe, and long-lasting display that turns your home into a warm, inviting space.
This guide to **how to attach outdoor string lights to gutter in 2026** is built on real experience—the wins, the fails, and the “why didn’t I think of that?” moments. The key? Use quality clips, plan your layout, and respect your home’s structure.
You don’t need to be a contractor. You just need to be careful, thoughtful, and a little creative.
So grab your clips, climb that ladder (safely!), and light up your nights. Whether it’s for a party, a quiet evening, or just because you love the glow, these lights are worth the effort.
And when your neighbor says, “How did you do that so neatly?”—just smile and say, “It’s all in the clips.”
Now go enjoy your beautifully lit space—one twinkle at a time.