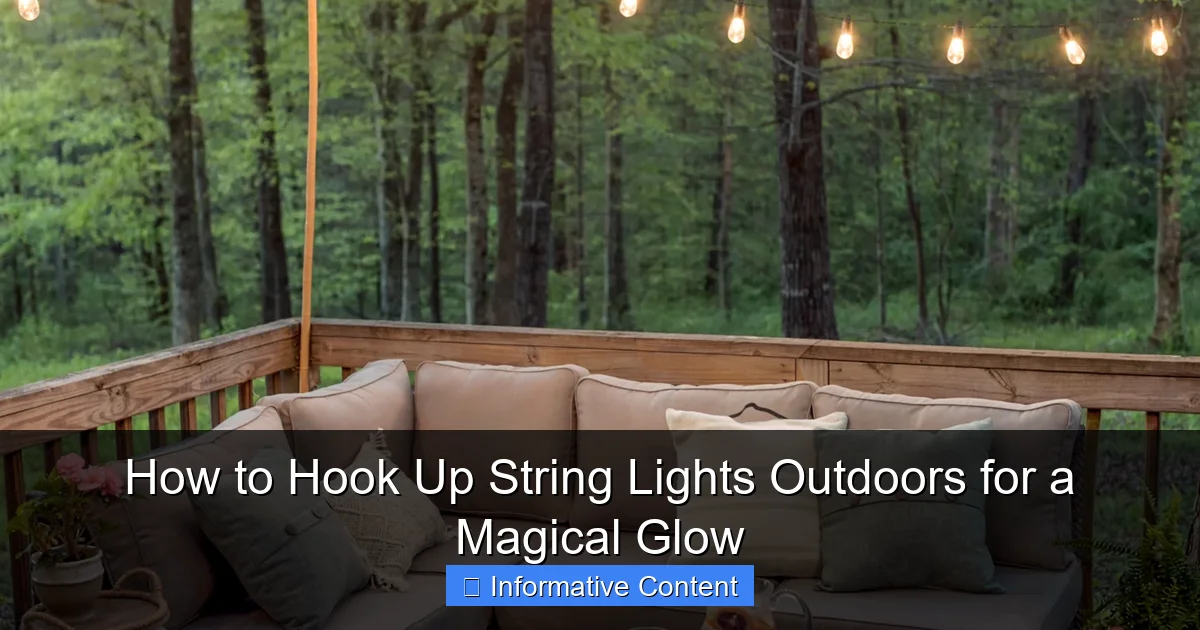
Featured image for how to hook up string lights outdoors
Image source: homestoriesatoz.com
Transform your outdoor space into a glowing oasis by securely mounting string lights along sturdy structures like fences, railings, or trees using hooks, clips, or zip ties—ensuring they’re rated for outdoor use. Always plan your layout first, spacing lights evenly and avoiding overloaded circuits to maintain both safety and sparkle. For a magical, long-lasting glow, opt for LED string lights and connect them to a weatherproof outlet or timer to effortlessly set the mood.
Key Takeaways
- Plan your layout first: Sketch the area to determine light placement and power needs.
- Use outdoor-rated lights: Ensure all lights and cords are weatherproof for safety and durability.
- Secure lights properly: Use hooks, clips, or tension wires to avoid sagging or damage.
- Check extension cords: Use grounded, outdoor-rated cords and keep them off the ground.
- Time it right: Install lights in dry weather to avoid hazards and ensure adhesion.
- Add a timer: Automate lighting schedules for energy efficiency and convenience.
📑 Table of Contents
How to Hook Up String Lights Outdoors for a Magical Glow
There’s something undeniably enchanting about outdoor spaces bathed in the soft, twinkling glow of string lights. Whether it’s a backyard barbecue, a romantic dinner on the patio, or a quiet evening with a book, string lights have a way of transforming ordinary spaces into magical retreats. I remember the first time I strung up lights in my backyard—initially, I thought it would be a simple task. But between tangled cords, uneven spacing, and the fear of tripping over wires, it turned into a mini-adventure. After a few tries, though, I discovered that with a little planning and the right approach, hanging outdoor string lights can be both easy and rewarding.
Whether you’re a first-timer or looking to upgrade your current setup, this guide will walk you through everything you need to know about how to hook up string lights outdoors. From choosing the right lights to securing them safely and stylishly, we’ll cover the tools, techniques, and pro tips to help you create a warm, inviting atmosphere—without the stress. So grab a cup of coffee (or a glass of wine, if you’re already in your backyard), and let’s make your outdoor space shine.
Choosing the Right String Lights for Your Outdoor Space
Types of Outdoor String Lights
Not all string lights are created equal, especially when it comes to outdoor use. The first step in learning how to hook up string lights outdoors is selecting the right type. Here are the most common options:
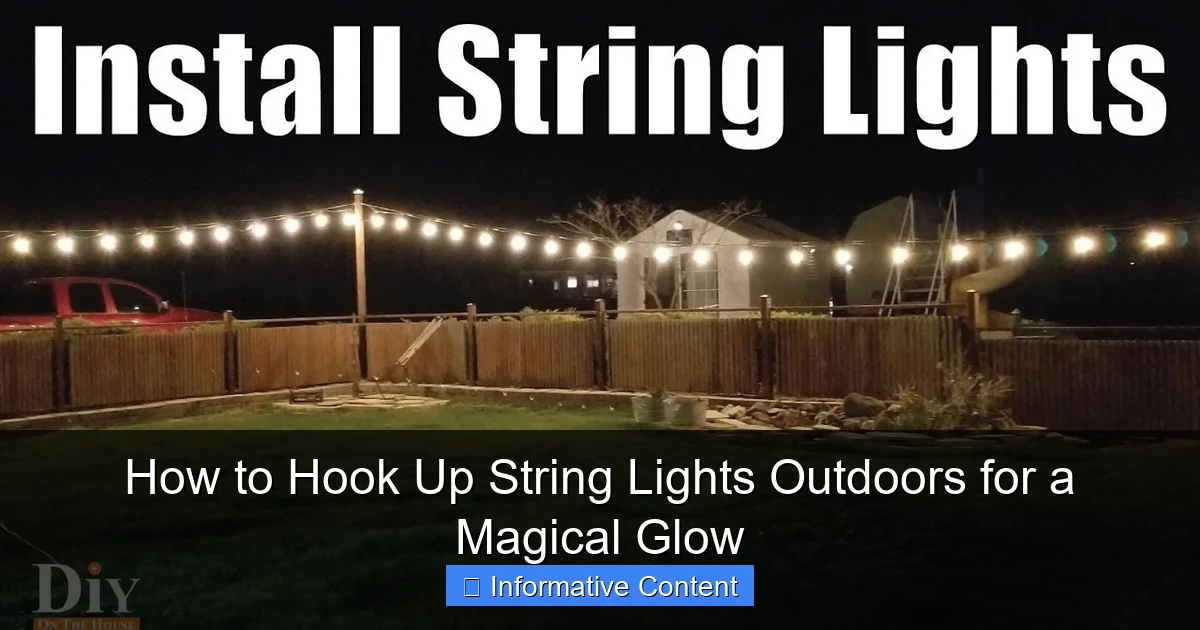
Visual guide about how to hook up string lights outdoors
Image source: i.ytimg.com
- LED String Lights: Energy-efficient, long-lasting, and cool to the touch. Ideal for year-round use and available in warm white, cool white, and color options. Most modern outdoor string lights are LED-based.
- Incandescent String Lights: Offer a warm, nostalgic glow but consume more energy and generate heat. Best for occasional use, like holiday decorations.
- Solar-Powered String Lights: Eco-friendly and easy to install since they don’t require an outlet. However, they may not be as bright or reliable in cloudy climates.
- Plug-In String Lights: Provide consistent brightness and are best for permanent or semi-permanent installations. Ensure you have access to a GFCI-protected outdoor outlet.
For most homeowners, LED plug-in string lights are the sweet spot—bright, efficient, and safe. Look for lights rated for outdoor use (usually labeled “IP44” or higher), which means they’re protected against dust and water splashes.
Bulb Styles and Spacing
String lights come in various bulb shapes and spacing, which affect both aesthetics and function:
- Edison-style bulbs: Vintage, exposed filaments—perfect for a rustic or boho look.
- Globe bulbs: Round, soft glow—ideal for a cozy, intimate feel.
- Mini lights: Tiny, densely packed bulbs—great for wrapping trees or railings.
Spacing matters too. Lights spaced 6–12 inches apart work well for general ambiance, while tighter spacing (4–6 inches) creates a denser, more dramatic effect. For large areas like a deck or pergola, opt for longer strands (25–50 feet) with fewer bulbs per foot to avoid overwhelming the space.
Smart Features and Controls
Want to take your setup to the next level? Consider smart string lights that connect to apps or voice assistants (like Alexa or Google Home). These allow you to adjust brightness, change colors, or set schedules—perfect for parties or seasonal changes. Just make sure your outdoor Wi-Fi signal is strong enough to reach the lights.
Planning Your Layout: Where and How to Hang
Map Out Your Space
Before you start hanging, take a walk around your outdoor area and sketch a rough layout. Ask yourself:
- Where do you want the light to be the brightest? (e.g., dining table, seating area)
- What structures are available for mounting? (e.g., walls, trees, pergola, fence)
- How far is the nearest power source? (You’ll need a GFCI outlet within 6 feet of the first light strand.)
Pro tip: Use glow sticks or LED flashlights at night to test different layouts. This helps you visualize how the lights will look in real conditions.
Common Hanging Configurations
Here are five popular ways to arrange string lights, depending on your space:
- Overhead Canopy (Pergola or Gazebo): Run lights across beams in a zigzag, crisscross, or grid pattern. This creates a “roof” of light—perfect for alfresco dining.
- Fence or Wall Lines: Attach lights horizontally or vertically along a fence or house wall. Use hooks or clips to keep them taut.
- Tree Wrapping: Wrap lights around trunks and larger branches for a whimsical, fairy-tale effect. Start at the base and work upward, spacing bulbs evenly.
- Railings and Staircases: Use adhesive clips or zip ties to secure lights along railings. Avoid loose cords that could be tripping hazards.
- Free-Standing Poles: For open yards, install temporary poles (like shepherd’s hooks or PVC pipes) and string lights between them. This is great for events or renters.
For a balanced look, avoid overloading one area. Spread the lights to create layers of illumination—think of it like decorating a room with multiple light sources.
Measuring and Calculating Length
Measure the total distance you need to cover, then add 10–15% extra for slack and connections. For example, if your pergola spans 20 feet, plan for 22–23 feet of lights. Most string lights can be connected end-to-end (check the packaging for maximum strand limits—usually 3–5 per circuit). Use extension cords sparingly, and always choose outdoor-rated ones with built-in surge protection.
Tools and Hardware: What You’ll Need
Essential Tools
You don’t need a full toolkit, but a few basics make the job easier:
- Measuring tape (for accurate layout planning)
- Drill with masonry bit (if installing permanent mounts on brick or stucco)
- Screwdriver or power drill (for attaching hooks)
- Ladder or step stool (for high areas)
- Work gloves (to protect your hands from splinters or sharp edges)
For renters or those avoiding permanent changes, no-drill solutions like tension rods, removable adhesive hooks, or magnetic clips work great.
Mounting Hardware Options
Choose hardware based on your surface and how permanent you want the setup to be:
- Cup hooks: Screw into wood, pergolas, or deck beams. Use 1-inch hooks for most string lights. Pre-drill holes to prevent splitting.
- Eye hooks: Similar to cup hooks but with a loop—ideal for creating anchor points between poles.
- Adhesive outdoor clips: Stick to smooth surfaces like stucco, vinyl siding, or glass. Brands like Command Outdoor™ are weather-resistant and removable.
- Zip ties: Great for trees, railings, or temporary setups. Use UV-resistant ties to prevent brittleness over time.
- Stakes or shepherd’s hooks: Drive into the ground to create anchor points in open areas.
Pro tip: Use stainless steel or coated hooks to resist rust. Avoid cheap plastic hooks—they crack in cold weather.
Safety and Weather Considerations
Outdoor lighting must withstand wind, rain, and temperature swings. Always:
- Use GFCI outlets (they cut power if water gets into the circuit).
- Seal connections with weatherproof electrical tape or silicone covers.
- Keep cords off the ground—use clips or hooks to elevate them at least 18 inches.
- Inspect lights annually for frayed wires or loose bulbs.
For snowy climates, avoid hanging lights in areas where ice dams or heavy snow could damage the strands.
Step-by-Step Installation Guide
Step 1: Prepare Your Space
Clear the area of furniture, plants, or decorations that might get in the way. If you’re using a ladder, place it on a stable, level surface. For tree installations, trim low branches to prevent snagging.
Step 2: Install Mounting Hardware
Mark hook locations with a pencil, then drill pilot holes if needed. Screw in cup or eye hooks every 3–5 feet. For a zigzag pattern, alternate hooks on opposite sides of a pergola. Use a level to ensure hooks are aligned.
Example: For a 20-foot pergola, install 8 hooks (4 on each side), spacing them 3 feet apart.
Step 3: Hang the Lights
Start at the power source. Plug in the first strand and drape it loosely over the hooks. Don’t pull it tight yet—you’ll adjust tension later. For multiple strands:
- Connect strands end-to-end (if within the manufacturer’s limit).
- Use extension cords sparingly, and always connect them under cover (e.g., under a table or awning).
- For long runs, use a power distribution box to split the circuit safely.
Pro tip: Leave 6–12 inches of slack at each connection point to reduce stress on the wires.
Step 4: Adjust Tension and Position
Once all strands are hung, gently pull each section taut to eliminate sagging. Use zip ties or hooks to secure loose ends. For tree installations, wrap lights in a spiral pattern, spacing bulbs 6–8 inches apart. Avoid wrapping too tightly—tree bark expands and contracts with moisture.
Step 5: Test and Troubleshoot
Turn on the lights. If a section isn’t working:
- Check for loose connections or damaged bulbs.
- Inspect the fuse in the plug (most outdoor lights have a replaceable fuse).
- Use a circuit tester to verify power at the outlet.
For solar lights, ensure panels face south and get at least 6 hours of direct sunlight.
Maintenance and Seasonal Tips
Routine Care
Outdoor string lights need minimal maintenance, but a little effort keeps them looking great:
- Wipe bulbs: Use a dry cloth to remove dust or pollen every 2–3 months.
- Check connections: Inspect for corrosion or loose wires before each season.
- Store properly: If removing lights, coil them loosely and store in a dry place. Use a storage reel to prevent tangles.
Seasonal Adjustments
Your setup might need tweaks depending on the time of year:
- Spring/Summer: Trim overgrown plants that block lights. Clean bulbs after pollen season.
- Fall: Check for loose hooks after windstorms. Remove lights before heavy snowfall in cold climates.
- Winter: If keeping lights up, use frost-proof strands rated for sub-zero temperatures. Avoid turning them on when ice or snow is on the wires.
Upgrades and Customization
Want to refresh your setup? Try:
- Smart controls: Add a timer or motion sensor for automatic lighting.
- Color-changing lights: Use RGB bulbs for holidays or themed parties.
- Layered lighting: Combine string lights with path lights or lanterns for depth.
For a dramatic effect, hang lights at varying heights—e.g., low near seating and high overhead.
Data: Comparing String Light Options
| Type | Average Lifespan | Energy Use (Watts/Strand) | Best For | Pros | Cons |
|---|---|---|---|---|---|
| LED Plug-In | 25,000+ hours | 5–10W | Permanent installations | Bright, energy-efficient, long-lasting | Requires outlet; cords can be visible |
| Solar-Powered | 10,000–15,000 hours | 0W (after charging) | Temporary or remote areas | No wires, eco-friendly, easy to install | Less reliable in cloudy weather; shorter lifespan |
| Incandescent | 1,000–2,000 hours | 25–40W | Holiday or short-term use | Warm, nostalgic glow | High energy use, hot bulbs, fragile |
| Smart LED | 25,000+ hours | 6–12W | Tech-savvy users | App/voice control, color options, scheduling | Higher cost; requires Wi-Fi |
Learning how to hook up string lights outdoors doesn’t have to be intimidating. With the right lights, a solid plan, and a few quality tools, you can create a stunning outdoor oasis that’s both functional and beautiful. The key is to start small—maybe just one strand over your dining table—and build from there. Over time, you’ll develop a system that works for your space and lifestyle.
Remember, the goal isn’t perfection. It’s about creating moments—late-night conversations, quiet evenings, or joyful gatherings—under a canopy of light. So don’t stress over a slightly crooked hook or a loose bulb. Those little quirks add character. And if a storm knocks a strand down? Just hang it back up. That’s the beauty of outdoor lighting: it’s alive, changing, and always worth the effort.
Now, step outside, plug in those lights, and let the magic begin. Your backyard is waiting.
Frequently Asked Questions
How do I safely hang string lights outdoors without damaging my home?
Use removable hooks, adhesive clips, or tension rods designed for outdoor use to avoid nails or screws. Always check the weight rating of your mounting method to ensure it can support the lights securely.
What’s the best way to power outdoor string lights without nearby outlets?
Use outdoor-rated extension cords or solar-powered string lights to extend reach or eliminate cords. For permanent setups, consider installing a weatherproof outlet or using a low-voltage transformer.
How to hook up string lights outdoors in a zigzag pattern between trees?
Wrap lights around each tree trunk or use zip ties to attach them to branches, adjusting height for even spacing. Ensure the lights are rated for outdoor use and avoid overstretching the strands.
Can I connect multiple string lights outdoors without overloading the circuit?
Check the wattage or amperage rating on each strand and stay below 80% of your circuit’s capacity. Use a power strip with surge protection to manage connections safely.
How do I protect outdoor string lights from wind and rain?
Choose weatherproof or IP65-rated lights and secure them tightly with clips or hooks to prevent swaying. Angle sockets downward to keep water from pooling in the bulbs.
What tools do I need to install outdoor string lights on a pergola or patio?
You’ll typically need S-hooks, zip ties, a ladder, and a measuring tape for precise spacing. For permanent installations, consider using cable clips or a wire track system for a clean look.

