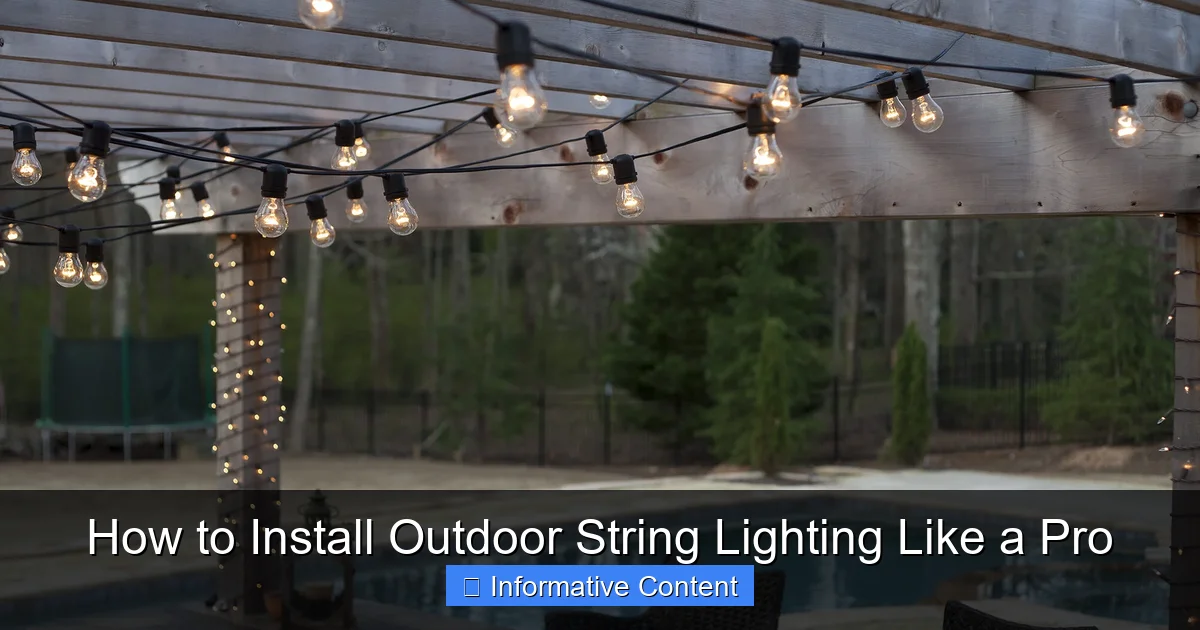
Featured image for how to install outdoor string lighting
Image source: img.yardenvy.com
Plan your layout and choose weather-resistant, commercial-grade string lights to ensure a safe, long-lasting installation. Secure mounting points with appropriate hardware—like eye hooks or zip ties—spaced every 12–18 inches to prevent sagging and damage. Always use a GFCI outlet and test connections before finalizing to achieve a professional, polished look that enhances your outdoor space.
Key Takeaways
- Plan your layout first: Measure space and mark anchor points before installation.
- Use weatherproof fixtures: Ensure lights and connections are rated for outdoor use.
- Secure with proper hardware: Install hooks or eye screws into sturdy structural supports.
- Test lights before mounting: Check for defects or dead bulbs to avoid rework.
- Maintain safe spacing: Keep bulbs 6-12 inches apart for even illumination.
- Protect electrical connections: Use waterproof covers and elevate plugs off the ground.
📑 Table of Contents
How to Install Outdoor String Lighting Like a Pro
Picture this: a warm summer evening, the sun dipping below the horizon, and your backyard bathed in a soft, golden glow from perfectly strung lights. It’s not just lighting—it’s ambiance, comfort, and a little bit of magic. I remember the first time I tried to hang outdoor string lights. I thought, “How hard can it be?” Spoiler: it was harder than I expected. I tangled the wires, misjudged the distance, and ended up with a lopsided mess that looked more like a spider’s web than a cozy oasis. But after a few trial runs (and a few laughs), I learned the tricks to do it right—and now, I’m sharing them with you.
Outdoor string lighting isn’t just about aesthetics. It extends your living space, creates a welcoming atmosphere, and can even boost your home’s curb appeal. Whether you’re planning a romantic dinner under the stars or a lively backyard barbecue, the right lighting setup can make all the difference. In this guide, I’ll walk you through every step—from choosing the right lights to troubleshooting common mistakes—so you can install your outdoor string lighting like a pro, without the stress or the tangled mess.
1. Planning Your Outdoor String Lighting Layout
Before you even touch a light bulb, take a step back and plan. A little preparation saves hours of frustration later. Think of this phase as sketching the blueprint for your dream space. Here’s how to get started:
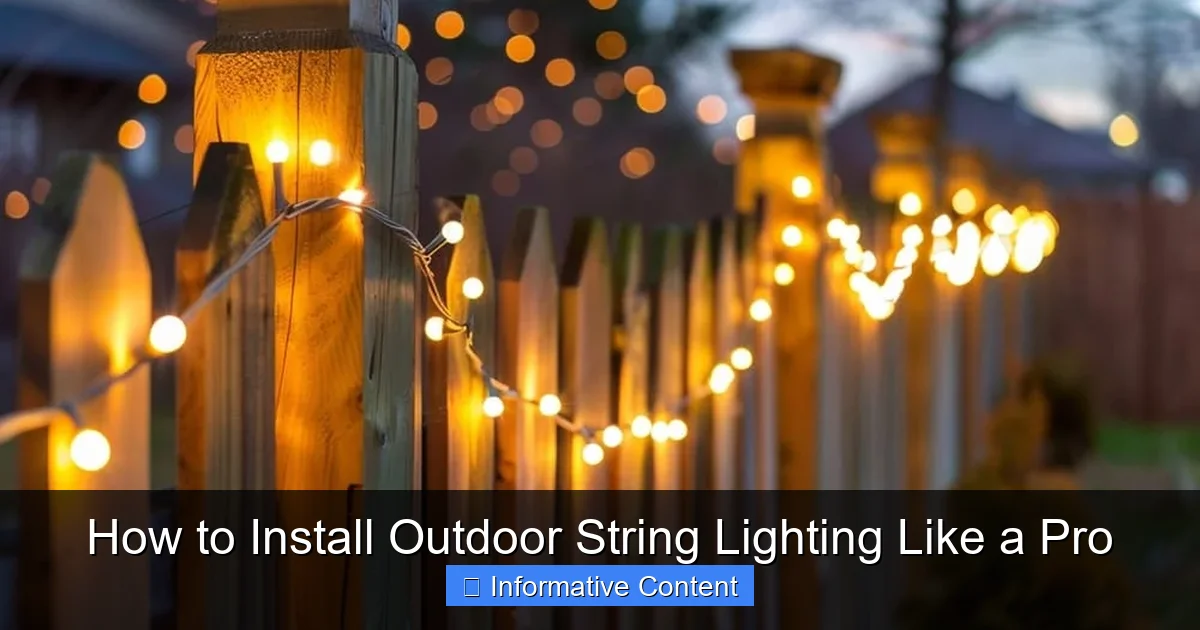
Visual guide about how to install outdoor string lighting
Image source: garden.lighting
Assess Your Outdoor Space
Walk around your yard or patio and visualize where the lights will go. Are you framing a dining area? Highlighting a walkway? Creating a cozy nook? Use chalk, tape, or even string to mark anchor points (like trees, posts, or eaves). For example, if you’re lighting a 20-foot patio, you’ll need at least three anchor points to avoid sagging. Pro tip: Measure distances between points with a measuring tape or pacing (your stride is roughly 2.5 feet—use that as a rough estimate if you’re in a pinch).
Choose the Right Lighting Pattern
Not all layouts are created equal. Here are a few popular patterns and their best uses:
- Straight lines: Ideal for framing a patio or deck. Use for a clean, modern look.
- Grid or crisscross: Perfect for covering large areas (e.g., a pergola). Adds depth and drama.
- Zigzag or “catenary” style: Great for uneven spaces. Creates visual interest and hides imperfections.
- Canopy effect: Hang lights from a central point (like a tree) outward for a starry-night vibe.
Example: My friend Sarah hung her lights in a grid over her pergola. She used 10 anchor points (posts and eaves) and 50 feet of string lights. The result? A stunning, Instagram-worthy space that’s now her go-to spot for evening cocktails.
Calculate Power Needs
Outdoor lights need power, but overloading circuits is a real risk. Check your string lights’ wattage (usually listed on the packaging) and add up the total. Most standard outlets handle 15-20 amps. As a rule of thumb: Don’t exceed 80% of your circuit’s capacity (e.g., 12 amps on a 15-amp circuit). If you’re using multiple strands, plug them into a weatherproof outlet with a GFCI (Ground Fault Circuit Interrupter) for safety.
2. Choosing the Right Outdoor String Lights
Not all string lights are created equal. The wrong choice can lead to dim lighting, short lifespans, or even electrical hazards. Let’s break down what to look for:
Bulb Type: LED vs. Incandescent
LED lights are the clear winner for outdoor use. They’re energy-efficient (using up to 80% less power than incandescent), last 25,000+ hours, and stay cool to the touch. Plus, many are dimmable and come in warm or cool tones. Incandescent lights are cheaper upfront but burn out faster and get hot—risky if you have kids or pets.
My take: I switched to LED after my incandescent bulbs kept burning out after one season. The upfront cost is higher, but I’ve saved money on replacements and electricity bills.
Bulb Shape and Style
- Globe lights: Round bulbs (e.g., G40 or G50) create a classic, festive look. Great for patios and trees.
- Edison bulbs: Vintage-style with exposed filaments. Perfect for boho or rustic aesthetics.
- Candle-style: Flickering bulbs mimic real candles. Ideal for romantic settings.
- Mini lights: Tiny bulbs (e.g., 5mm) for subtle, twinkling effects. Best for railings or delicate spaces.
Durability and Weather Resistance
Outdoor lights must withstand rain, wind, and UV rays. Look for:
- IP rating: IP44 or higher (e.g., IP65) means water-resistant. Avoid anything below IP44.
- UV-resistant cords: Prevent yellowing and brittleness from sun exposure.
- Weatherproof connectors: Rubber or silicone seals protect plug connections.
Pro tip: Test your lights indoors first. I once bought a “weatherproof” set that shorted out after one storm. Lesson learned: always check the IP rating.
3. Gathering Tools and Materials
You don’t need a toolbox full of gadgets, but the right gear makes the job smoother and safer. Here’s your checklist:
Essential Tools
- Measuring tape: For spacing anchor points and light strands.
- Drill and bits: For installing hooks or eye screws (if needed).
- Ladder: A sturdy step ladder for reaching eaves or high points.
- Wire cutters/strippers: For trimming excess cord (if your lights are too long).
- Zip ties or cable clips: To secure cords and prevent tripping hazards.
- Voltage tester: To ensure outlets are safe to use (optional but smart).
Hardware and Accessories
- Hooks or eye screws: Stainless steel or galvanized for rust resistance. Use 1-2 per anchor point.
- Turnbuckles: Adjustable tensioners for straight-line layouts. Prevent sagging.
- Extension cords: Outdoor-rated, GFCI-protected, and long enough to reach outlets.
- Timers or smart plugs: Automate on/off times to save energy.
Example: For my 30-foot patio, I used 6 eye screws, 2 turnbuckles, and 10 zip ties. Total hardware cost: ~$25. Worth every penny.
Optional (But Helpful) Extras
- Outdoor-rated extension cord reel: Keeps cords tidy and tangle-free.
- Light tester: Quickly checks for dead bulbs or faulty connections.
- Work gloves: Protect your hands from sharp hooks or rough surfaces.
4. Step-by-Step Installation Process
Now for the fun part: putting it all together! Follow these steps for a professional-looking finish.
Step 1: Install Anchor Points
Mark your anchor points (trees, posts, eaves) with chalk. For permanent setups, drill pilot holes and screw in eye hooks or turnbuckles. For temporary setups (e.g., renters), use removable hooks or adhesive clips. Pro tip: Space hooks 6-10 feet apart to prevent sagging. For long spans, add a central support (like a pole).
Step 2: Hang the Lights
- Straight lines: Attach one end of the lights to an anchor. Unroll the strand along the layout, securing with zip ties every 3-4 feet. Connect the other end to the second anchor. Use turnbuckles to tighten and eliminate sag.
- Grid/crisscross: Start with one “main line” (e.g., from post to post). Hang perpendicular strands from it, spacing them 12-18 inches apart. Secure intersections with zip ties.
- Canopy effect: Tie the lights to a central point (e.g., tree branch) and fan them outward to perimeter anchors.
Common mistake: Don’t pull the cord too tight! It can stress connections and shorten the lights’ lifespan. Aim for a gentle “smile” curve.
Step 3: Connect to Power
- Plug the first strand into an outdoor outlet (GFCI-protected).
- If linking multiple strands, connect them end-to-end before hanging. Most lights allow 3-5 strands per circuit.
- Use extension cords only if necessary, and keep them off the ground (tuck under furniture or use cord covers).
- Test the lights! If any bulbs don’t work, check connections or replace bulbs.
Step 4: Secure and Tidy
- Use zip ties to anchor loose cords to posts or railings.
- For a polished look, hide cords behind furniture or along edges.
- Trim excess zip tie ends with wire cutters.
5. Troubleshooting Common Issues
Even the best-laid plans hit snags. Here’s how to fix the most common problems:
Problem: Lights Sag in the Middle
Solution: Add a turnbuckle or extra anchor point. For long spans, install a temporary pole or use a “catenary” layout with extra support lines.
Problem: Some Bulbs Don’t Light Up
Solution: Check for loose connections or dead bulbs. Use a light tester to pinpoint the issue. For LED strands, a single dead bulb can break the circuit—replace it ASAP.
Problem: Lights Flicker or Dim
Solution: Overloaded circuit? Unplug other devices on the same outlet. Or, the voltage drop is too high (common with long extensions). Use a thicker extension cord (14-gauge or lower).
Problem: Cords Are a Tripping Hazard
Solution: Run cords along edges, under rugs (outdoor-rated), or through cord covers. For permanent setups, bury cords in conduit (PVC pipe).
Problem: Weather Damage
Solution: After storms, inspect for frayed cords or loose connections. Store lights indoors during winter if possible. For year-round setups, choose IP65-rated lights and seal all connections with silicone.
6. Maintenance and Long-Term Care
Good lighting is a long-term investment. A little upkeep keeps it shining year after year.
Seasonal Maintenance
- Spring: Inspect for winter damage. Replace dead bulbs and tighten loose hooks.
- Summer: Clean bulbs with a damp cloth to remove dust and bugs.
- Fall: Trim nearby branches to prevent wind damage. Check for rodent-chewed cords.
- Winter: Store lights indoors or cover with a waterproof tarp (if leaving up).
When to Replace Your Lights
Even the best lights don’t last forever. Replace them if:
- Bulbs burn out frequently (sign of aging).
- Cords show cracks or brittleness.
- Water seeps into sockets (fire hazard).
Energy-Saving Tips
- Use timers or smart plugs to avoid leaving lights on overnight.
- Choose warm-white LEDs (2700K-3000K) for ambiance and lower energy use.
- Turn off lights during peak hours (e.g., 5-7 PM) to reduce strain on circuits.
Data Table: Outdoor String Light Comparison
| Feature | Budget-Friendly (Incandescent) | Mid-Range (LED) | Premium (Smart LED) |
|---|---|---|---|
| Price (per 25 ft strand) | $10-$20 | $30-$50 | $60-$100 |
| Lifespan | 1,000-2,000 hours | 25,000+ hours | 50,000+ hours |
| Energy Use | High (5-10W/bulb) | Low (0.5-1W/bulb) | Very Low (0.2-0.5W/bulb) |
| Weather Resistance | IP44 (basic) | IP65 (high) | IP67 (extreme) |
| Best For | Short-term/seasonal use | Year-round outdoor spaces | Smart home integration |
Outdoor string lighting is one of those small upgrades that make a big difference. It’s not just about the lights—it’s about creating moments. Whether you’re hosting a party, unwinding after work, or stargazing with a loved one, the right lighting transforms your space into a retreat. I’ll never forget the first time I turned on my lights after fixing the sagging mess. The glow was steady, the spacing perfect, and the whole yard looked magical. That’s the power of doing it right.
So grab your tools, plan your layout, and don’t be afraid to experiment. If you run into hiccups (and you probably will), remember: every pro was once a beginner. Start simple, learn as you go, and before you know it, you’ll have a lighting setup that’s not just functional—it’s a work of art. And hey, if you ever need a second opinion, just picture me, tangled in lights, laughing at my own mistakes. You’ve got this.
Frequently Asked Questions
How do I install outdoor string lighting safely?
To install outdoor string lighting safely, always use lights rated for outdoor use and ensure all connections are waterproof. Avoid overloading circuits and use a ground fault circuit interrupter (GFCI) outlet for added protection.
What’s the best way to hang outdoor string lights without damaging my home?
Use removable hooks, adhesive clips, or tension wires designed for outdoor string lighting to avoid nails or screws. These options provide a secure hold while protecting your siding, gutters, or eaves.
How far apart should I space the lights when installing outdoor string lighting?
For even illumination, space bulbs 6–12 inches apart, depending on the bulb size and desired brightness. Measure your area first to ensure you buy enough string lights for full coverage.
Can I install outdoor string lighting on a sloped or uneven surface?
Yes! Use adjustable hooks, zip ties, or a guide wire system to secure lights on slopes or irregular surfaces. This method keeps the strings taut and prevents sagging over time.
Do I need a transformer or special tools for outdoor string lighting installation?
Most plug-and-play string lights require only basic tools like a ladder, measuring tape, and clips. However, low-voltage systems may need a transformer and wire strippers for hardwired setups.
How do I hide the wires when installing outdoor string lights?
Route cords along fences, under eaves, or through cable raceways to conceal them. Use cord covers or paintable clips to blend wires with your home’s exterior for a clean, professional look.

