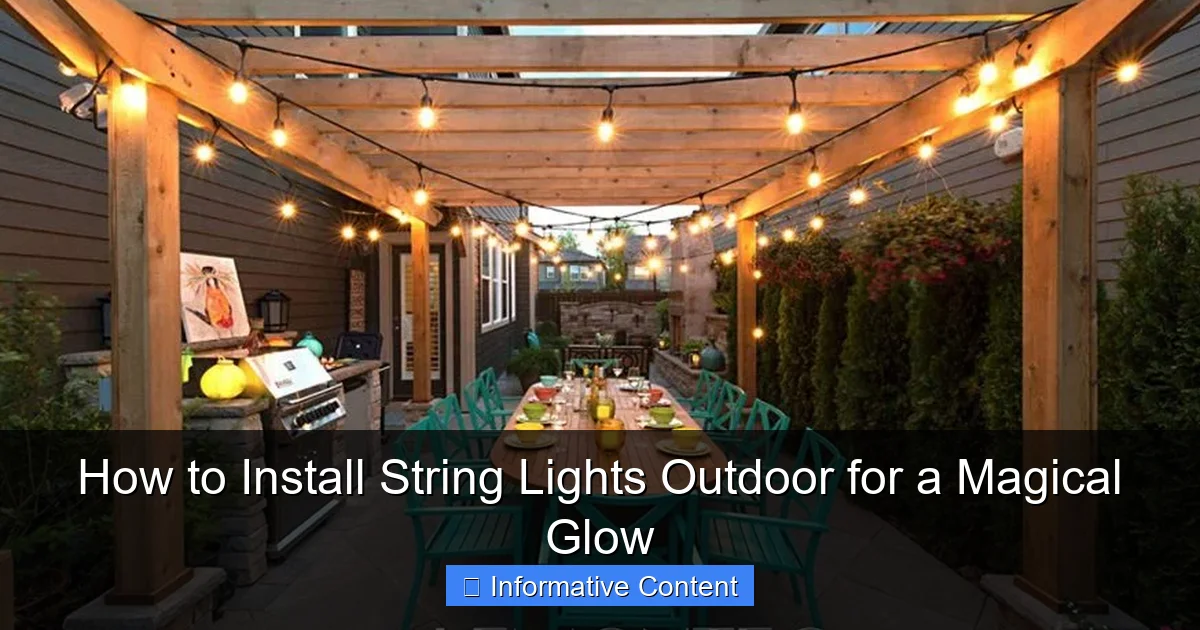
Featured image for how to install string lights outdoor
Image source: everythingbackyard.net
Transform your outdoor space into a magical retreat by securely mounting string lights along sturdy anchor points like eaves, trees, or railings using hooks or zip ties. Ensure lights are spaced evenly and connected to a weatherproof outlet for a seamless, enchanting glow—always use outdoor-rated lights and GFCI protection to guarantee safety and durability through every season.
Key Takeaways
- Plan your layout first: Measure the area to ensure proper light placement and avoid overstretching cords.
- Choose weather-resistant lights: Opt for UL-listed, waterproof string lights for long-term outdoor durability.
- Use secure mounting hardware: Install hooks, clips, or poles rated for outdoor use to prevent sagging.
- Keep power sources accessible: Position outlets nearby or use extension cords rated for outdoor conditions.
- Test lights before installing: Check functionality to avoid troubleshooting after mounting.
- Space bulbs evenly: Maintain consistent gaps for a balanced, professional look.
📑 Table of Contents
- Why Outdoor String Lights Are a Game-Changer
- Planning Your String Light Layout
- Choosing the Right String Lights for Your Space
- Step-by-Step Installation Guide
- Safety and Weatherproofing Tips
- Creative Ideas and Pro Tips for Stunning Results
- Maintenance and Longevity
- Final Thoughts: Your Outdoor Oasis Awaits
Why Outdoor String Lights Are a Game-Changer
Imagine stepping into your backyard on a warm summer evening. The sun has dipped below the horizon, but instead of darkness, you’re greeted by a soft, golden glow—twinkling lights strung across the patio, wrapped around trees, or draped along a pergola. That’s the magic of outdoor string lights. They don’t just illuminate; they transform spaces into cozy, inviting retreats perfect for gatherings, quiet nights, or even a romantic dinner under the stars.
But here’s the catch: installing outdoor string lights isn’t as simple as hanging a few bulbs and calling it a day. Done poorly, they can look messy, sag in the middle, or even become a safety hazard. Done right? They become the heartbeat of your outdoor ambiance. Whether you’re lighting up a small balcony or a sprawling garden, knowing how to install string lights outdoor properly makes all the difference. And the best part? You don’t need to be an electrician or a DIY expert. With the right plan, tools, and a little patience, you can create a stunning, professional-looking setup—no contractor needed.
Planning Your String Light Layout
Before you even unbox your lights, take a step back and plan. This is the most critical phase—because a great layout means fewer headaches later. Think of it like sketching a blueprint for your dream space.
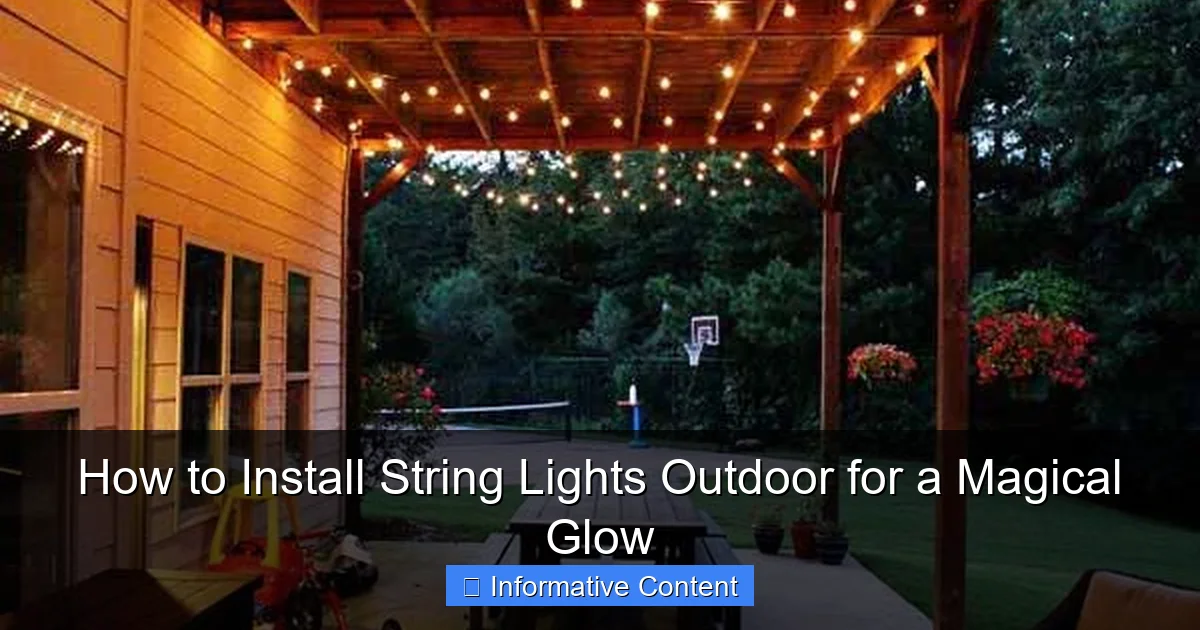
Visual guide about how to install string lights outdoor
Image source: amazinginteriordesign.com
Measure Your Space Accurately
Grab a measuring tape (or a long piece of string if you’re old-school) and map out the area you want to light. Measure the distance between trees, posts, or walls where you’ll hang the lights. Pro tip: Add 10–15% extra to your measurements. Lights always need a little slack to avoid tension, and you’ll thank yourself when you’re not scrambling to find an extension cord.
For example, if you’re stringing lights across a 20-foot patio, plan for at least 23 feet of lighted length. If you’re wrapping around a tree trunk, measure the circumference at the height where you’ll hang the lights. And don’t forget to account for vertical drops—like lights hanging from a roofline down to a railing.
Choose the Right Mounting Points
Your mounting points are the anchors of your setup. They need to be strong and weather-resistant. Here are the most common options:
- Trees: Great for natural charm, but check for healthy, sturdy branches. Avoid weak or dead limbs. Use tree-friendly hooks or adjustable straps (not nails or screws) to protect the bark.
- Fences and Railings: Use S-hooks, zip ties, or adhesive clips. Ensure your fence can support the weight—especially if you’re using heavier Edison-style bulbs.
- Pergolas and Gazebos: Ideal for straight runs or crisscross patterns. Use eye hooks, cup hooks, or zip ties on the beams.
- Walls and Eaves: Use gutter hooks, screw-in hooks, or tension rods. For brick or stucco, you may need anchors.
One mistake I made early on? Assuming every tree branch was strong enough. I learned the hard way when a light strand came crashing down after a windy night. Now, I always test the branch by gently pulling down on it—if it bends too much, find a thicker one.
Sketch Your Design
Grab a notebook or use a free app like SketchUp or Google’s “Sketch a Room” to draw your layout. Sketch the mounting points, light paths, and any obstacles (like windows or doors). This helps you visualize the final look and catch potential issues—like lights blocking a walkway or dangling too low.
For inspiration, think about patterns: straight lines across a patio, a crisscross “X” over a dining area, or a zigzag along a fence. You can even create a canopy effect by hanging lights in a grid or diamond pattern.
Choosing the Right String Lights for Your Space
Not all outdoor string lights are created equal. Picking the right type is like choosing the right tool for a job—it makes everything easier and better.
LED vs. Incandescent: The Bright Choice
Almost every expert will tell you: go with LED. Here’s why:
- Energy Efficiency: LEDs use up to 80% less energy than incandescent bulbs. That means lower electricity bills and longer run times.
- Durability: LEDs are shock-resistant and last 25,000–50,000 hours (vs. 1,000–2,000 for incandescents).
- Heat Output: LEDs stay cool, making them safer around kids, pets, and flammable materials.
- Weather Resistance: Look for IP65 or IP67 ratings—meaning they’re dust-tight and can handle heavy rain or snow.
That said, incandescent bulbs have a warmer, vintage glow. If you love that look, consider LEDs with a warm white (2700K–3000K) color temperature—they mimic the incandescent feel without the drawbacks.
Bulb Style and Spacing
Bulb style affects both aesthetics and function:
- Edison Bulbs: Large, exposed filaments. Great for vintage charm, but they’re heavier and may sag over time.
- Mini Bulbs: Small, often with a clear or frosted glass. Perfect for delicate, twinkling effects.
- Integrated LEDs: No bulbs—just a continuous strand with tiny LEDs embedded. Super durable and modern.
Spacing matters too. Bulbs spaced 4–6 inches apart create a dense, cozy glow. Wider spacing (8–12 inches) works for a more minimalist look. For long runs (over 30 feet), tighter spacing prevents dark gaps.
Power Source and Connectivity
How will you power your lights?
- Plug-In: Most common. Use outdoor-rated extension cords and GFCI outlets. Avoid daisy-chaining more than 3 strands unless the manufacturer says it’s safe.
- Solar-Powered: Eco-friendly, but only work in sunny areas. Great for temporary setups or shaded spots (as long as the solar panel gets sun).
- Battery-Operated: Flexible for tight spaces, but batteries need frequent replacement. Best for small accents or seasonal use.
One thing I love? Smart string lights with Wi-Fi or Bluetooth. You can control them with your phone, set timers, or even sync them to music. Just make sure they’re rated for outdoor use!
Step-by-Step Installation Guide
Now for the fun part—putting it all together! Follow these steps for a smooth, professional-looking install.
Step 1: Gather Your Tools
You’ll need:
- String lights (with extra bulbs or fuses)
- Measuring tape
- Drill and appropriate bits (for screw-in hooks)
- Eye hooks, cup hooks, or gutter hooks
- Zip ties or adhesive clips
- Extension cords (outdoor-rated, with GFCI)
- Step ladder (if needed)
- Gloves (for handling bulbs)
Pro tip: Lay everything out before you start. It saves time and prevents mid-installation trips to the store.
Step 2: Install Mounting Hardware
Start at the power source and work outward. Here’s how:
- For Trees: Wrap a tree strap (available at garden centers) around the trunk and secure it with a hook. Or use a tree-friendly hook that screws in gently.
- For Walls/Pergolas: Drill pilot holes, then screw in cup hooks or eye hooks. For gutters, use gutter hooks that clip on without drilling.
- For Fences: Use zip ties to attach S-hooks to the top rail. Or use adhesive clips (great for vinyl or metal fences).
Always install hooks slightly higher than needed—you can adjust later. And avoid sharp bends or kinks in the wire.
Step 3: Hang the Lights
Start at the outlet and work toward the end. Here’s the key: don’t pull the lights tight. Instead, let them hang with a slight sag—like a clothesline. This prevents tension on the wire and looks more natural.
- For straight runs: Hook one end, then walk to the other end and attach it. Adjust the sag as you go.
- For crisscross patterns: Use a ladder to reach the center point. Secure the lights with zip ties or hooks, then work outward.
- For trees: Wrap the lights around the trunk or branches, using hooks to guide the path. Avoid wrapping too tightly—trees grow!
One trick I learned from a landscaper: use a long pole with a hook to reach high points. It’s way easier than climbing a ladder with a strand of lights in your hands.
Step 4: Manage Power and Cords
This is where many setups go wrong. Ugly cords ruin the magic. Here’s how to hide them:
- Use cord clips or zip ties: Secure cords to fences, railings, or walls. Run them along the edge of a pergola or behind furniture.
- Paint cords to match: Use outdoor spray paint to blend cords into the background.
- Use a power box: A waterproof outlet cover keeps the connection safe and tidy.
And never run cords across walkways—tripping hazards are no joke. If you must cross a path, use a cord cover or bury the cord under mulch (only if it’s rated for direct burial).
Step 5: Test and Adjust
Plug in the lights and check for:
- Brightness (adjust spacing if needed)
- Sagging (add support hooks if lights are drooping)
- Cord visibility (re-route or hide as needed)
If a bulb is out, check the fuse (usually in the plug) or replace the bulb. Keep a few extras on hand!
Safety and Weatherproofing Tips
Outdoor lights face rain, wind, snow, and sun. A little prep keeps them safe and long-lasting.
Weatherproofing Essentials
Always use outdoor-rated lights and cords. Look for:
- IP65 or higher: Dust-tight and water-resistant.
- UL Listed: Meets safety standards.
- UV-Resistant Wiring: Prevents sun damage.
For extra protection, use waterproof wire connectors at splices and cover plugs with a weatherproof outlet box.
Wind and Storm Protection
Wind is the enemy of string lights. To prevent damage:
- Use tensioners: Adjustable hooks or turnbuckles keep lights taut in windy areas.
- Add support poles: Install temporary poles (like shepherd’s hooks) for long runs.
- Take down in extreme weather: If a storm is coming, unplug and remove lights. Better safe than sorry!
I once left my lights up during a tornado warning (bad idea). The wind tore the strands, and I lost half the bulbs. Now, I have a quick-release system with carabiners—I can take them down in minutes.
Electrical Safety
Never overload circuits. Use a GFCI outlet (or GFCI extension cord) to prevent shocks. And avoid running cords under doors or through windows—this can damage the wire and create fire hazards.
If you’re using multiple strands, check the manufacturer’s “max connect” rating. Most LED strands can connect 10–15 together, but incandescents usually max out at 3–5.
Creative Ideas and Pro Tips for Stunning Results
Now that you’ve got the basics, let’s level up your design game.
Layer Your Lighting
Don’t rely on string lights alone. Combine them with:
- Fairy lights in planters for a ground-level glow.
- Path lights to guide guests.
- Uplights on trees or sculptures for drama.
Example: String lights over the patio, fairy lights in the flower beds, and a spotlight on a water feature. Instant magic!
Use Reflective Surfaces
Hang lights near mirrors, white walls, or water to amplify the glow. A light-colored pergola or fence bounces light beautifully.
Try Color and Motion
While warm white is timeless, colored lights (like soft blue or amber) can set a mood. For holidays, use RGB lights with a remote. And don’t overlook twinkle or chase modes—they add whimsy without being cheesy.
Seasonal Swaps
Keep your lights year-round by switching bulbs. Use warm white in summer, colored bulbs for holidays, and even solar-powered fairy lights for winter (they’re low-profile and energy-free).
Pro Tip: The “Floating” Effect
For a truly magical look, hang lights between trees at varying heights—like a 3D canopy. Use different strand lengths and stagger the bulbs. It feels like you’re walking through a starlit forest.
Maintenance and Longevity
Your lights will last years if you care for them. Here’s how:
- Clean bulbs yearly: Wipe with a damp cloth to remove dirt and pollen.
- Check connections: Tighten loose hooks and replace frayed cords.
- Store properly: Coil lights around a cardboard circle or storage reel. Keep in a dry, cool place.
And remember: quality matters. Cheap lights may save money upfront but fail faster. Invest in a reputable brand—you’ll save time and frustration in the long run.
Final Thoughts: Your Outdoor Oasis Awaits
Installing outdoor string lights isn’t just about lighting—it’s about creating a feeling. That feeling of warmth, joy, and connection. Whether you’re hosting a party, enjoying a quiet evening, or just looking out the window, the right lights turn your outdoor space into a sanctuary.
So grab your tools, trust your plan, and take it step by step. You’ve got this. And when you finally flip the switch and see that soft, golden glow spreading across your patio or garden? That’s the moment it all clicks. You didn’t just install lights—you created magic.
Now go enjoy your new favorite spot. And don’t forget to share the light with others. After all, the best part of a magical glow is sharing it.
| Light Type | Best For | Pros | Cons |
|---|---|---|---|
| LED Edison Bulbs | Patios, pergolas | Warm glow, durable, energy-efficient | Heavier, may sag over long runs |
| Mini LED Bulbs | Balconies, trees | Delicate, twinkling effect, lightweight | Less bright for large areas |
| Solar-Powered | Shaded areas, eco-conscious setups | No wiring, low energy cost | Depends on sunlight, less bright |
| Smart RGB | Parties, holidays | Color-changing, app-controlled | Higher cost, needs Wi-Fi |
Frequently Asked Questions
How do I install string lights outdoor without damaging my walls or roof?
Use removable adhesive hooks, gutter clips, or tension rods to secure the lights without nails or screws. These methods provide stability while protecting surfaces, making them ideal for rentals or delicate exteriors.
What’s the best way to plan the layout for outdoor string lights?
Measure the area first and sketch a rough layout, accounting for anchor points (trees, posts, or eaves). Ensure your string lights’ length and spacing match the design to avoid mid-installation adjustments.
How to install string lights outdoor if there’s no nearby power source?
Use solar-powered string lights or a weatherproof extension cord routed safely from an indoor outlet. For longer runs, consider a low-voltage transformer with outdoor-rated cables to minimize tripping hazards.
Are outdoor string lights safe to use in all weather conditions?
Yes, as long as they’re UL-listed for wet locations and all connections are sealed with waterproof covers. Always check the manufacturer’s rating to ensure they can handle rain, snow, or humidity.
Can I connect multiple string lights for a longer span?
Yes, but check the maximum wattage or amperage rating on the first light’s plug to avoid overloading. Use end-to-end connectors or a power strip with built-in safety features for seamless installation.
How do I keep outdoor string lights from sagging between anchor points?
Install a guide wire between anchor points and attach the lights to it with zip ties or hooks. This distributes weight evenly and maintains a taut, professional look without straining the bulbs.

