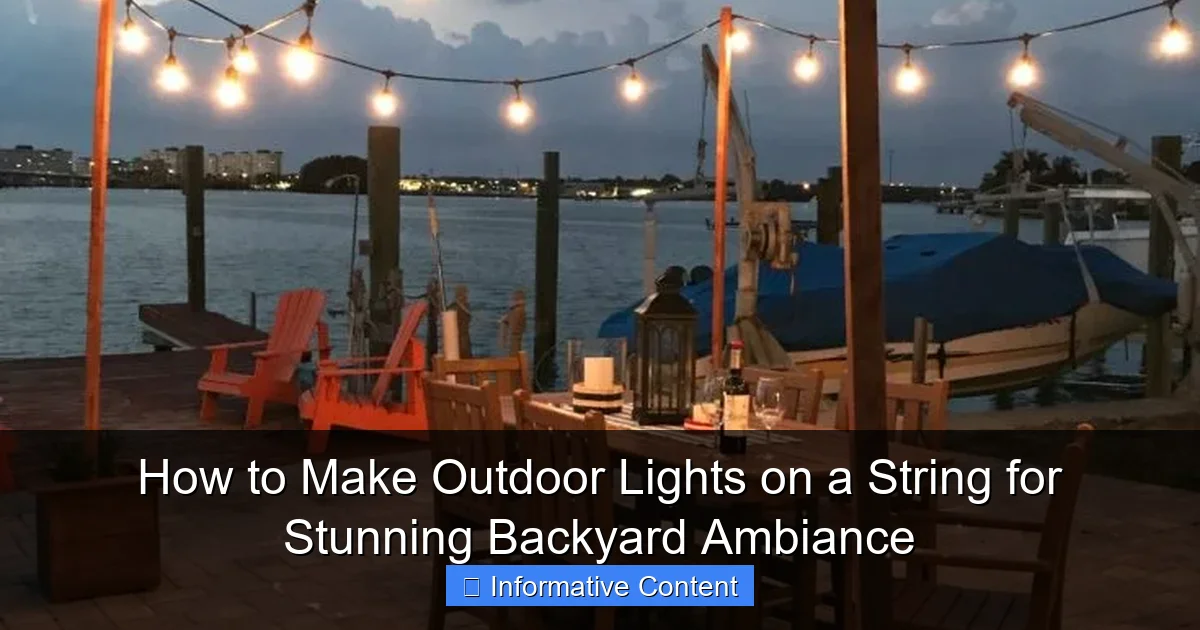
Featured image for how to make outdoor lights on a string
Image source: h2obungalow.com
Transform your backyard into a captivating retreat by crafting custom string lights using weather-resistant bulbs, durable wire, and creative spacing techniques. With simple tools and a few DIY tricks—like using vintage jars or spacing bulbs evenly—you can achieve a professional, enchanting glow that enhances any outdoor space. This easy project combines style and function for unforgettable nighttime ambiance.
Key Takeaways
- Choose weatherproof bulbs: Ensure durability with outdoor-rated, shatterproof LED lights.
- Plan your layout first: Sketch spacing and anchor points before installation.
- Use sturdy support: Secure lights to strong structures like pergolas or trees.
- Hide cords creatively: Blend wires with clips, plants, or decorative covers.
- Add dimmers or timers: Control ambiance and save energy effortlessly.
- Test before finalizing: Check connections and brightness prior to full setup.
📑 Table of Contents
- Why String Lights Transform Your Outdoor Space
- Planning Your Outdoor String Light Setup
- Choosing the Right Materials and Components
- Step-by-Step Guide to Installing Your String Lights
- Creative Design Ideas for Maximum Impact
- Maintenance, Safety, and Longevity Tips
- Bring Your Backyard to Life with DIY String Lights
Why String Lights Transform Your Outdoor Space
There’s something magical about stepping into a backyard lit by soft, twinkling string lights. Whether you’re hosting a summer barbecue, enjoying a quiet evening with a book, or celebrating a special occasion, the right lighting can turn an ordinary outdoor space into an enchanting retreat. I remember the first time I strung lights in my own backyard—simple, budget-friendly, and instantly transformative. It felt like I’d unlocked a secret to instant ambiance. If you’ve ever wondered how to make outdoor lights on a string that look professional and last season after season, you’re in the right place.
Creating your own outdoor string lights isn’t just about aesthetics—it’s about crafting an experience. With the right materials, a bit of planning, and some creative flair, you can design lighting that’s both functional and beautiful. From cozy patios to sprawling gardens, DIY string lights let you personalize your space without breaking the bank. And the best part? You don’t need to be an electrician or a DIY expert. This guide walks you through every step, from choosing the right bulbs to securing your lights safely and stylishly. So grab a cup of tea, put on some comfy shoes, and let’s turn your outdoor dreams into glowing reality.
Planning Your Outdoor String Light Setup
Assess Your Outdoor Space
Before you buy a single bulb, take a good look at your backyard or patio. Ask yourself: Where do I want the lights to shine? Are you framing a dining area? Highlighting a pathway? Creating a canopy over a seating nook? The layout of your space will determine the length, style, and placement of your string lights.
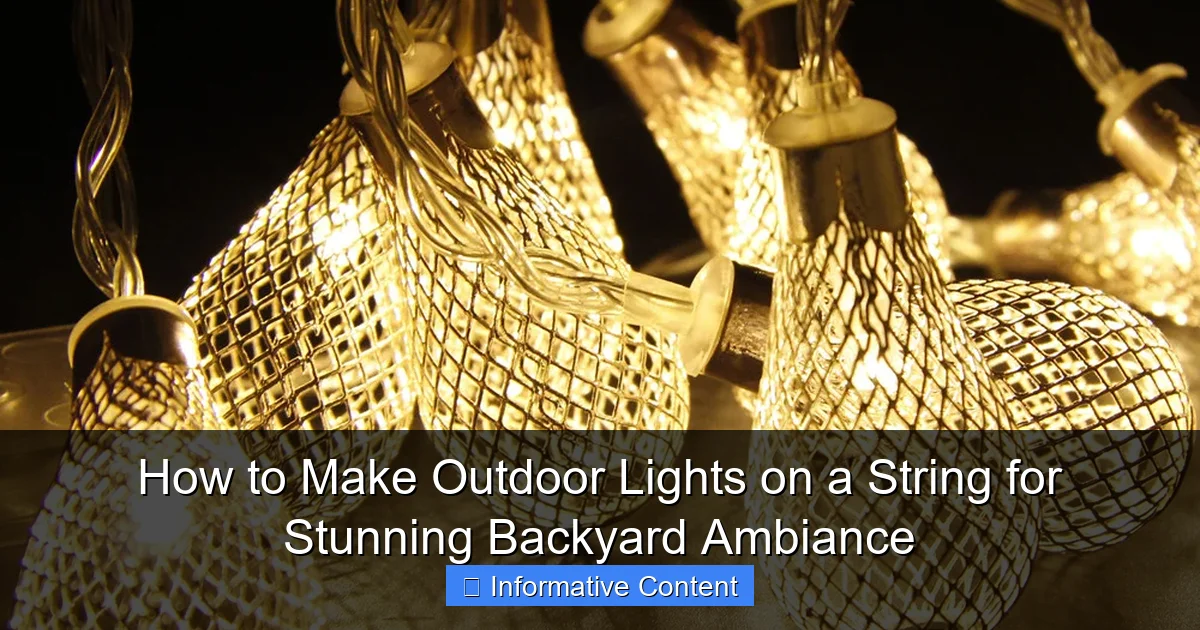
Visual guide about how to make outdoor lights on a string
Image source: warisanlighting.com
For example, if you have a pergola, you might drape lights across the beams for a starry-night effect. On a small balcony, you could run lights along the railing or up a wall. Measure the distances between anchor points—trees, posts, eaves, or fences—so you know how much lighting you’ll need. Pro tip: Add 10–15% extra length to your measurements to account for slack, curves, and potential obstacles.
Choose the Right Style and Ambiance
Not all string lights are created equal. Think about the mood you want to create. Do you prefer warm white for a cozy, romantic glow? Or colorful LEDs for a festive vibe during holidays? Here’s a quick breakdown:
- Warm white Edison bulbs: Timeless, vintage charm—perfect for rustic or boho spaces.
- Cool white LEDs: Crisp and modern, great for contemporary patios.
- Colored or RGB lights: Fun for parties, holidays, or themed events (think red and green for Christmas or pastels for a baby shower).
- Frosted or globe bulbs: Soften the light, reduce glare, and add elegance.
One friend of mine used soft amber fairy lights in her garden, and it instantly felt like a fairytale escape. Another opted for bright, programmable RGB strings for game nights and movie screenings. The style you choose should reflect your personality and how you use your outdoor area.
Check Power Access and Safety
Safety first—always. Before you start hanging anything, identify your power source. Do you have an outdoor GFCI (ground-fault circuit interrupter) outlet? If not, you may need to run an extension cord from indoors or invest in solar-powered lights. Never use indoor-rated extension cords outdoors—they’re not waterproof and can be a fire hazard.
Also, consider how weatherproof your setup needs to be. If your lights will face rain, wind, or snow, make sure every component—bulbs, cords, connectors—is rated for outdoor use. Look for an IP65 or higher rating, which means the lights are dust-tight and protected against water jets.
Choosing the Right Materials and Components
Types of String Lights: Pros and Cons
There are several types of string lights to choose from, each with its own strengths and quirks. Here’s a rundown of the most popular options:
- Plug-in LED string lights: Energy-efficient, long-lasting, and easy to install. Best for permanent or semi-permanent setups. Look for ones with replaceable bulbs.
- Solar-powered lights: No wiring needed—just place the solar panel in sunlight. Great for remote areas or renters. However, they may not shine as brightly or last as long on cloudy days.
- Incandescent string lights: Warm, nostalgic glow, but less efficient and shorter lifespan. Not ideal for year-round use.
- Smart string lights: Can be controlled via app, voice assistant, or remote. Change colors, set schedules, or sync with music. A bit pricier but worth it for tech lovers.
I once tried using solar lights in a shaded corner of my yard—big mistake. They barely glowed after a few hours. Lesson learned: solar works best in direct sunlight. For shaded areas, plug-in or battery-powered options are better.
Essential Hardware for Hanging
Even the best lights won’t shine if they fall down. You’ll need the right hardware to keep them secure and looking great. Here’s what to gather:
- Outdoor-rated hooks or eye screws: Use stainless steel or galvanized steel to resist rust. Install them into wood, stucco, or masonry using appropriate anchors.
- Zip ties or cable clips: Great for temporary setups or securing lights to railings, fences, or trees. Use UV-resistant zip ties to prevent them from snapping in the sun.
- Light clips with adhesive backing: Ideal for smooth surfaces like glass or metal. Make sure they’re rated for outdoor use.
- Turnbuckles or tensioners: For long spans (e.g., between trees), these help keep the lights taut and prevent sagging.
- Extension cords and power strips: Choose ones with built-in surge protection and outdoor ratings.
One of my go-to tricks: use fence-mounted clips on chain-link or wooden fences. They’re easy to install and remove, and they keep the lights at just the right height.
Bulb Spacing and Density
How close should your bulbs be? It depends on the effect you want. Close spacing (every 4–6 inches) creates a dense, glowing line—ideal for framing or outlining. Wider spacing (8–12 inches) gives a more subtle, twinkling effect, perfect for canopies or ambient lighting.
For example, if you’re draping lights over a pergola, try a mix: dense spacing along the edges and wider in the center. This creates depth and avoids a “light bar” look. You can also experiment with layered lighting—combine close-spaced strands with a few widely spaced ones for a dynamic effect.
Step-by-Step Guide to Installing Your String Lights
Step 1: Gather and Test Your Lights
Before you hang anything, plug in your lights and test every bulb. It’s much easier to replace a faulty bulb on the ground than 10 feet in the air. Check for dim spots, flickering, or dead sections. If you’re using smart lights, make sure the app or remote works properly.
Also, lay out the lights along the ground to get a sense of their length and how they’ll flow. This helps you spot kinks, tangled cords, or missing hardware before installation.
Step 2: Install Anchors and Hardware
Mark your anchor points with chalk or painter’s tape. Use a level to ensure your hooks or eye screws are straight. For wood surfaces, pre-drill holes to avoid splitting. For masonry or stucco, use a masonry bit and wall anchors.
Pro tip: Install hardware at slightly different heights to create a gentle wave effect. This looks more natural than a flat line and helps prevent water pooling on the cords.
Step 3: Hang the Lights (Without the Bulbs)
Start by hanging the cord first, then add the bulbs. This prevents you from damaging the bulbs while pulling the cord through tight spaces. Use a ladder or step stool—safety first! If you’re working at height, have someone spot you.
For long runs, attach the cord to the first anchor, then stretch it to the next, securing it as you go. Use zip ties or clips every 12–18 inches to prevent sagging. For a canopy, drape the lights in a crisscross or web pattern. Use a fishing line or thin cord as a guide if needed.
Step 4: Add Bulbs and Connect Power
Once the cord is secure, screw in the bulbs. Be gentle—LEDs are durable, but incandescent bulbs can break if twisted too hard. Plug in the lights and step back to admire your work. Adjust any clips or hooks for a balanced look.
If you’re using multiple strands, connect them with a weatherproof connector or use a power strip. Never overload a single outlet—most outdoor circuits can handle 10–15 amps, so check your total wattage.
Step 5: Weatherproof and Secure Connections
Exposed connections are vulnerable to moisture. Use weatherproof electrical tape or silicone sealant on any splices. For plug-in connections, use a covered outlet box or a drip loop—this lets water run off the cord instead of pooling at the plug.
One reader told me her lights failed after a heavy rain because water dripped into the plug. A simple drip loop (a U-shaped bend in the cord below the outlet) solved the problem. Small fix, big impact.
Creative Design Ideas for Maximum Impact
Create a Canopy or Ceiling of Light
Transform your patio or pergola into a glowing sanctuary. Drape lights in a crisscross, zigzag, or starburst pattern. For a romantic touch, add sheer fabric between the lights to diffuse the glow.
Example: I helped a neighbor create a “light chandelier” by hanging strings from the center of a pergola outward, like rays from the sun. It looked stunning at night and became the focal point of their outdoor dining area.
Highlight Landscaping and Pathways
Use string lights to guide the eye and improve safety. Wrap lights around tree trunks, drape them along hedges, or line walkways with low-hanging strands. Solar path lights with string bulbs are perfect for this.
One clever trick: run lights along a wooden fence in a zigzag pattern. It adds visual interest and makes the fence feel like part of the decor, not just a boundary.
Frame Windows, Doors, and Structures
Outline your garage door, front porch, or sliding glass doors with string lights. This not only boosts curb appeal but also makes your home feel welcoming at night.
For a modern twist, use linear LED strips along the edges of a deck or pergola. They’re sleek, bright, and perfect for minimalist designs.
Go Vertical with Hanging Installations
Don’t limit yourself to horizontal runs. Hang lights vertically from a pergola to the ground, or drape them from a tree branch to a fence. This creates depth and draws the eye upward.
One reader hung lights from a tall tree to a nearby shed, creating a “light curtain” that felt like a secret garden entrance. It was simple, stunning, and cost less than $50.
Maintenance, Safety, and Longevity Tips
Regular Cleaning and Inspection
Dust, pollen, and spiderwebs can dim your lights over time. Every few months, wipe down bulbs with a dry microfiber cloth. For stubborn grime, use a damp cloth (unplugged, of course). Check for frayed cords, loose bulbs, or rusted hardware.
After storms or high winds, inspect your setup. Replace any damaged bulbs or clips before the next use.
Seasonal Storage and Protection
If you live in a cold climate, consider removing lights during winter to extend their life. Store them coiled in a dry, temperature-controlled space. Wrap cords around a piece of cardboard or use a cord reel to prevent tangling.
For year-round setups, invest in weatherproof enclosures for plugs and connectors. Silicone covers or outdoor junction boxes are worth the extra $10–$20.
Energy Efficiency and Smart Controls
LEDs use up to 90% less energy than incandescent bulbs. Pair them with a timer or smart plug to turn them on at sunset and off at bedtime. This saves energy and prevents overheating.
Smart systems let you schedule lighting, dim the brightness, or change colors remotely. One friend used a smart plug to sync her lights with her porch lights—automatically turning on at dusk and off at 10 PM.
Data Table: Recommended String Lights for Different Uses
| Use Case | Recommended Type | Bulb Spacing | Power Source | Estimated Cost (per 25 ft) |
|---|---|---|---|---|
| Pergola Canopy | Plug-in LED, warm white | 6 inches | Outdoor outlet | $25–$40 |
| Tree Wrapping | Solar-powered, RGB | 8 inches | Solar panel | $30–$50 |
| Fence Lining | Plug-in LED, cool white | 10 inches | Extension cord | $20–$35 |
| Pathway Lighting | Solar path lights with string | 12 inches | Solar | $15–$30 |
| Smart Home Integration | Smart RGB LED string | 4–6 inches | Outdoor outlet + app | $50–$80 |
Bring Your Backyard to Life with DIY String Lights
Learning how to make outdoor lights on a string is more than a DIY project—it’s a way to create memories, enhance safety, and elevate your outdoor lifestyle. From the first flicker of light to the soft glow that lingers after the party ends, your handmade lighting setup will become a signature feature of your home.
Remember, it’s not about perfection. A few sagging strands or mismatched bulbs? That’s part of the charm. What matters is the feeling your lights create—warmth, joy, and a sense of place. Whether you’re wrapping a single tree or transforming an entire yard, every step you take brings you closer to your dream outdoor oasis.
So go ahead—grab your tools, pick your favorite bulbs, and start stringing. Your backyard is waiting to shine. And when the sun sets and the lights come on, you’ll know it was worth every moment. After all, the best ambiance isn’t bought—it’s built with love, creativity, and a little bit of glow.
Frequently Asked Questions
How do I choose the right bulbs for outdoor string lights?
Opt for weather-resistant, shatterproof LED bulbs rated for outdoor use to ensure durability and safety. Consider warm white or Edison-style bulbs for a cozy ambiance, and verify the IP rating (IP44 or higher) for water resistance.
Can I make DIY outdoor lights on a string without electrical wiring?
Absolutely! Use solar-powered or battery-operated string lights for a no-wiring solution. These are easy to install and perfect for renters or temporary setups.
What’s the best way to hang string lights in my backyard?
Use sturdy anchor points like trees, pergolas, or poles, and secure lights with hooks, zip ties, or guide wires. Keep bulbs 6-12 inches apart for even illumination and a balanced look.
How do I make outdoor lights on a string energy-efficient?
Choose LED bulbs, which use up to 80% less energy than incandescent ones, and pair them with a timer or smart plug. This reduces power consumption while maintaining a stunning glow.
Are there creative ways to style outdoor string lights beyond basic hanging?
Yes! Try weaving lights through railings, creating a canopy with crisscross patterns, or wrapping them around trees for a whimsical effect. Use dimmers to adjust brightness for different moods.
How do I ensure my DIY outdoor lights on a string stay safe in all weather?
Use outdoor-rated extension cords, seal connections with silicone, and avoid overloading circuits. Regularly check for frayed wires or damaged sockets to prevent hazards.

