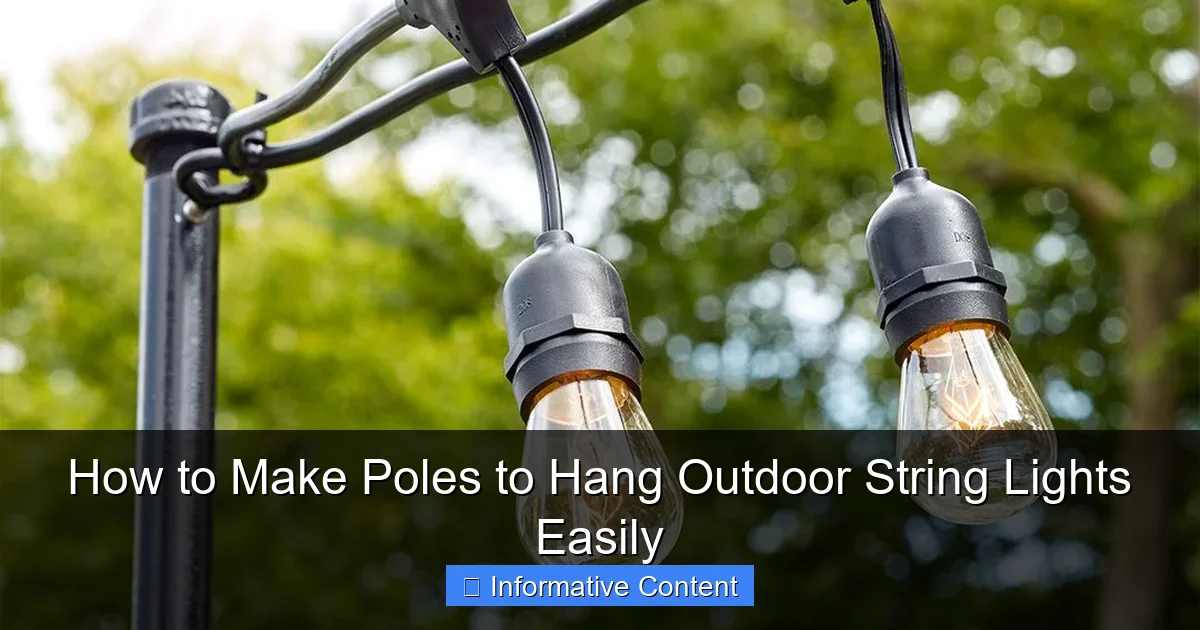
Featured image for how to make poles to hang outdoor string lights
Image source: bhg.com
Transform your backyard ambiance effortlessly by building DIY poles to hang outdoor string lights using basic materials like PVC pipes, wooden posts, or metal rods. With simple tools and a few hours, you can create sturdy, weather-resistant supports that elevate your lighting setup and withstand wind and rain. This easy, customizable solution ensures professional-looking results without the high cost.
Key Takeaways
- Choose durable materials: Use weather-resistant metals or treated wood for long-lasting poles.
- Measure spacing accurately: Place poles 8-10 feet apart for optimal light suspension.
- Secure deep installation: Bury poles at least 2 feet deep for stability.
- Add angled supports: Brace poles with diagonal stakes to prevent leaning.
- Use adjustable hooks: Install eye hooks for easy height and tension adjustments.
- Test before hanging: Ensure poles are level and sturdy before stringing lights.
📑 Table of Contents
- Why Hanging Outdoor String Lights Is Worth the Effort
- Choosing the Right Materials for Your Light Poles
- Step-by-Step Guide to Building and Installing Poles
- Creative Pole Designs for Different Yard Layouts
- Hanging the Lights: Tips for a Professional Look
- Maintenance and Long-Term Care
- Data Table: Material Comparison for Outdoor Light Poles
- Final Thoughts: Light Up Your Space with Confidence
Why Hanging Outdoor String Lights Is Worth the Effort
There’s something magical about stepping into a backyard lit by soft, glowing string lights. Whether it’s a cozy dinner under the stars, a birthday party with friends, or just a quiet evening with a book, those twinkling lights instantly transform your outdoor space into something special. But here’s the catch: without proper support, your dreamy lighting setup can quickly turn into a tangled mess—or worse, a safety hazard.
Many people assume they need to drill into their house or spend a fortune on professional installations. But the truth? You can easily make poles to hang outdoor string lights using simple, affordable materials. I’ve been there—struggling with drooping wires, leaning trees, and awkward angles. After a few failed attempts (and one memorable incident involving a ladder and a squirrel), I learned how to do it right. And now, I’m sharing my step-by-step guide so you can skip the frustration and get straight to the ambiance.
Choosing the Right Materials for Your Light Poles
The foundation of any great outdoor lighting setup starts with strong, reliable poles. But “strong” doesn’t have to mean “expensive.” The key is matching your materials to your yard’s layout, soil type, and weather conditions. Let’s break down your options so you can make an informed choice.
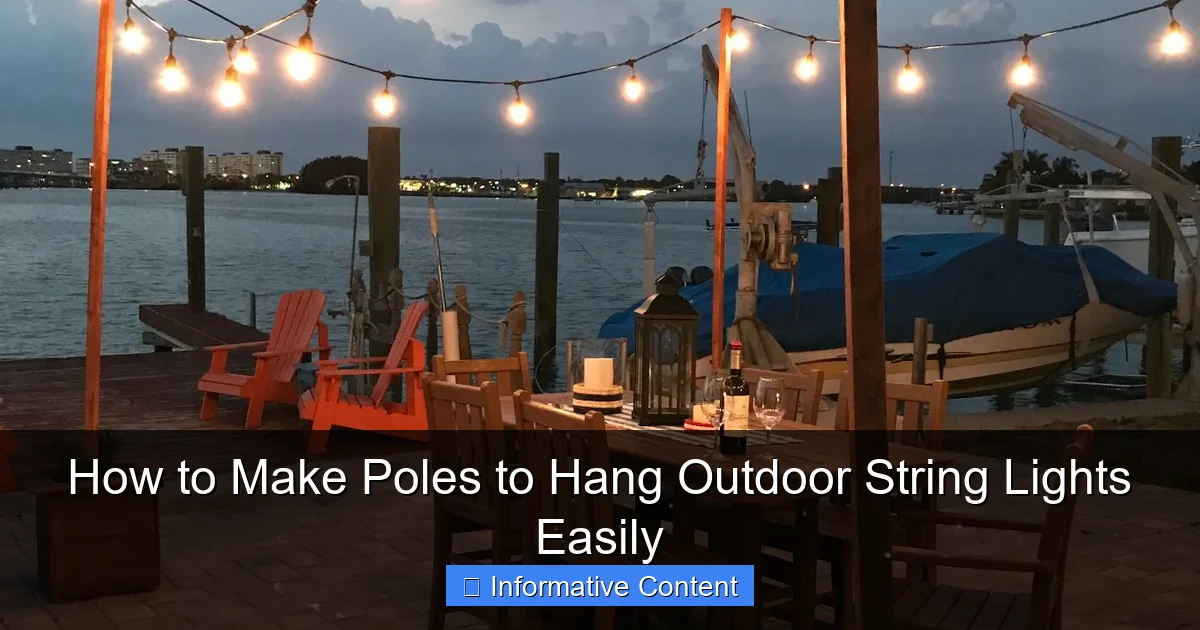
Visual guide about how to make poles to hang outdoor string lights
Image source: h2obungalow.com
Metal vs. Wood: Pros and Cons
When it comes to poles, metal and wood are the two most popular choices—and each has its strengths.
- Metal (Galvanized Steel or Aluminum): These are durable, weather-resistant, and perfect for windy areas. Galvanized steel, in particular, resists rust and can last 10+ years with minimal maintenance. However, metal poles can be heavier and harder to cut or modify without special tools. They also tend to be more expensive than wood.
- Wood (Cedar, Redwood, or Pressure-Treated Pine): Wood is easier to work with, especially if you’re a DIY beginner. Cedar and redwood naturally resist rot and insects, making them ideal for humid climates. Pressure-treated pine is budget-friendly but may need sealing to prevent warping. The downside? Wood requires more upkeep—resealing every 2–3 years—and may not hold up as well in extreme weather.
Tip: If you’re in a coastal area or somewhere with frequent rain, metal is the safer bet. For dry climates or temporary setups, wood works beautifully.
Length and Thickness: Getting the Dimensions Right
Size matters—especially when it comes to stability. A pole that’s too short won’t give your lights enough clearance. Too thin, and it’ll wobble in the wind.
- Height: Aim for 7–9 feet above ground. This keeps lights out of the way but still low enough to feel intimate. For patios or decks, 6 feet might work, but avoid going below 5 feet to prevent head bumps.
- Diameter: For metal poles, 1.5–2 inches in diameter is ideal. Wood poles should be at least 4×4 inches (about 10×10 cm) for maximum strength. Thinner wood (like 2×2) is okay for short-term use or lightweight lights.
Pro insight: I once used 1-inch metal poles for a garden party. They looked sleek, but a gust of wind knocked them over—along with my string lights and a tray of cupcakes. Lesson learned: always prioritize sturdiness over style.
Where to Source Materials (And Save Money)
You don’t need to buy everything new. Here are my favorite budget-friendly sources:
- Hardware stores: Look for scrap metal sections or offcuts. Many stores sell pre-cut 8-foot metal poles for under $20.
- Reclaimed wood: Check Craigslist, Facebook Marketplace, or construction sites (with permission!). Old fence posts or decking can be repurposed.
- Online retailers: Amazon and Home Depot offer affordable kits, like metal ground sleeves or adjustable pole brackets.
Real example: My friend Sarah used old copper pipes from her home renovation project to make poles. They looked industrial-chic and cost her nothing. Get creative!
Step-by-Step Guide to Building and Installing Poles
Now that you’ve picked your materials, it’s time to build. Whether you’re using metal or wood, the process is straightforward—but attention to detail matters. Follow these steps to create sturdy, long-lasting poles.
Preparing the Poles: Cutting, Sanding, and Sealing
Start with clean, smooth poles to prevent splinters (wood) or rust spots (metal).
- For wood: Cut your 4×4 to 8 feet (or your desired height). Sand all edges with 120-grit sandpaper. Apply a water-repellent sealant—I like Thompson’s WaterSeal. Let it dry for 24 hours.
- For metal: Use a hacksaw or pipe cutter to trim to size. Sand the cut ends with steel wool to remove sharp edges. Wipe with a damp cloth to remove debris.
Tip: If you’re using metal, consider painting it with outdoor-rated spray paint (e.g., Rust-Oleum) for a pop of color. Just avoid covering the top 6 inches—that’s where the lights attach.
Securing the Base: Concrete, Ground Sleeves, or Weighted Bases
This is where most DIYers go wrong. A shaky base = wobbly poles. Here are three reliable methods:
- Concrete footings: Dig a 12-inch-deep hole (18 inches if you live in a windy area). Place the pole in the hole and pour quick-setting concrete around it. Use a level to keep it straight. Let it cure for 24–48 hours. Best for permanent installations.
- Ground sleeves: Buy metal sleeves (like this Simpson Strong-Tie model) and drive them into the ground with a sledgehammer. Slide the pole into the sleeve and secure with set screws. Great for renters or seasonal use.
- Weighted bases: Use sandbags, cinder blocks, or purpose-built bases (like the LITOM 50lb bases). Place them at the pole’s bottom and cover with decorative rocks or mulch. Ideal for patios or decks.
Real example: For my patio, I used ground sleeves. I could easily remove the poles in winter and reinstall them in spring. No damage to the deck!
Adding Hooks, Eye Bolts, or Crossbeams
Your lights need something to hang from. Here’s how to add attachment points:
- Eye bolts: Drill a hole near the top of the pole and screw in stainless steel eye bolts (rated for outdoor use). Space them 6–8 inches apart for even weight distribution.
- Crossbeams: For wider spaces, attach a horizontal beam between two poles using brackets. Use 2×4 lumber or a metal rod. This creates a “canopy” effect.
- Hooks: Screw-in hooks (like these OOK hooks) are quick and easy. Just avoid plastic—it cracks in the sun.
Pro tip: Pre-drill holes for eye bolts to prevent wood from splitting. For metal poles, use a drill bit designed for metal.
Creative Pole Designs for Different Yard Layouts
Your yard’s shape and features will determine the best pole design. Here are five setups I’ve used—and how to adapt them.
Backyard Canopy (Between Two Trees or Structures)
Got trees? Use them! Wrap a heavy-duty ratchet strap around each tree trunk (at 6–7 feet high) and attach a metal cable or rope between them. Then, hang your lights from the cable. No poles needed! But if the trees are too far apart, add a central pole to keep the cable taut.
- Materials: 1/8-inch galvanized steel cable, turnbuckle, tree protectors (to avoid bark damage).
- Spacing: Poles or trees should be 15–20 feet apart for standard string lights.
Patio or Deck (Freestanding Poles)
For decks, weighted bases are your friend. Use 50–75lb bases (or stack cinder blocks) to anchor 8-foot poles. Add crossbeams between poles for a pergola-like feel. Bonus: Paint the poles to match your deck furniture!
- Tip: Leave 3 feet of clearance around the poles to avoid tripping.
Garden or Lawn (Permanent Concrete Footings)
For open lawns, concrete footings are the gold standard. Space poles 10–12 feet apart in a grid or zigzag pattern. Plant flowers or shrubs around the base to hide the concrete.
- Design idea: Use alternating pole heights (e.g., 7 feet and 9 feet) for visual interest.
Small Balcony or Urban Space (Foldable or Telescoping Poles)
Short on space? Try foldable poles (like this telescoping model) or wall-mounted brackets. Attach lights to a railing or balcony edge, then use a single pole in a planter for balance.
- Pro tip: Use battery-powered LED lights to avoid extension cords.
Party-Ready Setup (Temporary Ground Sleeves)
Hosting an event? Install ground sleeves a week before the party. Remove the poles afterward and store them for next time. No damage to your lawn!
- Time-saving hack: Label each sleeve with tape so you know where to put the pole.
Hanging the Lights: Tips for a Professional Look
Now for the fun part: hanging the lights! A few tricks can take your setup from “DIY” to “designer.”
Spacing and Tension: Avoiding Sagging
Sagging lights = sad vibes. Keep them taut with these tips:
- Use a turnbuckle: Install a turnbuckle in the middle of your cable or rope. Tighten it gradually to remove slack.
- Add extra support: For long runs (30+ feet), add a third pole halfway to prevent sagging.
- Choose the right lights: LED string lights are lighter than incandescent ones, reducing strain on poles.
Real example: I once hung lights between two 20-foot poles without a turnbuckle. By midnight, they sagged so much they touched the ground. A $10 turnbuckle fixed it instantly.
Attaching Lights: Clips, Hooks, or Zip Ties?
Skip the nails—they damage lights and poles. Instead, try:
- Light clips: Plastic clips (like GE clips) snap onto the wire and screw into poles.
- Zip ties: Use outdoor-rated zip ties to secure lights to eye bolts or crossbeams. Cut the excess with scissors.
- Adhesive hooks: Stick-on hooks work for lightweight lights, but they may fall in rain.
Pro tip: Test clips or hooks before hanging the full strand. You don’t want to discover they’re too loose halfway through!
Power and Extension Cords: Staying Safe
Safety first! Follow these rules:
- Use outdoor-rated extension cords: Look for “SJTW” on the label. Avoid indoor cords—they’re not weatherproof.
- Elevate cords: Run them along the pole or use cord clips to keep them off the ground.
- Ground Fault Circuit Interrupter (GFCI): Plug into a GFCI outlet to prevent shocks.
Warning: Never daisy-chain extension cords. Use a single long cord or a power strip with a surge protector.
Maintenance and Long-Term Care
Your poles and lights can last for years with a little TLC. Here’s how to keep them looking great.
Cleaning and Inspecting Poles Annually
Every spring, do a quick check:
- Wood poles: Scrub with a mild soap solution. Reapply sealant if it’s peeling.
- Metal poles: Wipe with a damp cloth. Check for rust spots—touch them up with paint.
- All poles: Tighten loose bolts or hooks. Remove debris from the base.
Pro tip: Store poles indoors during winter if you live in a snowy area. Freeze-thaw cycles can crack concrete footings.
Storing Lights Off-Season
Don’t just toss lights in a box! Wrap them around a cardboard tube or use a storage reel to prevent tangles. Keep them in a dry, temperature-controlled space.
Troubleshooting Common Issues
Even the best setups have hiccups. Here’s how to fix them:
- Pole leaning: Add concrete or drive a stake beside the pole for extra support.
- Lights flickering: Check connections and replace any damaged bulbs.
- Animals chewing cords: Use cord protectors or run cords through PVC pipe.
Data Table: Material Comparison for Outdoor Light Poles
| Material | Cost (8-ft pole) | Lifespan | Best For | Maintenance |
|---|---|---|---|---|
| Galvanized Steel | $20–$40 | 10–15 years | Windy areas, permanent setups | Low (check for rust) |
| Aluminum | $25–$45 | 12–20 years | Coastal areas, lightweight needs | Very low |
| Cedar Wood | $15–$30 | 5–8 years | Natural look, dry climates | Medium (reseal every 2–3 years) |
| Pressure-Treated Pine | $10–$20 | 4–6 years | Budget-friendly, temporary use | High (seal annually) |
Final Thoughts: Light Up Your Space with Confidence
Making poles to hang outdoor string lights isn’t just about function—it’s about creating a space where memories happen. Whether you’re hosting a party, relaxing with family, or just enjoying the night sky, the right setup can make all the difference.
Remember: start simple. Use materials you already have, test your design on a small scale, and don’t be afraid to experiment. I’ve learned that the best lighting setups evolve over time—maybe you’ll add a second row of lights next year, or swap in solar-powered bulbs. The key is to enjoy the process, not just the result.
Now go grab those tools, pick your favorite lights, and start building. Your dreamy, well-lit oasis is just a few poles away. And hey—if you run into a squirrel, just laugh it off. (They’re part of the fun!)
Frequently Asked Questions
How do I make poles to hang outdoor string lights without digging holes?
Use freestanding bases like weighted planters or sandbags to stabilize poles made from PVC, metal, or wooden posts. This method avoids permanent installation and suits patios or decks.
What are the best materials for DIY poles to hang outdoor string lights?
PVC pipes (1-2 inch diameter), metal conduit, or wooden 4x4s work well for sturdy, weather-resistant poles. Pair with rust-proof hardware for longevity.
How tall should my poles be for outdoor string lights?
Ideal height is 7-9 feet for comfortable clearance and even light distribution. Adjust slightly based on your space—taller poles for larger yards, shorter for intimate seating areas.
Can I use existing structures instead of making new poles for string lights?
Yes! Attach lights to trees, pergolas, or fences with hooks or zip ties. For “how to make poles to hang outdoor string lights,” this saves time and materials.
How do I secure the string lights to the poles to prevent sagging?
Use eye hooks, zip ties, or specialized clips to attach lights tightly. For long runs, add a guide wire (like steel cable) between poles for extra support.
Are there portable options for temporary outdoor string light poles?
Absolutely! Try telescoping poles or foldable tripod stands for easy setup and storage. Perfect for events or renters needing non-permanent solutions.

