Featured image for how to make post for outdoor string lights
Image source: i.pinimg.com
Creating sturdy, stylish posts for outdoor string lights starts with choosing weather-resistant materials like cedar, metal, or pressure-treated wood to ensure long-term durability. This guide walks you through measuring, setting secure footings, and spacing posts evenly to support your lights safely and enhance your outdoor ambiance. With the right tools and a few simple steps, you’ll transform your backyard into a beautifully lit retreat.
Key Takeaways
- Choose durable materials: Use weather-resistant wood or metal for long-lasting posts.
- Plan spacing carefully: Position posts 8–10 feet apart for optimal light distribution.
- Secure installation: Anchor posts at least 2 feet deep for stability.
- Measure string light length: Match post distance to light spacing for a clean look.
- Add decorative touches: Paint or stain posts to enhance outdoor aesthetics.
- Check local codes: Ensure compliance with zoning and electrical safety rules.
📑 Table of Contents
- Why You Should Consider Making Posts for Outdoor String Lights
- Planning Your Outdoor String Light Post Project
- Materials and Tools You’ll Need
- Step-by-Step Guide to Building and Installing Posts
- Creative Design Ideas and Customization
- Maintenance and Troubleshooting Tips
- Comparing Installation Methods: Pros and Cons
- Final Thoughts on Making Posts for Outdoor String Lights
Why You Should Consider Making Posts for Outdoor String Lights
There’s something magical about the soft glow of outdoor string lights on a warm summer night. Whether it’s a backyard barbecue, a cozy patio dinner, or just a quiet evening with a book, string lights instantly elevate the mood. But here’s the catch: without proper support, those beautiful lights can sag, droop, or even fall during a windy night. That’s where custom posts come in.
When I first tried hanging string lights between two trees in my backyard, I thought I was set. But after a week, the lights were sagging so much that they almost touched the ground. After a few failed attempts with zip ties, I realized I needed a better solution. That’s when I discovered the power of how to make post for outdoor string lights. It’s not just about aesthetics—it’s about safety, longevity, and getting the most out of your lighting setup. And the best part? You don’t need to be a DIY expert to pull it off. With a little planning and the right materials, you can create a stunning, functional lighting system that lasts for years.
Planning Your Outdoor String Light Post Project
Assessing Your Space and Needs
Before you even pick up a tool, take a step back and assess your outdoor space. Ask yourself: Where do I want the lights to go? Over a patio? Across a yard? Between two structures? The location will determine the type and size of posts you need. For example, if you’re lighting up a 20-foot-wide patio, you’ll need taller, sturdier posts than if you’re just adding ambiance to a small nook.
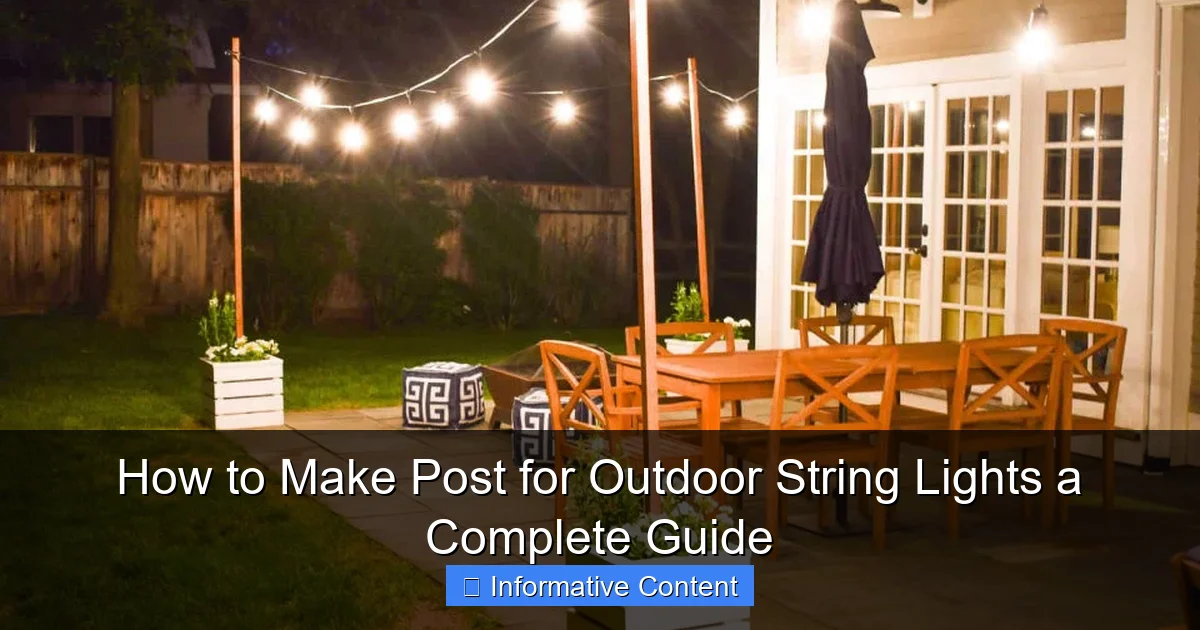
Visual guide about how to make post for outdoor string lights
Image source: blitsy.com
Also, consider how many lights you’re using. A few strands won’t need as much support as a full canopy of lights. I once tried to string 100 feet of lights between two weak fence posts—needless to say, the lights sagged, and the fence leaned. Lesson learned: always account for the weight of your lights and the tension you’re creating.
Choosing the Right Height and Spacing
Height and spacing are crucial for both function and aesthetics. For most outdoor areas, aim for posts that are 7 to 10 feet tall. This gives enough clearance for people to walk under while still creating a cozy, intimate feel. If you’re hanging lights over a dining table, 8 feet is ideal. For a larger space, like a backyard or garden, 10 feet works well.
Spacing depends on the length of your light strands. As a rule of thumb, place posts every 8 to 12 feet. If you’re using heavy-duty Edison bulbs, go for 8-foot spacing. For lighter LED strands, 10 to 12 feet is fine. I once spaced my posts 15 feet apart—big mistake. The lights sagged in the middle, and it looked messy. Stick to the recommended spacing, and you’ll avoid this issue.
Deciding on Materials and Style
Your choice of materials will affect both durability and style. Here are some popular options:
- Wood (e.g., cedar, redwood, or pressure-treated pine): Great for a rustic or natural look. Cedar and redwood are naturally resistant to rot, but pressure-treated pine is more affordable and durable.
- Metal (e.g., aluminum, steel, or wrought iron): Ideal for a modern or industrial look. Aluminum is lightweight and rust-resistant, while steel is heavier but more sturdy.
- PVC or composite: Low-maintenance and weather-resistant, but not as strong as wood or metal.
For my first project, I used pressure-treated pine posts. They were affordable, easy to work with, and held up well in my rainy climate. If you’re going for a sleek, modern look, metal posts might be the way to go.
Materials and Tools You’ll Need
Essential Materials List
Here’s what you’ll need to build your posts:
- Posts: 4×4 wood or 3-inch diameter metal poles (length depends on your height requirements).
- Concrete mix: For securing posts in the ground (if using in-ground installation).
- Post anchors: Metal brackets that attach to concrete footings (for surface mounting).
- Hardware: Eye hooks, lag screws, or swag hooks for attaching the lights.
- Wood sealant or paint: To protect wooden posts from moisture and UV damage.
- String lights: LED or incandescent, depending on your preference.
I recommend buying slightly longer posts than you need (e.g., 10-foot posts for an 8-foot height). This gives you room to bury or anchor them securely.
Tools Required for the Job
You don’t need a full workshop, but these tools will make the process much easier:
- Measuring tape and level: For accurate placement and alignment.
- Post hole digger or auger: If you’re burying posts in the ground.
- Drill and drill bits: For pilot holes and attaching hardware.
- Saw: For cutting posts to size (if needed).
- Shovel: For mixing and pouring concrete.
- Wrench or socket set: For tightening bolts and anchors.
When I first started, I tried to dig post holes with a regular shovel—it took forever! A post hole digger or auger (even a manual one) makes this step so much faster.
Optional Upgrades for Durability and Style
If you want to go the extra mile, consider these upgrades:
- Galvanized or stainless steel hardware: Resists rust and corrosion.
- Decorative post caps: Adds a nice finishing touch and protects the top of the post.
- Adjustable tensioners: For fine-tuning the tightness of your lights.
- Solar-powered lights: Eco-friendly and easy to install (no wiring needed).
I added solar-powered LED lights to one of my posts, and they’ve been running for two years without any issues. Great for areas without easy access to power.
Step-by-Step Guide to Building and Installing Posts
Preparing the Site
Start by marking the locations for your posts. Use stakes and string to create a straight line or desired pattern. Check for level and alignment—this is crucial for a professional-looking result.
If you’re installing in-ground posts, dig holes that are at least 1/3 the length of the post (e.g., for an 8-foot post, dig a 2.5-foot hole). Make sure the holes are wide enough to allow for concrete. For surface-mounted posts, clear the area of debris and level the ground.
Pro tip: Use a laser level or string line to ensure all posts are aligned. I once skipped this step and ended up with crooked posts—not a good look!
Installing In-Ground Posts
For in-ground installation:
- Place the post in the hole, making sure it’s plumb (perfectly vertical).
- Mix the concrete according to the instructions and pour it into the hole around the post.
- Use a level to check the post’s alignment as the concrete sets (it should take 24–48 hours).
- Once the concrete is cured, attach your hardware (eye hooks, swag hooks, etc.) to the posts.
For wooden posts, I recommend sealing the bottom with a wood preservative before installation. This helps prevent rot from ground moisture.
Setting Up Surface-Mounted Posts
If you’re using surface-mounted posts (e.g., on a deck or concrete patio):
- Drill pilot holes into the surface and secure the post anchors.
- Insert the posts into the anchors and tighten the bolts.
- Attach your lighting hardware to the posts.
This method is quicker and less labor-intensive, but make sure the anchors are rated for outdoor use. I used this method on my deck, and it’s held up perfectly through heavy rain and snow.
Attaching the String Lights
Once your posts are secure, it’s time to hang the lights. Here’s how:
- Start at one post and attach the first end of the light strand to an eye hook or swag hook.
- Stretch the lights taut to the next post and attach them. Use a helper if needed—this step is much easier with two people.
- For longer runs, use a tensioner or turnbuckle to prevent sagging.
- If your lights have a plug, make sure it’s accessible and protected from moisture.
I always test the lights before fully tightening them. This way, I can adjust the spacing or height if needed.
Creative Design Ideas and Customization
Adding Decorative Elements
Your posts don’t have to be plain! Here are some ways to add flair:
- Paint or stain the posts: Match your home’s exterior or go bold with a pop of color.
- Wrap the posts with string lights: Create a glowing column effect.
- Add planters or lanterns: For a layered look.
- Install post caps with solar lights: Doubles as a nightlight.
I painted my posts white to match my house, and it made the entire setup look intentional and polished. A little paint can go a long way.
Combining with Other Features
String lights work great with other outdoor features:
- Fire pits or fire tables: Create a cozy gathering space.
- Outdoor kitchens or bars: Add ambiance to cooking areas.
- Garden trellises or pergolas: Extend the lighting vertically.
- Water features: Reflect the lights for a magical effect.
I combined my string lights with a small fire pit, and it’s now my favorite spot in the yard. The combination of light and warmth is unbeatable.
Seasonal and Themed Setups
Don’t be afraid to switch things up! For holidays, use colored lights or themed decorations. In the summer, go for a boho-chic look with lanterns and tassels. In the winter, wrap the posts with garlands and add fairy lights.
One year, I turned my posts into a holiday display with red and green lights, wreaths, and ornaments. It was a hit with the neighbors—and my kids loved it!
Maintenance and Troubleshooting Tips
Routine Care for Longevity
To keep your posts and lights looking great:
- Inspect the posts annually: Check for rot, rust, or loose hardware.
- Clean the lights: Wipe down bulbs and strands to remove dust and debris.
- Seal wooden posts: Reapply sealant every 1–2 years.
- Check electrical connections: Make sure plugs and cords are in good condition.
I neglected my wooden posts for two years, and they started to warp. Now I inspect them every spring and seal them as needed.
Common Issues and Fixes
Here are some common problems and how to fix them:
- Sagging lights: Add a tensioner or tighten the existing one.
- Flickering lights: Check for loose connections or faulty bulbs.
- Rusty hardware: Replace with galvanized or stainless steel.
- Wobbly posts: Re-secure the post or add additional bracing.
When my lights started flickering, I found a loose plug in the middle of the strand. A quick fix saved me from replacing the entire set.
When to Replace or Upgrade
Even the best setups need updates. Consider replacing your posts or lights if:
- The posts are severely rotted or rusted.
- The lights are no longer working or look outdated.
- You want to switch to a different style (e.g., solar-powered or smart lights).
I upgraded to solar-powered lights last year, and it’s been a game-changer. No more worrying about extension cords!
Comparing Installation Methods: Pros and Cons
Here’s a quick comparison of the two main installation methods:
| Method | Pros | Cons |
|---|---|---|
| In-Ground Posts |
|
|
| Surface-Mounted Posts |
|
|
I’ve used both methods, and each has its place. For my backyard, in-ground posts were the best choice. For my deck, surface-mounted posts worked perfectly.
Final Thoughts on Making Posts for Outdoor String Lights
Creating posts for your outdoor string lights might seem like a big project, but it’s one of the most rewarding DIY upgrades you can make. Not only do you get beautiful, functional lighting, but you also add value and charm to your outdoor space. Whether you’re going for a rustic, modern, or whimsical look, the key is to plan carefully, choose the right materials, and take your time with installation.
From my own experience, I’ve learned that a little extra effort upfront pays off in the long run. Properly installed posts will keep your lights looking great for years, and you’ll avoid the frustration of sagging or failing setups. So grab your tools, pick a design you love, and get started. Before you know it, you’ll be enjoying those magical, glowing nights in your own backyard—just like I do. And remember, it’s not about perfection. It’s about creating a space where you love to spend time. Happy building!
Frequently Asked Questions
How do I choose the right materials for making a post for outdoor string lights?
Select weather-resistant materials like cedar, redwood, or pressure-treated wood for durability. Metal posts are also a great option, especially if you want a modern look and added strength.
Can I install outdoor string lights without drilling into my house or trees?
Yes, you can use freestanding posts or shepherd’s hooks to hang your outdoor string lights without drilling. This method is ideal for renters or areas where permanent installation isn’t allowed.
How tall should my posts be for outdoor string lights?
Posts should be at least 7–8 feet tall to ensure lights are high enough for clearance and ambiance. Adjust based on your space—higher for large yards, slightly lower for cozy patios.
What’s the best way to secure posts in the ground for long-term use?
For stability, bury posts 18–24 inches deep and use concrete to anchor them. Add gravel at the base for drainage and to prevent rot if using wood posts.
How far apart should I place posts for outdoor string lights?
Space posts 8–12 feet apart, depending on the weight of your lights and desired sag. Heavier bulbs or longer runs may require closer spacing to prevent sagging.
Can I make decorative posts to match my outdoor decor?
Absolutely! Paint, stain, or add decorative elements like finials or wraps to your outdoor string lights posts. This enhances aesthetics while blending with your landscape.

