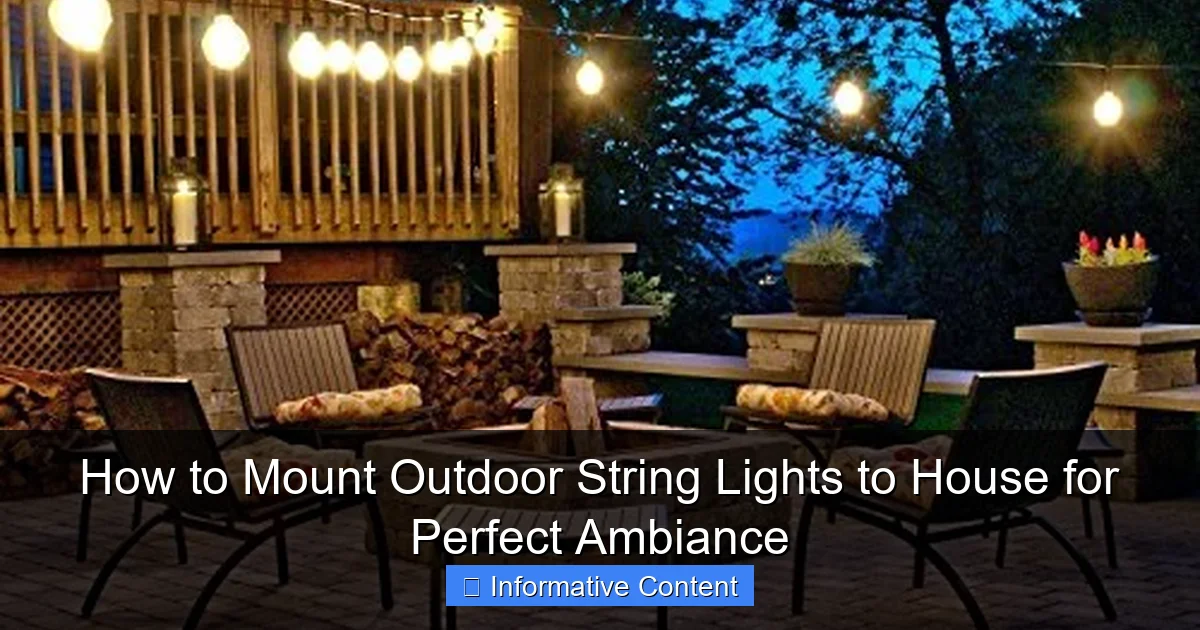
Featured image for how to mount outdoor string lights to house
Image source: houseandgardenstore.co.uk
Mounting outdoor string lights to your house is easiest and safest using removable adhesive hooks or screw-in eye hooks, depending on your siding type. Always plan your layout first, ensuring lights are spaced evenly and power sources are accessible to avoid overloading circuits. For a polished, weather-resistant setup, secure cords with zip ties and route them discreetly along gutters or trim.
Key Takeaways
- Plan your layout: Sketch light placement before installing to ensure even spacing and coverage.
- Use proper hardware: Choose weather-resistant hooks, screws, or clips to securely mount lights.
- Check bulb type: Opt for LED or shatterproof bulbs for durability and energy efficiency.
- Test before finalizing: Hang a temporary strand to preview brightness and coverage.
- Weatherproof connections: Seal plugs and joints with silicone to prevent moisture damage.
- Maintain accessibility: Position lights near outlets or use outdoor-rated extension cords.
- Trim excess cable: Use zip ties to tidy wires and reduce tripping hazards.
📑 Table of Contents
Setting the Scene: The Magic of Outdoor String Lights
There’s something almost magical about stepping into a backyard lit by soft, glowing outdoor string lights. Whether it’s a warm summer evening, a festive holiday gathering, or just a quiet night under the stars, the right lighting transforms your outdoor space into a welcoming haven. I still remember my first attempt at stringing lights—overambitious, poorly planned, and ending with tangled wires and a ladder wobbling precariously. But with a few lessons learned and a lot of trial and error, I discovered that mounting outdoor string lights to your house isn’t just about aesthetics. It’s about creating a mood, a feeling, a memory.
Outdoor string lights do more than illuminate. They define spaces, guide movement, and add a touch of whimsy. From cozy patios to sprawling gardens, the right setup can elevate your home’s curb appeal and make your outdoor area feel like an extension of your living room. But how do you get it right? How do you hang them securely, safely, and stylishly without damaging your house or spending a fortune? That’s exactly what we’ll explore in this guide. Whether you’re a DIY newbie or a seasoned home improver, this step-by-step walkthrough will help you achieve that perfect ambiance—no wobbling ladders required.
Planning Your String Light Layout
Assess Your Space and Goals
Before you even touch a screw or pull out a measuring tape, take a moment to step back and visualize. What do you want your outdoor lights to achieve? Are you aiming for a romantic dinner setting on the patio? A playful vibe for weekend barbecues? Or perhaps a subtle glow along your roofline for year-round charm? Your goals will shape your layout.
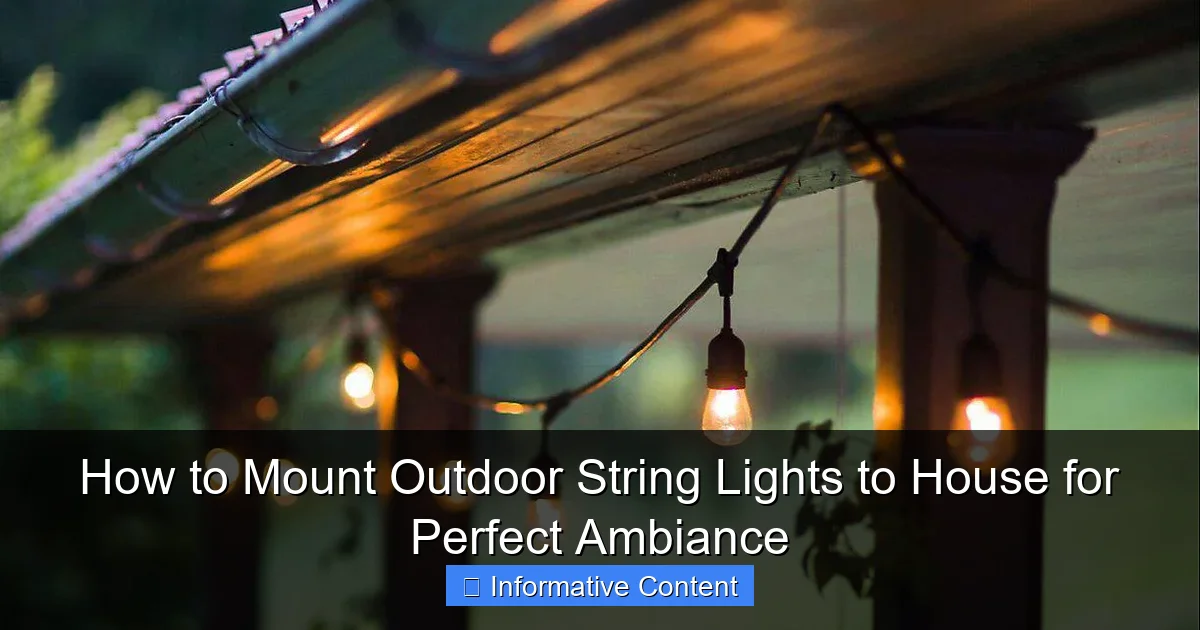
Visual guide about how to mount outdoor string lights to house
Image source: cdn.shopify.com
Start by sketching your outdoor area on paper or using a free design app. Note key features: the house, trees, pergolas, railings, and any obstacles like gutters or vents. Then, decide where you want the light to fall. For example:
- Patio or deck: String lights overhead in a grid or zigzag pattern.
- Walkways: Hang lights along railings or low-hanging lines to guide guests.
- Garden or yard: Use poles, trees, or stakes to create floating canopies.
- Roofline: Outline your eaves or gables for a festive, architectural touch.
Pro tip: Use painter’s tape to mark potential light paths. Walk around at night (with a flashlight) to see how the lines will look. This helps avoid awkward gaps or overly bright spots.
Measure and Calculate
Once you’ve mapped your layout, measure the total distance your lights will cover. Don’t forget to add 10–15% extra for slack, curves, or adjustments. For example, if your patio is 20 feet wide and you plan a zigzag pattern with three runs, you’ll need at least 60–70 feet of lights.
Also, check the maximum wattage or amperage your circuit can handle. Most outdoor outlets are on 15-amp circuits, and you don’t want to overload them. For LED string lights (recommended), a single 100-foot strand typically uses under 10 watts—safe for daisy-chaining multiple sets. But if you’re using incandescent bulbs, stick to one or two strands per outlet.
Example: If you have a 30-foot run from your house to a tree, and the tree is 15 feet tall, you’ll need a light strand long enough to reach from the house to the tree’s canopy (about 35 feet with slack). If the tree is too tall, consider adding a support pole or using a pulley system.
Choose the Right Mounting Points
Your house is the backbone of your lighting setup. But not every spot is suitable. Avoid:
- Wood that’s rotting or soft—it won’t hold screws.
- Metal gutters—unless using gutter clips (more on that later).
- Windows or doors—unless you’re using removable hooks.
Instead, look for:
- Eaves, fascia boards, or soffits—solid wood or vinyl trim.
- Fence posts or railings—great for side yards.
- Pergolas or awnings—natural anchors for overhead lights.
Remember: The stronger the mounting point, the safer and more durable your setup. If you’re unsure, test a small pilot hole. If the screw goes in easily and feels tight, it’s a good spot.
Choosing the Right Hardware and Lights
Selecting String Lights
Not all outdoor string lights are created equal. Here’s what to consider:
- LED vs. Incandescent: LED lights are energy-efficient, last longer (25,000+ hours), and stay cool. Incandescent bulbs are warmer but less durable and consume more power. For most homes, LED is the way to go.
- Bulb Shape: Globe, Edison, or mini lights? Globe bulbs offer a modern, soft glow. Edison-style (exposed filaments) add vintage charm. Mini lights are great for subtle accents.
- Weather Resistance: Look for an IP65 or higher rating (dustproof and water-resistant). Avoid indoor-only lights.
- Length and Connectivity: Most outdoor strands are 25–50 feet long. If you need more, buy sets with end-to-end connectors. But don’t exceed the manufacturer’s recommended number of linked strands (usually 3–5).
- Smart Features: Want to dim lights or change colors? Some models work with apps or voice assistants (Alexa, Google Home). Handy for holidays or parties.
Pro tip: Buy one extra strand. You’ll likely need it for corners, repairs, or future expansions.
Mounting Hardware Options
Your hardware depends on your house’s material and your light weight. Here are the top choices:
- Eye Screws (Screw Eyes): Best for wood or vinyl trim. They’re sturdy, easy to install, and hold up to 50 lbs. Use #8 or #10 size for standard string lights.
- Cup Hooks: Similar to eye screws but with a small loop. Great for lighter loads (e.g., mini lights). Avoid on softwood.
- Adhesive Hooks: No drilling! Use heavy-duty outdoor-rated hooks (e.g., 3M Command Outdoor). Ideal for brick, stucco, or rental homes. Test weight capacity—some hold only 2–5 lbs.
- Gutter Clips: Designed to snap onto metal gutters. Perfect for roofline lighting. Ensure they fit your gutter type (K-style, half-round, etc.).
- Stakes or Poles: For freestanding setups. Use ground stakes for temporary lines or metal poles (like shepherd’s hooks) for permanent installations.
- Zip Ties or Cable Clips: For securing wires to railings, fences, or trees. Use UV-resistant ties for longevity.
Example: For a wooden pergola, use eye screws. For a brick house, adhesive hooks or masonry anchors (with plastic sleeves) work best.
Tools You’ll Need
Keep these handy:
- Drill and drill bits (for pilot holes)
- Screwdriver or power screwdriver
- Measuring tape
- Pencil or marker
- Ladder (extendable for roof access)
- Level (to keep lines straight)
- Wire cutters (for trimming zip ties)
- Outdoor-rated extension cord (if your outlet is far)
Pro tip: Use a fish tape or magnetic retrieval tool if you drop a screw into a gutter or tight space.
Step-by-Step Installation Guide
Prep Your Workspace
Safety first! Clear the area of furniture, toys, or debris. Lay down a tarp if you’re working on a roof or balcony. Turn off the outdoor outlet’s circuit breaker (use a voltage tester to confirm it’s off). If using a ladder, secure it on level ground and have a spotter.
Unpack your lights and lay them out. Test each strand to ensure they work before installing. Nothing’s more frustrating than hanging a faulty set.
Install Mounting Points
Follow these steps based on your hardware:
For Eye Screws or Cup Hooks (Wood/Vinyl):
- Drill a pilot hole (slightly smaller than the screw’s shank) to prevent splitting.
- Twist the screw in by hand, then finish with a screwdriver. Don’t overtighten.
- Space screws 3–4 feet apart for straight lines, or 2–3 feet for curves or heavy lights.
- For corners, install a screw at a 45-degree angle to maintain tension.
For Adhesive Hooks (Brick/Stucco):
- Clean the surface with isopropyl alcohol.
- Press the hook firmly for 30 seconds.
- Wait 24 hours before hanging lights (even if the hook feels secure).
For Gutter Clips:
- Snap clips onto the front lip of the gutter.
- Space every 2–3 feet. Avoid overloading one clip.
For Masonry Anchors (Brick/Concrete):
- Drill a hole with a masonry bit.
- Insert a plastic anchor.
- Drive the screw into the anchor.
Pro tip: Use a template (cardboard with hole markings) to ensure even spacing.
Hang the Lights
Now the fun part! Start at the power source (outlet or transformer) and work outward.
- For straight lines: Drape the lights over the hooks or screws. Keep tension even—too tight risks snapping wires; too loose causes sagging.
- For curves or zigzags: Use extra hooks at bends. Adjust as you go.
- For overhead canopies: Create a grid with parallel lines. Use a second person to help hold the lights at height.
- For rooflines: Start at the peak and work down. Use clips every 2–3 feet. Angle lights slightly downward for better visibility.
Secure loose wires with zip ties or cable clips every 3–4 feet. This prevents wind damage and keeps the look tidy.
Connect and Test
Plug in the lights. If they don’t turn on:
- Check the outlet with another device.
- Inspect for loose connections or damaged wires.
- Test each strand individually.
Once lit, step back and assess. Adjust hooks, tighten wires, or add dimmers if needed. For smart lights, pair with your app or voice assistant.
Weatherproofing and Safety Tips
Protect Against the Elements
Outdoor lights face rain, wind, snow, and UV rays. Here’s how to protect them:
- Seal Connections: Use electrical tape or silicone sealant on plug junctions. For extra protection, slide a piece of heat-shrink tubing over the connection.
- Elevate Cords: Don’t let extension cords sit in puddles. Use cord covers or run them through PVC conduit.
- Trim Trees: Prune branches that could snag lights or drop leaves into sockets.
- Use GFCI Outlets: These cut power if they detect a ground fault—critical for safety. Install a GFCI outlet or use a GFCI extension cord.
Pro tip: In winter, remove lights if your area gets heavy snow. Ice can weigh down wires and damage bulbs.
Minimize Damage to Your House
No one wants holes in their siding or stripped gutters. Avoid:
- Drilling into mortar joints (they’re weaker than bricks).
- Using nails or staples—they can pierce wires or damage wood.
- Overloading gutters—too many clips can cause sagging.
For renters or temporary setups, use adhesive hooks or tension rods (e.g., between two trees). Remove all hardware at season’s end.
Fire and Electrical Safety
Never:
- Daisy-chain more than the manufacturer’s recommended number of strands.
- Use indoor extension cords outdoors.
- Cover lights with flammable materials (e.g., fabric, paper).
Check lights annually for frayed wires, cracked sockets, or loose connections. Replace damaged sets immediately.
Creative Ideas and Pro Tips for Perfect Ambiance
Layer Your Lighting
String lights work best when combined with other sources:
- Path Lights: Line walkways with solar-powered stakes.
- Fairy Lights: Wrap around trees or railings for a magical touch.
- Spotlights: Illuminate focal points like a water feature or statue.
Example: Pair string lights over a dining table with lanterns on the table for a layered glow.
Use Color and Dimming
White lights are classic, but colored or RGB lights add drama. Use:
- Warm white (2700K–3000K): Cozy, inviting.
- Cool white (4000K+): Crisp, modern.
- Color-changing: Great for holidays or parties.
Install a dimmer switch (smart or plug-in) to adjust brightness. Dim lights for intimate dinners, brighten for gatherings.
Create Zones
Divide your yard into activity zones:
- Dining Area: Overhead grid or canopy.
- Conversation Nook: String lights on a pergola or between trees.
- Play Area: Low-hanging lights for kids (supervised only).
Pro tip: Use different bulb sizes or colors in each zone to distinguish spaces.
Data Table: Recommended Hardware by Surface Type
| Surface Type | Best Hardware | Max Weight per Hook | Installation Time | Removability |
|---|---|---|---|---|
| Wood/Vinyl Trim | Eye Screws | 50 lbs | 2–5 min per hook | Moderate (fill holes) |
| Brick/Stucco | Adhesive Hooks | 5 lbs | 1 min per hook | Easy (peel off) |
| Metal Gutters | Gutter Clips | 20 lbs | 30 sec per clip | Easy (unsnap) |
| Concrete | Masonry Anchors | 30 lbs | 5–10 min per hook | Difficult (drill out) |
| Fences/Railings | Zip Ties or Cable Clips | 10 lbs | 1 min per tie | Easy (cut ties) |
Note: Always check manufacturer specs for weight limits. Overloading risks damage.
Wrapping Up: Your Perfect Outdoor Oasis Awaits
Mounting outdoor string lights to your house isn’t just a weekend project—it’s an investment in joy. With the right plan, hardware, and a little patience, you can create a space that feels like a retreat every time you step outside. Whether it’s a quiet night with a book or a lively party with friends, the glow of your lights will set the tone.
Remember, the key to success is preparation. Sketch your layout, choose quality lights and hardware, and prioritize safety. Don’t rush the installation—take your time to get the tension just right, the spacing even, and the connections secure. And if something doesn’t work the first time? That’s okay. Even the pros make adjustments.
As you flip the switch and see your yard bathed in warm, inviting light, you’ll realize it was worth every minute. So grab your tools, gather your lights, and get ready to transform your outdoor space. The perfect ambiance is just a few hooks away. Here’s to many nights under the stars—lit just the way you like it.
Frequently Asked Questions
How do I securely mount outdoor string lights to my house without damaging the siding?
Use removable hooks, adhesive clips, or gutter hooks designed for your siding material (e.g., vinyl, wood, or stucco). Avoid nails or screws unless you’re certain they won’t compromise the structure or weatherproofing.
What’s the best way to plan the layout for mounting outdoor string lights to house?
Sketch your desired pattern (e.g., zigzag, parallel, or canopy) and measure distances between anchor points. Ensure your lights’ cord length and power source placement align with the layout for a seamless setup.
Can I use existing fixtures like eaves or railings to hang outdoor string lights?
Yes, eaves, railings, and pergolas make excellent anchor points. Wrap lights around sturdy structures or use S-hooks for easy attachment, but avoid overloading weak or rusted fixtures.
How do I hide the cords when installing outdoor string lights to house?
Use cable clips or conduit channels to tuck cords along edges of the house, gutters, or trim. For a cleaner look, choose lights with dark or neutral-colored cords that blend into the background.
What tools do I need to mount outdoor string lights to house safely?
Essential tools include a ladder, measuring tape, hooks/clips, a drill (if needed), and a voltage tester for plug-in lights. Always prioritize safety with non-slip footwear and a helper for stability.
How do I ensure my outdoor string lights stay up through wind and rain?
Use weather-resistant clips and tighten connections with zip ties or wire clamps. Leave slight slack in the lights to prevent tension from wind, and check anchors seasonally for wear.

