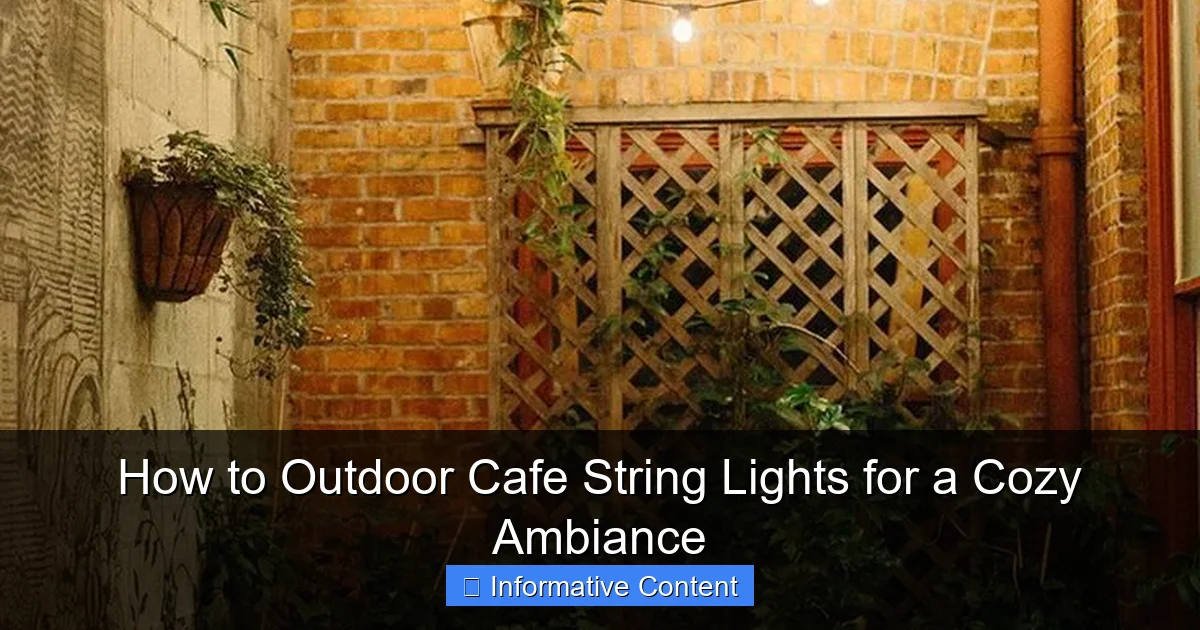
Featured image for how to outdoor cafe string lights
Image source: i.pinimg.com
Transform your outdoor space into a cozy retreat by strategically hanging cafe string lights to create warm, inviting layers of light. Choose durable, weather-resistant bulbs and drape them along railings, trees, or pergolas at varying heights for depth and ambiance—timers and dimmers enhance both mood and energy efficiency.
Key Takeaways
- Choose weatherproof lights: Ensure durability with IP65-rated or outdoor-safe string lights.
- Plan your layout first: Measure space and sketch light placement for balanced coverage.
- Use dimmers or warm tones: Create cozy vibes with soft, adjustable lighting.
- Secure lights safely: Anchor with hooks or zip ties to avoid sagging or hazards.
- Layer with other lights: Combine string lights with lanterns or candles for depth.
- Time your lights: Automate with timers or smart plugs for effortless ambiance.
📑 Table of Contents
- How to Outdoor Cafe String Lights for a Cozy Ambiance
- Why Outdoor Cafe String Lights Work So Well
- Choosing the Right Type of Outdoor Cafe String Lights
- Planning Your Layout: Design Tips for Maximum Impact
- Installation: Step-by-Step Guide to Hanging Your Lights
- Enhancing Ambiance: Dimmers, Timers, and Smart Features
- Maintenance and Longevity: Keeping Your Lights Looking Great
How to Outdoor Cafe String Lights for a Cozy Ambiance
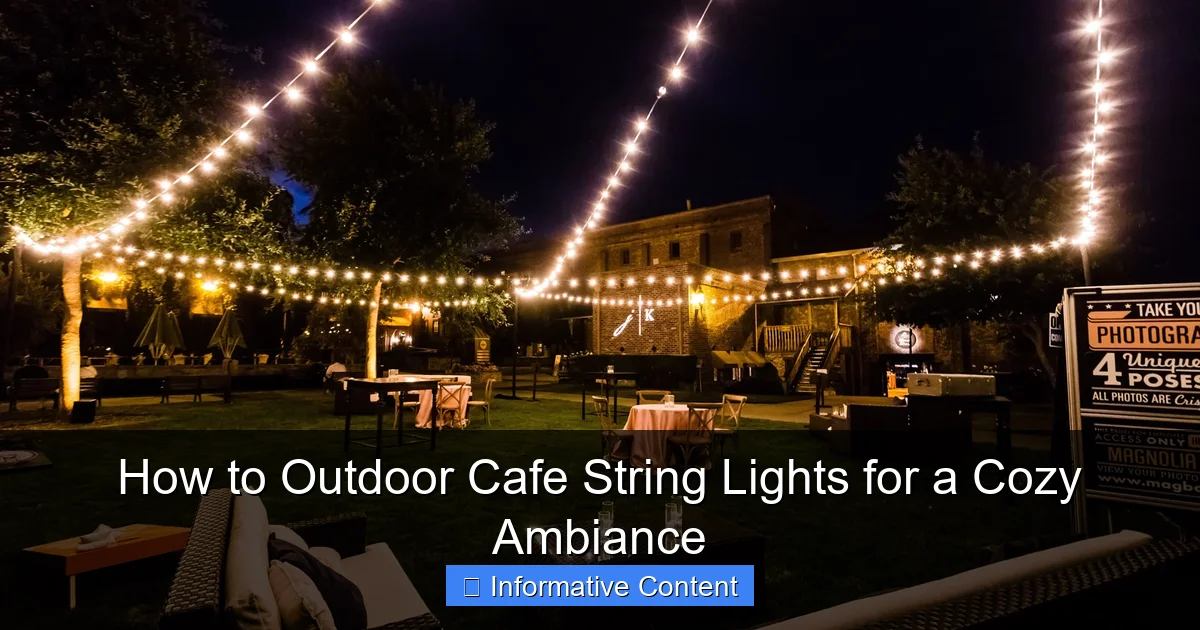
Imagine stepping into your backyard at dusk. The air is cool, the sky is painted in soft hues of orange and purple, and the gentle glow of outdoor cafe string lights casts a warm, inviting aura across your patio. There’s laughter, the clink of glasses, and a sense of magic in the air. That’s the power of well-placed lighting. It’s not just about seeing where you’re going; it’s about creating a mood, a moment, a memory.
For years, I’ve experimented with different ways to light up my outdoor space—solar path lights, floodlights, even tiki torches. But nothing compares to the charm of cafe string lights. They’re like the fairy lights of adulting: simple, elegant, and transformative. Whether you’re hosting a dinner party, enjoying a quiet evening with a book, or just want to make your garden feel like a Parisian bistro, outdoor cafe string lights are your secret weapon. But here’s the catch: getting them right takes more than just hanging them up and hoping for the best. From choosing the right bulbs to ensuring they last through seasons, there’s a method to the magic.
Why Outdoor Cafe String Lights Work So Well
The Psychology of Warm Lighting
Lighting isn’t just functional—it’s emotional. Studies show that warm-toned lighting (around 2700K to 3000K on the color temperature scale) triggers a sense of comfort and relaxation in our brains. It mimics the soft glow of candlelight, which humans have associated with safety and connection for centuries. That’s why outdoor cafe string lights feel so cozy. They don’t flood your space with harsh light; they create pockets of warmth, like little beacons of hospitality.
Visual guide about how to outdoor cafe string lights
Image source: specialeventlighting.com
I remember one evening when I lit up my patio with Edison-style bulbs. My neighbor, who rarely stops by, came over unannounced. “It just felt… inviting,” she said. That’s the power of ambiance. It’s not about brightness—it’s about mood.
Versatility Across Spaces
One of the best things about outdoor cafe string lights is their flexibility. You can hang them:
- Across a pergola or gazebo
- Along fence lines or railings
- Between trees or posts
- Over a dining table or lounge area
- Even in a balcony or small courtyard
They work in urban apartments, suburban backyards, and sprawling country gardens. I’ve seen them transform a tiny rooftop into a Parisian-style escape and a wide-open deck into an al fresco dining room. The key is thinking creatively about your space.
Affordability and Accessibility
Compared to permanent outdoor lighting installations (like recessed or hardwired fixtures), outdoor cafe string lights are surprisingly affordable. You can find a 25-foot strand for under $20, and high-quality, weather-resistant options for $50–$100. Plus, they’re plug-and-play—no electrician needed (unless you’re going for a hardwired look, which we’ll cover later).
When I first started, I bought a cheap set from a big-box store. It lasted two seasons before the bulbs started flickering and the wires frayed. Lesson learned: invest in quality, but start simple if you’re unsure about your design.
Choosing the Right Type of Outdoor Cafe String Lights
Bulb Type: LED vs. Incandescent
This is the big debate. Both have pros and cons, so let’s break it down:
- LED Bulbs: Energy-efficient, long-lasting (up to 25,000 hours), cooler to the touch, and often dimmable. They’re pricier upfront but save money on electricity and replacement costs. Ideal for permanent or semi-permanent setups.
- Incandescent Bulbs: Warmer glow (closer to candlelight), cheaper initially, but less efficient and shorter lifespan (around 1,000–2,000 hours). They also get hot, which can be a safety concern near flammable materials.
For most outdoor uses, I recommend LED outdoor cafe string lights. They’re safer, more durable, and better for the environment. But if you’re going for a vintage, nostalgic vibe (think 1920s speakeasy), incandescent might be worth it for the look.
Weather Resistance: IP Rating Matters
Not all string lights are built for the outdoors. Look for an IP rating (Ingress Protection) that indicates water and dust resistance. For outdoor use, you want at least IP44, which means protection against splashing water and solid particles larger than 1mm.
Higher ratings like IP65 (dust-tight and protected against water jets) are ideal if your lights will be exposed to heavy rain or snow. I once used indoor-rated lights on my porch during a rainy season. Within a month, the sockets were corroded, and the bulbs kept flickering. Lesson: always check the IP rating.
Socket Type and Spacing
Most outdoor cafe string lights come with either E26 (standard) or E12 (candelabra) sockets. E26 is more common and easier to replace. Spacing between bulbs typically ranges from 12 to 24 inches. Closer spacing (12–18 inches) creates a denser, more intimate glow—great for dining areas. Wider spacing (24 inches) gives a more open, starry-night effect—perfect for large patios or trees.
Pro tip: Buy extra bulbs. Even with LEDs, a few will fail over time. Keep a few replacements on hand so you don’t have to replace the whole strand.
Plug Type: End-to-End vs. Single-Ended
End-to-end (or “connectable”) strands can be linked together to cover longer distances. Great for large spaces, but be mindful of power draw. Most sets allow 3–5 strands to be connected safely. Single-ended lights are simpler and often more affordable, but you’ll need multiple power sources or extension cords.
Planning Your Layout: Design Tips for Maximum Impact
Map Your Space First
Before buying anything, sketch your space. Measure the areas where you want lights—between trees, across a pergola, along a fence. Decide on the height: 7–8 feet is ideal for most patios (high enough to walk under, low enough to feel cozy).
I once tried to hang lights between two trees without measuring. The result? One side sagged, the other was too tight, and the whole thing looked messy. Now, I always use a tape measure and mark anchor points with masking tape.
Create Zones with Light
Think of your outdoor space as a series of “rooms.” Use outdoor cafe string lights to define each zone:
- Dining area: Hang lights directly above the table in a straight line or crisscross pattern.
- Lounge area: Drape lights in a zigzag or “cloud” formation for a relaxed feel.
- Pathway: Line the edges with low-hanging strands or use lights to highlight steps.
- Focal point: Frame a fire pit, water feature, or sculpture with a halo of light.
This zoning technique makes your space feel larger and more intentional. It’s like interior design—but for the outdoors.
Use Anchors Wisely
You’ll need something to attach the lights to. Options include:
- Existing structures: Pergolas, eaves, railings, or trees (use tree-safe hooks or zip ties).
- Posts or poles: Install 4×4 wooden posts or metal poles if you don’t have natural anchors.
- Ground stakes: For temporary setups, use stakes to hold up end points.
- Ceiling hooks or eye screws: For permanent installations, these are sturdy and discreet.
Never nail or staple lights directly to wood—it can damage the wires and create fire hazards. Use S-hooks, zip ties, or specialized light clips instead.
Consider the View from Inside
Your outdoor lights should enhance, not distract from, your indoor space. If you have large windows, position the lights so they create a beautiful view from inside. I love how my living room looks at night—like I’m gazing into a glowing garden oasis.
Installation: Step-by-Step Guide to Hanging Your Lights
Step 1: Gather Your Tools
You’ll need:
- Measuring tape
- Masking tape or chalk (for marking)
- Drill and screws (if installing hooks)
- S-hooks, zip ties, or light clips
- Extension cord (outdoor-rated, GFCI-protected)
- Ladder (if working at height)
- Helper (for long runs)
Always use a GFCI-protected outlet for outdoor electrical safety. If your outdoor outlet isn’t GFCI, install a GFCI adapter or have an electrician upgrade it.
Step 2: Install Anchors
Mark your anchor points with tape. Drill pilot holes and install eye screws, hooks, or posts. For trees, use tree-friendly methods like:
- Tree straps (wide, non-abrasive straps that won’t cut into bark)
- Zip ties with felt pads (to protect bark)
- Adjustable tree hooks (designed to expand as the tree grows)
Never use nails, screws, or wire—they can damage the tree and create entry points for disease.
Step 3: Hang the Lights
Start at one end and work your way across. Use S-hooks to connect the light strand to your anchors. For a taut, professional look, pull the strand tight but not so much that it strains the wires. Leave a little slack (about 1–2 inches per 10 feet) to accommodate wind and movement.
For a “draped” effect (common in bistro settings), hang the lights in a zigzag or wave pattern. Use zip ties or clips every 12–18 inches to control the drape.
Step 4: Connect and Power Up
Plug in the lights and test them. If you’re using multiple strands, connect them end-to-end (check the manufacturer’s max connection limit). Use outdoor-rated extension cords and avoid daisy-chaining more than two cords.
For a cleaner look, hide cords under furniture, along fences, or in cable raceways. I use black zip ties to bundle cords and blend them into dark surfaces.
Step 5: Adjust and Refine
Step back and look at the whole setup. Adjust any sagging spots or uneven drape. Trim excess zip ties. Add dimmers or timers if desired (more on that below).
Enhancing Ambiance: Dimmers, Timers, and Smart Features
Add a Dimmer for Mood Control
Not all outdoor cafe string lights are dimmable, but if yours are, a dimmer is a game-changer. It lets you:
- Lower the brightness for intimate dinners
- Increase it for late-night gatherings
- Create a sunset-like fade effect
I use a plug-in dimmer switch that works with LED lights. It’s simple to install and gives me total control over the mood. Just make sure the dimmer is compatible with your bulb type (LED vs. incandescent).
Use a Timer for Effortless Lighting
Timers are perfect for people who forget to turn lights on or off. Set them to:
- Turn on at sunset
- Turn off at midnight (or your preferred time)
- Create a “fading out” effect for late-night ambiance
Mechanical timers are cheap and reliable. Digital timers offer more precision and can be programmed for different days. I use a digital timer that syncs with sunrise/sunset times—no fiddling with clocks twice a year.
Go Smart: Wi-Fi and App Control
For tech lovers, smart outdoor cafe string lights offer remote control via smartphone apps. You can:
- Turn lights on/off from inside
- Adjust brightness and color (if RGB)
- Set schedules and scenes
- Integrate with voice assistants (Alexa, Google Assistant)
I tried a smart set last year. It was fun at first, but the app crashed often, and the Wi-Fi signal dropped in the far corner of my yard. For now, I stick with simple timers—but I’ll revisit smart lights when the tech improves.
Maintenance and Longevity: Keeping Your Lights Looking Great
Seasonal Care
Outdoor lights face wind, rain, snow, and UV rays. To extend their life:
- Inspect regularly: Check for frayed wires, loose sockets, or broken bulbs.
- Clean gently: Wipe bulbs with a damp cloth (unplugged, of course). Avoid harsh chemicals.
- Store in winter: If you live in a harsh climate, take lights down in winter to prevent ice damage.
- Trim vegetation: Keep branches and leaves away to reduce wear and fire risk.
I leave my lights up year-round, but I do a monthly “light check” to catch issues early.
Replacing Bulbs and Sockets
When a bulb burns out, replace it immediately to prevent voltage issues. For incandescent lights, use the same wattage. For LEDs, match the base type (E26 or E12). If a socket fails, replace the whole strand—repairing outdoor sockets is risky and often not cost-effective.
Upgrading Over Time
As your outdoor space evolves, so can your lighting. Maybe you’ll add a fire pit and need lights to highlight it. Or you’ll expand your patio and need longer runs. Keep your setup modular so you can add or reconfigure lights easily.
| Feature | Best For | Cost (25-ft strand) | Lifespan | Energy Use |
|---|---|---|---|---|
| LED, IP65, E26, 12″ spacing | Permanent, year-round use | $60–$100 | 25,000 hours | Low (5–10W) |
| Incandescent, IP44, E26, 18″ spacing | Seasonal, vintage look | $20–$40 | 1,000–2,000 hours | High (50–100W) |
| Smart LED, RGB, IP65 | Tech lovers, color effects | $80–$150 | 20,000 hours | Low (6–12W) |
| Solar-powered, IP65 | Off-grid, eco-friendly | $40–$80 | 15,000 hours | Zero (sun-powered) |
Creating a cozy outdoor ambiance with outdoor cafe string lights is one of the most rewarding DIY projects you can do. It’s not just about the lights themselves—it’s about the moments they help create. Whether it’s a romantic dinner, a family game night, or a quiet evening with a glass of wine, the right lighting transforms ordinary spaces into extraordinary experiences.
Start small. Try a single strand over your dining table. See how it feels. Then expand, experiment, and refine. Remember: lighting is personal. What works for your neighbor might not work for you. Trust your eye, listen to your space, and don’t be afraid to change things up.
And most importantly—enjoy the glow. That warm, golden light? It’s not just electricity. It’s magic. And you, my friend, are the magician.
Frequently Asked Questions
How do I choose the right outdoor cafe string lights for my space?
Consider the size of your area, bulb type (LED for energy efficiency), and weather resistance. Opt for warm white or soft yellow tones to create a cozy ambiance, and ensure the lights are rated for outdoor use to withstand rain and humidity.
Can I install outdoor cafe string lights without professional help?
Yes, most outdoor cafe string lights are designed for easy DIY installation. Use hooks, poles, or existing structures like fences or pergolas to hang them, and always follow the manufacturer’s safety guidelines.
How do I power outdoor cafe string lights safely?
Use outdoor-rated extension cords and GFCI outlets to prevent electrical hazards. If running wires across walkways, secure them with cord covers or bury them shallowly to avoid tripping or damage.
What’s the best way to hang outdoor cafe string lights for a professional look?
Plan a layout with even spacing, using tension wires or guide strings to keep lines straight. For patios, zigzag patterns between poles or drape them overhead in parallel lines for a balanced, inviting effect.
How do I maintain my outdoor cafe string lights?
Clean bulbs periodically with a dry cloth to remove dust or debris, and check for loose connections or frayed wires. Store them indoors during extreme weather to prolong their lifespan.
Can I use solar-powered outdoor cafe string lights?
Absolutely! Solar-powered lights are eco-friendly and easy to install, but ensure the solar panel gets 6-8 hours of sunlight daily. They’re ideal for areas without accessible power outlets but may be less bright than wired options.

