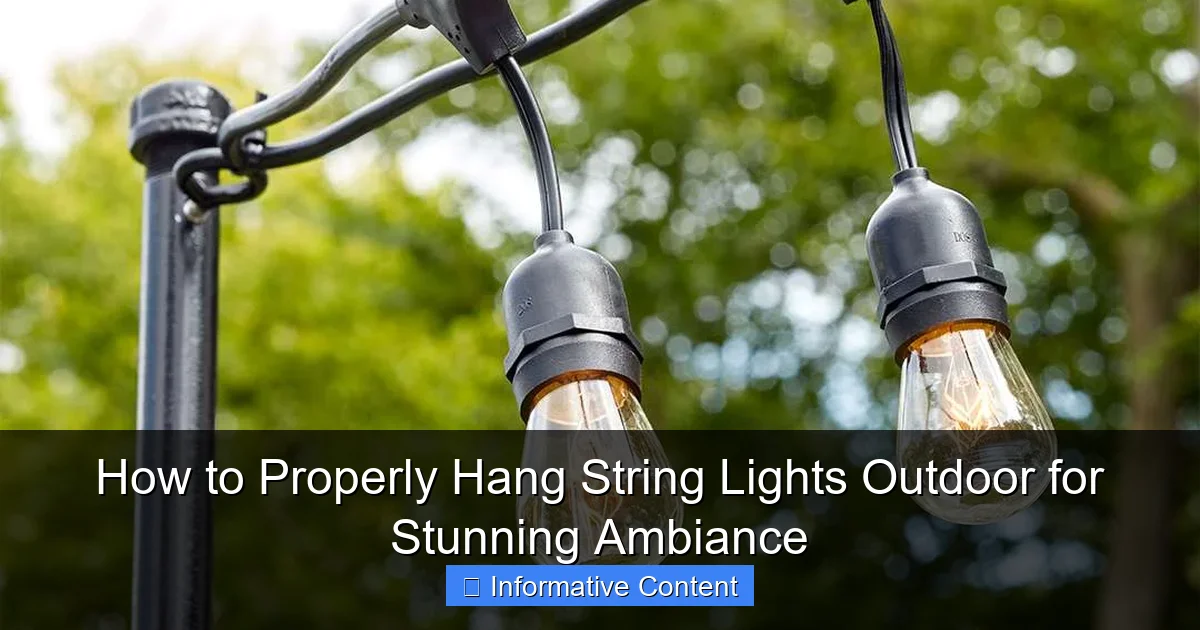
Featured image for how to properly hang string lights outdoor
Image source: bhg.com
Properly hanging outdoor string lights starts with planning a safe, stable layout using weather-resistant fixtures and measuring your space to avoid sagging or overstretching. Use hooks, clips, or specialized hardware designed for outdoor use—never nails or staples—to protect wires and ensure a polished look. For stunning ambiance, layer lights at varying heights and keep bulbs spaced evenly, plugging into a GFCI outlet for safety and reliability.
Key Takeaways
- Plan your layout first: Sketch light placement to avoid gaps and ensure even coverage.
- Use outdoor-rated lights: Always choose weatherproof and durable string lights for safety.
- Secure with proper hardware: Install hooks, clips, or screws designed for outdoor surfaces.
- Maintain safe clearance: Keep lights away from flammable materials and high-traffic areas.
- Test before finalizing: Power on lights during setup to catch issues early.
- Use timers or smart plugs: Automate lighting for convenience and energy efficiency.
📑 Table of Contents
- How to Properly Hang String Lights Outdoor for Stunning Ambiance
- 1. Choose the Right String Lights for Your Space
- 2. Plan Your Layout and Measure Carefully
- 3. Secure Anchor Points the Right Way
- 4. Hang the Lights with Tension and Sagging in Mind
- 5. Power and Safety Considerations
- 6. Creative Ideas and Maintenance Tips
- Final Thoughts: Your Outdoor Oasis Awaits
How to Properly Hang String Lights Outdoor for Stunning Ambiance
There’s something magical about the soft, warm glow of outdoor string lights. Whether it’s a quiet evening on the patio, a summer barbecue, or a cozy winter night under the stars, these lights have a way of transforming any outdoor space into a welcoming retreat. I remember the first time I strung up lights in my backyard—what started as a simple idea turned into a full-blown obsession. I wanted that perfect, Instagram-worthy ambiance, but I quickly learned it’s not as simple as just hanging them up and calling it a day. There’s an art to it, and getting it right makes all the difference.
If you’ve ever tried hanging string lights only to end up with sagging wires, tangled messes, or lights that barely last a season, you’re not alone. I’ve been there. But after years of trial and error, I’ve learned the secrets to creating a beautiful, durable outdoor lighting setup that’s both functional and stunning. In this guide, I’ll walk you through everything you need to know—from choosing the right lights to securing them properly, avoiding common pitfalls, and even creative ideas to elevate your space. Let’s turn your yard into a glowing oasis, one light at a time.
1. Choose the Right String Lights for Your Space
Before you start hanging anything, it’s crucial to pick the right type of string lights. Not all lights are created equal, and the wrong choice can leave you frustrated or even unsafe. The good news? There’s a perfect set for every outdoor need.
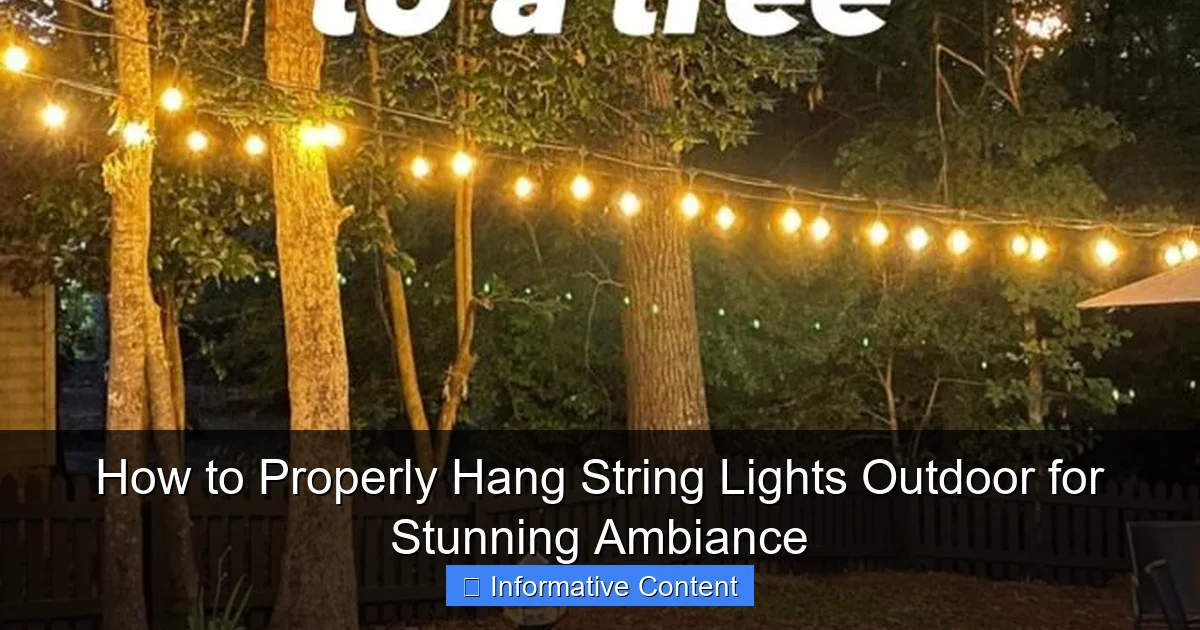
Visual guide about how to properly hang string lights outdoor
Image source: i.pinimg.com
Understand the Types of Outdoor String Lights
Outdoor string lights come in several styles, each with its own strengths. Here’s a quick breakdown:
- LED String Lights: These are the gold standard for outdoor use. They’re energy-efficient, last for years (many rated for 25,000+ hours), and generate less heat than traditional bulbs. Plus, they’re available in warm white, cool white, and even color-changing options. I’ve had the same set of warm white LEDs in my backyard for over five years, and they still look brand new.
- Incandescent String Lights: These give off a classic, nostalgic glow but use more energy and burn out faster. They’re great for occasional use, like holiday parties, but not ideal for year-round lighting.
- Edison-Style Bulbs: With their vintage, exposed filament design, these add a trendy, rustic charm. Just make sure they’re rated for outdoor use—some aren’t.
- Solar-Powered String Lights: These are perfect for areas far from outlets. They charge during the day and turn on automatically at dusk. However, they’re often dimmer and less reliable in cloudy climates. I use them in my garden, but I keep my main patio lights on a plug-in system for consistency.
Check for Outdoor Safety and Durability Ratings
Look for lights with an IP (Ingress Protection) rating of at least IP44. This means they’re protected against splashes and dust. For areas with heavy rain or snow, go for IP65 or higher. Also, check that the lights are ETL, UL, or CSA certified—these labels ensure they meet safety standards.
Pro tip: Buy lights with replaceable bulbs. If one goes out, you don’t have to replace the whole string. Some brands even sell replacement bulbs separately, which saves money and reduces waste.
Match the Style to Your Aesthetic
Think about the vibe you want. Warm white (2700K–3000K) is cozy and inviting—perfect for dining areas or patios. Cool white (4000K–5000K) feels modern and bright, ideal for walkways or pools. For a playful touch, try multi-color or twinkle lights, but use them sparingly to avoid a carnival look.
2. Plan Your Layout and Measure Carefully
You wouldn’t start building a house without blueprints, right? The same goes for string lights. A little planning saves time, frustration, and extra trips to the hardware store.
Sketch Your Space
Grab a piece of paper or use a free app like SketchUp or Canva. Sketch your yard, patio, or balcony, and mark where you want the lights. Consider:
- Where will people gather? (e.g., dining table, fire pit)
- What areas need more light? (e.g., stairs, pathways)
- What architectural features can you highlight? (e.g., pergola beams, tree trunks)
For example, in my backyard, I created a “lighting zone” around the dining table with a crisscross pattern over the pergola. Then I added a single strand along the fence for subtle ambient light.
Measure Twice, Hang Once
Use a measuring tape or laser distance measurer to get accurate distances. Don’t forget to include:
- The distance between anchor points (e.g., house to tree, post to post)
- Extra length for sagging (more on this later)
- Distance from the nearest outlet
Most string lights come in 10-, 25-, or 50-foot lengths. If you need more than one string, look for sets with end-to-end connectors so you can plug multiple strands together. Just don’t exceed the manufacturer’s maximum connection limit (usually 3–4 strings).
Test Your Plan
Before committing, run a test. Use garden twine or invisible fishing line to mimic the light path. This helps you see if the spacing looks balanced or if you need to adjust.
3. Secure Anchor Points the Right Way
This is where most people go wrong. Poorly secured lights sag, pull away, or even damage your home. The key is using the right hardware for your surface and climate.
For Wooden Surfaces (Fences, Pergolas, Decks)
Wood is the easiest to work with. Use:
- Eye screws (also called screw eyes): These are perfect for permanent installations. Drill a pilot hole first, then screw them in. I use #10 or #12 size for heavy-duty support.
- Cup hooks: Great for lighter lights or temporary setups. They’re easier to remove and leave smaller holes.
Pro tip: Space anchor points every 2–3 feet to prevent sagging. For longer spans, add extra supports in the middle.
For Brick, Stucco, or Concrete Walls
These surfaces require special hardware:
- Plastic anchors and screws: Drill a hole, insert the anchor, then screw in a hook or eye bolt. I’ve used these on my stucco wall for years with no issues.
- Toggle bolts: For heavier lights, these spread out behind the wall for extra grip. Just make sure the hole is the right size.
Warning: Never use nails or staples on hard surfaces—they’ll crack the material.
For Trees and Natural Landscapes
Trees are beautiful anchors, but you must protect them. Use:
- Tree-friendly clips: These wrap around the trunk without damaging bark. I like the Gardener’s Supply Tree Hugger Clips—they’re reusable and gentle.
- Adjustable nylon straps: For larger trees, these distribute weight evenly. Just check them yearly and loosen if the tree grows.
Never use wire, zip ties, or nails on trees. They can girdle the trunk and kill the tree over time.
For Gutters and Eaves
If you’re hanging lights from your house, use:
- Gutter hooks: These clip onto the edge of the gutter without drilling. They’re removable and great for seasonal lights.
- Adhesive hooks: For a no-drill option, look for outdoor-rated hooks with strong adhesive (like 3M Command Outdoor Hooks). Just make sure they’re rated for your climate.
4. Hang the Lights with Tension and Sagging in Mind
Now for the fun part—actually hanging the lights! But don’t just throw them up. Proper tension and sagging are crucial for both safety and aesthetics.
Use a Support Wire (For Long Spans)
If you’re spanning more than 15 feet between anchor points, use a support wire. Here’s how:
- Run a thin, high-tensile wire (like galvanized steel or paracord) between the anchor points.
- Attach the string lights to the wire with s-hooks or zip ties every 6–8 inches.
This prevents the lights from sagging under their own weight. I used this method for a 20-foot span over my patio, and the lights look perfectly straight even after years of use.
Control Sagging for Aesthetic Appeal
Some sagging is okay—and even desirable—for a relaxed, cozy look. But too much looks sloppy. Aim for a gentle catenary curve (like a smile). For every 10 feet of span, allow 6–12 inches of sag at the center.
To adjust sagging:
- Use turnbuckles or adjustable hooks to tighten or loosen the lights.
- Add mid-span supports (like a small post or tree branch) to lift the center.
Secure the Lights Properly
Never just drape the lights over hooks. Use:
- S-hooks: Easy to attach and remove. Just hook each end of the light string onto the anchor points.
- Zip ties: For a cleaner look, thread the ties through the light’s hanging loop and around the anchor. Trim the ends for a neat finish.
- Carabiners: Reusable and great for heavy-duty setups.
Pro tip: Leave a little slack at the plug end so you can reach the outlet without pulling on the lights.
5. Power and Safety Considerations
Outdoor lighting isn’t just about looks—it has to be safe and reliable. A little attention to power and weatherproofing goes a long way.
Use Outdoor-Rated Extension Cords and Outlets
Never use indoor extension cords outside. They’re not weatherproof and can become a fire hazard. Instead:
- Use outdoor-rated extension cords with a ground fault circuit interrupter (GFCI) plug. These shut off automatically if they detect a short.
- Plug into a weatherproof GFCI outlet. If your outdoor outlet isn’t GFCI, install one or use a GFCI adapter.
I learned this the hard way after a storm fried my indoor extension cord. Now I only use outdoor cords with GFCI protection.
Weatherproof Your Connections
Water and electricity don’t mix. Protect connections with:
- Electrical tape: Wrap the plug and socket connection tightly.
- Weatherproof cord covers: These silicone sleeves seal the connection. I use the Gardener’s Supply Cord Covers—they’re easy to install and last for years.
- Elevated outlets: If possible, plug into an outlet that’s under a roof or eave.
Use a Timer or Smart Plug
Manually turning lights on and off every night is a hassle. Instead, use:
- Mechanical timers: Set them once, and they turn the lights on at dusk and off at dawn.
- Smart plugs: Control your lights from your phone, set schedules, or even sync with sunrise/sunset times. I use a TP-Link Kasa Smart Plug and love how I can turn the lights on from inside when I’m hosting guests.
6. Creative Ideas and Maintenance Tips
Now that you’ve got the basics down, let’s have some fun! With a little creativity, your string lights can do more than just light up the night.
Creative Layouts for Different Spaces
Here are some ideas to inspire you:
- Overhead Canopy: String lights in a crisscross or zigzag pattern over a patio or dining area. This creates a cozy, intimate feel.
- Vertical Accents: Wrap lights around tree trunks, columns, or fence posts for a whimsical touch.
- Pathway Lighting: Line walkways or garden paths with low-hanging lights or ground-level fairy lights.
- Floating Canopy: Use a central pole (like a flagpole or umbrella) to create a “floating” effect with lights radiating outward.
Seasonal and Themed Decor
Change up your lights for different seasons or events:
- Spring/Summer: Use warm white or pastel colors for garden parties.
- Fall: Add orange and yellow lights for a harvest vibe.
- Winter: Go for cool white or blue for a frosty, magical look.
- Holidays: Mix in themed lights (like snowflakes or stars) for extra cheer.
Maintenance for Longevity
To keep your lights shining for years:
- Clean bulbs annually: Wipe them with a dry cloth to remove dust and debris.
- Inspect for damage: Check cords and bulbs each season. Replace frayed cords or burnt-out bulbs immediately.
- Store properly: If you take lights down, store them in a cool, dry place. Wrap them around a reel or cardboard to prevent tangles.
Data Table: String Light Comparison
| Type | Lifespan (Hours) | Energy Use | Best For | Pros | Cons |
|---|---|---|---|---|---|
| LED | 25,000+ | Low | Year-round use | Energy-efficient, durable, low heat | Higher upfront cost |
| Incandescent | 1,000–2,000 | High | Occasional use | Warm glow, low cost | Short lifespan, fragile |
| Solar-Powered | 10,000–15,000 | None (sun-powered) | Remote areas | No wiring, eco-friendly | Dimmer, weather-dependent |
| Edison-Style | 10,000–15,000 | Medium | Rustic/decorative | Vintage charm, stylish | Bulky, not all outdoor-rated |
Final Thoughts: Your Outdoor Oasis Awaits
Hanging outdoor string lights isn’t just a DIY project—it’s an investment in your home’s ambiance and your own enjoyment. When done right, they create a magical, welcoming space that you’ll love using year after year. I’ve seen how a few well-placed lights can turn a simple backyard into a favorite gathering spot for friends, a peaceful retreat for quiet evenings, and even a backdrop for unforgettable moments.
Remember, the key is patience and attention to detail. Choose the right lights for your space, plan your layout carefully, secure anchor points properly, and don’t skimp on safety. A little effort upfront pays off in durability, beauty, and peace of mind. And if you make a mistake? That’s okay. I’ve had my share of tangled cords and sagging wires, but each one taught me something new.
So grab your lights, a measuring tape, and a few hooks. Your outdoor oasis is just a few hours away. Light up the night, enjoy the glow, and savor the moments that happen under your very own canopy of stars.
Frequently Asked Questions
How do I hang string lights outdoor without damaging my house?
Use removable adhesive hooks, gutter clips, or magnetic mounts to avoid nails or screws. These methods securely hold lights while protecting siding, shingles, and gutters.
What’s the best way to plan the layout for outdoor string lights?
Measure your space and map anchor points (e.g., posts, trees, eaves) to ensure even spacing. Leave slack for bulb replacement and avoid overstretching to prolong the life of your lights.
Can I hang string lights outdoor in cold or wet weather?
Yes, but use only UL-listed outdoor string lights with weatherproof seals. Check connections regularly and use waterproof wire nuts for extensions to prevent shorts.
How do I hide the wires when hanging string lights outdoor?
Route cords along natural pathways like railings or tree branches, using cable clips or zip ties. For a seamless look, choose lights with green or brown wires to blend with surroundings.
How far apart should anchor points be for outdoor string lights?
Space anchor points 4–8 feet apart, depending on the light strand’s weight. Heavier bulbs or longer runs may need closer support to prevent sagging or damage.
Do I need a transformer for outdoor string lights?
Only if using low-voltage LED lights—they require a compatible transformer to step down power. Plug-in incandescent or LED lights with a built-in transformer can connect directly to GFCI outlets.

