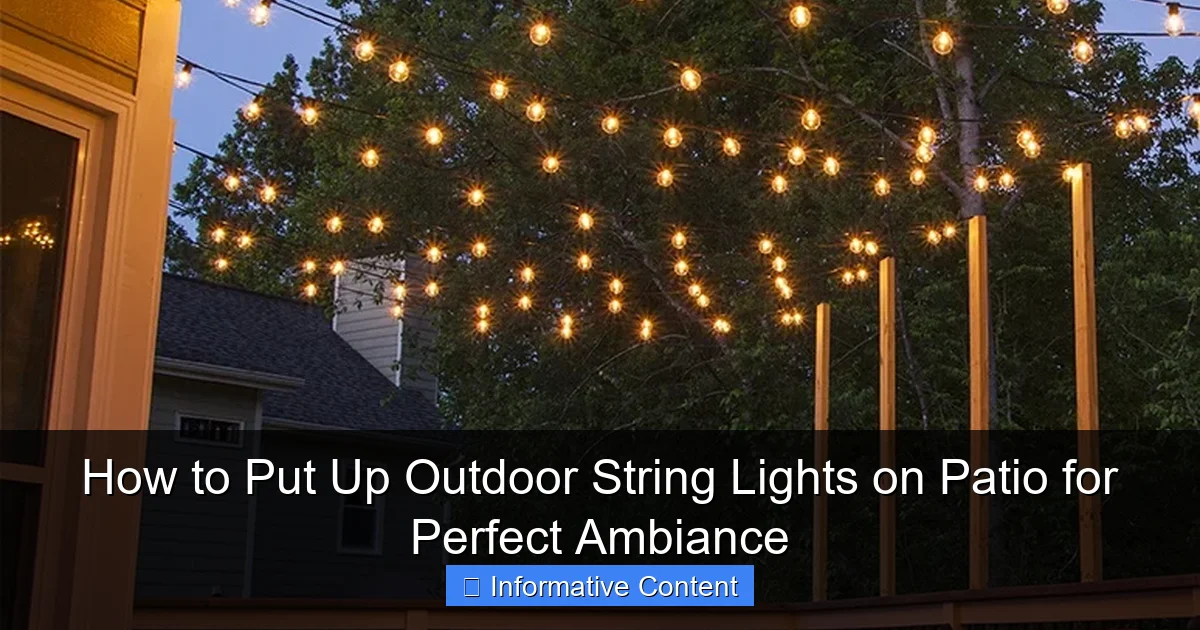
Featured image for how to put up outdoor string lights on patio
Image source: cdn.christmaslightsetc.com
Transform your patio into a captivating retreat by securely mounting outdoor string lights using weather-resistant hooks or tension cables for a seamless, professional look. Ensure proper spacing and height (7–10 feet) to maximize ambiance while avoiding sagging or tripping hazards. Always opt for LED, outdoor-rated bulbs and test connections before final installation to guarantee safety and longevity.
Key Takeaways
- Plan your layout first: Sketch light placement to avoid costly adjustments later.
- Use weather-resistant lights: Ensure durability and safety for outdoor conditions.
- Secure with proper hardware: Use hooks, clips, or cables designed for outdoor use.
- Measure spacing accurately: Keep bulbs evenly spaced for balanced, professional results.
- Test lights before mounting: Check functionality to troubleshoot issues early.
- Hide cords creatively: Tuck wires under eaves or use raceways for a clean look.
📑 Table of Contents
- Why Outdoor String Lights Are the Secret to a Cozy Patio
- 1. Planning Your Layout: Design Before You Drill
- 2. Choosing the Right Outdoor String Lights
- 3. Gathering Tools and Materials
- 4. Step-by-Step Installation Guide
- 5. Troubleshooting and Safety Tips
- 6. Styling Tips for Maximum Ambiance
- Final Thoughts: Light Up Your Life (Literally)
Why Outdoor String Lights Are the Secret to a Cozy Patio
There’s something magical about stepping onto your patio at night and being greeted by a soft, warm glow. It’s not just light—it’s mood. Whether you’re hosting a summer barbecue, enjoying a quiet evening with a book, or sharing wine with a loved one, outdoor string lights can transform your patio from a forgotten corner into a welcoming retreat. I remember the first time I strung up lights over my tiny backyard patio. I was skeptical—would they look tacky? Would they survive a rainstorm? But once I flipped the switch, the entire space felt warmer, more intimate, and undeniably inviting. That’s when I realized: outdoor string lights aren’t just decoration. They’re ambiance architects.
But here’s the thing: hanging outdoor string lights isn’t as simple as draping them across a few trees and calling it a day. Done wrong, they can sag, tangle, or even become a safety hazard. Done right, they can elevate your outdoor space into something truly special. Whether you’re a DIY novice or a seasoned weekend warrior, this guide will walk you through every step—from planning and choosing the right lights to installing them safely and stylishly. By the end, you’ll know exactly how to put up outdoor string lights on patio spaces of any size, shape, or layout.
1. Planning Your Layout: Design Before You Drill
Assess Your Patio’s Structure and Boundaries
Before you buy a single bulb, take a good look at your patio. Is it open-air? Covered? Attached to a house or freestanding? The structure determines where you can hang lights and what hardware you’ll need. For example, if you have a pergola, you’ve got built-in support. If your patio is open, you’ll need to create anchor points using poles, trees, or even your home’s eaves.
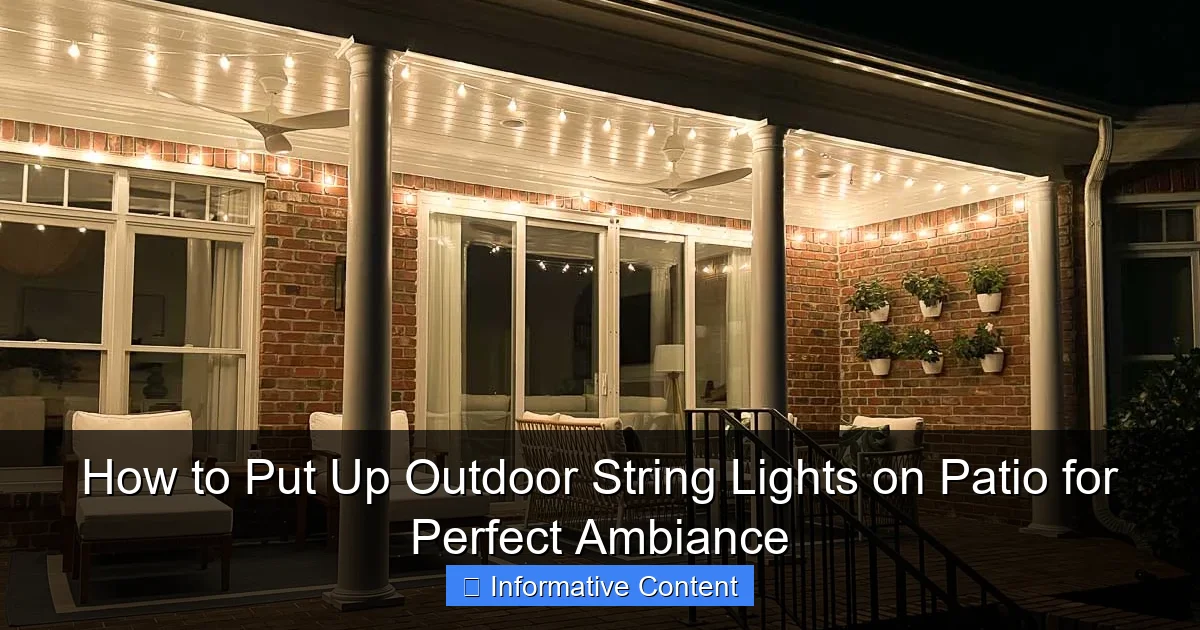
Visual guide about how to put up outdoor string lights on patio
Image source: drivenbydecor.com
Walk around your patio at night with a flashlight. Visualize where the lights will go. Do you want them overhead like a canopy? Along the perimeter? In a zigzag pattern? I once tried to hang lights without planning and ended up with a tangled mess that looked more like a spiderweb than a romantic glow. Lesson learned: measure twice, hang once.
Choose the Right Pattern and Spacing
There’s no one-size-fits-all layout, but here are a few popular options:
- Canopy (Grid) Pattern: Ideal for pergolas or covered patios. Lights are strung in a grid, creating a ceiling-like effect. Use zip ties or hooks every 12–18 inches for even spacing.
- Perimeter (Border) Pattern: Wrap lights around the edges of your patio. Great for open spaces or when you want to define the area without overhead clutter.
- Zigzag (Crisscross) Pattern: Adds visual interest and works well over dining tables or conversation areas. Requires more lights and careful tensioning.
- Hanging (Draped) Pattern: Lights hang in gentle swags between two points. Best for patios with trees or posts. Avoid over-sagging—keep a 10–15% sag for safety and aesthetics.
For a 10×12 ft patio, a grid pattern with 4 rows and 3 columns (12 connection points) usually works well. Use painter’s tape to mark anchor points on the ground or walls to visualize spacing before installing anything.
Map Power Sources and Extension Cords
Most outdoor string lights need a power source. Check if your patio has an outdoor-rated outlet. If not, you’ll need a heavy-duty, weatherproof extension cord (rated for outdoor use, at least 14-gauge). Avoid daisy-chaining more than 3 cords—overloading can cause overheating.
Pro tip: Use a timer or smart plug so your lights turn on at dusk and off at bedtime. I use a Wi-Fi plug that syncs with sunset times—no more forgetting to flip the switch!
2. Choosing the Right Outdoor String Lights
Types of Lights: LED vs. Incandescent
LED lights are the clear winner for most patios. They’re energy-efficient (use up to 80% less power), last 10–20 times longer, and stay cool to the touch. Incandescent bulbs give a warmer, vintage glow but burn out faster and get hot—risky if kids or pets are around.
For ambiance, I recommend warm white LEDs (2700–3000K). They mimic candlelight without the fire hazard. Cool white (5000K+) feels more like a parking lot—great for visibility, not for coziness.
Weather Resistance: IP Ratings Matter
Outdoor lights must withstand rain, snow, UV rays, and temperature swings. Check the IP (Ingress Protection) rating:
- IP44: Splash-resistant (okay for covered patios).
- IP65: Dust-tight and water-resistant (ideal for open patios).
- IP67: Waterproof (can survive temporary submersion).
I learned this the hard way when my “outdoor-rated” lights failed after one heavy rainstorm. Now I only buy IP65 or higher.
Bulb Shape, Spacing, and Length
Consider these factors:
- Bulb Shape: Globe bulbs offer a classic look. Edison-style (exposed filament) adds vintage charm. Mini lights are subtle and modern.
- Spacing: Closer spacing (4–6 inches) creates a dense, starry effect. Wider spacing (12+ inches) is better for larger patios.
- Length: Measure your layout and add 10% extra for slack and connections. Most strands are 24–48 ft. You can connect multiple strands, but check the manufacturer’s max (usually 2–3).
For my 12×16 ft patio, I use 3 strands of 48-ft IP65-rated warm white LED globe lights (6-inch spacing), connected end-to-end with a 10-ft extension cord.
3. Gathering Tools and Materials
Essential Hardware and Supplies
Here’s what you’ll need (adjust based on your patio type):
- String lights (with IP65+ rating, warm white LEDs)
- Outdoor-rated extension cord (14-gauge, 10–25 ft)
- Timer or smart plug
- Anchor points:
- For wood: Screw-in hooks, eye bolts, or zip ties
- For concrete/brick: Masonry anchors, concrete screws, or adhesive hooks
- For metal: Magnetic hooks or hose clamps
- For trees: Tree-safe zip ties or rope (never nails!)
- Measuring tape
- Drill (with masonry bit for concrete)
- Ladder (if working overhead)
- Level (to keep lines straight)
- Zip ties or cable clips (for securing cords)
Optional (But Helpful) Add-Ons
- Light tester: Checks if strands work before hanging.
- Weatherproof cord covers: Protects cords on the ground.
- Light dimmer: For mood control (some smart plugs offer this).
- Light clips: Plastic clips that slide onto gutters or railings.
I keep a “light hanging kit” in my garage: a small toolbox with hooks, zip ties, a level, and spare bulbs. It saves time and prevents mid-project hardware store trips.
4. Step-by-Step Installation Guide
Step 1: Install Anchor Points (The Foundation)
Start with the strongest support—usually your house or a pergola. Use a drill to install screw-in hooks or eye bolts every 3–4 feet. For masonry, drill pilot holes with a masonry bit, then insert anchors and screws.
Pro tip: Use a level to keep anchor points aligned. A crooked line ruins the effect. For trees, wrap a soft rope (at least 1 inch wide) around the trunk and tie a loop for the lights. Never use nails or wire—they damage the bark and can create entry points for pests.
Example: On my patio, I used 8 screw-in hooks (4 on the house, 4 on the pergola) spaced 3.5 ft apart. I marked each spot with painter’s tape, then drilled pilot holes to avoid wood splitting.
Step 2: Hang the First Strand
Start at the power source. Hang the first light strand, leaving a 1–2 ft “tail” at the plug end. Secure it to the first anchor point with a zip tie or hook. Then, stretch it to the next point, maintaining slight tension—not too tight (it’ll sag in summer heat) or too loose (it’ll droop).
Use a 10–15% sag rule: For a 10-ft span, the center should hang 1–1.5 ft lower than the ends. This looks intentional and prevents strain on the cord.
Step 3: Connect Additional Strands
If using multiple strands, connect them end-to-end. Most outdoor lights have male/female plugs. Ensure connections are tight and wrap them with electrical tape or use a weatherproof connector cover to prevent moisture damage.
Never exceed the manufacturer’s max number of connected strands (usually 2–3). Overloading can trip breakers or melt cords.
Step 4: Secure the Entire Run
Once all strands are connected, secure them to every anchor point. Use zip ties, hooks, or cable clips. For long spans, add intermediate supports (e.g., a pole or tree) to prevent sagging.
For a zigzag pattern, run lights diagonally between anchor points. Use a measuring tape to keep angles consistent.
Step 5: Manage Cords and Power
Route the extension cord along a wall or railing, securing it with cable clips. Avoid running cords across walkways (tripping hazard). If you must cross a path, bury the cord in a weatherproof conduit or use a cord cover.
Plug the cord into the timer/smart plug, then test the lights. If any bulbs are out, check connections or replace bulbs before finalizing.
5. Troubleshooting and Safety Tips
Common Installation Mistakes (And How to Fix Them)
- Problem: Lights sag too much.
Solution: Add a support pole in the middle or tighten slightly (but never taut). - Problem: Flickering bulbs.
Solution: Check connections. Loose plugs are the #1 cause. Re-tape or re-plug. - Problem: Cord overheating.
Solution: Unplug immediately. Reduce the number of connected strands or upgrade to a heavier cord. - Problem: Lights not turning on.
Solution: Use a light tester. Replace the first bulb in the strand—if it works, the rest will follow.
Safety First: Weatherproofing and Maintenance
- Never use indoor lights outdoors. They’re not rated for moisture and can short-circuit.
- Inspect cords yearly. Look for fraying, cracks, or melted insulation.
- Remove lights in extreme weather. Take them down during hurricanes, blizzards, or prolonged heavy rain.
- Use GFCI outlets. Outdoor circuits should have Ground Fault Circuit Interrupter protection to prevent shocks.
- Trim nearby branches. Falling branches can snap lights and create fire hazards.
I learned about GFCI the hard way—after a thunderstorm, my patio outlet sparked. An electrician installed a GFCI breaker, and now I sleep soundly.
6. Styling Tips for Maximum Ambiance
Layer Your Lighting
String lights work best with other light sources. Add:
- Path lights to guide movement
- Table lanterns for dining areas
- Spotlights to highlight plants or art
My patio has string lights overhead, solar path lights along the walkway, and a lantern on the table. The layered glow feels magical, not flat.
Match Lights to Your Patio’s Aesthetic
- Boho: Use colored LEDs or paper lanterns mixed with string lights.
- Modern: Sleek, white or black cords with minimalist bulbs.
- Rustic: Edison bulbs with vintage-style filaments.
- Tropical: Brightly colored bulbs or tiki torches alongside lights.
For a romantic dinner, I dim the lights and add a few candles in glass jars. The flicker complements the steady glow perfectly.
Seasonal Adjustments
Don’t take lights down every fall! Use seasonal covers (e.g., clear plastic domes for snow) or choose lights rated for year-round use. In winter, add a strand of white or blue lights for a frosty glow.
| Patio Size (ft) | Recommended Light Length | Anchor Points | Max Connected Strands | Best Pattern |
|---|---|---|---|---|
| 8×8 | 24–36 ft | 4–6 | 2 | Perimeter or Grid |
| 10×12 | 48–72 ft | 6–8 | 2–3 | Grid or Zigzag |
| 12×16 | 72–120 ft | 8–12 | 3 | Grid or Draped |
| 15×20+ | 120+ ft | 12+ | 3 (with supports) | Draped or Zigzag |
Final Thoughts: Light Up Your Life (Literally)
Putting up outdoor string lights on your patio isn’t just a DIY project—it’s an investment in joy. The right lights turn ordinary evenings into moments worth remembering. I’ve hosted birthday parties under my canopy of lights, read novels in their soft glow, and even proposed to my partner with them as the backdrop. They’re not just wires and bulbs. They’re memories in the making.
Remember: how to put up outdoor string lights on patio spaces is all about patience and attention to detail. Plan your layout, choose weatherproof lights, install anchors securely, and manage cords safely. When you flip that switch and see your patio bathed in golden light, you’ll know it was worth every step. So grab your tools, gather your lights, and get ready to create a space that doesn’t just look good—it feels like home.
Frequently Asked Questions
How do I hang outdoor string lights on a patio without drilling holes?
Use adhesive hooks, removable mounting strips, or tension rods between railings or furniture to avoid permanent damage. This method works well for renters or temporary setups.
What’s the best way to secure string lights on a large patio?
For expansive spaces, use a combination of poles, trees, or pergolas as anchor points, ensuring lights are spaced evenly. Consider using zip ties or outdoor-rated clips to reinforce connections.
Can I install outdoor string lights on a patio with no nearby power source?
Yes! Use solar-powered or battery-operated string lights, or run an outdoor-rated extension cord safely along walls or railings. Always follow local electrical safety guidelines.
How far apart should I space hooks for patio string lights?
Space hooks 1–2 feet apart for straight runs or 2–3 feet for a draped look, depending on the weight of your lights. This prevents sagging and ensures even lighting.
Are there weatherproof options for outdoor string lights on a patio?
Look for UL-listed, weather-resistant string lights with sealed sockets and LED bulbs. These withstand rain, wind, and UV exposure for long-term outdoor use.
How do I create a cozy ambiance with patio string lights?
Use warm-white or soft-glow bulbs, layer lights at varying heights, and drape them loosely for a relaxed vibe. Add dimmers or timers to adjust brightness effortlessly.

