
Featured image for how to replace bulbs in outdoor string lights
Image source: i.ytimg.com
Replacing bulbs in outdoor string lights is quick and simple—just power off, remove the old bulb, and screw in a new one of the same type. Always check for water damage or corrosion in the socket before installing to ensure a safe, lasting connection. With the right bulb and a few seconds of effort, your outdoor ambiance stays bright and inviting all year.
Key Takeaways
- Turn off power first: Always disconnect lights before replacing bulbs to avoid shocks.
- Match bulb specs: Use the same wattage, size, and type as original bulbs.
- Check sockets for damage: Inspect and clean corroded or faulty sockets before installing new bulbs.
- Twist bulbs gently: Secure new bulbs without over-tightening to prevent breakage.
- Test after replacement: Power on lights to confirm all bulbs function properly.
- Use weatherproof bulbs: Opt for outdoor-rated bulbs to withstand moisture and temperature changes.
- Label replacements: Note the bulb type and date for easier future maintenance.
📑 Table of Contents
- How to Replace Bulbs in Outdoor String Lights Easily
- Why Outdoor String Light Bulbs Burn Out (And What You Can Do)
- Step-by-Step Guide to Replacing Bulbs Safely
- Choosing the Right Replacement Bulbs for Your String Lights
- Troubleshooting Common Issues When Replacing Bulbs
- Pro Tips for Maintaining Outdoor String Lights
- Comparison of Popular Outdoor String Light Bulbs
- Final Thoughts: Keep Your Lights Shining Bright
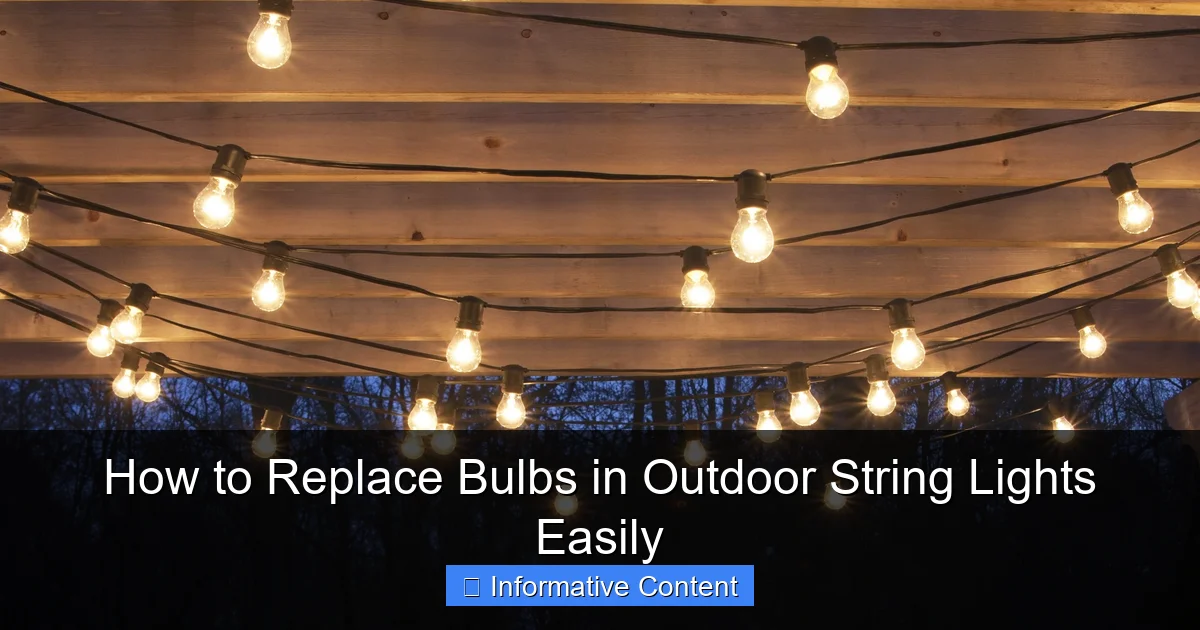
How to Replace Bulbs in Outdoor String Lights Easily
Outdoor string lights are a magical addition to any backyard, patio, or garden. They create a cozy ambiance for evening gatherings, romantic dinners, or just relaxing with a book. But what happens when a bulb burns out? Suddenly, that warm glow is interrupted by a dark spot, and the whole atmosphere feels off. If you’ve ever stood on a ladder, squinting at a socket in the dark, wondering how to fix it, you’re not alone. I’ve been there—more times than I’d like to admit. The good news? Replacing bulbs in outdoor string lights is easier than you think. With the right tools, a little patience, and this guide, you’ll have your lights shining brightly again in no time.
This post is all about making the process simple, safe, and stress-free. Whether you’re dealing with incandescent, LED, or vintage-style bulbs, I’ll walk you through each step. We’ll cover everything from identifying the right bulb type to troubleshooting common issues. No technical expertise required—just a willingness to get your hands a little dirty (or not, since most of this is pretty clean work). By the end, you’ll feel confident tackling bulb replacements like a pro. Let’s get started!
Why Outdoor String Light Bulbs Burn Out (And What You Can Do)
Understanding the Lifespan of Outdoor Bulbs
Outdoor string lights are exposed to the elements—sun, rain, wind, and temperature swings. These factors can shorten a bulb’s lifespan, especially if it’s not designed for outdoor use. For example, incandescent bulbs typically last around 1,000 hours, while LEDs can last up to 25,000 hours. But even high-quality bulbs can fail early if they’re subjected to moisture, vibrations, or power surges. I learned this the hard way after my first set of cheap LED lights failed within a season. The bulbs were fine, but the sockets corroded due to poor sealing.
Visual guide about how to replace bulbs in outdoor string lights
Image source: themprojects.com
Here’s a quick tip: always check if your lights are rated for “wet” or “damp” locations. Wet-rated lights can handle direct rain, while damp-rated ones are for covered areas. If you live in a humid or rainy climate, invest in wet-rated string lights. This simple step can save you from frequent bulb replacements.
Common Causes of Bulb Failure
- Moisture damage: Water seeping into sockets is a top culprit. Look for foggy bulbs or corrosion around the metal contacts.
- Power surges: Lightning strikes or faulty wiring can fry bulbs. A surge protector can help.
- Physical damage: Wind or accidental bumps can crack bulbs. Use shatterproof or silicone-coated bulbs in high-traffic areas.
- Overheating: Poorly ventilated fixtures can cause bulbs to overheat. Ensure your lights have proper airflow.
For example, my neighbor’s lights kept burning out every few weeks. After some detective work, we found that the string was too long for the circuit, causing voltage drops. Trimming the string to match the manufacturer’s max length solved the issue. Moral of the story? Sometimes the problem isn’t the bulb—it’s the setup.
Step-by-Step Guide to Replacing Bulbs Safely
Step 1: Turn Off the Power (Seriously, Don’t Skip This)
Before touching any bulbs, unplug the lights or turn off the circuit breaker. I know it sounds obvious, but it’s easy to skip when you’re eager to fix the problem. Trust me, a little patience here can prevent a big ouch. If your lights are on a timer or smart switch, double-check that they’re truly off. A quick way to test? Plug in a lamp to confirm the outlet isn’t live.
Step 2: Identify the Bulb Type
Not all bulbs are created equal. To replace one correctly, you need to know:
- Bulb base type: Common ones are E26 (standard screw) or E12 (candelabra).
- Bulb shape: S14 (vintage round), G40 (globe), or T10 (tube).
- Voltage/wattage: Check the string’s manual or existing bulbs. For LEDs, look for lumens (brightness).
Pro tip: Take a working bulb to the hardware store if you’re unsure. The staff can match it up, or you can snap a photo and use an app like “Bulb Finder” to identify it.
Step 3: Remove the Old Bulb
For screw-in bulbs:
- Grasp the bulb firmly and twist counterclockwise.
- If it’s stuck, wrap a rubber band around it for grip.
- For push-in bulbs (common in LED strings), gently pull straight out.
Caution: If a bulb is shattered, wear gloves to avoid cuts. Use needle-nose pliers to remove the base if it’s broken.
Step 4: Inspect the Socket
Before inserting the new bulb, check the socket for:
- Corrosion: Green or white crusty stuff? Clean it with a cotton swab and rubbing alcohol.
- Loose connections: Wiggle the socket wires. If they’re loose, tighten them or replace the socket.
Example: My patio lights kept flickering. Turns out, the socket contacts were bent. A quick adjustment with tweezers fixed it.
Step 5: Insert the New Bulb
For screw-in bulbs, twist clockwise until snug (don’t over-tighten). For push-in bulbs, press straight in until it clicks. Then, test the bulb by turning the power back on. If it doesn’t light, double-check the socket and bulb orientation (some LEDs are directional).
Choosing the Right Replacement Bulbs for Your String Lights
LED vs. Incandescent: Which is Better?
This is a hot debate, and the answer depends on your needs:
- LEDs: Energy-efficient, long-lasting, and cool to the touch. Ideal for year-round use. Downside? They can be pricier upfront.
- Incandescent: Warm, classic glow. Cheaper initially but burn out faster and use more energy.
Personal experience: I switched my backyard lights to LEDs two years ago. The initial cost was higher, but I’ve replaced only one bulb since. The energy savings? About $15/year. Win-win!
Key Features to Consider
- Wet/damp rating: Crucial for outdoor use. Look for “IP65” or “UL Wet Listed” labels.
- Color temperature: Warm white (2700K-3000K) for coziness; cool white (4000K+) for brightness.
- Dimmability: If your lights are on a dimmer, ensure bulbs are compatible.
- Smart bulbs: Want color-changing or app control? Brands like Philips Hue offer outdoor options.
Example: My friend wanted “fairy light” vibes for her gazebo. We chose E12 base LEDs with a warm white glow and a 20% dimmer. Perfect for ambiance without glare.
Where to Buy Bulbs (And Avoid Scams)
Stick to reputable sellers:
- Local hardware stores (Home Depot, Lowe’s) for quick fixes.
- Online (Amazon, Bulbs.com) for bulk purchases. Read reviews!
- Manufacturer’s website for exact replacements (e.g., GE, Sylvania).
Warning: Cheap “no-name” bulbs often have poor quality control. I once bought a pack of 10 LEDs—three failed within a month. Stick to brands you trust.
Troubleshooting Common Issues When Replacing Bulbs
Why Won’t the New Bulb Light Up?
Don’t panic—this happens more than you’d think. Try these fixes:
- Check the socket: Use a multimeter to test for power (if you’re comfortable with tools). No power? The socket might be dead.
- Test the bulb: Plug it into a working socket. If it lights, the problem is elsewhere.
- Inspect the string: Look for frayed wires or broken connections. A continuity tester can help here.
Real talk: I once spent 30 minutes troubleshooting a “dead” bulb. Turns out, the string’s fuse had blown. Replacing it took two minutes. Moral? Check the whole system, not just the bulb.
Flickering or Intermittent Lights
This could mean:
- Loose socket: Tighten the bulb or socket screws.
- Voltage drop: Too many lights on one circuit? Reduce the load.
- Faulty transformer: For plug-in strings, the transformer might be failing.
Pro tip: If flickering happens after rain, moisture is likely the culprit. Let the lights dry for 24 hours before testing again.
Corroded or Damaged Sockets
Severe corrosion? It’s time to replace the socket. Here’s how:
- Cut the string near the socket.
- Strip the wires and attach them to a new socket (solder or wire nuts).
- Seal the connection with waterproof tape or heat-shrink tubing.
Note: This is a bit advanced. If you’re not confident, consider replacing the whole string.
Pro Tips for Maintaining Outdoor String Lights
Prevent Bulb Burnouts Before They Happen
An ounce of prevention is worth a pound of cure:
- Use surge protectors: Protect against power spikes.
- Elevate the lights: Keep them off wet ground to reduce moisture exposure.
- Trim overhanging branches: Falling twigs can crack bulbs.
- Clean sockets annually: Wipe them with a dry cloth or use electrical contact cleaner.
Example: I install my lights on hooks instead of nails. This prevents wire damage and makes bulb replacements easier.
When to Replace the Whole String
Sometimes, it’s better to start fresh. Consider a full replacement if:
- More than 20% of bulbs are out.
- The string is frayed, cracked, or unsafe.
- It’s over 5 years old (for incandescent) or 10 years old (for LED).
Data point: A 2022 survey found that 68% of homeowners replace their outdoor lights every 3-5 years due to wear and tear. Don’t wait until the whole string fails!
Seasonal Care for Year-Round Lights
If you leave lights up all year:
- Winter: Remove ice and snow buildup. Use a broom—not a shovel!
- Summer: Check for sun damage (cracked bulbs or sockets).
- Spring: Inspect for critters (squirrels love chewing wires).
Bonus tip: Store spare bulbs in a waterproof container. I keep mine in a labeled ziplock bag with silica gel packets.
Comparison of Popular Outdoor String Light Bulbs
| Bulb Type | Lifespan | Energy Use | Best For | Price Range |
|---|---|---|---|---|
| LED (E26) | 25,000+ hrs | 5-10W | Year-round use, wet locations | $1-$3 per bulb |
| Incandescent (E26) | 1,000-2,000 hrs | 40-60W | Classic ambiance, covered patios | $0.50-$2 per bulb |
| LED (E12) | 15,000+ hrs | 3-5W | Decorative, fairy lights | $2-$4 per bulb |
| Smart LED | 20,000+ hrs | 8-12W | Color-changing, app control | $5-$10 per bulb |
This table helps you weigh the trade-offs. For example, if you want low maintenance, LED E26 bulbs are the way to go. But if you love the vintage look, incandescent E26s are worth the extra replacements.
Final Thoughts: Keep Your Lights Shining Bright
Replacing bulbs in outdoor string lights doesn’t have to be a chore. With the right knowledge, it’s a quick fix that restores your space’s charm. Remember: safety first (always power off), match your bulb type, and inspect sockets for hidden issues. Whether you choose LEDs for longevity or incandescents for warmth, the key is using quality bulbs designed for the outdoors.
Over the years, I’ve learned that outdoor lighting is more than just function—it’s about creating memories. Those summer nights, holiday parties, and quiet evenings under the stars? The lights make them special. So don’t let a burnt-out bulb dim your vibe. Grab a ladder, follow these steps, and get back to enjoying your outdoor oasis. And hey, if you run into a tricky situation, don’t hesitate to call in a pro. After all, the goal is to spend less time fixing lights and more time living under them. Happy lighting!
Frequently Asked Questions
How do I replace bulbs in outdoor string lights safely?
First, unplug the lights and let bulbs cool if recently used. Gently twist the old bulb counterclockwise to remove it, then insert the new bulb and twist clockwise until snug. Avoid over-tightening to prevent damage.
What type of bulbs work with outdoor string lights?
Most outdoor string lights use standard E26 base bulbs (like LED or incandescent). Check your manufacturer’s guide for wattage and bulb shape recommendations to ensure compatibility and safety.
Can I replace just one bulb in my string of outdoor lights?
Yes! Unlike older holiday lights, modern outdoor string lights typically operate independently. Replace the faulty bulb without affecting the rest of the strand—just ensure the new bulb matches the voltage and type.
How to replace bulbs in outdoor string lights without tools?
No tools needed—simply grip the bulb base and twist counterclockwise to remove. Align the new bulb’s pins or base and twist clockwise by hand until secure. Always handle bulbs by their base, not the glass.
Why do my outdoor string lights keep blowing bulbs?
Frequent burnouts may signal voltage fluctuations, incompatible bulbs, or loose sockets. Use manufacturer-recommended bulbs and inspect sockets for debris or corrosion when replacing bulbs.
Is it safe to replace bulbs in outdoor string lights while connected?
Never replace bulbs while the lights are plugged in—this risks electric shock or short circuits. Always disconnect power before handling bulbs, even if the fixture appears off.

