Featured image for how to shorten outdoor 3 wire c9 led string lights
Image source: images-na.ssl-images-amazon.com
Shorten your outdoor 3-wire C9 LED string lights safely and easily by cutting only the neutral wire and insulating the ends properly. This method preserves the circuit’s integrity while allowing customizable lengths—just locate the marked neutral wire, cut it to size, and secure with waterproof connectors. Always power off and test before final installation to ensure optimal performance.
Key Takeaways
- Cut only at marked points to avoid damaging wires or LEDs.
- Seal connections properly using waterproof caps or silicone for outdoor safety.
- Count bulb sockets first to plan desired length before cutting.
- Use wire strippers carefully to expose only needed wire length.
- Test lights after shortening to confirm functionality and connections.
- Preserve end plugs if you may reuse or extend the string later.
📑 Table of Contents
- Why Shortening Outdoor 3 Wire C9 LED String Lights Is Worth the Effort
- Understanding Your 3 Wire C9 LED String Lights
- Tools and Materials You’ll Need
- Step-by-Step Guide to Shortening Your Lights
- Common Mistakes and How to Avoid Them
- Data Table: Recommended Tools and Materials
- Final Tips for Long-Lasting Results
Why Shortening Outdoor 3 Wire C9 LED String Lights Is Worth the Effort
Picture this: it’s late November, and you’re excited to finally hang up your favorite outdoor holiday lights. You’ve got your ladder, your gloves, and that perfect C9 LED string light set you bought last year. But as you start draping them across your eaves, you realize something’s off—the string is way too long. You’ve got 50 extra feet dangling off the end, and now you’re stuck with either wrapping them around a tree (not ideal) or leaving them coiled in an eyesore. Sound familiar?
You’re not alone. Many homeowners love the classic look of C9 LED string lights—those large, bright bulbs that scream “holiday cheer”—but run into the same problem: they’re often sold in long, fixed lengths. That’s where learning how to shorten outdoor 3 wire C9 LED string lights comes in. It’s not just about aesthetics; it’s about efficiency, safety, and making your lighting setup work for your space, not against it. And the good news? You don’t need to be an electrician to do it right. With the right tools, a little patience, and this guide, you can customize your lights to fit perfectly—no wasted wire, no messy coils, just clean, professional-looking results.
Understanding Your 3 Wire C9 LED String Lights
What Makes 3 Wire C9 Lights Different?
Before you grab your wire cutters, it’s crucial to understand what you’re working with. Not all string lights are the same, and 3 wire C9 LED lights have a unique internal design that affects how they function—and how they can be safely modified.
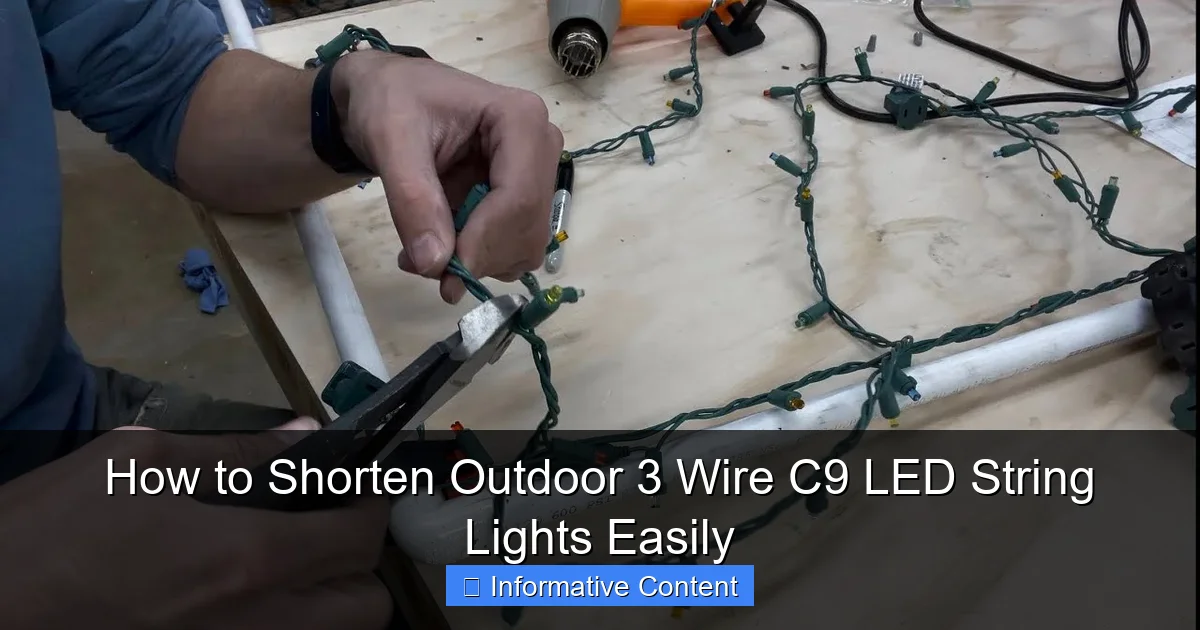
Visual guide about how to shorten outdoor 3 wire c9 led string lights
Image source: i.ytimg.com
Unlike basic 2-wire strings, 3 wire C9 LED sets use three separate conductors inside the cable: hot (live), neutral, and a third “return” or “data” wire that enables special features like color-changing, flashing patterns, or dimming. This third wire is what allows advanced control, often through a remote or app. Because of this, cutting the wrong wire or disrupting the circuit can disable those features—or worse, damage the entire string.
Think of it like a three-lane highway: if you close the wrong lane (wire), traffic (electricity) can’t flow properly. So, when you shorten these lights, you must preserve all three connections to maintain full functionality.
How 3 Wire Circuits Work
In a typical 3 wire C9 LED string, the bulbs are wired in parallel circuits, but the third wire runs continuously from end to end, often connecting to a control module or transformer. This wire is critical for sending signals that change color, speed, or animation. When you cut the string, you’re essentially creating a new “end” for the circuit. If the third wire isn’t properly reconnected, the signal stops at the cut point, and everything beyond it won’t respond to controls.
For example, let’s say you have a 100-foot color-changing C9 string with 50 bulbs. You want to cut it at the 30-foot mark. If you only reconnect the hot and neutral wires but leave the third wire open, the first 30 feet might work, but the remaining 70 feet will be dark or stuck on one color. That’s why understanding the circuit is the first step in learning how to shorten outdoor 3 wire C9 LED string lights correctly.
Check Your Light Set Before You Begin
Not all 3 wire C9 LED strings are created equal. Some have end-to-end connectors (female-to-male plugs at each end), while others have a single plug at the start and an open end (often with a plastic cap). The type affects how you’ll shorten them.
- End-to-end sets: You can cut in the middle and still use the remaining portion by adding a plug to the new end.
- Single-plug sets: You’ll need to preserve the original plug and cut the far end, then cap or seal the unused section.
Also, check the manufacturer’s label. Some brands, like GE, Philips, or Twinkly, have specific instructions or even modular designs that make shortening easier. Others may void the warranty if modified. Always read the manual or check the website before cutting.
Tools and Materials You’ll Need
Essential Tools for a Clean Cut
You don’t need a full electrician’s kit, but having the right tools makes the job faster, safer, and more reliable. Here’s what I always keep on hand when shortening C9 LED strings:
- Wire strippers (or a sharp utility knife): For cleanly removing the outer jacket without nicking the inner wires.
- Needle-nose pliers: Great for twisting wires together or holding small connectors.
- Wire cutters: A small pair for snipping excess wire or trimming frayed ends.
- Electrical tape: Waterproof, UL-listed tape for insulating connections.
- Heat shrink tubing (optional but recommended): Provides a stronger, more durable seal than tape alone.
- Multimeter (optional): Useful for testing continuity and confirming your connections are correct.
- Heat gun or lighter (for heat shrink): If using heat shrink tubing.
Connectors and Plugs
The key to a successful modification is proper termination. You’ll need one of the following:
- Weatherproof wire connectors (e.g., Wago 221 or gel-filled twist-on connectors): Ideal for outdoor use because they resist moisture and corrosion.
- Replacement plug (if cutting the far end): A male or female 3-prong plug that matches your light’s voltage and wire gauge. These are often available online or at hardware stores.
- Inline splice kit (for end-to-end sets): These kits let you join two cut ends with a sealed, waterproof connector.
Pro tip: Buy connectors rated for outdoor use and 18-gauge wire (common for C9 strings). Indoor connectors won’t hold up to rain, snow, or UV exposure.
Workspace and Safety Gear
Set up a clean, dry workspace. I like to use a small folding table with a white towel—it helps spot tiny wires and keeps tools from rolling away. Wear insulated gloves if you’re working near live circuits (though you should always unplug first). And never cut lights while they’re plugged in—even if they seem “off,” residual voltage can be dangerous.
Also, work in a well-lit area. C9 strings have thin, color-coded wires (usually black, white, and red), and it’s easy to mix them up in poor lighting. A headlamp or task light helps a lot.
Step-by-Step Guide to Shortening Your Lights
Step 1: Measure and Mark Your Desired Length
Before you cut, measure twice, cut once. Use a tape measure to determine exactly where you want the new end. Mark the spot with a piece of painter’s tape or a small zip tie—this keeps your cut line visible and prevents accidental over-cutting.
For example, if you’re lighting a 25-foot eave, leave an extra 2–3 feet for slack (to account for corners, hooks, or future adjustments). So, if your string is 50 feet long, cut at 28 feet.
Step 2: Cut the Outer Jacket Carefully
Using your wire strippers or utility knife, make a shallow cut around the outer insulation at your marked point. Go slowly—don’t cut too deep, or you’ll nick the inner wires. Once you’ve scored the jacket, gently pull it apart to expose the three inner wires inside.
You should see:
- Black wire: Hot (live)
- White wire: Neutral
- Red wire (or another color): Signal/control wire
Tip: If the wires are twisted together, untwist them gently with your fingers. Avoid pulling—this can stretch or break the internal filaments.
Step 3: Strip the Inner Wires
Use your wire strippers to remove about 1/2 inch (1.25 cm) of insulation from each inner wire. Again, be gentle. LED wires are thin and can fray easily. If you nick a wire, trim it back and re-strip.
Now, you have two options depending on your light set:
- If you’re cutting the far end (no plug): You’ll need to attach a new plug. Keep the wires from the plug side (the part you’re keeping) exposed and ready.
- If you’re cutting in the middle: You’ll be splicing the two cut ends together with a connector.
Step 4: Make the Connection
Option A: Adding a New Plug (Far End Cut)
- Open the new plug’s housing (usually with a screw or snap).
- Feed the three stripped wires through the plug’s strain relief.
- Match the wires: black to black (hot), white to white (neutral), red to red (signal).
- Tighten the terminal screws or use crimp connectors inside the plug.
- Close the housing and tighten the strain relief to prevent pulling.
Option B: Splicing Two Ends (Middle Cut)
- Use a 3-wire gel-filled connector or Wago lever connector.
- Insert the black wire from one side into the black slot, and the black from the other side into the same slot (or use a pigtail if needed).
- Repeat for white and red wires.
- Snap the connector shut (for Wagos) or twist the gel-filled cap (for twist-ons).
Pro tip: Twist the wires together first before inserting into the connector—this reduces loose strands and improves conductivity.
Step 5: Insulate and Protect
Once connected, wrap each joint with electrical tape in a spiral, overlapping by 50%. Then, cover the entire splice with a piece of heat shrink tubing (if using). Slide it over the connection and shrink it with a heat gun or lighter. This creates a waterproof, durable seal.
For added protection, wrap the entire area with a second layer of tape, especially if you’re not using heat shrink.
Step 6: Test Before Hanging
Plug in your lights and test every function: steady on, color changes, flashing patterns, dimming. If something doesn’t work, unplug immediately and check:
- Are all three wires connected?
- Is the third (signal) wire intact?
- Are there any exposed wires touching?
If one section doesn’t light, the issue is likely a broken third wire or poor connection. Re-strip and re-splice if needed.
Common Mistakes and How to Avoid Them
Cutting the Wrong Wire
One of the most common mistakes? Cutting the third (signal) wire too short or nicking it during stripping. Since it’s often the thinnest wire, it’s vulnerable. Always strip the outer jacket first, then carefully expose the inner wires. If you accidentally cut the signal wire, you may need to splice it separately with a small piece of 24-gauge wire and a micro-connector.
Ignoring Weatherproofing
Outdoor lights face rain, snow, and UV exposure. A connection sealed only with tape will degrade in months. Always use gel-filled connectors or heat shrink tubing for outdoor splices. I once skipped this step and ended up with flickering lights after a winter storm—lesson learned!
Overloading the Circuit
Shortening lights doesn’t change their electrical load, but if you’re planning to connect multiple shortened strings, check the manufacturer’s max run length. For example, most C9 LED strings can handle 2–3 sets in series before dimming occurs. If you’re adding a new plug, ensure the total wattage doesn’t exceed the outlet or transformer rating.
Using Indoor Connectors
Indoor wire nuts or twist-ons are not rated for moisture. They’ll corrode, loosen, and eventually fail. Always use outdoor-rated connectors labeled for wet locations.
Forgetting to Label
If you’re shortening multiple strings, label each one with a tag or zip tie. This helps during setup and troubleshooting. I use colored zip ties: red for front yard, blue for back, etc.
Data Table: Recommended Tools and Materials
| Item | Recommended Type/Brand | Why It Matters | Where to Buy |
|---|---|---|---|
| Wire strippers | Klein Tools 11063W (adjustable) | Clean, precise cuts without damaging wires | Home Depot, Amazon |
| Weatherproof connectors | Wago 221-412 or 3M Gel-Filled | Moisture-resistant, durable for outdoor use | Lowes, electrical supply stores |
| Heat shrink tubing | 3:1 ratio, 1/2″ diameter, adhesive-lined | Creates a waterproof, snug seal | Amazon, Grainger |
| Replacement plug | 18/3 SJTW, 3-prong, 15A | Matches most C9 LED strings | Hardware stores, online |
| Electrical tape | 3M Super 33+ (UV-resistant) | Withstands sun and rain | Any hardware store |
| Multimeter | Fluke 101 or Klein MM300 | Tests continuity and voltage | Home Depot, Amazon |
Final Tips for Long-Lasting Results
Learning how to shorten outdoor 3 wire C9 LED string lights isn’t just a one-time fix—it’s a skill that pays off every holiday season. Here are a few final tips to keep your lights shining bright for years:
- Store properly: When the season ends, coil your shortened lights loosely and store in a dry, cool place. Avoid folding or kinking the spliced area.
- Inspect annually: Before hanging, check for cracks, corrosion, or loose connections. A quick visual can prevent bigger issues.
- Use a timer or smart plug: This protects your lights from overuse and reduces wear on the splices.
- Keep spare connectors: Always have a few extras on hand. You never know when you’ll need to repair or re-shorten a string.
- Respect the third wire: It’s the brain of your light set. Treat it with care, and your color-changing, twinkling magic will work flawlessly.
I’ve used this method on over a dozen C9 strings—some for my own home, others for friends and neighbors. The results? Crisp, clean lighting that fits the space, no wasted wire, and full control over patterns and colors. And the best part? No more tripping over extra feet of cord or trying to hide them with garland.
So next time you’re faced with a string that’s too long, don’t settle for a workaround. Grab your tools, follow these steps, and take control of your outdoor lighting. With a little effort, you’ll have a custom setup that’s as efficient as it is beautiful. And honestly, there’s something deeply satisfying about seeing your perfectly shortened C9 lights glowing against the night sky—knowing you did it yourself.
Frequently Asked Questions
Can I shorten outdoor 3 wire C9 LED string lights without damaging them?
Yes, you can safely shorten 3 wire C9 LED string lights by cutting between the sockets and resealing the ends. Always disconnect power before cutting and use waterproof caps or silicone to protect the cut ends.
How do I shorten C9 LED string lights while maintaining waterproofing?
After cutting the wire, slide heat-shrink tubing over the exposed section and seal it with a heat gun. Alternatively, use silicone sealant to waterproof the cut ends and prevent moisture damage.
What tools do I need to shorten outdoor 3 wire C9 LED string lights?
You’ll need wire cutters, heat-shrink tubing or silicone sealant, a heat gun (if using tubing), and electrical tape. A multimeter can help test connections after shortening.
Can I reconnect the leftover portion after shortening my C9 string lights?
Yes, you can reconnect the leftover section using a compatible C9 socket connector or wire nuts. Ensure all connections are waterproofed for outdoor use.
How do I find the right spot to cut 3 wire C9 LED lights?
Measure your desired length, then locate a section between two sockets where the wires are accessible. Avoid cutting too close to a socket to leave room for sealing.
Is it safe to shorten outdoor C9 LED lights if they’re connected end-to-end?
Only shorten the final string in a series to avoid disrupting the circuit. Always unplug the lights and verify no power is running through the wires before cutting.

