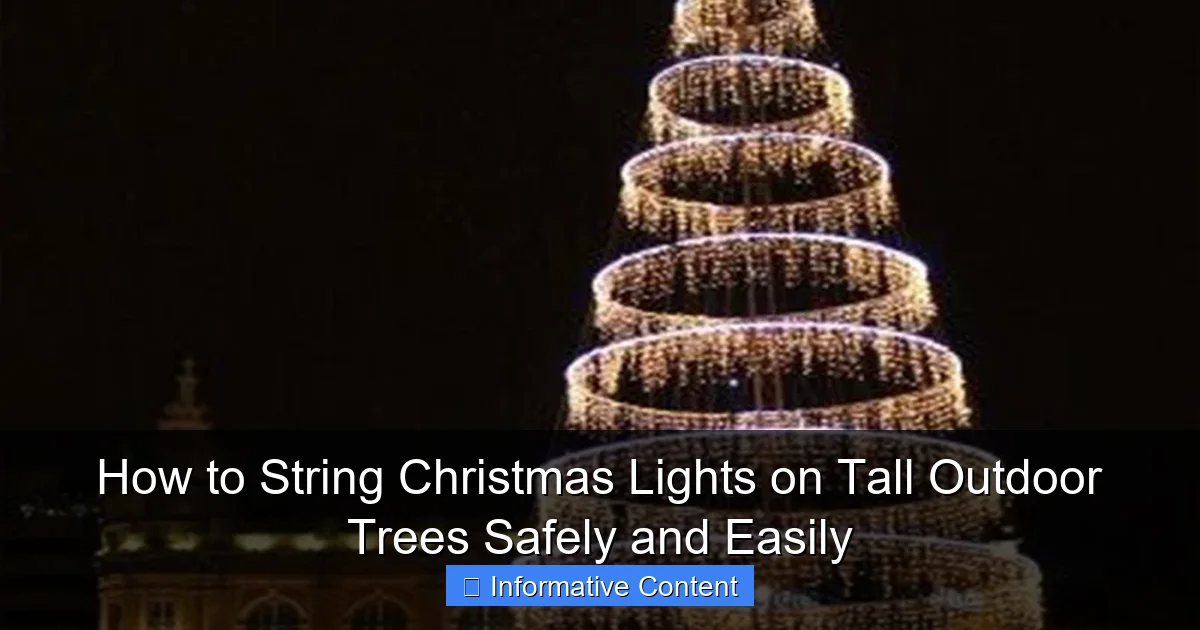
Featured image for how to string christmas lights on tall outdoor trees
Image source: i.pinimg.com
Always prioritize safety by using a sturdy ladder and a helper when stringing Christmas lights on tall outdoor trees. Wrap lights evenly around branches in a spiral pattern, starting from the bottom and working upward, to ensure balanced illumination and prevent tangles. Use outdoor-rated, LED lights and secure connections with clips—never nails—to protect both the tree and your display.
Key Takeaways
- Plan your design first: Sketch light placement to avoid mid-air adjustments.
- Use a sturdy ladder: Always stabilize it on level ground for safety.
- Opt for LED lights: They’re lighter, safer, and more energy-efficient.
- Secure lights with clips: Avoid nails or staples to protect tree bark.
- Work top-down: Start at the crown to prevent tangling and ensure coverage.
- Check connections: Test lights before climbing to save time and effort.
- Use a spotter: Always have someone nearby for assistance and safety.
📑 Table of Contents
- How to String Christmas Lights on Tall Outdoor Trees Safely and Easily
- Plan Your Tree Lighting Strategy Before You Start
- Use the Right Tools and Equipment for Safety
- Step-by-Step: How to String Lights on a Tall Tree
- Overcome Common Challenges and Mistakes
- Maintenance, Removal, and Storage
- Final Thoughts: Light Up Your Tree with Confidence
How to String Christmas Lights on Tall Outdoor Trees Safely and Easily
There’s something magical about walking through a neighborhood during the holidays and seeing tall, majestic trees wrapped in twinkling lights. It feels like nature itself is joining in the celebration. But if you’ve ever stood at the base of a 20- or 30-foot tree, lights in hand, wondering how on earth you’re going to reach the top without turning your backyard into a scene from a slapstick comedy, you’re not alone. Stringing lights on tall outdoor trees is equal parts rewarding and intimidating—especially when safety, efficiency, and aesthetics all matter.
I’ve been there. A few years ago, I tried to drape lights around our 25-foot cedar using a wobbly ladder, a broomstick, and sheer stubbornness. By the time I reached the top, I was tangled, sweaty, and questioning my life choices. That experience taught me a valuable lesson: preparation, the right tools, and a smart strategy make all the difference. Whether you’re lighting up a single focal-point tree or transforming an entire yard, this guide will walk you through how to string Christmas lights on tall outdoor trees safely and easily—no circus acts required.
Plan Your Tree Lighting Strategy Before You Start
Choose the Right Type of Lights
Before you even touch a ladder, take a moment to think about the type of lights you’ll use. Not all Christmas lights are created equal—especially when it comes to outdoor use and height.
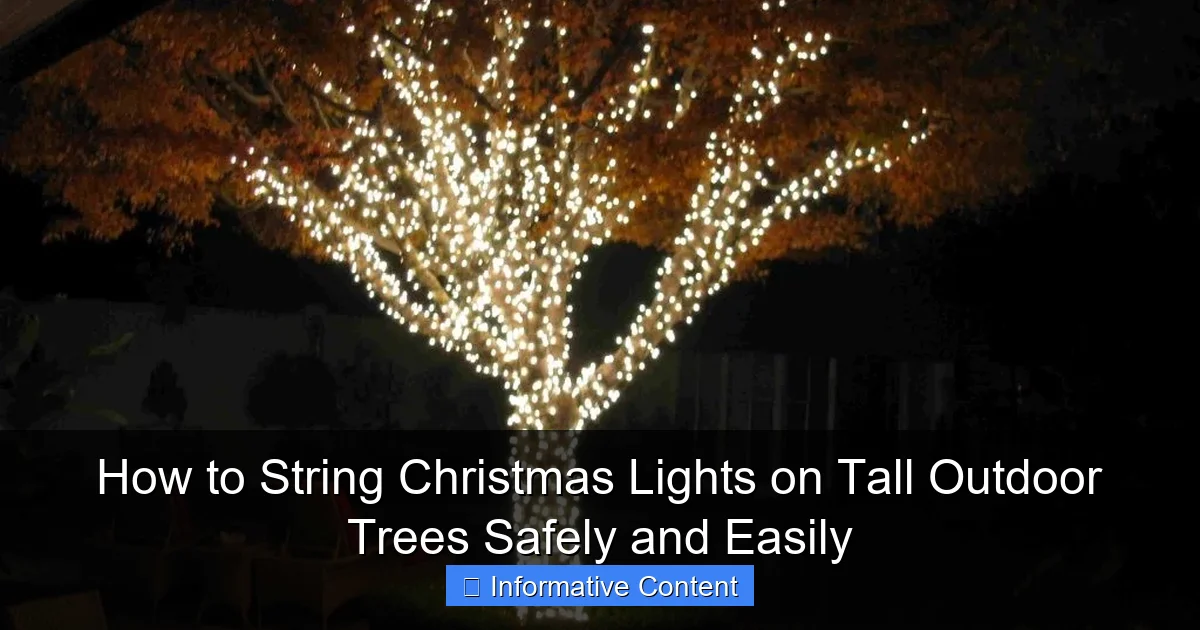
Visual guide about how to string christmas lights on tall outdoor trees
Image source: themprojects.com
- LED lights are your best friend for tall trees. They’re energy-efficient, cool to the touch, and last longer than incandescent bulbs. Look for outdoor-rated LED string lights with weatherproof sockets.
- Warm white vs. multicolor: Warm white gives a classic, elegant glow—perfect for tall evergreens. Multicolor is festive but can look chaotic if overdone. Consider using warm white for the main wrap and adding a few colored strands near the base for contrast.
- Length and spacing: Measure your tree’s circumference at the base and estimate how many vertical wraps you’ll need. For a 20-foot tree, you’ll likely need 10–12 vertical strands spaced about 12–18 inches apart. A 50-foot strand may only cover 4–5 wraps, so plan accordingly.
Pro tip: Buy 10–15% more lights than you think you’ll need. Trees are rarely perfect cylinders, and you’ll want extra for overlapping at the top and bottom or adding decorative clusters.
Map Out Your Lighting Design
Think of your tree like a canvas. Do you want a tight spiral wrap from bottom to top? A grid pattern with horizontal and vertical lines? Or a starburst effect with lights radiating from the center?
- Spiral wrap: Classic and clean. Start at the base and wrap upward, keeping tension consistent. This works well for conical trees like pines or firs.
- Vertical strands: Hang individual strands from the top down. Great for broad, spreading trees (like oaks or maples) where wrapping would look uneven.
- Hybrid approach: Combine both. Use vertical strands for structure and add a few spiral wraps around the lower third for depth.
Sketch your design on paper or use a photo-editing app to overlay light patterns on a picture of your tree. This helps avoid over-lighting and ensures balance. Remember: less is often more. A well-placed 500-light strand can outshine a tangled mess of 2,000.
Check Power Access and Extension Cords
Tall trees often sit far from outlets. Before you climb, map out your power path.
- Use outdoor-rated extension cords with a minimum 16-gauge thickness. Thinner cords overheat with long runs.
- Calculate total wattage. Most LED strings draw about 10–20 watts per 100 lights. A 500-light strand = 50–100 watts. Add all strands and stay under 80% of your circuit’s capacity.
- Use GFCI outlets or a GFCI-protected extension cord to prevent shocks in wet conditions.
- Plan for cord management. Tuck cords into tree bark or use clips to keep them from dangling.
Use the Right Tools and Equipment for Safety
Choose a Stable, Appropriate Ladder
If you’re using a ladder, don’t cut corners. A 24-foot extension ladder is ideal for 20–25-foot trees. For taller trees, consider a 32-foot model—but never go beyond your comfort zone.
- Always set the ladder on level, stable ground. Use ladder levelers or a spotter to hold it steady.
- Follow the 4-to-1 rule: For every 4 feet of height, move the base 1 foot away from the tree. This prevents tipping.
- Never stand on the top two rungs. Use a tool belt or a light pole hook to carry lights up with you.
Personal story: My neighbor once tried to string a 30-foot spruce with a 16-foot step ladder. He ended up leaning it against a branch, lost balance, and took out a birdbath. Not worth it.
Invest in a Tree Lighting Pole (Game-Changer!)
For trees over 20 feet, a telescoping light pole is a total game-changer. These poles extend to 20–30 feet and have a hook at the end to grab and hang lights.
- Models like the LightKeeper Pro or TreeLight Hook let you hang lights from the ground.
- Attach a light strand to the hook, raise the pole, and guide it through branches. Lower, reposition, repeat.
- No climbing, no ladder, no stress. Perfect for seniors, families, or anyone who values safety.
Cost: $40–$80. But consider it an investment—you’ll use it for years.
Use Light Clips and Ties (Not Tape or Nails!)
Never staple or nail lights to trees. It damages bark and creates fire hazards. Instead, use:
- UV-resistant plastic clips that attach to branches or bark without harming the tree.
- Zip ties for thick branches (cut them after the season).
- Fishing line for temporary vertical strands. Tie one end at the top, run it down, attach lights, then tie the bottom to a stake.
Pro tip: Wrap clips around branches, not just the trunk. This distributes weight and prevents sagging.
Step-by-Step: How to String Lights on a Tall Tree
Step 1: Start at the Top (If Using a Pole or Ladder)
Begin at the top of the tree, not the bottom. This prevents tangles and ensures even spacing.
- If using a pole: Hook the first light strand at the highest reachable point. Let the rest drape down.
- If using a ladder: Climb safely, attach the strand at the top, then work your way down.
- Secure the strand with a clip or tie every 2–3 feet as you go.
Why top-down? Imagine wrapping a candy cane from the bottom—it gets messy fast. Top-down keeps tension even and avoids pulling on lower branches.
Step 2: Create Vertical Strands or Spiral Wraps
For vertical strands:
- Space strands 12–18 inches apart around the trunk.
- Attach the top end first, then guide the strand down, clipping every 2–3 feet.
- Leave the plug-end near the base for easy connection.
For spiral wraps:
- Start at the top, wrap the strand around the trunk at a 45-degree angle.
- Keep tension consistent—don’t pull too tight or let it sag.
- Use clips every 3–4 feet to hold the spiral in place.
Example: On my 22-foot blue spruce, I use 11 vertical strands spaced 15 inches apart. It gives full coverage without overcrowding.
Step 3: Add Depth with Layered Lighting
Don’t just light the trunk. Add dimension with:
- Branch lighting: Clip a few strands to major side branches. This makes the tree glow from within.
- Inner core lighting: For dense trees, add a strand down the center. It creates a “halo” effect when backlit.
- Base clusters: Wrap the lower trunk tightly for a “crown” effect. Use warm white for elegance.
Pro tip: Use shorter, 25-foot strands for branches. Connect them to the main trunk strands with outdoor-rated splitters.
Step 4: Manage Cords and Plugs
Nothing ruins a beautiful tree like a tangled cord mess at the base.
- Use outdoor cord clips to guide all plug-ends to a central point near the trunk.
- Connect strands using outdoor power taps (rated for 15 amps).
- Run the final extension cord along the ground, away from foot traffic. Bury it under mulch or use a cord cover.
Bonus: Use a timer or smart plug to automate on/off times. No more climbing in the snow to turn them off!
Overcome Common Challenges and Mistakes
Dealing with Dense or Awkward Branching
Not all trees are symmetrical. Pines may have sparse tops; oaks may have low, wide limbs. Adapt your approach.
- For dense tops: Use a pole to weave lights through branches. Focus on outer edges for visibility.
- For low-hanging branches: Light them separately. Hang a strand from a nearby fence or post to “frame” the tree.
- For bare trunks: Use a spiral wrap with tighter spacing. Add a few “light clusters” (tightly wrapped sections) for visual interest.
Example: My neighbor’s maple has a 6-foot-wide crown. We use vertical strands from the top and add horizontal “rings” at 10 and 15 feet to fill space.
Avoiding Overheating and Fire Hazards
Even with LEDs, safety matters.
- Never exceed the manufacturer’s maximum strand connection limit (usually 210–300 watts).
- Inspect lights for frayed wires or cracked sockets before hanging.
- Don’t cover lights with snow or ice. Use a broom to gently clear buildup.
- Turn off lights during storms or high winds.
Stat: According to the U.S. Fire Administration, holiday lights cause about 1,000 fires annually. Don’t be a statistic.
Preventing Tangling and Frustration
Tangled lights are the bane of every decorator’s existence.
- Unpack and lay out all strands before climbing. Test them first.
- Use a light reel or storage reel to keep strands organized.
- If a strand gets tangled, don’t pull. Backtrack and untwist carefully.
Pro tip: Wrap each strand around a cardboard rectangle (like a gift wrap tube) for storage. No more “Christmas knot” nightmares.
Maintenance, Removal, and Storage
Inspect and Maintain During the Season
Check your lights weekly.
- Look for burnt-out bulbs. Replace them promptly—one dead bulb can dim an entire section.
- Clear snow and ice buildup. Heavy snow can snap branches.
- Adjust clips that shift due to wind or rain.
Use a light tester to find dead strands without climbing. Just plug in the strand and press the tester against each bulb.
Safely Remove and Store Lights
When the season ends, remove lights carefully.
- Start at the top and work down. Unclip strands, don’t yank.
- For vertical strands: Gently pull from the bottom while someone guides the top.
- For spiral wraps: Unwrap slowly, coiling each strand as you go.
- Store in a cool, dry place. Use reels, bins, or labeled bags.
Pro tip: Label each strand with its length and type (e.g., “50ft Warm White LED”). Makes next year’s setup a breeze.
Long-Term Tree Health
Good lighting shouldn’t harm your tree.
- Remove all clips, ties, and cords by spring. Plastic can girdle bark.
- Inspect for broken branches or bark damage.
- Water the tree well in spring and fall—holiday lights add minimal heat, but stress adds up.
Data Table: Recommended Light Setup by Tree Height
| Tree Height | Light Type | Number of Strands | Spacing | Recommended Tool | Estimated Time |
|---|---|---|---|---|---|
| 15–20 ft | LED, 100–200 lights/strand | 8–10 vertical | 12–15 in | 20 ft ladder or pole | 1.5–2 hours |
| 20–25 ft | LED, 200–300 lights/strand | 10–12 vertical or spiral | 15–18 in | 24–28 ft ladder or pole | 2–2.5 hours |
| 25–30 ft | LED, 300–500 lights/strand | 12–14 vertical | 18–24 in | 30 ft pole or professional help | 2.5–3 hours |
| 30+ ft | LED, 500+ lights/strand | 14–16+ (hybrid) | 24+ in | 30+ ft pole or lift | 3+ hours (or hire pro) |
Final Thoughts: Light Up Your Tree with Confidence
Stringing Christmas lights on tall outdoor trees doesn’t have to be a stressful, dangerous chore. With the right tools, a solid plan, and a little patience, you can transform any towering evergreen into a breathtaking holiday centerpiece. Remember: safety first. A light pole beats a ladder any day. LEDs beat incandescent. And a well-placed 500-light strand beats 2,000 tangled ones.
I’ll never forget the year my family gathered to light our tree using the new telescoping pole. No ladders, no yelling, no near-falls. Just laughter, hot cocoa, and the soft glow of warm white LEDs climbing into the night sky. That’s the magic of the season—shared, safe, and beautiful.
So grab your lights, plan your design, and go for it. Whether you’re lighting a modest 15-footer or a neighborhood landmark, you’ve got this. And when you stand back to admire your work, take a photo. Years from now, it’ll remind you of the joy, the effort, and the light you brought into the world—one tall tree at a time.
Frequently Asked Questions
How do I safely string Christmas lights on tall outdoor trees without a ladder?
Use a light-hanging pole with a hook attachment or a remote-controlled light reel to avoid climbing. Ensure the pole is insulated and rated for outdoor use to prevent electrical hazards.
What’s the best method for evenly spacing lights on a tall tree?
Start at the base and work upward in a spiral pattern, maintaining consistent spacing (6–8 inches apart) using zip ties or light clips. A helper can guide the strand to prevent tangling.
Can I use regular extension cords for outdoor Christmas lights on tall trees?
No—always use outdoor-rated, GFCI-protected extension cords with proper gauge (14 or 16 AWG) to handle the load. Overloading cords can cause fire hazards, especially in wet conditions.
How do I avoid damaging tree bark when installing lights?
Use plastic light clips or flexible zip ties instead of nails or staples, which can harm the tree. Wrap lights loosely around branches to prevent girdling as the tree grows.
How many strands of Christmas lights can I safely connect for tall outdoor trees?
Check the manufacturer’s rating (usually 3–5 max for incandescent, up to 20+ for LED). Exceeding limits risks overheating—use a power strip with overload protection for longer runs.
What tools make hanging lights on tall outdoor trees easier?
A telescoping light pole, magnetic hooks, or a drone with a light dispenser can help reach high branches. For stability, pair tools with a buddy system to manage the strand’s weight.

