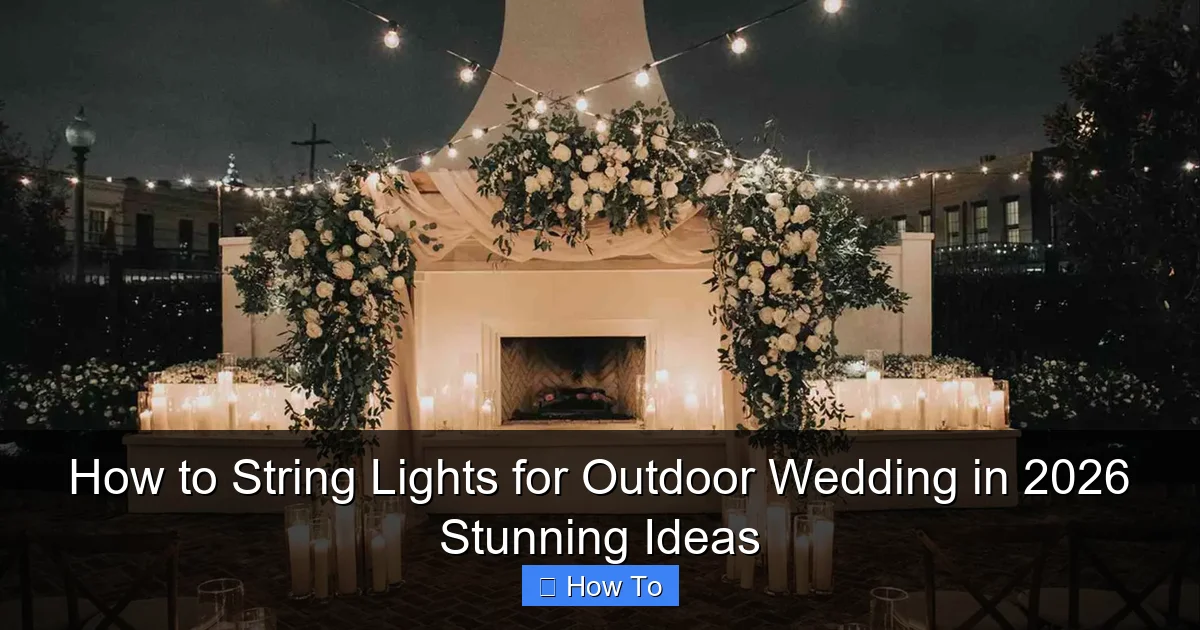
Featured image for how to string lights for outdoor wedding
Image source: brides.com
Transform your outdoor wedding into a magical wonderland by strategically stringing lights along trees, pergolas, and overhead canopies to create a warm, romantic ambiance. Use weather-resistant LED string lights in soft white or warm hues, spacing them evenly and securing them with zip ties or hooks for a safe, polished look. For 2026’s most stunning effect, layer different heights and incorporate dimmers to control the mood as daylight fades.
“`html
How to String Lights for Outdoor Wedding in 2026 Stunning Ideas
Key Takeaways
- Plan your layout first: Sketch light placement to ensure even coverage and avoid last-minute changes.
- Use weatherproof lights: Choose durable, outdoor-rated lights to withstand unpredictable weather conditions.
- Anchor securely: Install poles or hooks at safe heights for stable, tangle-free string light setups.
- Layer lighting types: Combine string lights with lanterns or LEDs for depth and ambiance.
- Time it right: Hang lights 2-3 days prior to avoid damage and ensure flawless execution.
- Test before the event: Check all connections and bulbs to fix issues before the big day.
Why This Matters / Understanding the Problem
Imagine this: your guests step into your outdoor wedding venue as the sun dips below the horizon. The air is warm, the music soft, and suddenly—bam—a canopy of twinkling lights unfolds above, wrapping the space in golden, dreamy warmth. That’s the magic of how to string lights for outdoor wedding in 2026 stunning ideas—it’s not just decoration; it’s an experience.
But here’s the catch: getting it right isn’t as simple as draping a few strands between trees. Poor planning can lead to dim lighting, tangled messes, or even safety hazards. I’ve been there—my sister’s backyard wedding had one strand flickering like a haunted house because we didn’t test the lights beforehand. Lesson learned.
Whether you’re planning a rustic barn wedding, a garden soiree, or a beachside vow exchange, lighting sets the mood. And in 2026, couples want more than just “pretty.” They want stunning, Instagram-worthy, and safe setups that last all night. That’s why nailing how to string lights for outdoor wedding in 2026 stunning ideas is essential.
What You Need
Before we dive into the how, let’s talk about the what. You don’t need a professional crew (though they’re great), but you do need the right tools and materials. Here’s your checklist:
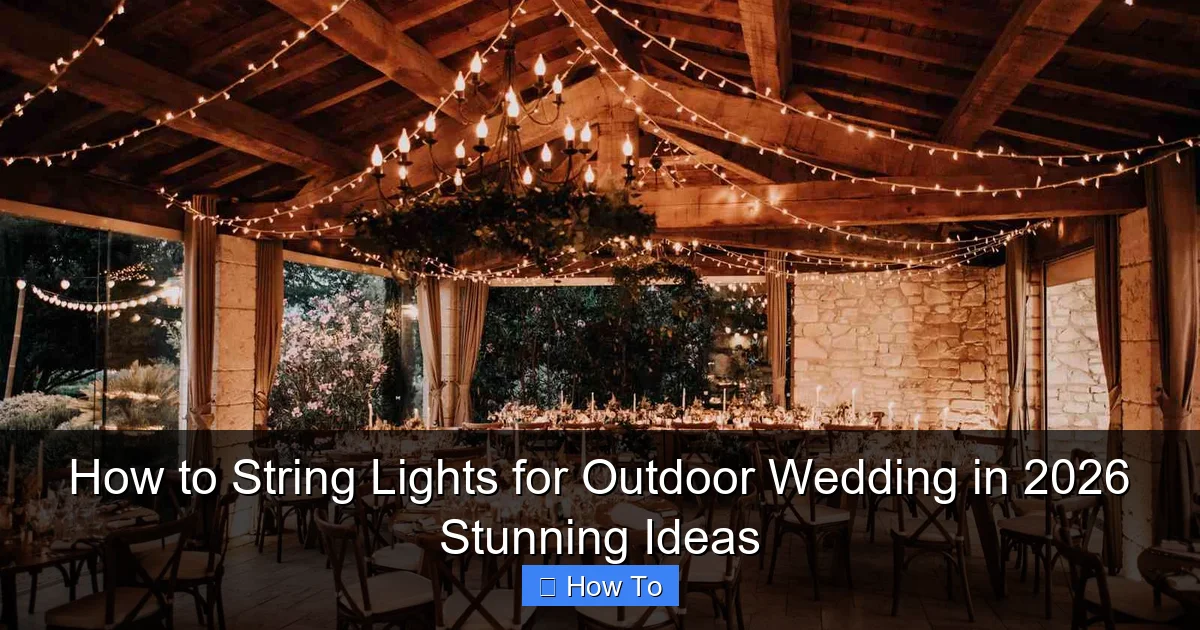
Visual guide about how to string lights for outdoor wedding
Image source: brides.com
- String lights (LED recommended): Opt for weatherproof, outdoor-rated LED strands. They last longer, use less power, and stay cool. Look for “dimmable” options for mood control.
- Extension cords and power sources: Outdoor-rated, GFCI-protected cords. Avoid overloading circuits.
- Mounting hardware: Zip ties, outdoor-rated adhesive hooks, screw-in hooks, or light clips. For trees, use non-damaging tree straps.
- Measuring tape and ladder: Essential for planning and reaching high spots.
- Timer or smart plug: So lights turn on automatically at dusk.
- Weatherproofing gear: Waterproof wire nuts, electrical tape, and conduit for exposed connections.
- Backup lights: Always have extras. One burnt-out bulb can ruin a section.
Pro Tip: Renting lights from a local event supplier can save money and ensure professional-grade quality. Ask if they offer setup support—many do.
Step-by-Step Guide to How to String Lights for Outdoor Wedding in 2026 Stunning Ideas
Step 1: Choose Your Lighting Style & Layout
Start with vision. What vibe are you going for? Romantic, bohemian, modern, or vintage? The style dictates your layout.
- Canopy (most popular): Lights crisscross overhead, like a net. Ideal for gardens, patios, or under a tent.
- Garland (draped): Lights hang in soft curves between trees, poles, or structures. Perfect for a whimsical, organic look.
- Pathway lighting: Lines of lights along walkways or seating aisles. Great for safety and ambiance.
- Backdrop lighting: Focused on the ceremony or sweetheart table area.
Sketch your venue. Use paper or a free tool like Canva. Mark where lights will go. For a canopy, aim for a grid pattern: 2–3 feet between rows. For garlands, plan gentle S-curves.
This is where how to string lights for outdoor wedding in 2026 stunning ideas really begins—your layout is the blueprint.
Step 2: Measure & Calculate Light Needs
Don’t guess. Measure the area. For a canopy:
- Measure the length and width of the space (e.g., 20 ft x 30 ft).
- Decide on spacing (e.g., 2.5 ft between rows).
- Calculate total linear feet: (Width / spacing) x length + (Length / spacing) x width.
- Example: (30 / 2.5) x 20 + (20 / 2.5) x 30 = 240 + 240 = 480 ft.
Now, check light strand length. Most are 25–50 ft. You’ll need 10–20 strands (480 ft / 48 ft per strand). Always add 10% extra for slack.
For garlands, measure the distance between anchor points and add 20% for drape. If trees are 15 ft apart, use 18 ft strands.
Pro tip: Use connectable lights so you can plug strands together. Avoid daisy-chaining more than 3–5 strands per outlet to prevent overload.
Step 3: Test All Lights & Power Setup
Before hanging, test every strand. Plug them in indoors. Check for:
- Flickering or dim bulbs
- Damaged wires
- Faulty plugs
Replace or repair any issues. Nothing worse than discovering a dead strand at sunset.
Next, map your power sources. Identify outdoor outlets or generators. Use GFCI-protected circuits to avoid tripping. For large setups, rent a portable power station or hire an electrician to install temporary outdoor outlets.
Plan your extension cords. Run them along the ground, not across walkways (safety hazard). Use cord covers if needed. For long runs, use 12-gauge cords to prevent voltage drop.
Step 4: Install Anchor Points
Where will lights attach? Common options:
- Trees: Use tree straps (fabric with buckles) or non-damaging hooks. Never screw into bark—it harms the tree and may violate venue rules.
- Poles or posts: Screw-in hooks, zip ties, or light clips. For metal poles, use adhesive hooks.
- Tents or structures: Use clips or zip ties on the frame. For fabric tents, check with the rental company first.
- Buildings or fences: Adhesive hooks (for smooth surfaces) or screw-in hooks (for wood).
Install anchors at consistent heights. For a canopy, aim for 8–10 ft high. Use a ladder and helper. Mark each anchor with tape so you don’t forget.
For trees, wrap straps around the trunk, not branches. Tighten just enough to hold—don’t constrict growth.
Step 5: Hang the Lights
Now the fun part! Start with one side and work across.
- For canopy grids: Attach one end of a strand to an anchor. Unroll the strand to the next anchor, leaving a little slack. Secure with a zip tie or hook. Continue row by row.
- For garlands: Drape strands in soft curves. Use zip ties every 2–3 ft to prevent sagging. Add extra ties at the bottom of curves for weight support.
- For pathways: Run strands along both sides of the path. Use ground stakes or low hooks to keep them 12–18 inches off the ground.
Keep strands straight (for grids) or gently curved (for garlands). Avoid sharp angles—they strain wires.
Use light clips for precise placement. They grip the bulb socket and let you adjust height.
For long spans, add mid-span supports (e.g., a hook on a center pole) to prevent drooping.
Step 6: Connect, Power, and Test
Once all lights are up, connect them:
- Plug strands together at anchors (if using connectable lights).
- Run extension cords to power sources. Keep connections off the ground—use zip ties to lift them 6+ inches.
- For exposed connections, use waterproof wire nuts and wrap with electrical tape.
Plug in and test. Walk the space. Look for:
- Dark spots or overly bright areas
- Flickering
- Cords in walkways
Adjust as needed. Add dimmers or extra strands to fix dark zones.
Set a timer or smart plug to turn lights on at dusk and off at midnight. No one wants to fumble with switches in the dark.
Step 7: Weatherproof & Safety Check
Outdoor weddings mean weather. Protect your setup:
- Seal all outdoor connections with waterproof tape or conduit.
- Secure cords to prevent tripping. Use stakes, tape, or covers.
- For windy areas, add extra zip ties or clips.
- If rain is forecast, have a backup plan (e.g., a clear tent or indoor option).
Check local fire codes. Some venues ban certain lighting types or require permits. When in doubt, consult the venue manager.
Finally, do a safety walk with your planner or a friend. Fix any hazards before guests arrive.
Pro Tips & Common Mistakes to Avoid
After helping with 10+ outdoor weddings, I’ve seen what works—and what doesn’t. Here’s my insider advice:
Pro Tip 1: Use warm white LEDs (2700K–3000K). They mimic candlelight and flatter skin tones. Avoid cool white (4000K+)—it looks harsh.
Pro Tip 2: Layer your lighting. Combine string lights with uplighting (lights aimed at trees or structures) and candles for depth.
Pro Tip 3: Rent a lighting designer for large venues. They’ll optimize placement, power, and safety. Worth every penny.
Pro Tip 4: Use app-controlled smart lights (like Philips Hue). Change colors or brightness from your phone. Perfect for first dance moments.
Common Mistake 1: Ignoring the power source. I once saw a wedding where the lights died at 8 PM because the outlet was on a different circuit. Always test power load and have backups.
Common Mistake 2: Overcrowding. Too many lights can look chaotic. Less is more. Focus on key areas: ceremony, dining, dance floor.
Common Mistake 3: Forgetting the wind. Lights can sway and tangle. Use shorter strands and extra clips in breezy spots.
Common Mistake 4: Not testing the setup early. Install lights at least 24 hours before the event. Fix issues when there’s still time.
Remember: how to string lights for outdoor wedding in 2026 stunning ideas isn’t just about aesthetics. It’s about creating a safe, functional, and unforgettable atmosphere.
FAQs About How to String Lights for Outdoor Wedding in 2026 Stunning Ideas
Got questions? I’ve got answers. Here’s what couples ask most:
Q: Can I use regular indoor string lights outdoors?
A: Nope. Indoor lights aren’t weatherproof. Moisture can damage them and cause fire hazards. Always use outdoor-rated, weatherproof lights. Look for an IP44 or higher rating.
Q: How many lights do I need for a 200-guest outdoor wedding?
A: It depends on the space, but here’s a rough guide: for a 50’x50’ area, you’ll need 600–800 ft of lights (12–16 strands). Focus on the ceremony and dining areas first. You can always add more.
Q: What if my venue has no power outlets?
A: Rent a portable generator or solar-powered lights. Generators are loud, so place them far from the party. Solar lights charge during the day and glow at night—perfect for eco-friendly weddings.
Q: Are solar string lights bright enough?
A: Modern solar lights are surprisingly bright. Look for models with 50+ lumens per bulb. They’re ideal for pathways or small garlands. For canopies, use solar with a battery backup.
Q: How do I hide cords without tripping hazards?
A: Use cord covers (rubber ramps) or bury them under mulch or grass. For pathways, run cords along the edge and cover with fabric. Always mark them with caution tape if visible.
Q: Can I DIY this, or should I hire a pro?
A: DIY is doable for small setups (under 500 ft). For large or complex designs (like a 200-ft canopy), hire a pro. They have the gear and experience to avoid mistakes. Plus, you’ll save stress on your big day.
Q: What’s the best way to remove lights after the wedding?
A: Take photos first! Then, remove zip ties and hooks carefully. Coil lights loosely to prevent tangling. Store in a dry place. Reuse them for future events or donate to a local theater.
Final Thoughts
Lighting transforms an outdoor wedding from “nice” to “wow.” But it’s not just about hanging lights—it’s about crafting an experience. When done right, how to string lights for outdoor wedding in 2026 stunning ideas becomes the backdrop for memories: your first dance under a starry canopy, guests laughing in a golden glow, the moment you say “I do” surrounded by warmth.
Start early. Plan meticulously. Test everything. And don’t forget the small details: a timer, extra bulbs, and a weather backup. Your guests won’t notice the work behind the scenes—they’ll only remember the magic.
So grab your measuring tape, call a friend, and get stringing. Your dream outdoor wedding is just a few twinkles away. And when the sun sets and the lights come on? You’ll know—every zip tie, every strand, every late-night test—was worth it.
“`

