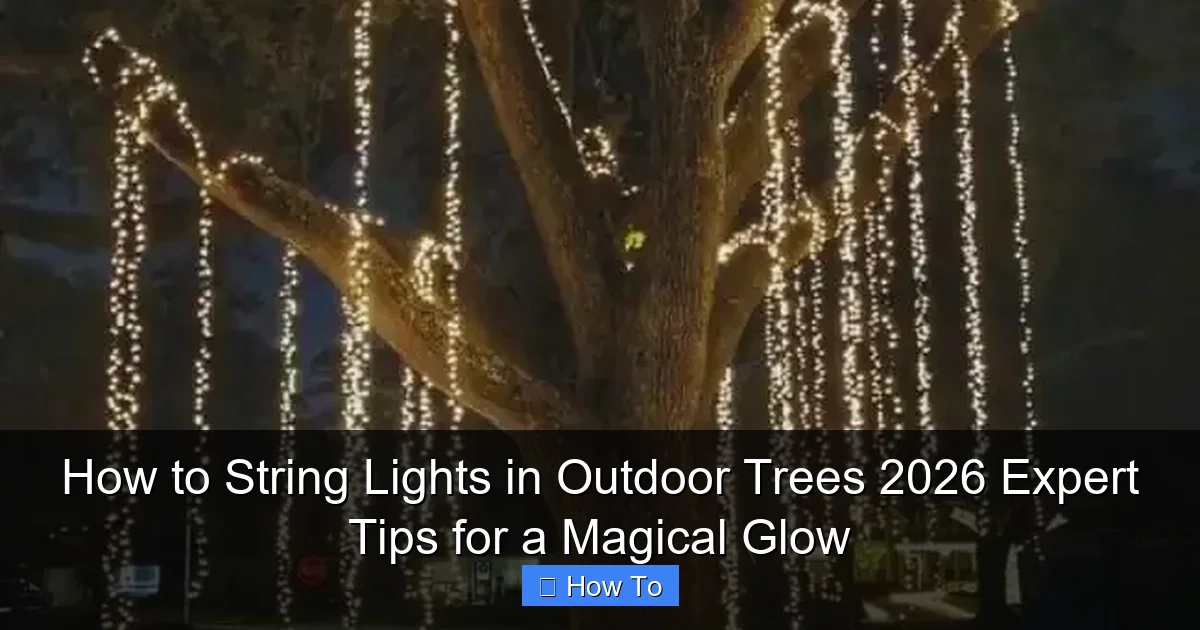
Featured image for how to string lights in outdoor trees
Image source: i1.wp.com
Transform your outdoor space into a breathtaking nighttime oasis by choosing weather-resistant, LED string lights and wrapping them evenly around tree trunks and branches for balanced illumination. Use non-invasive clips or zip ties to secure lights without harming the tree, and plan your layout from the base upward, working in layers to achieve depth and a magical glow. Always connect to a GFCI outlet for safety and consider a timer for effortless, energy-efficient ambiance.
“`html
How to String Lights in Outdoor Trees 2026 Expert Tips for a Magical Glow
Key Takeaways
- Plan your layout first: Sketch tree placements and light paths for balanced coverage.
- Use outdoor-rated lights: Ensure weatherproof, LED, and rated for extended outdoor use.
- Anchor securely: Wrap lights around trunks and branches without damaging bark.
- Distribute evenly: Weave lights vertically and horizontally for a natural, glowing effect.
- Time it right: Install early to avoid windy or rainy weather complications.
- Add timers: Automate on/off times for safety and energy efficiency.
Why This Matters / Understanding the Problem
There’s something undeniably magical about walking into a backyard lit by soft, twinkling lights draped through the trees. It feels like stepping into a storybook or a cozy holiday village—even in the middle of summer. But let’s be honest: how to string lights in outdoor trees 2026 expert tips for a magical glow isn’t just about aesthetics. It’s about creating a space where memories happen—late-night chats, family gatherings, or quiet evenings with a book.
Yet, many of us hesitate. We’ve seen tangled messes, lights that barely last a season, or installations that look more like a construction site than a fairy tale. The truth? It’s not about spending a fortune or being an electrician. It’s about smart planning, the right tools, and knowing how to work with nature, not against it.
Whether you’re prepping for a summer party, holiday season, or just want to elevate your outdoor space, this guide walks you through how to string lights in outdoor trees 2026 expert tips for a magical glow—step by step, with zero jargon and zero stress.
What You Need
Before you start climbing or untangling last year’s lights, let’s gather your toolkit. Nothing fancy—just the essentials to make this project smooth, safe, and long-lasting.
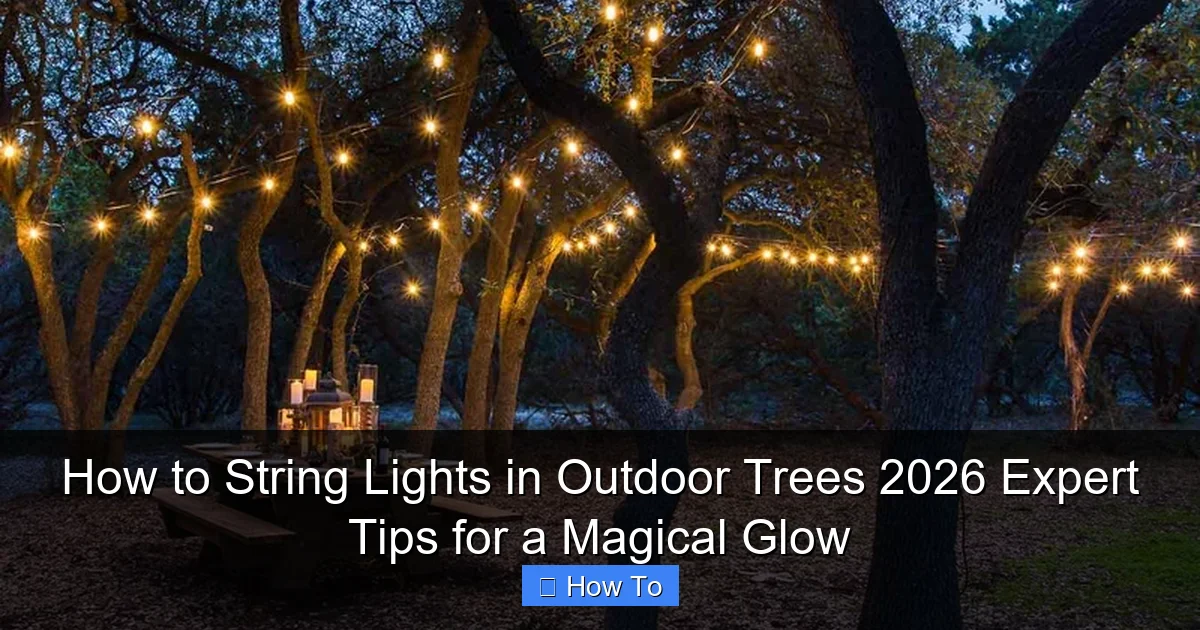
Visual guide about how to string lights in outdoor trees
Image source: cdn.shopify.com
- Outdoor-rated string lights – Look for UL-listed, weatherproof, and ideally with replaceable bulbs (LEDs last longer and use less power).
- Extension cords (outdoor-rated) – At least 20 feet long, preferably with GFCI protection for safety.
- Light clips or hooks – Tree-friendly clips, zip ties (UV-resistant), or commercial light hangers.
- Ladder (sturdy, non-conductive) – A fiberglass or aluminum step ladder, depending on tree height.
- Measuring tape – To plan spacing and avoid overbuying.
- Garden gloves – Protect your hands from rough bark and branches.
- Timer or smart plug – So your lights turn on automatically at dusk.
- Drill (optional) – For installing permanent hooks (only if you’re going for a long-term setup).
- Zip ties and cable clips – For securing cords along the ground or trunk.
Pro tip: Buy 10–15% more lights than you think you’ll need. Trees are rarely perfectly spaced, and you’ll want flexibility.
Step-by-Step Guide to How to String Lights in Outdoor Trees 2026 Expert Tips for a Magical Glow
Step 1: Plan Your Layout Like a Pro
Before touching a single light, take 15 minutes to map your design. Walk around your yard with a notepad or use a garden planning app.
- Sketch your trees – Note trunk diameter, branch height, and spacing between trees.
- Decide on the style – Do you want a canopy (lights crisscrossing above), wrap (spiraling up the trunk), or drape (hanging down like icicles)?
- Measure distances – Use your tape to mark where lights will go. For canopy designs, aim for 3–5 feet between anchor points.
- Locate power sources – Identify the nearest outdoor outlet. If it’s far, plan for extension cords or a temporary power station (e.g., a GFCI-protected box).
Personal insight: I once tried to eyeball a canopy between four trees. It looked crooked and used 30% more lights than needed. Now, I always measure first. It saves time, money, and frustration.
Step 2: Choose the Right Lights for Your Space
Not all string lights are created equal. For how to string lights in outdoor trees 2026 expert tips for a magical glow, your choice matters.
- LEDs are best – They’re energy-efficient, last 25,000+ hours, and stay cool (safe for trees).
- Bulb spacing – Tight spacing (4–6 inches) gives a dense glow; wider (12 inches) creates a subtle, starry effect.
- Color temperature – Warm white (2700K) feels cozy; cool white (4000K) feels crisp and modern. Avoid blue unless you’re going for a sci-fi vibe.
- Length matters – For canopy designs, buy 50–100 ft strands. For trunk wraps, 20–30 ft per tree is often enough.
Bonus: Look for “end-to-end” lights—they let you connect multiple strands without overloading circuits.
Warning: Never use indoor lights outdoors. They’re not sealed against rain, and the risk of shorting or fire is real. I learned this the hard way when my $40 “outdoor” lights died in one storm.
Step 3: Install Anchor Points Safely
Now, secure where your lights will attach. This is the backbone of your installation.
- For canopy designs: Use tree-friendly light clips (rubber-padded, no nails). Clip them to sturdy branches at least 1.5 inches thick, 8+ feet high.
- For trunk wraps: Use zip ties (UV-resistant, black) or light hangers. Space them every 12–18 inches as you go up.
- For permanent setups: Drill pilot holes and install stainless steel eye hooks (1/4 inch) into trunks. Use a level to keep them aligned.
Key: Don’t damage the bark. Wraps should be snug but not tight—trees grow! For wraps, leave a 1/4-inch gap between the light and bark to prevent girdling.
Pro tip: Use a ladder stabilizer (a $20 tool that attaches to your ladder) to prevent wobbling on uneven ground. My neighbor once fell off his—don’t be that guy.
Step 4: String the Lights with a System
Now the fun part! Start from the power source and work outward.
- For canopy: Attach the first end of the strand to a low anchor point (or a ground stake). Run it to the first tree, clip it, then stretch it to the next. Use a second person to hold tension—this prevents sagging.
- For wraps: Start at the base. Wrap the light around the trunk, securing every 12 inches. Go up in a spiral, not a straight line. At the top, secure the end and let the rest drape down like a waterfall.
- For drapes: Hang lights from high branches using clips. Let them fall 3–5 feet, then secure the end to a lower branch or stake.
Rule of thumb: Keep lights taut but not tight. Wind and rain will add stress. Sagging looks sloppy and can break bulbs.
Personal insight: I once used fishing line to “invisibly” hang lights. It worked—until it didn’t. The line stretched, lights sagged, and my wife called it a “spider web.” Stick to clips or hooks.
Step 5: Manage Cords and Power Sources
Messy cords ruin the magic. Tame them early.
- Use cable clips – Secure extension cords to tree trunks, fences, or the ground every 3–5 feet.
- Hide cords in mulch or grass – Bury them slightly (not deep) to protect from mowers.
- Use a GFCI outlet – Protects against shocks. If you don’t have one, buy a GFCI extension cord ($20).
- Plug into a timer – Set it for 5 PM to 11 PM. No more remembering to turn lights on/off.
For large setups: Use a power distribution box (a waterproof hub that splits one outlet into 6–8). It keeps cords organized and reduces tripping hazards.
Warning: Never overload circuits. Most outdoor outlets handle 1,800 watts max. Check your light wattage—LEDs are usually 10–50W per strand.
Step 6: Test, Adjust, and Admire
Turn on the lights at dusk. Walk around and check:
- Are lights evenly spaced? Adjust clips if needed.
- Any sagging or tangles? Re-secure loose strands.
- Does the glow feel balanced? Add a few extra strands in dark zones, or remove some if it’s too bright.
Pro move: Invite a friend to view from different angles. What looks perfect up close might feel overwhelming from the patio.
Personal insight: My first canopy looked great—until I saw it from the street. It was blinding! I added a dimmer switch (yes, they exist for outdoor lights) and now it’s just right.
Step 7: Maintain for Longevity
Good news: With a little care, your lights can last 5+ years.
- Inspect monthly – Look for frayed cords, loose clips, or dead bulbs.
- Trim branches – Overgrown limbs can rub against lights, causing shorts.
- Store properly – At season’s end, coil lights loosely and store in a dry, cool place. Use a labeled bin to avoid next year’s tangle.
- Upgrade bulbs – If one LED dies, replace it (most have user-replaceable bulbs).
For permanent setups: Re-secure clips every spring. Trees grow, and clips can loosen.
Pro Tips & Common Mistakes to Avoid
After 10+ years of stringing lights, here’s what I’ve learned the hard way:
- Don’t skip the timer – Manual switches lead to forgotten lights. A timer saves energy and extends bulb life.
- Use the “two-person rule” – One person holds the ladder, the other installs. Safety first!
- Avoid nails or staples – They damage trees and rust over time. Use clips or zip ties.
- Respect the tree – Never wrap lights too tightly. Trees need to breathe. For wraps, leave a 1/4-inch gap.
- Think about wind – In stormy areas, use shorter strands and more anchor points. I once had a 100-ft canopy blow down in 30 mph winds—lesson learned.
- Light color matters – Warm white blends with nature; cool white can look clinical. Test a strand before buying a dozen.
- Plan for growth – If you’re using young trees, account for future size. Install anchors at 10 ft now, not 6 ft.
Personal insight: I once used regular zip ties on a pine tree. The sap made them brittle and they snapped in winter. Now I only use UV-resistant, outdoor-grade ties. Small change, big difference.
For how to string lights in outdoor trees 2026 expert tips for a magical glow, remember: less is often more. A few well-placed strands can be more impactful than an overloaded canopy.
FAQs About How to String Lights in Outdoor Trees 2026 Expert Tips for a Magical Glow
Q: Can I leave outdoor tree lights up all year?
A: Yes—but with caveats. Use commercial-grade, all-weather lights. Check monthly for damage. In snowy areas, remove lights from low branches to avoid snow load. I leave mine up year-round, but I’m in a mild climate (Zone 7).
Q: How high should I hang canopy lights?
A: Aim for 8–12 feet. High enough to avoid head bumps, low enough to create intimacy. For a 10-person party, 10 feet is perfect. For a quiet nook, 8 feet feels cozier.
Q: What if I have a tall tree with no low branches?
A: Use a light pole (a 10-ft PVC pipe with a hook at the top). Drive it 2 ft into the ground near the tree. Attach one end of your canopy to the pole, the other to the tree. I used this for a 25-ft oak—worked like a charm.
Q: Can I use solar lights in trees?
A: Only if the tree gets 6+ hours of direct sun. Solar lights need sunlight to charge. In shade, they’ll glow dimly or not at all. For shady areas, stick to plug-in lights with a long extension cord.
Q: How do I prevent lights from tangling when storing?
A: Coil them around a piece of cardboard (like a paper towel tube) or use a light reel. Never toss them in a box. I use labeled bins with dividers—one for each tree or section.
Q: Are smart lights worth it?
A: For how to string lights in outdoor trees 2026 expert tips for a magical glow, yes! Smart lights let you change colors, dim, or schedule via an app. I use Philips Hue—set it to “candlelight” for dinners, “twinkle” for parties. But they’re pricier ($30–50 per strand).
Q: What’s the safest way to hang lights on a large tree?
A: Use a tree-friendly rope system. Tie a rope to a high branch (use a throw line if needed). Attach your lights to the rope, then pull them up. This avoids climbing and keeps pressure off the bark. I use paracord—strong, lightweight, and UV-resistant.
Final Thoughts
Creating a magical glow in your trees isn’t about perfection—it’s about intention. It’s about choosing lights that reflect your style, installing them with care, and maintaining them so they last. Whether you’re stringing lights for a holiday, a birthday, or just because, remember: how to string lights in outdoor trees 2026 expert tips for a magical glow is a skill, not a chore.
Start small. Try one tree this year. Next year, expand. And always—test at night. That’s when the magic happens. When the world is quiet, and your backyard feels like a sanctuary, you’ll know it was worth it.
So grab your ladder, call a friend, and let the glow begin. Your trees—and your memories—will thank you.
“`

