Featured image for how to string lights on outdoor pine tree
Image source: as2.ftcdn.net
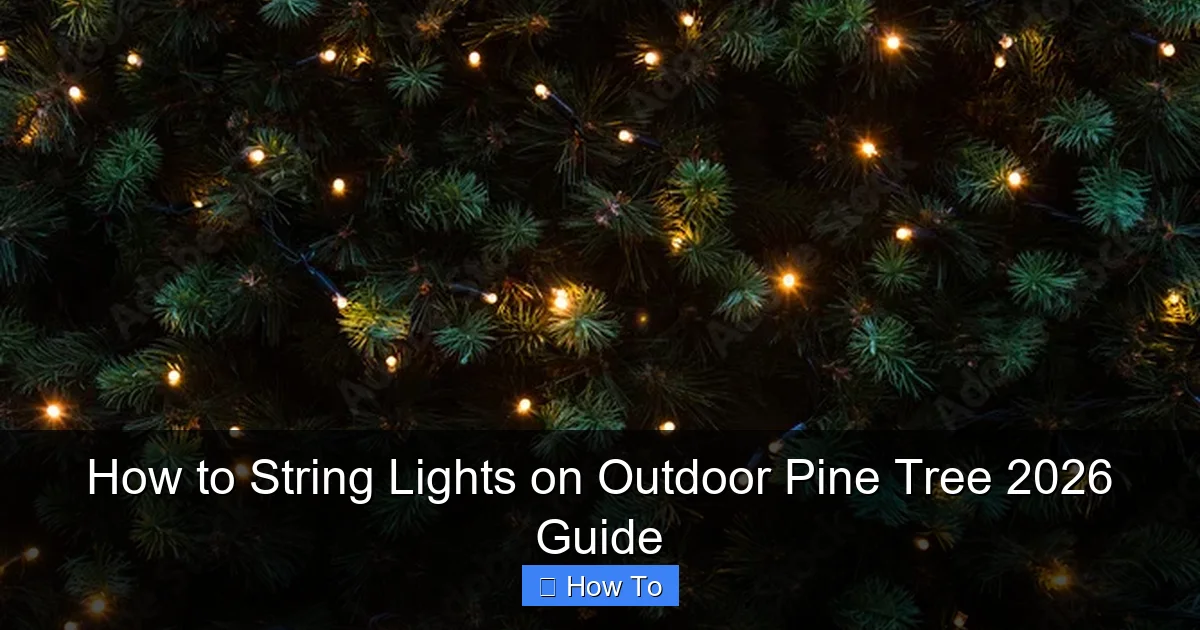
Transform your outdoor pine tree into a dazzling nighttime centerpiece by safely stringing lights from the trunk outward, using waterproof LED strands and non-invasive clips or zip ties to protect the bark. Prioritize even spacing and a spiral pattern for maximum visual impact while avoiding overloading branches—ensuring a festive, long-lasting glow all season.
“`html
How to String Lights on Outdoor Pine Tree 2026 Guide
Key Takeaways
- Plan spacing first: Measure branches and mark light placement for even coverage.
- Use outdoor-rated lights: Ensure durability with weatherproof, UL-listed LED strands.
- Start from the trunk: Wrap lights upward in spiral for balanced illumination.
- Secure with clips: Avoid nails; use insulated hooks or zip ties for safety.
- Test before hanging: Check bulbs and connections to prevent mid-installation failures.
- Power safely: Use GFCI outlets and hide cords with protective covers or conduit.
Why This Matters / Understanding the Problem
You’ve seen them—those magical pine trees glowing like something out of a holiday postcard. Maybe you’ve tried to recreate that glow yourself, only to end up with tangled lights, droopy strands, or worse, a tree that looks like it’s having a bad hair day. Trust me, I’ve been there.
Stringing lights on a pine tree isn’t as simple as wrapping them around like a gift. Pines have dense, prickly branches, uneven growth, and often sit in hard-to-reach spots. And if you’re not careful, you’ll spend more time untangling than actually enjoying the result.
That’s where this How to String Lights on Outdoor Pine Tree 2026 Guide comes in. Whether you’re decorating for the holidays, a backyard party, or just want year-round ambiance, this guide gives you a practical, stress-free method. We’ll walk through everything—from prep to cleanup—so your tree shines bright without the frustration.
And don’t worry: this isn’t a one-size-fits-all tutorial. I’ll share what works for small, medium, and large pines, plus how to keep your lights looking good for years. Let’s turn that pine into a twinkling masterpiece.
What You Need
Before you start, gather these tools and materials. Having everything on hand saves time and avoids mid-project trips to the hardware store.

Visual guide about how to string lights on outdoor pine tree
Image source: christmaslightsetc.com
- Outdoor-rated LED string lights (preferably warm white or multicolor, depending on your vibe)
- Extension cords (outdoor-safe, GFCI-protected)
- Light clips or zip ties (weather-resistant, UV-stable)
- Ladder or step stool (adjustable height, stable on uneven ground)
- Gloves (to protect your hands from pine sap and sharp needles)
- Measuring tape (to estimate how many feet of lights you need)
- Timer or smart plug (optional, but great for automatic on/off)
- Light tester (to check strands before hanging)
- Bucket or bin (to hold tools and avoid tripping)
- Twine or painter’s tape (for marking spacing, if needed)
Pro Insight: I learned the hard way that not all zip ties are created equal. Cheap ones crack in winter. Go for UV-resistant ones—they’ll last through sun, snow, and wind.
Bonus: If your pine is near a power source, you’re golden. If not, consider a solar-powered LED string for eco-friendly glow. But for this guide, we’re focusing on traditional electric lights—perfect for the How to String Lights on Outdoor Pine Tree 2026 Guide.
Step-by-Step Guide to How to String Lights on Outdoor Pine Tree 2026 Guide
Step 1: Choose the Right Lights
Not all lights are pine-friendly. Avoid incandescent bulbs—they get hot, which is a fire risk near dry needles. Go for LEDs. They’re cool, energy-efficient, and come in all sorts of styles: mini lights, C9 bulbs, icicle, or fairy lights.
Measure your tree’s height and circumference. A good rule: 100 lights per foot of tree height. So a 6-foot pine needs about 600 lights. But if your tree is bushy, add 20% extra for full coverage.
Warning: Don’t overload circuits. Most outdoor outlets handle about 1,440 watts. A typical LED strand uses 20–40 watts. So 3–4 strands are usually safe. Check your breaker box if unsure.
Test each strand before hanging. Plug them in, look for dead bulbs, and fix any issues. It’s way easier to replace a bulb on the ground than halfway up a ladder.
Step 2: Plan Your Layout
How do you want your lights to look? This is where the magic starts.
- Spiral wrap: Great for tall, narrow pines. Creates a clean, elegant look.
- Vertical strands: Hang lights from top to bottom like ribbons. Works well for bushy trees.
- Web or crisscross: For a whimsical, starry effect. Best for wide trees with strong branches.
- Top-down drape: Let lights cascade from the top like a waterfall. Ideal for trees with a central trunk.
Use painter’s tape or twine to mark spacing. For a spiral, mark every 6–8 inches around the trunk. For vertical strands, mark every 12–18 inches apart. This keeps things balanced and avoids clumps.
Pro Tip: Stand back and squint. If you can see gaps or hotspots, adjust the spacing. Your eye is the best design tool.
Remember: the goal is even glow, not total coverage. Pine needles naturally diffuse light, so a little space adds charm. This is a key part of the How to String Lights on Outdoor Pine Tree 2026 Guide—less is more.
Step 3: Start at the Top (Yes, the Top)
Most people start at the bottom. Big mistake. Starting at the top gives you control and prevents tangles.
- Plug in your first strand at the power source.
- Climb your ladder to the top of the tree. Secure the plug end with a clip or zip tie just below the highest branch.
- Unroll the strand as you go down, wrapping or draping according to your plan.
For spiral wraps: wrap the lights around the trunk, keeping tension even. Don’t pull too tight—pine bark is delicate. Use clips every 8–10 inches to hold the strand in place.
For vertical strands: attach the top end to a strong branch, then let it hang down. Use clips at the top, middle, and bottom to keep it straight.
Personal Story: Last year, I started at the bottom. By the time I reached the top, the lights were tangled like spaghetti. Now I always start at the top. It’s like building a house—foundation first.
Step 4: Work in Sections
Don’t try to do the whole tree at once. Break it into zones: top third, middle, bottom.
- Top third: Focus on the central leader and main branches. Use shorter strands or daisy-chain two together.
- Middle: This is where most people overdo it. Keep spacing consistent. Let branches show through.
- Bottom: Wrap around the base or let lights drape near the ground. This creates a “floating” effect.
Use zip ties or clips to secure lights to branches. Avoid tying directly around thin branches—they’ll snap. Instead, clip lights to thicker branches or use branch hangers (small hooks that grip without damage).
For dense areas, tuck lights behind branches so they peek through. This adds depth and makes the tree look fuller.
Warning: Don’t wrap lights around the trunk like a snake. It can damage bark and restrict growth. Use clips to guide the strand, not strangle the tree.
Step 5: Connect and Conceal Cords
Now it’s time to connect strands. Use outdoor-rated extension cords and connectors. Never splice wires—use proper plug-in adapters.
Hide cords by:
- Tucking them behind branches
- Running them down the trunk and covering with a small wooden box (painted to match)
- Using a cord cover (flexible plastic sleeve) that blends with bark
For multiple strands, use a power strip with a long cord. Place it near the tree base, but not in a puddle. Cover it with a waterproof box or upside-down bucket.
Pro Tip: I keep a small wooden crate near my pine. It hides the power strip, holds spare bulbs, and doubles as a side table for hot cocoa. Multi-functional decor? Yes, please.
Step 6: Adjust and Refine
Step back. Turn on the lights. Walk around the tree. Look from different angles.
Ask yourself:
- Are there dark spots? Add a short strand or reposition.
- Are lights sagging? Add a clip or tighten the zip tie.
- Do branches look cluttered? Pull back a few lights—sometimes less is more.
This is the fun part. It’s like editing a photo—you tweak until it feels right. Don’t rush. Take your time. This is the heart of the How to String Lights on Outdoor Pine Tree 2026 Guide: patience equals perfection.
Step 7: Set a Timer (Optional but Smart)
No one wants to remember to turn the lights on and off. A timer is a game-changer.
- Use a mechanical timer (set once, works for years)
- Or a smart plug (control with your phone, set schedules)
I use a smart plug. I set it to turn on at dusk and off at 10 p.m. It even adjusts for daylight saving time. No more fumbling with cords in the dark.
Bonus: timers save energy and extend bulb life. Win-win.
Step 8: Winter Prep (If Staying Up Year-Round)
Some people take lights down after the holidays. Others leave them up. If you’re in the “leave up” camp, prep for winter.
- Use all-weather lights (rated for -20°F or lower)
- Check clips and zip ties for brittleness
- Clear snow gently with a broom—don’t yank
- Inspect for ice buildup (remove if heavy)
For spring, do a quick check. Replace any dead bulbs, tighten loose clips, and clean off debris. A little maintenance keeps your tree looking fresh.
Pro Tips & Common Mistakes to Avoid
After years of trial, error, and a few “why is that branch on fire?” moments, here’s what I’ve learned.
Pro Tip 1: Use fairy lights for a soft, ethereal glow. They’re easier to tuck into dense pines and don’t overwhelm the shape.
Pro Tip 2: Buy lights with replaceable bulbs. When one goes out, you don’t have to replace the whole strand.
Pro Tip 3: Label your strands. Use colored tape to mark which one goes where. Saves time next year.
Pro Tip 4: For tall trees, use a light pole or extension pole with a hook to hang the top strand. No ladder needed.
Common Mistakes:
- Overcrowding: Too many lights = a hot, messy look. Let the tree breathe.
- Ignoring weather: Wind can whip lights around. Secure them well. Rain can fry circuits. Use GFCI outlets.
- Using indoor lights: They’re not waterproof. One storm and they’re toast.
- Forgetting the timer: Manual on/off is a chore. Automate it.
- Starting at the bottom: It’s a tangle trap. Start at the top. Always.
And one more: don’t use nails or screws. They damage the tree and can be dangerous if left behind. Clips and ties are safer and removable.
This How to String Lights on Outdoor Pine Tree 2026 Guide is all about working with the tree, not against it.
FAQs About How to String Lights on Outdoor Pine Tree 2026 Guide
Can I leave lights on my pine tree all year?
Yes, but with caveats. Use all-weather, UV-resistant lights. Check them monthly for damage. Avoid incandescents—they can overheat in summer. LEDs are safer and cooler. And always use a timer to reduce wear.
How do I prevent lights from tangling when storing?
I use cardboard light reels. Cut notches in a piece of cardboard, wrap each strand neatly, and store in a bin. No tangles. No mess. Pro tip: label each reel by tree or year.
What if my pine tree is too tall for a ladder?
Use a light pole or extension ladder with stabilizers. For very tall trees, consider professional installation. Or, use a drone with a light hook (yes, people do this). Safety first.
Are solar lights a good option for pine trees?
They can be, but they’re dimmer and less reliable in shade. If your pine gets full sun, solar works great. For shaded areas, stick with electric. Or mix both: solar for the top, electric for the base.
How do I fix a burned-out bulb?
Most LED strands have shunted sockets—if one bulb dies, the rest stay on. But if the whole strand flickers, check for a dead bulb. Use a bulb tester to find it. Replace with the exact same type (voltage, base size).
Can I use colored lights or should I stick to white?
It’s up to you! Warm white gives a classic, cozy glow. Multicolor is fun for holidays. I like color-changing LEDs—set to white for everyday, switch to red/green for Christmas. Versatility is key.
What’s the best way to remove lights without hurting the tree?
Unclip, don’t yank. Cut zip ties with scissors (don’t pull). Gently unwind spiral wraps. If a clip is stuck, use a flat tool to pry it open. Take your time. A little patience protects the tree and the lights.
Final Thoughts
Stringing lights on a pine tree is more than a chore—it’s a ritual. It’s about creating moments: quiet evenings under the glow, laughter with friends, or that first snowfall when the tree lights up like a beacon.
This How to String Lights on Outdoor Pine Tree 2026 Guide isn’t about perfection. It’s about joy. About doing it right so you can enjoy it longer. So grab your lights, your ladder, and your gloves. Take your time. Step back often. And when the sun sets and the lights come on, smile. You did it.
And when next year rolls around? You’ll know exactly what to do. No guesswork. No tangles. Just that same magical glow, year after year.
Now go make your pine tree shine.
“`

