Featured image for how to string lights outdoor
Image source: jessicawellinginteriors.com
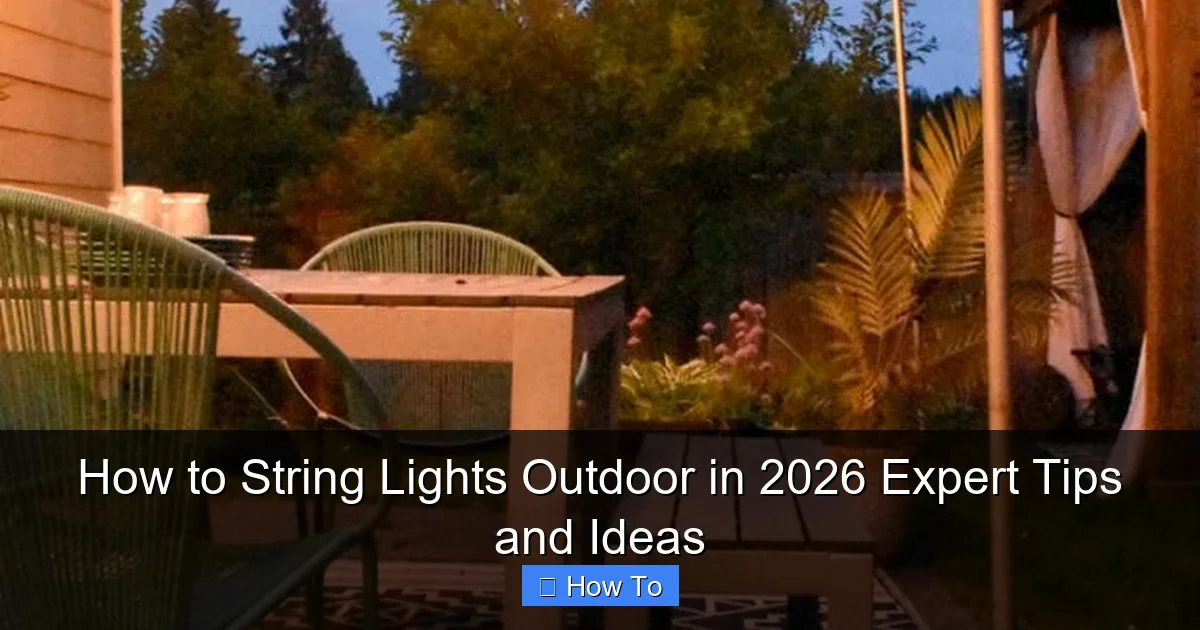
Transform your outdoor space in 2026 by choosing weather-resistant, LED string lights and planning a layout that highlights key areas like patios, trees, or pathways. Use secure mounting hardware—such as screw-in hooks or zip ties—and always follow safety guidelines by keeping cords elevated and using outdoor-rated extension cords. With the right setup, your outdoor lighting will shine brighter, last longer, and elevate any evening ambiance.
How to String Lights Outdoor in 2026: Expert Tips and Ideas
Key Takeaways
- Plan your layout first: Sketch light placement to avoid overbuying or gaps.
- Choose weatherproof lights: Opt for IP65-rated or higher for long-term outdoor use.
- Use durable anchors: Install hooks, clips, or poles rated for outdoor tension.
- Hide cords strategically: Conceal wires under eaves or along fences for a clean look.
- Test before finalizing: Check brightness and connections before securing lights permanently.
- Add timers or smart controls: Automate on/off times for convenience and energy savings.
Why This Matters / Understanding the Problem
Let’s be honest: nothing transforms a backyard, patio, or garden quite like the warm glow of outdoor string lights. Whether you’re hosting a summer BBQ, enjoying a quiet evening, or just want your space to feel a bit more magical, knowing how to string lights outdoor in 2026 expert tips and ideas can make all the difference.
I’ve been there—standing in my backyard with a tangled mess of lights, wondering if I should just give up and use candles. But after years of trial, error, and a few (okay, many) trips up a ladder, I’ve learned what works and what doesn’t. And the good news? It’s easier than you think—if you do it right.
Outdoor lighting isn’t just about aesthetics. It’s about safety, ambiance, and even boosting your home’s curb appeal. But without proper planning, you risk sagging wires, tripping hazards, or lights that don’t last more than one season. That’s why this guide is built around practical, real-world advice—so you can avoid rookie mistakes and create a setup that looks professional and lasts.
Whether you’re lighting up a small balcony or a sprawling backyard, this guide covers everything from choosing the right lights to avoiding common pitfalls. And yes, I’ll share the how to string lights outdoor in 2026 expert tips and ideas that pros use—without the jargon or overcomplication.
What You Need
Before you start, let’s gather the right tools and materials. Trust me, skipping this step is how you end up with a half-finished project at 8 p.m. on a Saturday.

Visual guide about how to string lights outdoor
Image source: warisanlighting.com
- Outdoor-rated string lights: Look for UL-listed, weatherproof (IP65 or higher), and preferably LED for energy efficiency and longevity.
- Measuring tape: Essential for planning spacing and avoiding shortfalls.
- Drill and screws or hooks: For permanent or semi-permanent installations (e.g., eye hooks, cup hooks, or screw-in anchors).
- Zip ties or cable clips: Great for temporary setups or securing loose wires.
- Extension cords (outdoor-rated): Make sure they’re GFCI-protected for safety.
- Timer or smart plug: So your lights turn on automatically at dusk.
- Step ladder: For reaching high points safely.
- Marker or chalk: To mark anchor points on surfaces.
- Optional: Light clips, gutter hooks, or tension wire: For unique mounting surfaces like gutters, trees, or pergolas.
Pro tip: Always buy 10–20% more lights than your measurement suggests. You’ll thank me when you’re not short by three feet and have to splice in a new strand.
“I once tried to save $20 by cutting a string of lights to fit my patio—only to realize I’d ruined the waterproof seal. Lesson learned: never compromise on weatherproofing.”
Step-by-Step Guide to How to String Lights Outdoor in 2026 Expert Tips and Ideas
Step 1: Plan Your Layout
Before you hang a single bulb, take a walk around your space. Ask: Where do I want the light? Over the dining table? Along the fence? In a canopy over the patio?
Sketch a rough diagram. Mark where anchor points will go—walls, posts, trees, gutters. This is the foundation of your how to string lights outdoor in 2026 expert tips and ideas strategy.
- For a canopy effect, run lights in a grid or crisscross pattern between two or more anchor points.
- For a border or perimeter, follow fence lines, railings, or rooflines.
- For tree lighting, wrap trunks or drape between branches (use soft, non-abrasive clips).
Measure the total distance. Then, check your light strands. Most outdoor string lights are 24–48 feet long. If your run is longer, you’ll need to connect multiple strands—just don’t exceed the manufacturer’s recommended max (usually 3–5 strands).
“I once tried to run 8 strands in a row—big mistake. The circuit overloaded, and half the lights flickered. Always check the max load.”
Step 2: Choose the Right Anchor Points
Anchor points are where your lights will attach. They need to be strong enough to support the weight of the lights and any wind or snow load.
- Wooden posts, pergolas, or eaves: Use cup hooks or screw-in eye hooks. They’re easy to install and hold well.
- Masonry or stucco walls: Use plastic anchors and screws. Drill pilot holes to avoid cracking.
- Gutters: Use gutter hooks (they clip on without drilling). Avoid over-tightening.
- Trees: Use soft, adjustable tree straps or zip ties (wrap loosely to avoid girdling the bark).
- Fences: Screw hooks into posts or use zip ties on chain-link.
Space anchor points every 4–6 feet for a tight, sag-free look. If you’re going for a “draped” aesthetic, you can go up to 8 feet—but use heavier-duty hooks.
Pro tip: Use a level to ensure your anchor points are aligned. Nothing ruins a sleek look like crooked lights.
Step 3: Install the Anchor Points
Now it’s time to drill, screw, or clip.
- Mark each anchor point with a pencil or chalk.
- For hooks, drill a small pilot hole (especially in hard wood or masonry).
- Screw in the hooks by hand first, then use a screwdriver or drill for tightness.
- For gutter hooks, simply clip them into place. No tools needed.
- For trees, wrap the strap or tie around the trunk, leaving a little slack for growth.
Don’t overtighten. You want the hook to hold, not strip the wood or crack the masonry.
“I once tightened a hook so much I cracked my pergola beam. Now I stop at ‘snug’—it’s safer and just as effective.”
Step 4: Hang the Lights
Start at the power source. This is critical—you want to minimize extension cord use and avoid running power across high-traffic areas.
- Plug in your first strand and test it. Make sure all bulbs light up.
- Attach the first end to the anchor point near the outlet. Use the built-in hook or a zip tie.
- Unroll the strand slowly, attaching each bulb or socket to the next anchor point as you go.
- For long runs, connect multiple strands. Use outdoor-rated connectors and seal with electrical tape or silicone.
- Keep the cord taut but not stretched. A little slack prevents stress on the wires.
For a grid pattern (like over a patio), start with the perimeter, then add cross-strands. Use a ladder to reach center points.
If you’re using a tension wire (great for large areas), run a steel or paracord line between anchor points first, then clip the lights onto it. This prevents sagging and makes future adjustments easier.
Step 5: Manage Power and Safety
This step is often overlooked—and it’s where most accidents happen.
- Use only outdoor-rated extension cords. Indoor cords can’t handle moisture and UV exposure.
- Plug into a GFCI outlet (or use a GFCI adapter). This cuts power if there’s a short—critical for safety.
- Keep cords off the ground. Use cord covers, clips, or run them along walls or railings.
- Never run cords through doorways or windows. It’s a tripping hazard and can damage seals.
- Use a timer or smart plug to automate on/off times. I set mine for 5 p.m. to 10 p.m.—perfect for evening use.
Pro tip: If your outlet is far away, use a weatherproof outdoor power strip mounted to a post or wall. Just keep it elevated and covered.
Step 6: Test, Adjust, and Secure
Once everything’s up, plug it in and step back.
- Check for dim or flickering bulbs. Replace or reposition as needed.
- Look for sagging. Tighten loose sections by adjusting anchor points or adding clips.
- Secure loose cords with zip ties or clips. Tuck them behind beams or under railings.
- Walk the area at night. Look for dark spots, glare, or tripping hazards.
Make small tweaks. Maybe one strand is too bright, or a corner is too dim. This is your chance to fine-tune.
“I once spent 20 minutes adjusting one strand because it cast a weird shadow on my grill. Worth it.”
Step 7: Maintain for Longevity
Outdoor lights don’t last forever—but with care, they can go 3–5 years or more.
- Inspect monthly: Look for frayed wires, loose connections, or damaged bulbs.
- Clean bulbs: Wipe with a dry cloth to remove dust and pollen.
- Store in winter: If you live in a snowy climate, take down lights after the season. Store in a dry, cool place.
- Replace bulbs: If one goes out, replace it quickly. A dead bulb can strain the circuit.
For permanent setups, consider using LED “fairy lights” with shatterproof bulbs. They’re more durable and energy-efficient.
Pro Tips & Common Mistakes to Avoid
Let’s talk about the things no one tells you—until you’ve already made the mistake.
Pro Tip 1: Use a Tension Wire for Large Areas
If you’re lighting a big patio or garden, a tension wire (like steel cable or paracord) is a game-changer. It supports the weight of the lights, prevents sagging, and makes it easy to add or remove strands later. I use this for my 20×20 ft backyard canopy—no drooping, ever.
Pro Tip 2: Mix Bulb Types for Depth
Not all string lights are the same. Try combining warm white Edison bulbs with smaller fairy lights. The mix creates layers of light—bright where you need it, soft where you don’t. I love this in dining areas.
Pro Tip 3: Go Solar for Off-Grid Areas
No outlet nearby? Solar-powered string lights are now brighter and more reliable than ever. Just make sure they get 6+ hours of sun. I use them in my garden, and they last all night.
Common Mistake 1: Overloading the Circuit
Connecting too many strands can trip a breaker or start a fire. Always check the max load on your lights and outlet. I once blew a fuse by running 6 strands—learned my lesson.
Common Mistake 2: Using Indoor Lights Outdoors
Indoor lights aren’t waterproof. They’ll fail in rain or humidity. Always look for “outdoor-rated” or IP65+.
Common Mistake 3: Poor Cord Management
Letting cords dangle or cross walkways is a tripping hazard. Use cord covers, clips, or run them along structures. Safety first.
Common Mistake 4: Ignoring the Weather
Wind, snow, and UV rays degrade lights fast. Use UV-resistant cords, secure loose ends, and take down lights in extreme weather. My neighbor left his up all winter—half the bulbs cracked.
Pro Insight: Think Seasonally
Your lighting needs change with the seasons. In summer, go for open canopies. In fall, add lights under trees for a cozy glow. In winter, focus on entryways and pathways. The how to string lights outdoor in 2026 expert tips and ideas mindset is about adaptability.
FAQs About How to String Lights Outdoor in 2026 Expert Tips and Ideas
Let’s tackle the questions I get all the time.
Q: Can I leave outdoor string lights up year-round?
It depends. If you live in a mild climate and use high-quality, weatherproof lights, yes—but inspect them monthly. In snowy or windy areas, it’s safer to take them down in winter. I leave mine up in California but store them in Oregon.
Q: How do I connect multiple strands without overloading?
Check the max load on each strand (usually 3–5). Use a power strip with a circuit breaker, and avoid daisy-chaining more than recommended. Better yet, use a smart plug with overload protection.
Q: What’s the best way to hang lights on trees?
Use soft tree straps or adjustable zip ties. Wrap them loosely around the trunk or branches—never too tight. For draping, run lights between trees using a tension wire or secure with clips. Avoid nails or screws; they damage the bark.
Q: How do I prevent sagging?
Use anchor points every 4–6 feet. For long runs, add a tension wire. Keep the lights taut but not stretched. I once used a clothesline trick—worked like a charm.
Q: Are solar string lights any good?
Yes—especially newer models. Look for ones with large solar panels and lithium batteries. They work best in sunny areas and last 6–8 hours on a full charge. Just remember: no sun, no light.
Q: Can I use indoor extension cords outside?
No. Indoor cords aren’t waterproof or UV-resistant. Use only outdoor-rated cords with GFCI protection. I learned this when my indoor cord melted in the rain.
Q: How do I make my lights look professional?
Plan first. Use a layout, space anchor points evenly, and manage cords. Test at night. Small details—like hiding connectors and using matching hooks—make a big difference. The how to string lights outdoor in 2026 expert tips and ideas all come down to attention to detail.
Final Thoughts
Lighting your outdoor space isn’t just about hanging bulbs—it’s about creating a feeling. A place to relax, connect, and enjoy the night. And with the how to string lights outdoor in 2026 expert tips and ideas, you can do it safely, beautifully, and with minimal hassle.
Remember: start with a plan, use the right tools, and don’t rush. Take your time with anchor points, manage power carefully, and test everything before you call it done.
And most importantly—have fun with it. Try different patterns, mix bulb types, and experiment with placement. Your outdoor space is a canvas. Let the lights be your paint.
Now go string some lights. Your backyard is waiting.

