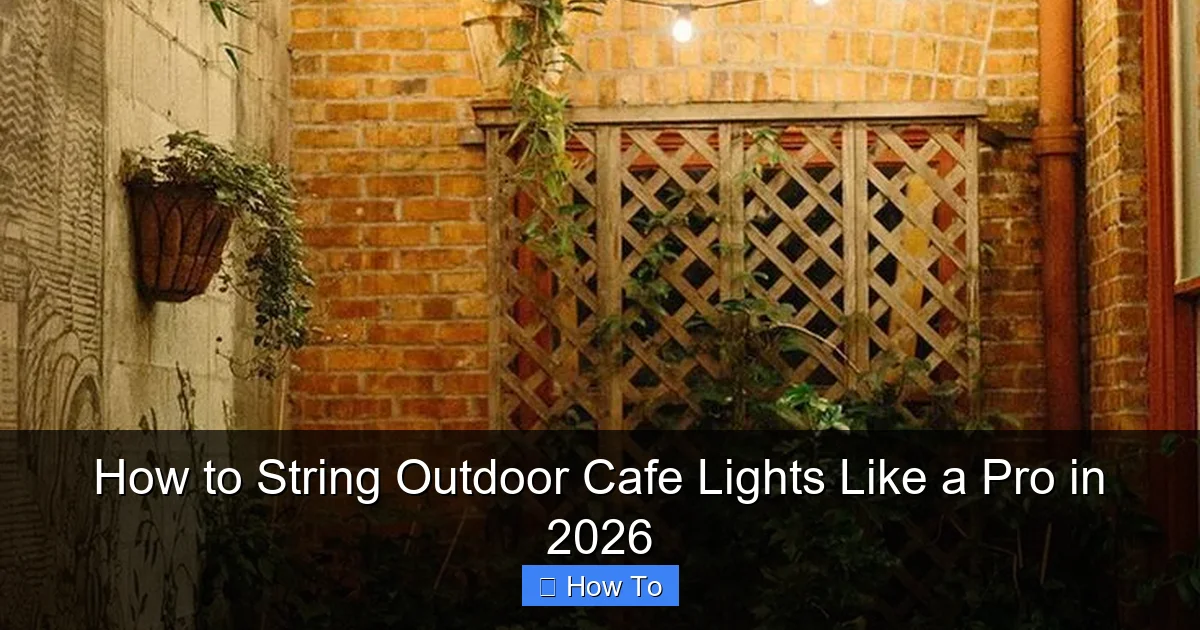
Featured image for how to string outdoor cafe lights
Image source: i.pinimg.com
Plan your layout and measure the space carefully before hanging to ensure a professional, balanced look that enhances your outdoor ambiance. Use sturdy support structures like poles, fences, or pergolas, and choose weather-resistant, LED cafe lights with proper spacing for a safe, energy-efficient glow that lasts through every season. With the right tools and a little patience, you can transform any backyard or patio into a stylish, inviting retreat in 2026.
“`html
How to String Outdoor Cafe Lights Like a Pro in 2026
Key Takeaways
- Plan your layout first: Measure space and mark anchor points for even, balanced lighting.
- Choose weatherproof lights: Use commercial-grade, outdoor-rated cafe lights for durability and safety.
- Secure with proper hardware: Install eye hooks or tension cables to support weight and wind.
- Maintain consistent spacing: Keep bulbs 12–18 inches apart for uniform brightness and visual appeal.
- Test before finalizing: Plug in lights during setup to catch issues early and adjust as needed.
- Use dimmers or timers: Automate ambiance and save energy with smart controls.
Why This Matters / Understanding the Problem
You’ve seen them: those dreamy, softly glowing strands of lights strung across a backyard, a patio, or a rooftop bar. They turn ordinary spaces into magical evening hangouts. But when you try to recreate that ambiance at home, things often go sideways. Maybe the lights sag, they flicker in the wind, or worse—they fall down after one storm.
That’s where learning how to string outdoor cafe lights like a pro in 2026 makes all the difference. It’s not just about aesthetics. It’s about safety, durability, and creating a space you actually want to spend time in. I learned this the hard way after my first attempt looked more like a haunted house than a cozy retreat. After trial, error, and a few (okay, five) YouTube rabbit holes, I cracked the code.
Now, I string lights for friends, family, and even my local coffee shop. And I want to share what I’ve learned—so you can skip the headaches and get straight to the magic.
What You Need
Before we dive in, let’s talk tools and supplies. You don’t need a contractor’s license or a truckload of gear. Just a few essentials. Here’s what’s in my go-to kit:
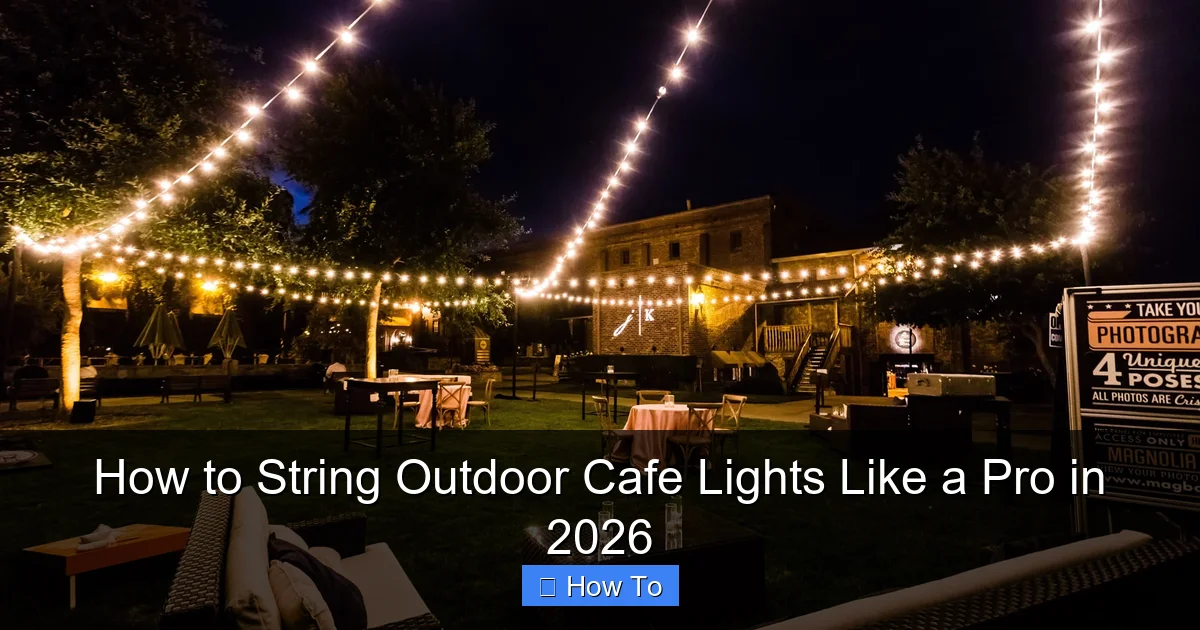
Visual guide about how to string outdoor cafe lights
Image source: specialeventlighting.com
- Cafe-style string lights (LED, weatherproof, with E26 or E27 sockets)
- Heavy-duty outdoor extension cords (rated for wet locations)
- Weatherproof zip ties or cable clips (rated for outdoor use)
- Turnbuckles or tensioners (for adjusting sag)
- Eye hooks, lag screws, or wall anchors (depending on surface)
- Measuring tape and level (trust me, you’ll need both)
- Ladder or step stool (safety first!)
- Drill with masonry bit (if attaching to brick, stucco, or concrete)
- Optional: Gutter clips or S-hooks (for non-permanent setups)
Pro tip: Buy 10–20% more lights and cord than you think you need. You’ll thank me later when you hit that corner or realize the run is longer than expected.
Step-by-Step Guide to How to String Outdoor Cafe Lights Like a Pro in 2026
Step 1: Plan Your Layout (The Secret to a Pro Look)
Before you even touch a drill, grab paper and pen—or use a design app like SketchUp or Canva. Sketch your space and decide where the lights will go. Are they going across a deck? Between two trees? Over a pergola?
Think about flow. You want the lights to guide the eye and enhance the space, not block pathways or create tripping hazards. I once strung lights too low over a dining table—my cousin nearly took out a bulb with his forehead. Not ideal.
Also, consider how to string outdoor cafe lights like a pro in 2026 with power in mind. Map out where outlets are. You’ll want the plug-in end within reach of a GFCI-protected outdoor outlet. If not, use a heavy-duty outdoor-rated extension cord (but never daisy-chain more than two).
Warning: Avoid running cords across high-traffic areas. Use cord covers or route them under furniture or rugs (if safe and dry).
Step 2: Choose the Right Mounting Points
Your mounting points are the anchors of your lighting system. They need to be strong, secure, and weather-resistant. Here’s what I’ve found works best:
- Wooden posts or beams: Use lag screws or eye hooks. Easy and sturdy.
- Brick, stucco, or concrete: Use masonry anchors and a drill. Pre-drill pilot holes to avoid cracking.
- Trees: Use tree-friendly methods. Wrap a soft strap around the trunk (not wire) and attach an S-hook or eye bolt. Never nail into live trees—they can die or attract pests.
- Gutters or eaves: Use gutter clips or S-hooks. They’re removable and won’t damage the roof.
Pro tip: If you’re unsure about a surface, test one anchor first. I once tried to mount lights on a vinyl fence—big mistake. The screws pulled right out. Now I always do a “tug test” before hanging anything heavy.
Step 3: Install Mounting Hardware (Do It Right the First Time)
Now it’s time to drill. But don’t rush. Use your measuring tape and level to ensure everything is straight and even. I like to mark spots with a pencil and double-check spacing.
For eye hooks or lag screws:
- Measure and mark your mounting points (typically 6–10 feet apart, depending on span).
- Pre-drill a pilot hole (smaller than the screw diameter).
- Twist in the hook or screw by hand first, then finish with a wrench or drill.
- Use a level to ensure all hooks are aligned horizontally.
If you’re using turnbuckles (highly recommended for long spans), attach them to the hooks now. They’ll let you adjust tension later.
Tip: For stucco or brick, use a hammer drill with a masonry bit. Regular drills struggle with hard surfaces.
Step 4: Hang the Lights (Start at the Power Source)
This is where the magic begins. But don’t just drape the lights and hope for the best. Start at the plug-in end—the one closest to your power source.
- Plug in the first light strand (but don’t turn it on yet).
- Run the cord to the first mounting point. Secure it with a zip tie or clip—not around the bulb socket.
- Attach the strand to the hook using an S-hook or loop the cord (if the strand has built-in hooks).
- Move to the next point. Keep the strand slightly loose—you’ll tension it later.
- Repeat until you reach the end.
For multiple strands, connect them with outdoor-rated connectors. Make sure the total wattage doesn’t exceed the circuit or cord rating (check the packaging).
Warning: Never connect more than three standard 120V outdoor strands unless the manufacturer says it’s safe. Overloading causes overheating.
Step 5: Add Tension with Turnbuckles or Tie-Offs
Sagging lights ruin the look. That’s why I always use turnbuckles on spans over 10 feet. Here’s how:
- Attach one end of the turnbuckle to the last mounting point.
- Loop the light strand through the turnbuckle’s hook.
- Slowly tighten the turnbuckle until the lights are taut but not stretched.
No turnbuckles? Use a tensioning knot. Loop the cord around a hook, pull it tight, and secure it with a figure-eight knot. It’s not as adjustable, but it works in a pinch.
For tree setups, I use a “floating anchor”: tie a soft rope between two trees, then hang the lights from that. It reduces stress on the bark and looks cleaner.
Step 6: Secure the Cord and Hide the Mess
Even the best lighting setup looks messy with cords dangling. Here’s how to clean it up:
- Use outdoor-rated cable clips every 2–3 feet to keep cords flush against walls or posts.
- Run cords behind furniture, planters, or along fence lines.
- For ground-level runs, use a cord cover or bury the cord under mulch (if safe and dry).
- Use zip ties to bundle excess cord at connection points.
I once left a cord coiled on the deck. My dog chewed through it. Lesson learned: always secure or hide the cord.
Step 7: Test, Adjust, and Enjoy
Now the fun part: turn on the lights. Check for:
- Flickering bulbs (replace immediately)
- Uneven spacing (adjust with clips)
- Sagging (tighten turnbuckles)
- Cord strain (loosen if pulling on outlets)
Invite a friend over. Ask, “Does this look right?” Fresh eyes catch things you miss. I always do this—my wife once pointed out a strand that was 6 inches lower than the rest. Oops.
Once everything looks perfect, step back and admire your work. You’ve just mastered how to string outdoor cafe lights like a pro in 2026.
Pro Tips & Common Mistakes to Avoid
After years of trial and error, here are the insider tips I wish I’d known from the start:
- Use LED bulbs only. They last longer, use less power, and don’t get hot—critical for outdoor safety.
- Buy lights with replaceable bulbs. If one goes out, you don’t have to replace the whole strand.
- Angle the bulbs downward. It reduces glare and creates a cozy, intimate glow.
- Check the IP rating. Look for IP44 or higher (resists rain and dust).
- Use a timer or smart plug. Automate on/off times to save energy and avoid leaving them on all night.
Common Mistake #1: Over-tightening. Lights should be taut, not stretched. Tension can damage sockets or pull out anchors.
Common Mistake #2: Ignoring weather. Even “weatherproof” lights need protection. I store mine in a dry place during winter. For year-round use, choose commercial-grade strands.
Common Mistake #3: Poor spacing. Lights should be 6–12 inches apart for a balanced look. Too close? Blinding. Too far? Sparse.
One last thing: how to string outdoor cafe lights like a pro in 2026 isn’t just about the lights. It’s about the experience. Pair your setup with music, plants, and comfortable seating. That’s when the magic happens.
FAQs About How to String Outdoor Cafe Lights Like a Pro in 2026
Can I string cafe lights between two trees?
Absolutely—but do it right. Use a soft, wide strap (not wire or rope that digs in) around the trunk. Attach an S-hook or eye bolt to the strap. For spans over 15 feet, add a center support (like a pole or third tree) to reduce sagging. And never nail or screw into a live tree. It’s bad for the tree and can cause rot.
How high should I hang the lights?
For walkways: 7–8 feet minimum. For dining or seating areas: 8–9 feet. I like 9 feet—it’s high enough to avoid head bumps but low enough to feel intimate. If you’re hanging over a pergola, aim for 7.5–8 feet to create a “canopy” effect.
Can I leave outdoor cafe lights up year-round?
It depends. Most residential-grade lights are rated for 3–5 months of outdoor use. If you want year-round lighting, invest in commercial-grade strands with thicker cords, UV-resistant sockets, and IP65+ ratings. I leave mine up from May to October, then store them. Even “all-season” lights degrade faster when exposed to constant sun and moisture.
What’s the best way to power long runs?
Use a heavy-duty 12-gauge outdoor extension cord (rated for wet locations). Plug it into a GFCI outlet. For runs over 50 feet, consider a transformer (like those used for landscape lighting) to reduce voltage drop. I once ran 70 feet without a transformer—the bulbs at the end were so dim they looked like ghosts.
How do I fix a sagging strand?
First, check your anchors. Are they loose? Tighten or re-secure. Next, add a turnbuckle at the end or middle of the run. If that’s not possible, use a temporary support (like a pole) until you can install a permanent fix. For short spans, you can loop the cord around a hook and pull it tight—but it’s not as durable.
Can I use solar-powered cafe lights?
Yes, but with caveats. Solar lights are great for low-light ambiance, but they’re often dimmer and less reliable in cloudy climates. I use them for accent lighting (like around a fire pit) but not for main overhead strings. Also, ensure the solar panel gets 6+ hours of direct sunlight. I once placed mine under a tree—big mistake.
Are there renter-friendly options?
Definitely. Use gutter clips or S-hooks to hang lights without drilling. For walls, try adhesive cable clips (rated for outdoor use). I once lived in an apartment and strung lights between balcony railings using zip ties and clips. No damage, no landlord complaints, and the neighbors loved it.
Final Thoughts
Learning how to string outdoor cafe lights like a pro in 2026 isn’t about perfection. It’s about creating a space that feels warm, inviting, and uniquely yours. It’s about the laughter under the glow, the late-night chats, the way the light catches the rain on a summer evening.
Start small. Test one strand. Get comfortable with the process. Then expand. Add dimmers, color-changing bulbs, or even a chandelier for drama. The key is to have fun with it.
And remember: even the pros make mistakes. My first setup had a bulb dangling by a wire. But that’s how you learn. So grab your lights, your tools, and your sense of adventure. Your dreamy outdoor oasis is just a few steps away.
Now go string those lights—and make every night feel like a celebration.
“`

