Featured image for how to string outdoor christmas lights on bushes
Image source: thumbs.dreamstime.com
Transform your bushes into dazzling holiday displays by using flexible LED string lights and non-damaging clips or zip ties to preserve plant health. Start from the base and weave lights upward in a spiral pattern, ensuring even coverage while avoiding overloading circuits for a safe, stunning glow all season long.
“`html
How to String Outdoor Christmas Lights on Bushes 2026 Guide
Key Takeaways
- Plan your layout first: Sketch bush shapes and spacing for even light distribution.
- Use outdoor-rated lights: Ensure lights are weatherproof and UL-listed for safety.
- Secure with insulated clips: Attach lights without damaging branches or stems.
- Wrap lights strategically: Weave through branches for depth, not just surface coverage.
- Test before finalizing: Check for dead bulbs or shorts before full installation.
- Time your setup: Install after frost, remove before heavy snowfall to avoid damage.
Why This Matters / Understanding the Problem
Let’s be real—nothing says “holiday magic” like twinkling lights glowing in the frosty night. But if you’ve ever tried to string outdoor Christmas lights on bushes, you know it’s not as simple as wrapping a tree or draping a roofline.
Bushes are unpredictable. They’re lumpy, uneven, and often full of hidden thorns or sharp twigs. One wrong move, and you’re tangled in a net of lights, frustrated, and possibly with a broken bulb.
That’s where this How to String Outdoor Christmas Lights on Bushes 2026 Guide comes in. I’ve been there—knees in the snow, gloves soaked, muttering under my breath. After years of trial, error, and a few too many tangled messes, I’ve cracked the code.
Whether you’re dressing up a single holly bush or transforming your entire front yard, this guide will help you do it safely, efficiently, and with a festive flair. No more guesswork. No more wasted strands. Just beautiful, even lighting that lasts all season.
And yes, we’ll cover the 2026 angle—new tech, updated safety standards, and smarter ways to light up your landscape without overloading circuits or breaking the bank.
What You Need
Before you dive in, let’s gather your gear. You don’t need a full toolkit, but skipping essentials can turn a fun project into a nightmare.
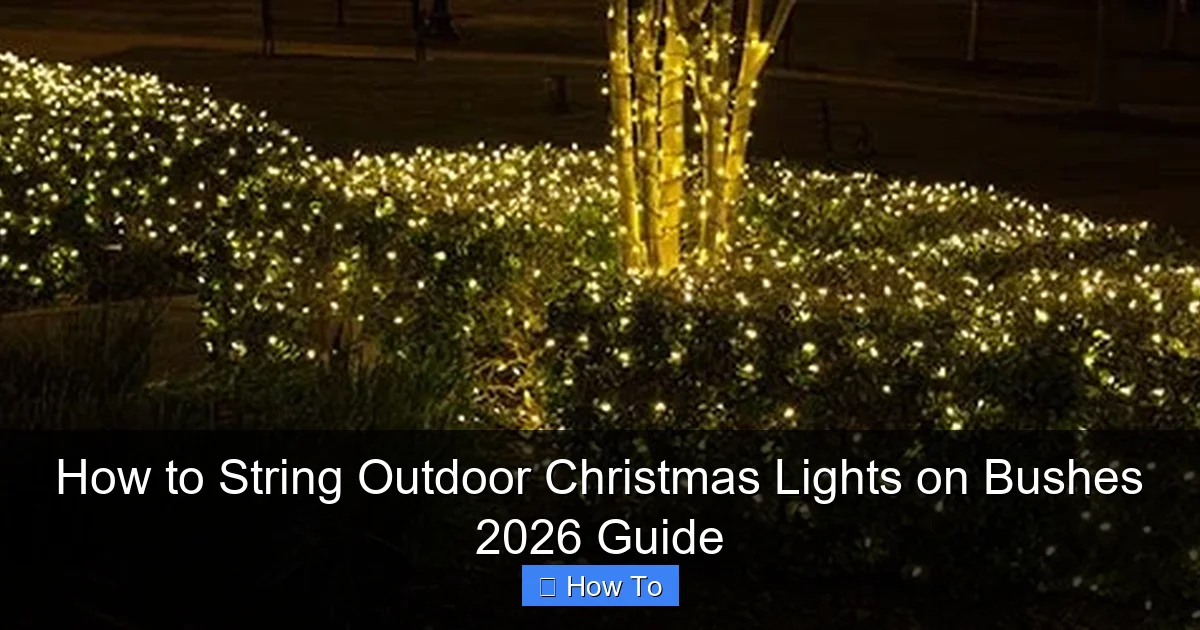
Visual guide about how to string outdoor christmas lights on bushes
Image source: cdn.christmaslightsetc.com
- Outdoor-rated LED Christmas lights (preferably shatterproof and weather-resistant)
- Light clips or zip ties (bush-friendly, not roof clips)
- Extension cords (outdoor-rated, GFCI-protected)
- Timer or smart plug (for automatic on/off—saves energy and sanity)
- Ladder (if needed)—a sturdy step stool or low ladder for taller bushes
- Gloves (thorn-resistant, warm, and grippy)
- Measuring tape (to estimate light strand length)
- Scissors or wire cutters (for trimming zip ties)
- Stakes or ground anchors (optional, to secure cords)
- Light tester (to check strands before hanging)
Pro tip: Buy 10–20% more lights than you think you’ll need. Bushes have more surface area than they appear, and you’ll want room for creative layering—especially with the How to String Outdoor Christmas Lights on Bushes 2026 Guide approach.
Step-by-Step Guide to How to String Outdoor Christmas Lights on Bushes 2026 Guide
Step 1: Choose the Right Lights for Your Bushes
Not all lights are created equal. For 2026, the smart move is LEDs with a CRI (Color Rendering Index) of 80+—they show colors more naturally and last longer.
Look for shatterproof or polycarbonate bulbs. They survive cold snaps, wind, and the occasional rogue snowball. Avoid glass bulbs—they’re fragile and can shatter in freezing temps.
Also, consider net lights or curtain lights for dense bushes. They spread evenly and reduce the need for hand-wrapping.
For a modern touch, try smart RGB LEDs (like Twinkly or LIFX). You can control colors and patterns via an app—perfect for themed holidays or neighborhood light shows.
Tip: Always test your lights indoors first. A single dead bulb can ruin a whole strand. Use a light tester or plug them into a socket before heading outside.
Step 2: Measure and Plan Your Layout
Grab your measuring tape. Estimate the height and width of each bush. Multiply by 3–4 for the total linear feet of lights needed. (Yes, it’s more than you think!)
Sketch a quick layout. Ask yourself: Do you want a wrapped look (lights spiraling around branches) or a draped look (lights hanging like vines)? For most bushes, a mix works best.
For the How to String Outdoor Christmas Lights on Bushes 2026 Guide, I recommend the “layered drape” method: Start at the top, drape down, loop around the base, and repeat. It’s even, avoids hot spots, and looks professional.
Also, map your power sources. You don’t want extension cords crisscrossing the yard. Use a central outlet with a GFCI-protected power strip to minimize trips and tripping hazards.
Step 3: Prep the Bushes (Yes, Really)
You wouldn’t hang lights on a dirty wall—same goes for bushes. A little prep goes a long way.
- Trim dead branches or sharp thorns—this prevents snags and protects your hands.
- Clear debris—leaves, twigs, and old decorations can hide hazards.
- Water the soil—wet soil holds stakes better and reduces static on dry branches.
If your bush is overgrown, consider a light trim. You don’t need a perfect shape, but removing 10–20% of inner branches improves light visibility and airflow.
And please—don’t use nails, screws, or staples. They damage the plant and can create fire hazards. This is a key part of the 2026 guide: plant-friendly, safe, and sustainable.
Step 4: Start at the Top (Not the Bottom!)
Here’s a mistake I made way too many times: starting at the base. By the time I got to the top, I was tangled, out of lights, and frustrated.
Start at the highest point of the bush. Drape the first strand from the top down, letting it hang naturally like a waterfall.
Use zip ties or bush clips every 12–18 inches to secure the strand. Don’t pull tight—let the light drape with a gentle curve. Tight wrapping creates hot spots and breaks bulbs.
For tall bushes, use a step ladder. Keep one hand on the ladder, one on the lights. Safety first, especially when it’s cold and the ground is slick.
Warning: Never stand on the top rung. I learned that the hard way—slipped, dropped a $50 strand, and had to start over. Use a stable platform or ask a friend to spot you.
Step 5: Work in Layers (Like a Pro)
Now comes the magic. After the first drape, add a second strand 6–12 inches below. Repeat every 6–12 inches until you reach the base.
For a fuller look, zigzag the strands side to side instead of straight down. This fills gaps and creates depth—especially on wide or irregular bushes.
Use zip ties to connect strands at the base. Don’t tie them too tight—bushes grow, and you don’t want to girdle them.
For dense evergreens (like juniper or boxwood), consider net lights. Drape the net over the top and secure with clips at the base. It’s faster and more even.
This layered technique is a hallmark of the How to String Outdoor Christmas Lights on Bushes 2026 Guide—it’s efficient, beautiful, and plant-safe.
Step 6: Secure and Conceal Cords
Visible cords ruin the look. Tuck them into the bush or run them along the trunk.
Use stakes or ground anchors to keep cords off walkways. For longer runs, bury the cord under mulch (but not deep—just an inch or two).
If you’re using a timer or smart plug, place it off the ground—on a shelf, in a weatherproof box, or under a bush. Moisture kills electronics.
For a seamless look, choose black or green extension cords. They blend into the landscape and are less distracting at night.
Step 7: Test, Adjust, and Automate
Before you call it a day, plug it in and test. Look for:
- Dead bulbs or dim spots
- Uneven spacing
- Cords pulling or sagging
Adjust as needed. A few extra clips or a repositioned strand can make a big difference.
Then, set your timer or smart plug. For 2026, I recommend:
- On: 4:30–5:00 PM (sunset)
- Off: 10:00 PM (saves energy and light pollution)
With smart lights, you can even sync to sunrise/sunset or create custom schedules. No more forgetting to turn them off!
Pro Tips & Common Mistakes to Avoid
After years of trial and error, here’s what I wish I knew sooner.
- Don’t overload circuits. Most outdoor outlets support 10–12 LED strands. Use a circuit checker or ask an electrician if unsure.
- Avoid “light stacking”—don’t drape multiple strands in the same spot. It creates hot spots and looks cluttered.
- Skip the tinsel and garland—they tangle with lights and look dated. Let the lights shine.
- Use a light meter app (like Light Meter for iOS) to check brightness. Too bright? Add a dimmer or use fewer strands.
- Check local codes—some HOAs or cities have rules about light placement, timers, or brightness. Don’t get fined!
Personal Insight: One year, I used cheap zip ties that snapped in the cold. Now I only use UV-resistant, cold-weather zip ties. They’re worth the extra $5.
Also, don’t leave lights up past January. Cold, wet, and wind can damage them. Take them down by early February—even if you’re sad to see them go.
For the How to String Outdoor Christmas Lights on Bushes 2026 Guide, the biggest trend is modularity. Use reusable clips and connectors so you can easily add/remove strands each year.
FAQs About How to String Outdoor Christmas Lights on Bushes 2026 Guide
Can I use indoor lights on bushes?
Nope. Indoor lights aren’t rated for moisture, UV, or extreme temps. They’ll short out, overheat, or fail within days. Always use outdoor-rated lights—look for the “ETL” or “UL” outdoor mark.
How many strands do I need for a large bush?
As a rule of thumb: 1 strand per 3–4 feet of bush height. For a 6-foot bush, use 2–3 strands. For a wide bush (like a hydrangea), add 1 extra strand per 4 feet of width. When in doubt, buy one more—you can always use it elsewhere.
What if my bush has thorns?
Wear thick, puncture-resistant gloves (like rose-pruning gloves). Use zip ties with a smooth edge to avoid snags. And go slow—rushing leads to cuts.
Can I leave lights up year-round?
Technically, yes—but I wouldn’t. UV rays degrade plastic, and moisture corrodes wires. Plus, it looks tacky in July. Take them down in winter. Store them in a dry, cool place (like a plastic bin with silica gel packs).
Are smart lights worth it?
Absolutely. For the How to String Outdoor Christmas Lights on Bushes 2026 Guide, smart LEDs save energy, let you change colors, and sync with music or voice commands. They cost more upfront, but pay off in convenience and longevity.
How do I fix a tangled strand?
Don’t panic. Lay the strand flat, untangle from the plug end, and work backward. Use a light untangler tool (a $10 lifesaver). Or, just buy a new strand—some tangles are beyond repair.
Can I use solar-powered lights?
Yes—but only if your bushes get 6+ hours of direct sun. Solar lights fade in shade or winter. For dense or shady bushes, stick with plug-in LEDs.
Final Thoughts
Stringing lights on bushes doesn’t have to be a chore. With the right tools, a little planning, and the How to String Outdoor Christmas Lights on Bushes 2026 Guide, you can create a stunning display that’s safe, sustainable, and stress-free.
Remember: Start at the top, work in layers, secure cords, and automate. Protect your plants, your hands, and your sanity.
And when the first snow falls and your lights glow against the dark sky? That’s the magic. That’s why we do this.
So grab your gloves, plug in your lights, and make your yard the talk of the block. Just don’t wait until Christmas Eve—start early, enjoy the process, and savor the glow.
Happy lighting, friend. Your bushes (and your neighbors) will thank you.
“`

