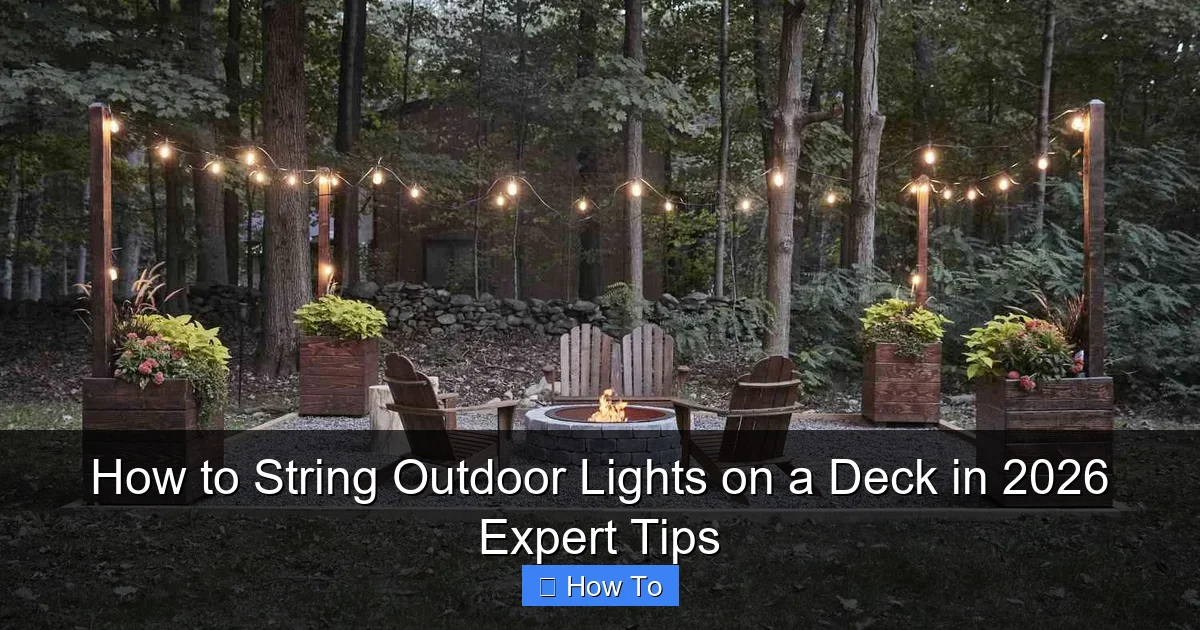
Featured image for how to string outdoor lights on a deck
Image source: thespruce.com
Transform your deck into a stunning nighttime oasis by securely mounting outdoor lights using durable, weather-resistant hardware designed for 2026’s top lighting trends. Whether you’re outlining railings, suspending overhead strands, or highlighting architectural features, always plan your layout first and use smart, energy-efficient LED lights for maximum impact and minimal maintenance.
How to String Outdoor Lights on a Deck in 2026 Expert Tips
Key Takeaways
- Plan your layout: Sketch light placement for balanced, functional deck illumination.
- Use weatherproof lights: Choose UL-listed fixtures for safety and longevity.
- Secure with proper hardware: Use hooks or clips rated for outdoor tension.
- Hide cords smartly: Conceal wires under railings or with raceways for a clean look.
- Test before finalizing: Check brightness and spacing to avoid over- or under-lighting.
- Install a timer: Automate on/off times for energy savings and convenience.
Why This Matters / Understanding the Problem
Picture this: It’s a warm summer evening. You’re sipping your favorite drink, barefoot on your deck, surrounded by friends or family. The sun dips below the trees, and suddenly, the mood shifts—your space goes dark, and the vibe flatlines.
That’s when you realize: outdoor lighting isn’t just about visibility. It’s about atmosphere. It’s about turning your deck into a cozy, inviting extension of your home.
But here’s the catch: how to string outdoor lights on a deck in 2026 expert tips isn’t just about hanging a few bulbs and calling it a day. You want something that lasts, looks amazing, and doesn’t turn into a tangled mess or a tripping hazard.
Maybe you’ve tried before—lights sagged, wires got chewed by squirrels, or the whole setup looked like a DIY disaster. Or maybe you’re starting fresh and just want to get it right the first time.
That’s where this guide comes in. I’ve been there—struggling with extension cords, measuring tape, and a ladder that wobbles in the wind. But after years of trial, error, and a few “why did I do that?” moments, I’ve cracked the code.
Whether you’re planning a romantic dinner under the stars or a weekend BBQ with friends, knowing how to string outdoor lights on a deck in 2026 expert tips means you can create a space that’s not just functional, but truly magical.
And the best part? You don’t need to be an electrician. With the right approach, a few smart tools, and a little patience, you can do this yourself—safely and beautifully.
What You Need
Before we dive in, let’s gather your gear. Think of this like packing for a weekend trip—everything you need, nothing you don’t.
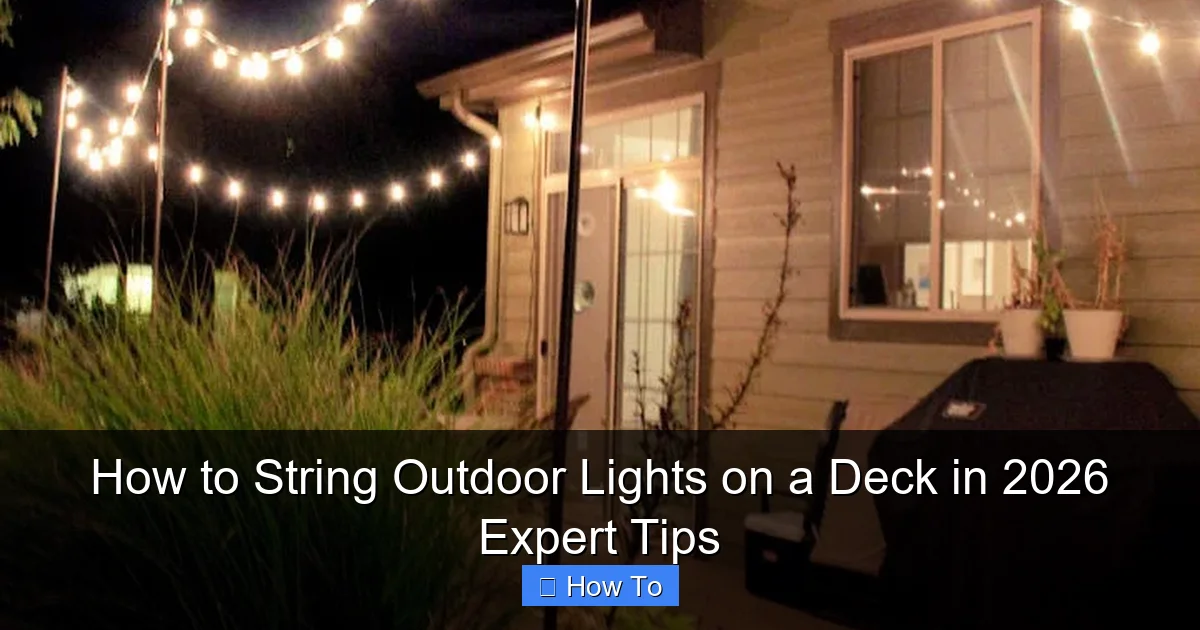
Visual guide about how to string outdoor lights on a deck
Image source: blitsy.com
Here’s your checklist for how to string outdoor lights on a deck in 2026 expert tips:
- Outdoor-rated string lights: Look for “wet-rated” or “weatherproof” labels. LED is your best friend—longer life, lower energy use, and less heat.
- Measuring tape: A 25-foot retractable tape is perfect. Measure your deck’s perimeter, plus 10–15% extra for slack.
- Weatherproof mounting hardware:
- Stainless steel eye hooks or screw-in hooks
- Outdoor-rated zip ties (UV-resistant)
- Adhesive-backed cable clips (for smooth surfaces)
- Drill and drill bits: For wood or composite decks. Use a small pilot bit to avoid splitting.
- Ladder or step stool: Make sure it’s stable and tall enough to reach your mounting points.
- Extension cord (outdoor-rated, GFCI-protected): This is non-negotiable. A ground fault circuit interrupter (GFCI) shuts off power if there’s a short—safety first.
- Power timer (optional but smart): Automate your lights to turn on at dusk and off at bedtime.
- Helper (optional but helpful): Someone to hold the ladder, hand you tools, or just offer moral support.
Pro tip: Buy lights with a “plug-in” end, not battery-powered. Batteries die fast outdoors, and replacing them every few weeks is a chore you don’t need.
Also, check the bulb spacing. For decks, 6–12 inches between bulbs gives a balanced glow—not too sparse, not too bright.
Step-by-Step Guide to How to String Outdoor Lights on a Deck in 2026 Expert Tips
Step 1: Plan Your Layout (Before You Buy a Single Hook)
You wouldn’t build a house without blueprints, right? Same here. Planning saves you time, money, and frustration.
Start by sketching your deck. Use graph paper or a free app like SketchUp Free or even a napkin (I’ve done it).
Decide where you want the lights:
- Along the railing (most common)
- Across the ceiling joists (for covered decks)
- From posts to trees or pergolas (for a canopy effect)
Measure the total distance. Add 10–15% extra for curves, slack, and connections. You don’t want to run out halfway.
Then, figure out where the power source will be. You’ll need an outdoor outlet or a GFCI-protected extension cord nearby. If there’s no outlet, consider a solar-powered option (more on that later).
Real talk: I once skipped this step and ended up with a string that was 3 feet too short. Had to splice in another—ugly and risky. Learn from my mistake.
Step 2: Choose the Right Mounting Method (Match It to Your Deck)
Not all decks are the same. Wood, composite, metal railings, glass panels—each needs a different approach.
Here’s how to pick the right hardware for how to string outdoor lights on a deck in 2026 expert tips:
- Wood or composite railings: Use stainless steel eye hooks. They’re strong, rust-resistant, and blend in. Drill pilot holes first to avoid cracking.
- Metal railings: Magnetic clips or zip ties work great. Avoid drilling—it can damage the finish or void warranties.
- Smooth surfaces (glass, vinyl): Use outdoor-rated adhesive clips. Look for ones with rubber pads to prevent slipping.
- Ceiling joists or beams: Screw-in hooks or eye bolts. For a seamless look, use hooks with a “J” shape—they hold the wire snug.
For a floating effect (lights hanging mid-air), use fishing line or clear monofilament. Tie it between hooks, then attach lights with small carabiners or zip ties.
My hack: I use clear zip ties to hang lights from fishing line—no one sees them, and they hold tight.
Step 3: Install the Mounting Points (Go Slow, Be Precise)
Now it’s time to drill, screw, or stick. This is where precision matters.
Start at the power source end. Work your way around the deck in one direction—clockwise or counterclockwise. This avoids tangles and makes troubleshooting easier.
For eye hooks:
- Mark spots every 12–18 inches along the railing or beam.
- Drill a small pilot hole (use a bit slightly smaller than the hook’s shaft).
- Twist the hook in by hand. Don’t over-tighten—it can strip the wood.
For adhesive clips:
- Clean the surface with rubbing alcohol.
- Press the clip firmly for 30 seconds. Wait 24 hours before hanging lights—patience pays.
For zip ties (on metal railings):
- Loop the tie around the post or railing.
- Snug it tight, but don’t cut it yet. You’ll use the tail to attach the light wire later.
Warning: Don’t space hooks more than 18 inches apart. Lights can sag over time, especially with heavy bulbs or wind.
Step 4: Hang the Lights (The Fun Part—With a Few Rules)
Now for the magic. But before you start, test your lights indoors. Plug them in to make sure all bulbs work. Fix any issues now—not when you’re 6 feet up on a wobbly ladder.
Unplug the lights. Start at the power source. Drape the first end over the nearest hook or clip. Don’t plug it in yet.
Work your way around the deck, looping the wire over each hook. Keep the wire taut but not stretched—like a guitar string, not a rubber band.
For zip ties: Loop the light wire through the tie’s tail, then cinch it snug. Trim excess with scissors.
For adhesive clips: Snap the wire into the clip. Use a small piece of tape if it’s loose.
If you’re using multiple strings, connect them with a weatherproof outdoor-rated connector. Never splice wires with regular electrical tape—it degrades fast outdoors.
My trick: I use a small carabiner to connect strings. It’s easy to remove for storage and looks clean.
Step 5: Secure the Power Source (Safety First, Always)
This is the most important step. Outdoor electrical safety isn’t optional—it’s life-saving.
Use a GFCI-protected extension cord. If your outlet isn’t GFCI, buy a GFCI adapter (~$10 at hardware stores).
Plug the lights into the extension cord. Then, run the cord to the outlet—never plug the extension cord into the lights first. That creates a dangerous “live” end dangling outside.
Route the cord along the deck edge or railing. Use zip ties or clips to secure it every 2–3 feet. Don’t let it drape on the ground—it’s a tripping hazard and can get wet.
If the cord must cross a walkway, use a rubber cord cover or bury it under a rug (temporary only).
Real story: My neighbor once ran an extension cord under a doormat. It frayed, sparked, and nearly caused a fire. Don’t be that neighbor.
Step 6: Test, Adjust, and Automate (The Final Touch)
Now, the moment of truth. Plug in the extension cord. Flip the switch.
Walk around the deck. Look for:
- Dark spots (add more lights or adjust spacing)
- Sagging wires (tighten hooks or add support)
- Glare (angle lights downward or use frosted bulbs)
If everything looks good, unplug and install a timer. Set it to turn on at dusk and off at 11 PM (or your bedtime). You’ll save energy and never forget to turn them off.
For solar lights: Place the solar panel where it gets 6+ hours of direct sun. Angle it toward the equator (south in the Northern Hemisphere).
My favorite: I use a smart plug with an app. I can turn the lights on from my phone—perfect for surprise guests.
Step 7: Maintain for Longevity (Because Lights Don’t Last Forever)
Outdoor lights last longer with a little care. Here’s how to keep your setup shining for years.
Every 3–6 months:
- Unplug and inspect wires for fraying, chew marks, or corrosion.
- Check bulbs. Replace any that are dim or flickering.
- Clean the bulbs with a soft, dry cloth. Dirt can block light and overheat sockets.
- Tighten loose hooks or zip ties.
At the end of the season (or before a storm):
- Unplug the lights. Store them in a dry, cool place.
- Remove adhesive clips (if removable) to prevent residue.
- Coil the string neatly—wrap it around your hand, then secure with a twist tie.
Pro tip: Label your lights with a waterproof tag. “Deck – 25ft – LED – Wet-rated.” Makes next year’s setup way easier.
Pro Tips & Common Mistakes to Avoid
“I learned this the hard way”: Don’t use indoor lights outside. I once hung cheap Christmas lights on my deck. Two days later, they were flickering and smelling like burnt plastic. Outdoor-rated means waterproof, UV-resistant, and safe for temperature swings.
- Don’t overload circuits. Check your extension cord’s wattage rating. Most outdoor strings use 10–20 watts per 25 feet. Add up your total. If it’s over 80% of the cord’s capacity, use a second circuit.
- Angle lights downward. Upward-facing bulbs glare into eyes and waste light. Point them at the deck floor or furniture.
- Use a dimmer or warm white bulbs. Bright white (5000K) feels clinical. Warm white (2700K–3000K) creates a cozy, inviting glow.
- Skip the staples. Stapling wires to wood or railings can damage insulation and cause shorts. Use hooks or clips instead.
- Plan for wind. In windy areas, use shorter strings (10–15 feet) and extra support. Long strings act like sails and can snap hooks.
- Think about shadows. If you hang lights on only one side, the opposite side will be dark. For full coverage, run strings on both railings or use a crisscross pattern.
“My neighbor’s squirrel problem”: Squirrels chew through wires like they’re snacks. I’ve had to rewire twice. Now I run cords through PVC conduit or use armored outdoor extension cords. It’s a small investment for peace of mind.
FAQs About How to String Outdoor Lights on a Deck in 2026 Expert Tips
Q: Can I use solar-powered lights on a covered deck?
A: Only if the solar panel gets direct sunlight. Most covered decks block too much sun. But if you have a skylight or open side, place the panel there. Otherwise, stick with plug-in lights.
Q: How do I hang lights without drilling into my deck?
A: Use magnetic clips (for metal railings), adhesive clips (for smooth surfaces), or zip ties. For a no-damage option, drape lights over the railing and secure with removable hooks.
Q: What if my deck has no outdoor outlet?
A: Run a GFCI-protected extension cord from an indoor outlet through a window or door. Use a cord cover to protect it. Or, invest in a solar-powered string with a separate panel you can place in the sun.
Q: Can I leave the lights up all year?
A: It depends. If your area has heavy snow, ice, or extreme temperatures, take them down in winter. For mild climates, leave them up—but inspect them monthly. Replace any damaged wires or bulbs.
Q: How many strings do I need for my deck?
A: Measure your deck’s perimeter. Divide by the length of each string (usually 25 feet). Add 10% extra. For example, a 40-foot deck needs 2 strings (40 ÷ 25 = 1.6 → round up to 2, plus 10% = 2.2 → get 3 to be safe).
Q: Are LED lights worth the extra cost?
A: Absolutely. LEDs last 25,000–50,000 hours (vs. 1,000–2,000 for incandescent). They use 80% less energy and don’t get hot. Plus, they’re safer for kids and pets.
Q: How do I make the lights look professional, not DIY?
A: Keep wires hidden. Run them along the railing or beam, not dangling. Use matching hardware (same color hooks, clips). Add a few well-placed lanterns or floor lights to balance the look. And never let extension cords cross walkways—it ruins the vibe.
Final Thoughts
There you have it—your complete guide to how to string outdoor lights on a deck in 2026 expert tips. No fluff, no jargon, just real advice from someone who’s been up that ladder, tangled in wires, and learned from every mistake.
Remember: this isn’t about perfection. It’s about creating a space where you love to spend time. Whether it’s a quiet night alone or a big party, the right lighting sets the mood.
Start small. Maybe just one side of your deck. Test it. Adjust it. Then expand. You’ll get better with each string you hang.
And when that first evening comes—lights glowing, laughter in the air, the stars above—you’ll know it was worth the effort.
So grab your tools, call a friend, and get started. Your dream deck is just a few hooks and a plug away.
Now go make some magic.

